Custom Logo Things
Bakery Logo Patch Beanies Material Sample Guide for Buyers
For a bakery team, a beanie sample is not a decoration check. It is a stress test. The logo might be the reason the order starts, but the fabric, stretch, comfort, and patch construction decide whether anyone actually wears the thing through a long shift.
That is why the bakery Logo Patch Beanies material sample guide should focus on the whole build, not just the artwork. A patch can look sharp in a mockup and still feel too stiff, sit crooked on the cuff, or make the knit collapse around it. Small problems like that show up fast once staff start folding, washing, and wearing the beanies every day.
The practical buyer is not asking, “Does this look good on a screen?” The real question is simpler: will it hold shape, feel decent, and survive daily use without turning into a regret purchase?
Bakery Logo Patch Beanies Material Samples: What Buyers Miss
The first thing buyers miss is that a sample is a full material test, not a logo test. A woven patch may look tight and polished on a proof, but once it is sewn onto a knit shell, the fabric can pucker, the cuff can twist, and the logo zone can start fighting the rest of the beanie. The sample has to prove the system: shell yarn, cuff structure, patch type, thread, backing, and placement.
That matters even more for bakery staff. Front-counter workers, decorators, and event crews move between cool display cases and warm prep areas. They bend, pull, stash, and rewear the same cap all week. A beanie that feels scratchy or runs hot will get abandoned, no matter how nice the brand mark looks.
Good samples answer a small list of blunt questions. Is the yarn soft enough for all-day wear? Does the knit recover after stretching? Are the patch edges clean or already lifting? Is the backing too rigid for the shell fabric? Does the color still read correctly under indoor lighting? Does the beanie still sit well after being worn for a few hours?
“A decent sample does not just look right in a photo. It behaves right after a shift, which is the part that usually gets ignored until it is too late.”
There is also a difference between three sample types, and buyers mix them up constantly. A color swatch confirms color only. A material sample shows the actual fabric and patch combination, but may still be rough around the edges. A pre-production sample should match the final order as closely as possible, including stitch density, dimensions, placement, and backing. If you ask for the wrong one, you will get the wrong kind of answer.
For bakery merch, the material choice often has more influence on approval than the logo itself. A cap made from a soft acrylic blend with a 1x1 rib cuff will behave differently from a thicker 2x2 knit or a cotton-rich shell. That difference is not cosmetic. It changes stretch, warmth, weight, and how much the patch distorts the cuff when it is sewn on.
Sample Process and Lead Time: From Request to Hands-On Review
A clean sample process starts with clean input. Send vector artwork if possible. Confirm the patch type, beanie color, yarn content, and exact placement on the cuff or crown. If you want the sample to mirror production, say so directly. If you only want to test a concept, say that too. That one sentence saves a lot of sloppy back-and-forth.
Typical sample work runs through the same checkpoints: file review, material sourcing, sample assembly, shipping, then internal review. Stock-based samples can often move in 5 to 10 business days before shipping. First-time custom builds usually need 10 to 15 business days, sometimes longer if the supplier has to source specialty yarns, custom backers, or a new patch finish. Add time if the brand color is being matched from a reference instead of pulled from stock.
The slowdowns are predictable. Custom dye matching takes longer than standard black, heather gray, or navy. Leather, faux leather, and molded silicone patches may need tooling or finish approval. Switching from sew-on to heat-applied backing changes construction. And revisions go sideways fast if the feedback is vague. “Make it nicer” is not a usable note. “Reduce patch thickness and move the logo 8 mm higher” is.
If the sample is meant to support a production launch, ask whether it is a prototype or a final approval piece. Those are not the same thing, even if someone in sales tries to blur the line. A prototype is for testing. A pre-production sample is for sign-off. Judging them by the same standard creates unnecessary noise.
Packaging deserves a mention because samples often get judged after a rough trip in transit. If the parcel is traveling with other branded items, ask about carton strength, corner protection, and how the cap is packed so it does not arrive crushed. For small apparel shipments, ISTA-style drop and vibration logic is useful even if the order is nowhere near freight scale.
Fabric, Patch, and Backing Choices That Change Wearability
The shell fabric sets the tone immediately. Acrylic is common because it is warm, cost-effective, and easy to color match, but it can feel less breathable than a cotton blend. Cotton or cotton-rich knits usually feel softer against the skin, though they may not spring back as aggressively after stretching. Recycled yarns are useful for brands that want to make a real sustainability claim, but they need closer review because handfeel and loft can vary more than buyers expect.
For knit construction, a few specs matter more than the rest. A 7-gauge or similar midweight knit will feel different from a looser, lighter gauge. Rib structure matters too. A tighter cuff holds a patch flatter, while a softer body gives more comfort but can let a heavy patch pull the front down. If the beanie is meant for a bakery crew, comfort usually wins, but not if the logo starts warping the cap.
Patch types and what they change
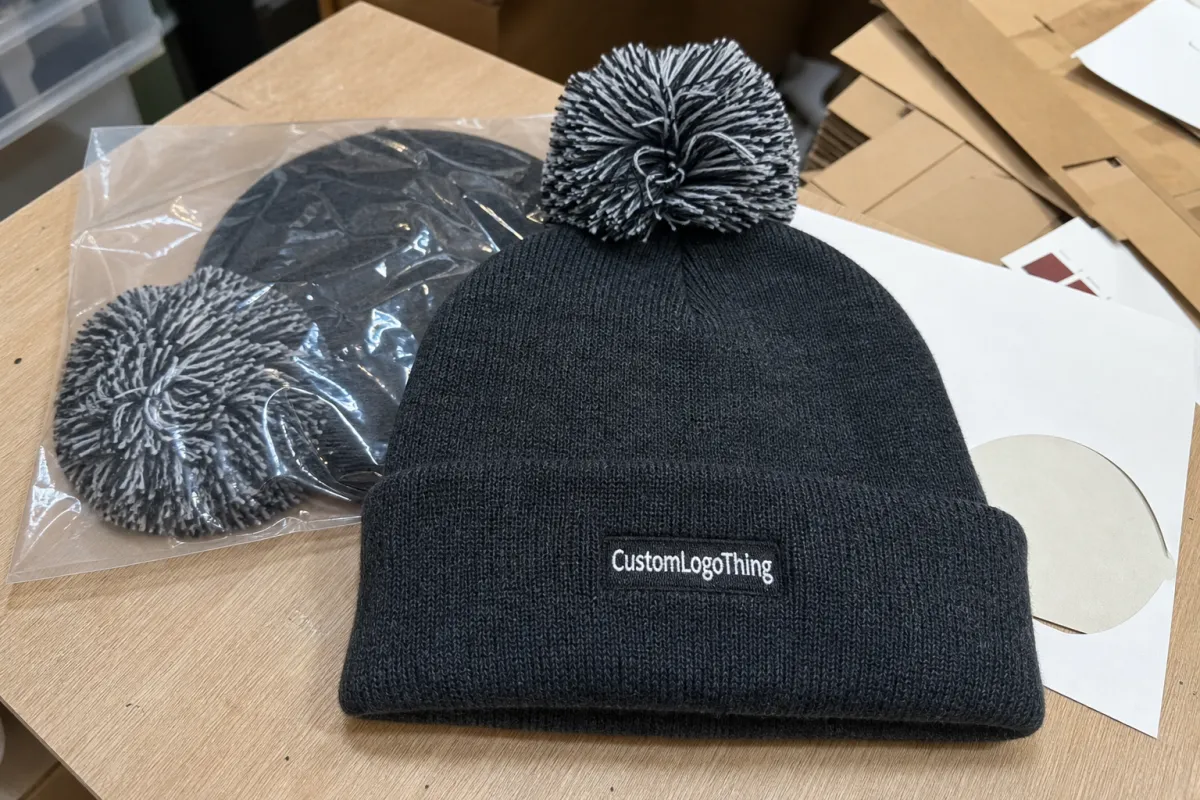
Woven patches are usually the safest choice for small logos because they keep lettering cleaner at a compact size. Embroidered patches bring more texture and a more traditional look, but thick satin fill can add bulk. Leather and faux leather patches create a premium visual and work well for some brands, though they are less forgiving on very soft knit shells. Silicone patches stay bold and modern, but they can read more retail-focused than bakery casual. Printed patches can work, but they need a real check for abrasion and wash behavior before approval.
Patch thickness matters more than most buyers think. A thin woven patch may sit around 0.8 to 1.2 mm, while molded or layered patches can run thicker. That extra thickness does not just affect appearance. It changes drape, folding, and how the beanie sits against the forehead. A big patch on a soft cuff can also create a cold spot or pressure point if the wearer pulls the beanie low.
Backing and attachment methods
Sew-on attachment is still the safest long-term option because it moves with the knit and usually outlasts other methods. Heat-applied backing can be efficient, but only if the adhesive is good and the application process is controlled. Too much heat can distort the shell. Too little heat and the patch may not bond properly. Reinforced backers can improve durability, but they can also make the logo area feel board-like, which is not great on a knit cap.
For bakery use, the sweet spot is usually a patch that is visible, flexible, and low-fuss. Staff fold beanies into aprons, toss them into lockers, and wash them more often than a merch buyer might expect. So the sample should be checked for edge curl, stitch pull, and whether the logo area stays flat after handling. A beanie that looks perfect on a hanger but twists after one wash is a bad buy, no matter how tidy the mockup was.
Packaging can be part of the material conversation too. If the program includes retail presentation or shipping with other branded goods, ask whether the sample arrives in kraft paper, corrugated cardboard, or another protective format that preserves shape. If the broader packaging plan uses FSC-certified paper, post-consumer waste content, or biodegradable packaging, the sample should reflect that direction instead of pretending sustainability is an afterthought.
For the paper side of the chain, FSC certification is a clean reference point. It does not solve every packaging question, but it does separate a real traceable paper spec from a vague “eco” claim. That distinction matters when the beanies ship with inserts, hang tags, or boxed merch kits.
Cost, MOQ, and Quote Factors for Sample Runs
Sample pricing usually comes down to four things: artwork setup, patch complexity, material sourcing, and whether the sample has to match production exactly. A stock-color beanie with a woven patch is cheaper than a sample that requires custom yarn, a new logo die, and a special backer. Most sample fees land somewhere around $25 to $80 per piece, but the number can move quickly once the build becomes more specific.
MOQ matters because the factory has to decide whether it is worth buying specialty material for one or two samples. If the bakery wants a custom heather knit, a recycled yarn blend, or a more unusual patch finish, the supplier may need to purchase more material than the sample itself uses. That can raise the sample price, but it also protects the final order from “we can make the sample, but not the run” problems.
Ask three things every time: whether the sample fee is credited back on the production order, whether freight is included, and whether revisions create new charges. Some suppliers roll labor into future volume. Others keep sample and production costs fully separate. Both models are normal. What matters is the total landed cost, not the quote number on line one.
| Sample Option | Typical Sample Cost | What It Tests Best | Main Trade-Off |
|---|---|---|---|
| Stock yarn + woven patch | $25-$45 | Logo clarity, fit, basic comfort | Less exact if your final color is custom |
| Custom yarn + embroidered patch | $45-$75 | Brand color, texture, patch presence | Longer lead time and more revision risk |
| Recycled yarn + silicone or leather patch | $55-$80 | Premium feel, sustainability story, shelf impact | Can be stiffer or more sensitive to attachment method |
Quote comparison gets messy if buyers mix up sample fee, setup fee, freight, and production unit price. A low sample quote can hide a more expensive final order. A slightly higher sample fee can still be the better value if the pre-production piece gets the details right the first time. That matters for seasonal bakery merch, where missing the launch window costs more than the difference between two sample invoices.
One more practical issue: minimum order quantity can change the sample conversation. If the final order is small, suppliers may be less willing to absorb tooling or specialty sourcing. If the order is larger, they may quote the sample more aggressively because the sample cost is spread across a real production run. Buyers should ask for that math instead of guessing.
How to Review a Sample Step by Step
A decent review process keeps emotion from driving the decision. Start with the beanie flat on a table. Check cuff width, patch placement, stitch tension, and symmetry. Then put it on a real head. A beanie that looks clean on a board can feel shallow, tight, or strangely tall once worn.
- Check the flat view: confirm logo centering, patch angle, and whether the cuff edge sits clean.
- Test the handfeel: rub the knit, stretch it gently, and see whether it rebounds without bagging out.
- View it in two lights: daylight and indoor lighting often reveal color shifts that photos hide.
- Wear it for a while: 15 to 30 minutes is enough to notice itchiness, slippage, or pressure points.
- Look at the patch after movement: check whether the edge lifts or the stitching distorts after wear.
Logo placement should be tested against the way the beanie will actually be used. Some people fold the cuff higher. Some wear it lower. If the mark disappears in one of those positions, that is a design miss, not a stylistic preference. For ecommerce photography, it matters too. A patch that sits too low can vanish in front-facing shots, which is annoying when the whole reason for the patch was visibility.
If the schedule allows it, I like a light wash test on one sample. Not a lab drama. Just a normal wash cycle that reflects real life. Then check seam integrity, patch edge wear, and whether the shell yarn pills or twists. If the sample had to travel before review, inspect packaging damage too. A folded beanie crushed into thin poly can look completely different from the same beanie packed in a structured carton with paper support.
Write notes while the sample is in front of you. “Patch too thick,” “logo 1 cm too low,” and “shell softer than reference” are useful. “Looks off” is not. Suppliers can act on measurements. They cannot decode mood.
Common Mistakes That Turn Good Samples Into Bad Orders
The easiest mistake is approving from a render alone. A digital mockup hides thickness, shift, texture, and scale in ways that make almost anything look clean. Once the beanie is knit and the patch is attached, the object behaves differently. If brand accuracy matters, a render is only the starting point.
Another common miss is ignoring care behavior. Bakery teams often wash uniforms more frequently than people expect, especially if the caps are worn in warm kitchens or near flour dust. Adhesives that look fine on arrival can fail early if they are exposed to heat, steam, or rough laundering. That is why the backing method should be reviewed alongside the fabric, not treated like a separate checkbox.
“If the sample never gets tried on a real person, the order is still a guess.”
Fit causes trouble too. A beanie can look tidy on a counter display and still be too shallow, too tight, or too tall once people wear it for a whole shift. Head shape matters. So does hair volume. So do glasses. One wearer is not enough to approve fit, even for a small program.
The final mistake is changing too many variables at once. If you switch yarn, patch type, backer, and placement in a single revision, you will not know what fixed the issue or what caused it. Better to make one change, test it, then move to the next. Boring process. Better outcome.
Expert Tips and Next Steps Before You Approve Production
The most useful approval tool is a one-page spec sheet. Keep the yarn content, patch type, backing, dimensions, placement measurements, color references, and care expectations on one page so production does not have to interpret your notes later. If the logo needs to sit 12 mm above the cuff seam or the patch needs to measure 35 mm wide, write that down before the order moves.
One revision at a time is still the cleanest way to work. It sounds slower than tossing every concern into one round of edits, but it actually speeds things up because the next sample gives you real information. Fix patch thickness first. Then placement. Then maybe color. If you change everything at once, the sample loses value.
Keep a physical archive of the approved piece with photos and notes. Memory fades. Email threads get buried. Reorders drift when someone new takes over the program and has to guess what “the approved one” was supposed to be. A sample archive helps across seasonal staff changes, new store openings, and repeat merch drops.
Buyers should also think about packaging and shipping as part of the approved spec, not an afterthought. If the beanies will ship with other branded goods, decide whether the outer packaging should use recycled materials, corrugated cardboard, or kraft paper protection. Presentation matters, but so does arrival shape. A crushed cuff or bent patch can make a good product look cheap.
That is the real value of a bakery Logo Patch Beanies material sample guide: it keeps the decision grounded in how the beanie actually performs. Not how it looks in a file. Not how it reads in a polished mockup. How it fits, wears, washes, ships, and holds up once it is on a crew member’s head for a long shift. That is the part worth getting right.
What should I look for in a bakery logo patch beanies material sample?
Check fabric softness, patch edge quality, logo size, stretch recovery, and whether the beanie still feels comfortable after the patch is added. Then view it in different lighting so you can judge color accuracy and contrast the way staff or customers will see it.
How long does a beanie material sample usually take to arrive?
Lead time depends on whether the supplier is using stock materials or sourcing custom yarns, patch backers, or specialty finishes. Simple samples can move fairly quickly, while first-time custom builds usually need extra time for artwork review, sourcing, and assembly.
Is the sample cost credited back on the final order?
Sometimes the fee is credited, sometimes it is separate, and the answer often depends on the sample policy and final order size. Ask whether freight, revision charges, and setup costs are included so you can compare quotes accurately.
Which patch material works best for bakery beanies?
The best choice depends on the look you want and how the beanies will be worn, but flexible options usually feel better on knit caps than rigid ones. Choose a patch that stays readable, resists wear, and still bends comfortably with the beanie fabric.
How do I compare multiple beanie samples before approving production?
Use the same checklist for every sample: fit, color, patch finish, softness, wash behavior, and logo placement. Review them in the same lighting and on the same wearer so your decision reflects real performance, not presentation differences.


