Buyer Fit Snapshot
| Best fit | Branded Stickers for Product Boxes projects where brand print, material claims, artwork control, MOQ, and repeat-order consistency need to be specified before quoting. |
|---|---|
| Quote inputs | Share finished size, material target, print colors, finish, packing count, annual reorder estimate, ship-to region, and any compliance wording. |
| Proofing check | Approve dieline scale, logo placement, barcode or warning zones, color tolerance, closure strength, and carton packing before bulk production. |
| Main risk | Vague material claims, crowded artwork, missing packing details, or unclear freight terms can make a low unit price expensive after revisions. |
Fast answer: Branded Stickers for Product Boxes: Material, Adhesive, Artwork, and MOQ should be specified like a repeatable production item. The safest quote records material, print method, finish, artwork proof, packing count, and reorder notes in one written spec.
Production checks before approval
Compare the actual filled-product size with the drawing, then confirm tolerance on folds, seals, hang holes, label areas, and retail display edges. Reserve space for logos, QR codes, warning copy, and material claims before decorative graphics fill the panel.
Quote comparison points
Review material grade, print process, finish, sampling route, tooling charges, carton quantity, and freight assumptions side by side. A quote is only useful when the supplier can repeat the same color, closure quality, and packing count on the next order.
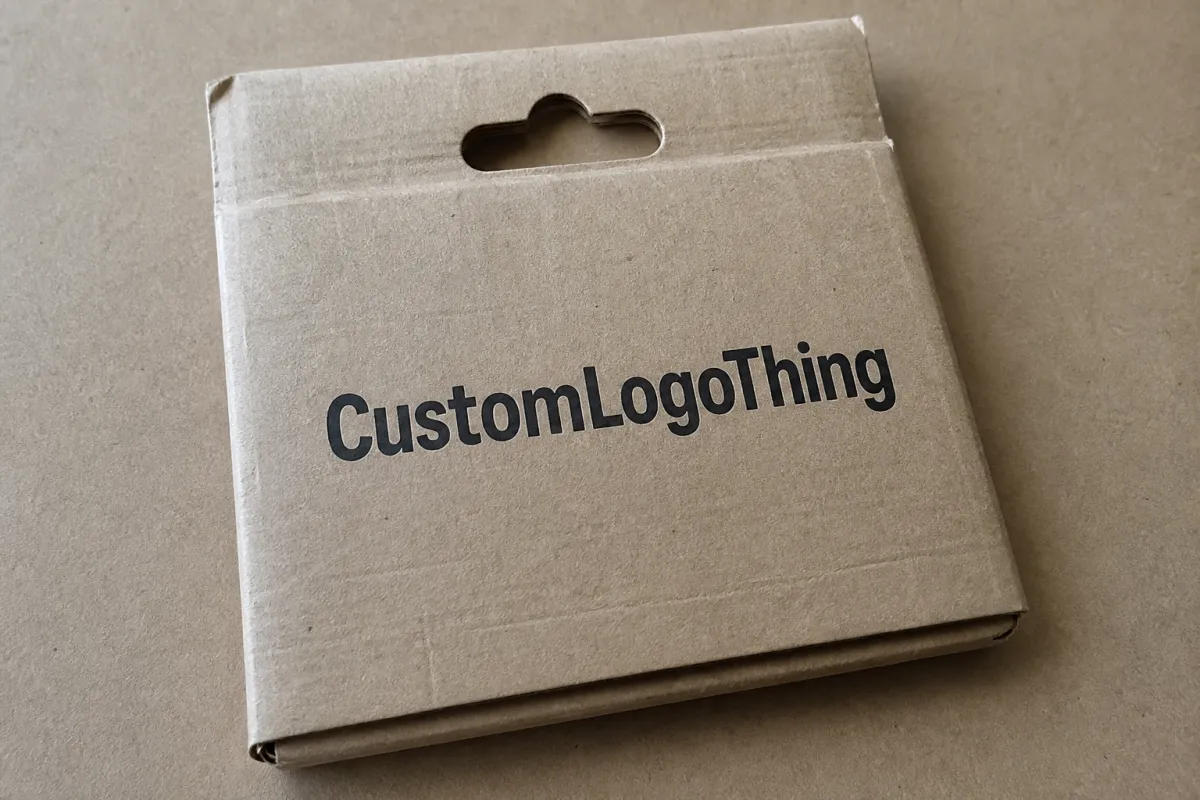
Branded Stickers for Product Boxes: Uses, Cost, and Tips
Branded stickers for product boxes do real work. They are not decoration for the sake of it. They are often the first brand touch a customer notices in hand, before the carton is even fully opened. On a plain mailer or a basic folding box, a good sticker can add identity fast, sharpen shelf presence, and make the pack feel intentional instead of tossed together.
What Branded Stickers for Product Boxes Actually Do
At a practical level, branded stickers for product boxes are adhesive brand elements used on cartons, mailers, sleeves, inserts, and seals to show identity and make packaging look finished. A sticker can carry a logo, a short message, a seasonal graphic, a QR code, a tamper-evident seal, or a color cue that helps separate SKUs on a busy packing table. That flexibility keeps them in rotation across a lot of packaging programs.
In production, stickers solve several problems at once. They reinforce the logo without forcing a full box redesign. They can flag a limited edition, identify a promotion, or show that a carton belongs to a specific subscription tier. They also help internal operations, which sounds boring until a warehouse is moving fifty or five hundred boxes an hour and the team needs a fast visual cue. Then it matters a lot.
Compared with direct print, stickers are far easier to change. A brand can test two graphics, update a campaign, or use the same base carton across several product lines without rebuilding the whole packaging system. That is useful for smaller order quantities too, because direct-printed cartons usually make more sense at higher volumes where setup cost spreads out over a long run. For many companies, branded stickers for product boxes sit right in the middle between plain packaging and a full custom box program.
They also raise perceived value in a way buyers notice immediately. A crisp matte label on kraft board feels more considered than a bare carton. A clean seal across a tuck flap tells the customer the pack was prepared with care. A clear film sticker can keep a minimalist design intact while still adding the logo and a bit of polish. None of that changes the product itself, but it changes how the package reads in the hand.
A sticker that lifts at the corner or slides on the surface causes more damage than no sticker at all. Finish, adhesive, and placement matter just as much as the artwork.
That is why packaging buyers often start here. Stickers are quick to spec, easy to test, and useful across many box styles. If the brand later moves into a larger carton program, the sticker work still informs the bigger packaging system. For a broader look at related options, our Case Studies page shows how different packaging elements work together, and our Custom Packaging Products page covers other formats that can sit alongside label-based branding.
How the Process Works: From Artwork to Application
The production path starts with artwork, and clean artwork saves time everywhere else. A sticker file should be built at the final size, not an estimated one. Bleed, usually 1/8 inch on many label jobs, helps prevent thin white edges after trimming or die-cutting. Safe zones matter too, especially on small labels where a logo or a short line of text can drift too close to the edge and feel cramped once printed. If the sticker will be placed on a moving pack line, high contrast and simple shapes generally read better than delicate detail.
Color management deserves attention. A warm kraft box, a bright white mailer, and a coated retail carton will all make the same sticker look slightly different. A proof helps before full production. On short runs, a digital proof may be enough to confirm layout and proportion. For stricter brand color work, a press proof or physical sample gives a better read on how the sticker will actually sit on the packaging surface.
Material choice changes the process too. Paper labels are often the easiest starting point for dry indoor use. BOPP and vinyl show up more often where moisture, abrasion, or heavy handling are part of the job. Some projects call for removable adhesive, permanent adhesive, or tamper-evident construction depending on whether the sticker is decorative, functional, or both. A rough recycled surface and a glossy coated surface do not behave the same way, even if they look similar from a distance. The adhesive needs to match the finish.
Print method follows volume and repeat frequency. Digital printing usually suits shorter runs, variable artwork, and faster turnaround. Flexographic printing tends to make more sense on larger repeat orders where the artwork stays stable and the unit economics improve with scale. Offset and specialty processes can work for premium looks, especially when precise detail or a specific finish is needed. The best method is the one that balances quantity, color requirements, and lead time without dragging in unnecessary setup cost.
Application can be manual, semi-automated, or machine-applied. For lower volumes, hand placement at the packing station is common and perfectly workable if the sticker size and peel-and-place process are simple. For higher volumes, label dispensers and applicators save labor and improve consistency. The decision should match actual pack-out behavior, not just the design intent. A beautiful seal that takes six seconds to place can slow the line enough to erase any savings from the lower unit price.
Quality control closes the loop. Good teams check alignment, edge lift, print consistency, and how the sticker behaves after being applied to the real box. They also inspect how labels are packed and stored before use, because heat, humidity, and pressure can affect the adhesive before the first carton is even sealed. A box of labels left under a dock door in summer can behave very differently from the same labels kept in controlled storage.
For brands building a more structured packaging plan, pairing labels with Custom Labels & Tags can create a more unified kit across product, shipping, and display packaging. That is often useful when the box is only one touchpoint in a broader unboxing sequence.
Key Factors That Affect Cost and Pricing
Sticker pricing usually comes down to size, shape, quantity, material, finish, and setup. A simple round paper sticker at 1,000 pieces can cost very little per unit, while a custom die-cut film label with specialty finish and precise color work will climb quickly. The headline number may look friendly at first glance. The real number depends on how much custom work sits behind it.
Size has an obvious effect, but shape matters more than many buyers expect. Standard circles, squares, and rectangles are usually easier to produce and trim, which keeps costs down. Custom die-cuts can be worth it for premium presentation, though they may add tooling or setup charges. If the design has narrow points, fine cutouts, or irregular edges, waste can go up and throughput can slow down. That does not make custom shapes a bad idea. It just means the shape should earn its place.
Material changes the unit price in a visible way. Paper is usually the lowest-cost option for dry, indoor use. BOPP film and vinyl cost more, but they hold up better against scuffing, moisture, and the rough handling that comes with shipping. Specialty papers, metallic stocks, and clear films sit higher still, especially when the finish needs to look precise on a retail shelf. Adhesive choice adds another layer: permanent adhesives, tamper-evident constructions, and cold-temperature formulas typically cost more than basic removable stock.
Setup and labor can stay hidden if a quote is not broken down carefully. Proofing, plate charges, die charges, rush runs, and shipping all deserve attention. A quote that looks lower on paper can become more expensive once proof revisions, expedited freight, or a second proof round are added in. Packaging teams should compare quotes on the same basis, not just by the last line on the page.
MOQ, or minimum order quantity, changes the economics a great deal. A small brand testing a new product line may prefer 250 to 1,000 stickers to stay flexible, even if the unit cost is higher. A more established brand that reorders consistently may find that 5,000 or 10,000 pieces drops the unit cost enough to justify extra inventory. The right answer depends on storage space, demand stability, and how often the artwork changes.
The table below gives a realistic feel for how those choices usually compare.
| Sticker Type | Typical Use | Common Strengths | Watchouts | Rough Unit Range |
|---|---|---|---|---|
| Paper label | Kraft boxes, dry retail cartons, light branding | Lowest cost, easy printability, clean look | Less resistance to moisture and abrasion | $0.03-$0.10 each at mid volumes |
| BOPP film label | Mailer boxes, shipping cartons, high-handling packs | Durable, moisture resistant, good for sealing | Higher cost than paper, surface testing needed | $0.06-$0.18 each depending on size |
| Clear film sticker | Minimal branding on premium cartons | Low visual clutter, lets box graphics show through | Adhesive and edge visibility matter a lot | $0.08-$0.22 each |
| Custom die-cut premium sticker | Launches, seasonal packs, special editions | Distinctive shape, stronger shelf appeal | Tooling and setup can raise total cost | $0.10-$0.30 each or more |
Two more factors tend to show up late in the process: turnaround and reprint policy. Faster production usually costs more, especially if the order needs to jump the queue. Reprint policy matters because color shifts, die issues, or artwork mistakes sometimes surface after the first batch arrives. A responsible supplier should be clear about what is covered, what counts as a file issue, and what happens if a sample does not match the approved proof.
If you want to compare sticker economics with other package components, our broader Custom Packaging Products catalog is a useful way to see where a label makes sense and where a printed carton or insert may be the better spend.
Choosing Materials, Adhesive, and Finish for the Box
Material selection should start with the box surface, not with the sticker catalog. A smooth SBS carton behaves differently from a recycled kraft mailer, and both behave differently from a soft-touch coated retail box. Paper labels work well on many dry applications, especially where cost control matters and the packaging will not face much friction. BOPP is a strong choice for mailers and shipping cartons because it handles scuffs and light moisture better. Vinyl is useful when durability matters, though it is not always necessary for ordinary e-commerce boxes. Clear film is the right fit when the brand wants the label to disappear visually while the logo or message still reads cleanly.
Adhesive choice deserves equal attention. Permanent adhesive is common for seals, shipping use, and tamper-sensitive applications because it is meant to stay put. Removable adhesive may suit promotional packaging, reusable cartons, or campaigns where the label is temporary. Repositionable options can help during hand application if the pack line needs a small adjustment window, though not every stock supports it equally well. Humidity, cold storage, and dusty surfaces can all change the result, which is why testing on the actual box is never wasted effort.
Finish changes both the look and the feel. Matte gives a calm, controlled impression and helps reduce glare under bright retail lighting. Gloss adds punch and can make colors feel stronger, though it may also show fingerprints more easily. Soft-touch coatings create a more tactile premium feel, but they can raise cost and are not the best fit for every handling environment. Specialty effects such as foil, metallic ink, emboss-like textures, or spot varnish can be striking, yet they should be used with restraint if the label is already small.
Practical testing should include more than one quick peel-and-stick check. Try the sticker on the actual carton, then inspect it after the adhesive has set for a few hours. Check the corners, the edge trim, and the way the label looks under store lighting or warehouse lighting. Rub it lightly with a dry cloth. If the pack may see cold storage or a humid delivery route, test that too. For some teams, a simple conditioning test and a short shipping simulation will reveal problems before a full order is approved. Those are the kinds of checks discussed in packaging and distribution guidance from organizations such as ISTA test standards and the sustainability-oriented material resources available through FSC-certified paper options.
A smart packaging buyer treats finish and adhesive as one decision. A matte paper sticker on a dry cosmetics box may be perfect. The same sticker on a cold-chain carton may fail the first time the box sweats in transit. That is not a design problem; it is a mismatch between substrate, environment, and use case.
Step-by-Step Guide to Ordering Branded Stickers for Product Boxes
The cleanest way to order is to define the use case first. Is the sticker branding a shipping mailer, sealing a retail carton, marking a limited release, or acting as a reusable element across several SKUs? That answer drives the rest of the specification. A decorative sticker and a tamper seal are not the same thing, even if they share the same artwork file.
Next, measure the actual box faces and map where the sticker will sit. The flat art file alone is not enough because folds, seams, tuck flaps, tear strips, and opening points all affect placement. A logo that looks perfectly centered on screen can end up too close to a fold or too near a flap edge once the box is built. For a seal, make sure there is enough surface area for both adhesion and clean opening behavior. If the sticker bridges two surfaces, the design must account for that movement.
Then choose the size, shape, substrate, adhesive, and finish. This is also the moment to decide whether the label needs to be printable in a short-run digital process or a longer-run method. A sample or proof is worth requesting here, especially if the sticker will appear on a textured box, a colored board, or a special coating. Proofs reduce uncertainty, but only a real sample on the real carton will show how the edge sits and how the color reads in actual conditions.
Artwork review deserves a careful pass. Look for alignment, logo legibility, contrast, and any tiny type that might disappear when printed at size. If the brand uses multiple box styles, keep the visual system consistent but not rigid. A shipping box may need a bigger icon, while a smaller retail carton may need a simplified lockup. Packaging works best when the system holds together across variants without forcing every surface to carry the exact same treatment.
Before placing the full order, build the receiving and application workflow. How will the stickers arrive: rolls, sheets, or individually cut pieces? Where will they be stored? Who opens the cartons? How will the team keep dust, humidity, and bending to a minimum? If the stickers are applied by hand, the pack-out station should be set up so the operator can place each piece with steady repetition and minimal waste. If the line is semi-automated, the applicator speed and label format need to match.
For teams refining their packaging mix, a small pilot order often delivers the best information. That pilot can reveal whether the box face is too busy, whether the adhesive grabs too quickly, and whether the label size feels balanced from arm’s length. Once the pilot passes, scaling is much easier. If you need examples of how these choices play out in the field, our Case Studies page is a helpful place to see practical packaging decisions in context.
Common Mistakes That Waste Budget or Hurt Branding
One of the most common mistakes is making the sticker too small for the box. On a design screen, tiny type can still look elegant. On a moving packing line, or in a customer’s hands while the box is being opened, it often reads as fussy or hard to see. If the sticker is meant to carry the logo, the logo should be instantly recognizable from a reasonable viewing distance, usually around an arm’s length for consumer packaging.
Another mistake is choosing the wrong stock or adhesive for the carton surface. A glossy sticker on an uncoated recycled box can behave one way; the same sticker on a coated mailer can behave another. Corners may lift, the label may shift during application, or the finish may wrinkle if the board has a strong texture. These issues are not always obvious in a proof file. They show up in real handling, and they are expensive if discovered after a full run.
Skipping a real-world test is one of the fastest ways to waste budget. A digital mockup cannot show how a sticker reacts to humidity, friction, or curved surfaces. It also cannot show how the box looks when stacked, shipped, or opened under warehouse lighting. A one-hour physical test on the actual carton often saves more than it costs.
Application speed is another hidden cost. A label that is slightly awkward to peel, align, or press into place can slow down the line enough to matter. If the sticker takes five extra seconds and the team runs thousands of units a week, that delay becomes a real labor cost. The cheapest unit price is not always the cheapest overall packaging decision.
Brands also run into trouble when artwork changes from one box type to another without a clear system. The label on a kraft mailer may not match the label on a white retail carton if the color profile, finish, or margin treatment changes too much. That inconsistency can make the packaging feel less professional even when each label is individually well made. Regulatory information can create a similar issue if it is handled inconsistently, especially on products that need lot codes, QR references, or standard notices.
In plain terms, the weak points are usually small things: a label that is 10 millimeters too narrow, a finish that reflects too much light, an adhesive that is overmatched for the surface, or a production choice that saves a few cents but adds labor at the packing bench. Those details separate a solid packaging program from a frustrating one.
Expert Tips and Next Steps for a Smooth Rollout
Start with one or two box styles, not the entire product range. That gives the team room to confirm fit, adhesive behavior, storage requirements, and visual impact without placing a large commitment on the first round. A pilot is especially useful if the stickers will be handled by a third-party fulfillment team or if the brand has seasonal packaging changes.
Create a simple spec sheet and keep it current. Record the approved sticker size, shape, material, finish, adhesive type, placement, and artwork version. Add notes about the box surface and any storage rules. That file becomes the source of truth for reorders, and it prevents a lot of avoidable back-and-forth when different team members order at different times. It also helps if you plan to expand into related items from Custom Labels & Tags, because the visual system can stay aligned across more than one format.
Ask the packing team what they see after the first trial. They usually notice practical issues before the design review does. Maybe the peel liner is harder to remove with gloves. Maybe the box surface sheds dust and reduces initial grab. Maybe the label looks excellent at one angle and too reflective at another. Those observations are not minor; they are exactly the kind of production feedback that improves the next order.
Set reorder thresholds early. If a brand uses branded stickers for product boxes every month, the reorder trigger should be based on actual consumption and lead time, not hope. Keeping a small safety stock can prevent rush charges, protect against supply delays, and avoid the pressure of approving artwork in a hurry. For many programs, a six- to eight-week look-ahead is enough to keep the packaging flow stable, though the right window depends on the supplier and the season.
If the goal is to keep packaging polished without overcomplicating the operation, the best plan is usually straightforward: measure one box, request a sample, review a proof on the real carton, and then place a controlled pilot order. That approach protects budget, keeps the visual result honest, and gives the team real data before scaling. Used well, branded stickers for product boxes can carry a lot of brand weight without forcing a complete packaging overhaul.
Are branded stickers for product boxes better than direct printing?
They are often the better choice for smaller runs, seasonal campaigns, or brands that use several box sizes and want more flexibility without changing the whole carton program. Stickers also make it easier to adjust artwork, fix a message, or test a new look without committing to a full packaging redesign. Direct printing can win on very large volumes, but stickers usually make more sense when setup cost, speed, and reorder flexibility matter more than permanent print integration.
What size should product box branding stickers be?
Size should be based on the actual box face, the viewing distance, and the amount of open space needed so the design does not feel crowded. A quick mockup on the real carton is the best check; if the logo reads cleanly from arm's length under normal lighting, the size is usually in the right range. If the sticker also acts as a seal, leave enough room for a clean fold-over or edge placement without interfering with opening the box.
Do branded stickers for product boxes need special adhesive?
Yes, the adhesive should match the box surface, because coated, textured, recycled, and cold-stored packaging all behave differently. Permanent adhesive is common for seals and shipping use, while removable or repositionable adhesive can be better for promotional packaging. The safest way to confirm the choice is still a physical test on the actual box, since that is the only way to see whether the sticker stays put without damaging the surface when removed.
How long do branded packaging stickers last during shipping?
Durability depends on the material, finish, adhesive, and the conditions the box will face, including friction, moisture, heat, and handling. Film-based stickers with the right coating usually hold up better than basic paper in rough transit or humid storage. A rub test and a short storage test on the actual package will show whether the sticker stays attractive through the full journey and whether the corners hold under real shipping stress.
What should I ask for in a quote for product box stickers?
Ask for quantity, size, shape, material, finish, adhesive type, and whether the price includes proofing, tooling, or setup charges. Confirm turnaround, shipping cost, packaging format, and whether there are price breaks at higher volumes. A good quote should make unit cost easy to compare so you can see the real difference between suppliers, not just the lowest headline number, and it should clearly show how branded stickers for product boxes fit your actual pack-out plan.

