Buy Very Small Custom Stickers Without Wasting Money
What Very Small Custom Stickers Can Actually Do
A 0.5-inch sticker sounds cute until the logo, QR code, batch number, legal text, and tiny slogan all start fighting for oxygen. Very small custom stickers work best when they have one job. Not six.
For most packaging buyers, “very small” means anything under 1 inch across the widest point. Common micro sizes include 0.375 inch, 0.5 inch, 0.75 inch, and 1 inch. A 0.5-inch circle can work beautifully as a tissue seal or logo dot. A 1-inch square gives enough room for a simple wordmark, batch code, or product variant mark. Below that, every extra letter becomes a tax on readability.
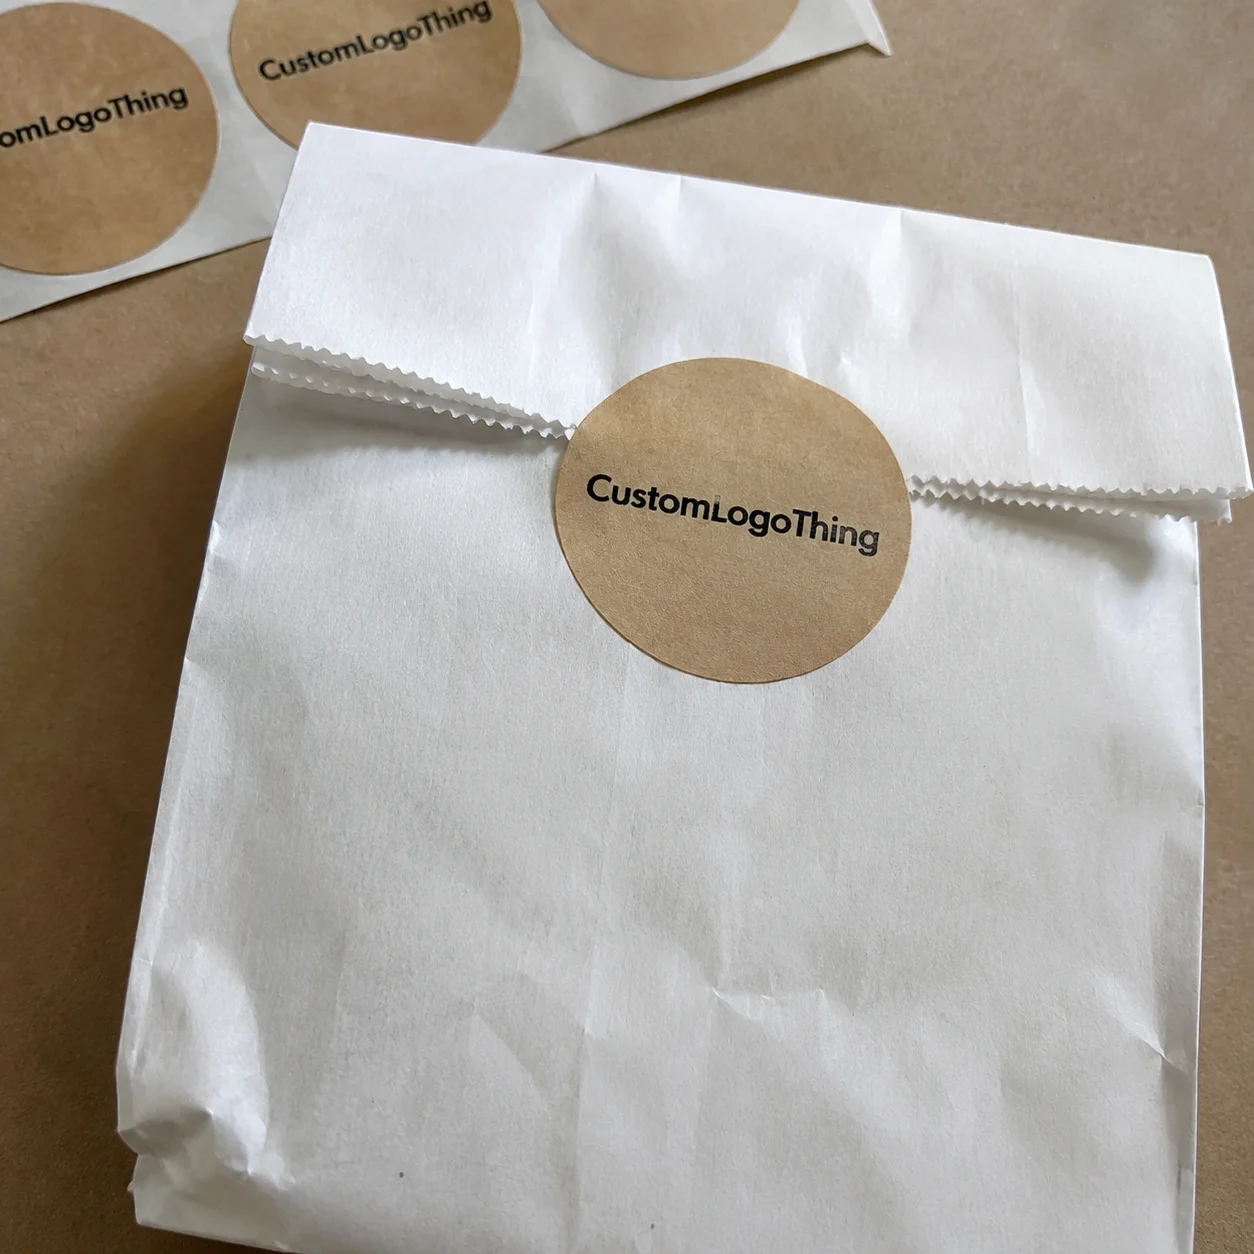
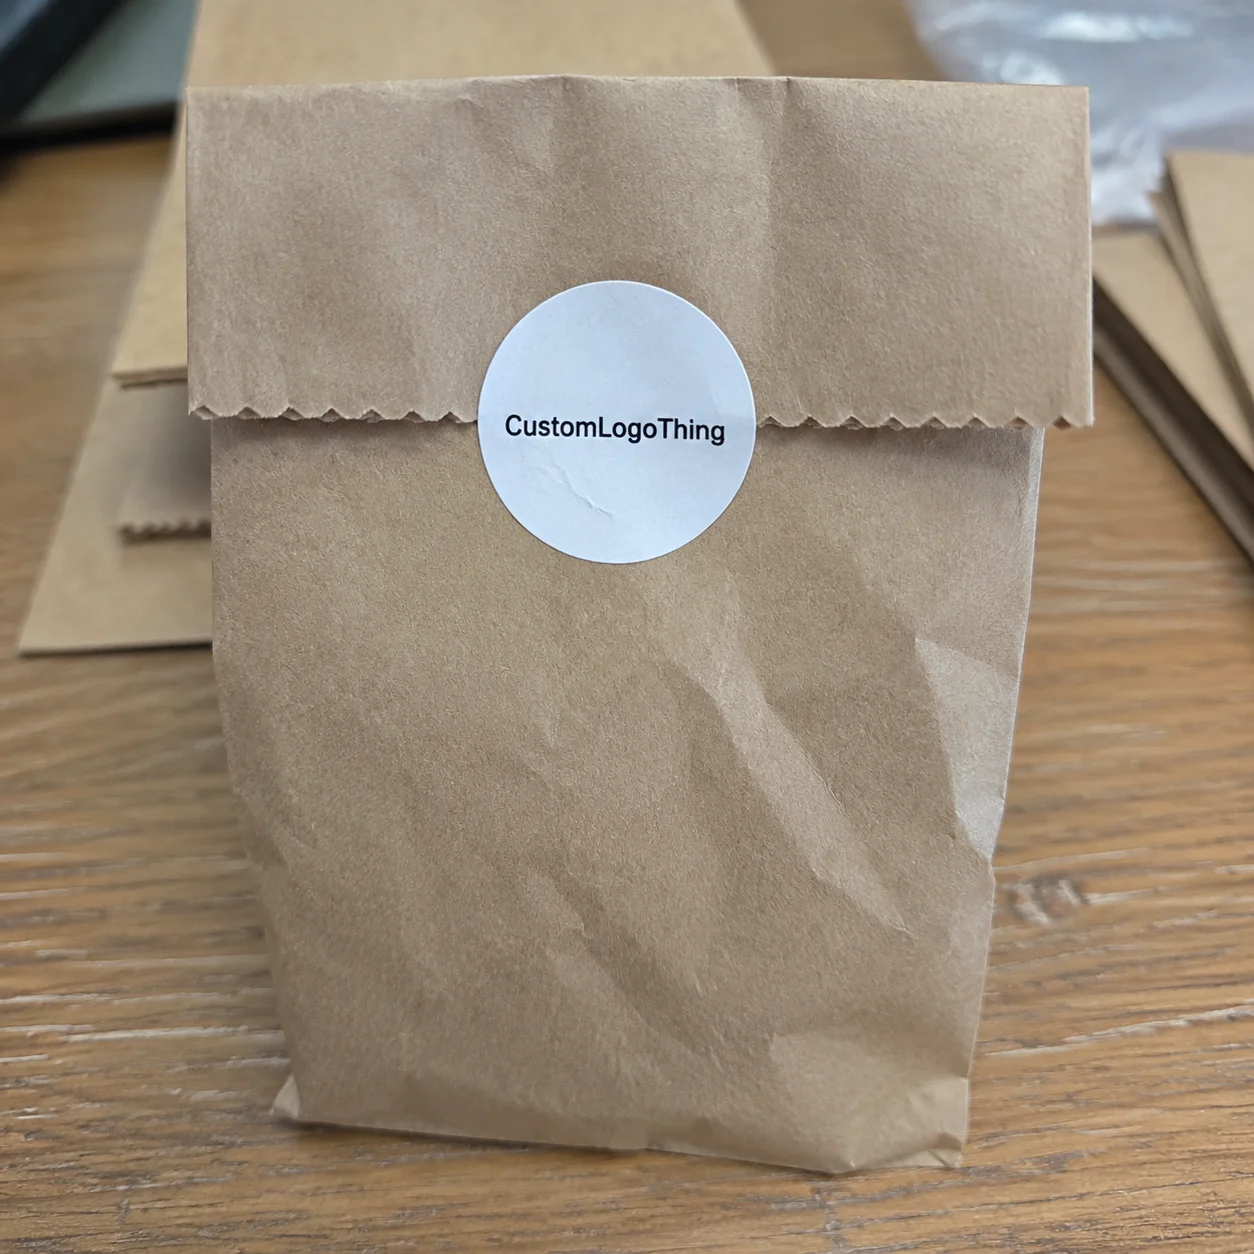
These stickers are useful in specific places: sealing tissue paper, labeling sample vials, marking electronics, decorating mini jars, branding lip balm tubes, identifying batches, closing retail packaging, or adding a tamper-style closure to small product packaging. They can also support branded packaging when a full custom box is overkill or the order quantity is too low for printed cartons. For broader packaging builds, they often work alongside Custom Packaging Products such as boxes, mailers, inserts, sleeves, and retail display packaging.
What are they bad at? Dense ingredient panels. Multi-line slogans. Tiny QR codes. Complex illustrations. Anything someone needs to read from across a counter. If the customer must squint, rotate the product, and question their eyesight, the design failed. Not the customer.
The smaller the sticker, the more ruthless the artwork needs to be. Use a simple icon, a bold mark, strong contrast, and breathing room around the edge. Size affects every decision after that: material, adhesive, cut style, print method, finish, packing format, and cost.
Practical rule: if the sticker is under 0.75 inch, design it like a symbol, not like a brochure.
How Tiny Stickers Are Printed, Cut, and Finished
The basic production path is not mysterious. Artwork gets reviewed, a proof is created, the sticker is printed, a coating or lamination is added if needed, the shape is cut, excess material may be weeded away, and the finished stickers are packed as rolls, sheets, or individual pieces. Simple enough. The annoying parts hide in the details.
Digital printing is usually the better fit for short runs, multiple designs, or small batches where you need 250 of one version and 500 of another. Flexographic or offset-style production can make more sense for larger roll-label runs with repeat artwork. Digital gives flexibility. Traditional production can lower unit cost at scale. Pick based on quantity, material, color expectations, and how often the artwork changes.
Cut format matters more than buyers expect. Kiss-cut sheets are convenient for hand application and storage. Individual cut stickers feel polished for inserts, events, or resale packs. Rolls are often faster for teams applying stickers to jars, tubes, bags, or boxes all day. If a warehouse worker has to peel 5,000 tiny circles from a cramped sheet, congratulations, you just bought a labor problem.
Shape is another reality check. Circles, squares, rectangles, and simple ovals usually print and cut cleanly at micro sizes. Intricate starbursts, hairline edges, and delicate cutouts are where optimism goes to die. Tiny die-cut shapes can work, but the simpler the silhouette, the cleaner the finished sticker looks.
Finish choices should support the job, not just look exciting on a sample card. Matte hides glare and feels premium. Gloss boosts color and makes small graphics pop. Clear stock can look sharp on glass, plastic, or coated boxes, but contrast has to be tested because unprinted clear areas disappear fast. Metallic and holographic stocks can work for small logo stickers if the artwork is simple. If the design has eight fine lines and a gradient, maybe don’t ask foil to perform surgery.
Adhesive is not a footnote. Standard permanent adhesive works for many indoor uses. Removable adhesive fits temporary promotions or short-term labeling. Freezer-grade adhesive is useful for cold storage, frozen samples, or chilled food packaging. High-tack adhesive helps on textured board, kraft paper, curved caps, or low-energy plastics. Specialty adhesives may be needed for oily cosmetics, squeeze tubes, damp glass, or outdoor exposure.
Ask where the sticker will live before choosing material. Paper is cost-effective and looks natural, but it hates moisture unless protected. White polypropylene or polyester film handles rubbing and moisture better. Clear film needs strong contrast. Vinyl is often used for durability, though it may be overbuilt for indoor packaging seals. The right material is not always the fanciest one. Annoying, but financially useful.
Size, Artwork, and Readability Rules That Matter
Small stickers do not shrink full-size artwork nicely. They need purpose-built artwork. A logo that looks crisp on a website header can become a blob at 0.5 inch, especially if it has thin strokes, tiny counters, delicate script, or low-contrast colors.
Use one logo mark or one short word. Avoid thin scripts. Keep line weights thick enough to survive ink spread and cutting tolerance. Leave a visible margin between the artwork and the cut line, especially on circles where even a tiny shift looks obvious. A border that sits 1 millimeter from the edge can look uneven after normal production movement, even when the sticker is technically within tolerance.
Text under 5 to 6 pt is risky, and that range still depends on the font, material, print method, ink coverage, and viewing distance. Bold sans-serif type has a better chance than a delicate serif or script. Legal copy at micro scale is usually a bad plan. If regulations require readable information, use a larger label, a box panel, or a folded insert. Tiny labels are not magic loopholes.
Bleed and safe zone still matter, even on a sticker smaller than a coin. Bleed means artwork extends beyond the cut edge, often around 0.0625 inch to 0.125 inch depending on the supplier. The safe zone is the inside area where critical artwork should stay. Cutting machines are accurate, but they are not emotionally invested in your perfectly centered 0.5-inch logo.
Color should be treated like a tool. Black on white, dark navy on white, white on black, or white on a deep brand color will beat pale beige on cream every single time. Subtle branding is lovely. Invisible branding is expensive confetti. Tiny stickers reduce the visual area, so weak contrast becomes weaker than it looked on screen.
QR codes and barcodes deserve extra suspicion. A QR code that scans on your monitor may fail when printed at 0.5 inch, laminated with gloss, and wrapped around a curved lip balm tube. Test it physically. Print a scaled paper mockup first. Then scan it in bad lighting, from an average phone, at a normal distance. Annoying? Yes. Cheaper than reordering 10,000 unusable stickers? Also yes.
- Best micro artwork: one icon, one bold word, or one simple mark.
- Risky micro artwork: taglines, legal copy, QR codes, gradients, thin borders, and script fonts.
- Quick test: print the sticker at actual size and view it from 12 to 18 inches away.
Cost, Pricing, and MOQ for Micro Sticker Orders
Tiny does not always mean dramatically cheaper. Yes, very small custom stickers use less material. No, that does not erase setup, proofing, cutting, packing, adhesive selection, or handling. Cutting a 0.5-inch sticker can be just as fussy as cutting a 1.5-inch sticker. Sometimes fussier. Machines do not hand out discounts for being annoyed.
Main cost drivers include size, quantity, material, adhesive, finish, number of designs, roll versus sheet format, custom shape complexity, proofing requirements, and packing style. A simple 0.75-inch paper sticker on sheets will price differently from a 0.5-inch clear polypropylene sticker on rolls with high-tack adhesive and gloss lamination.
For short digital runs, buyers may see pricing from a few cents to several cents per sticker, depending on the supplier and specs. A run of 500 to 1,000 micro stickers might land around $0.05 to $0.20 per piece if setup and handling are spread across a small quantity. Higher-volume roll orders can push unit costs much lower, sometimes into the $0.01 to $0.05 range for simple specs. Specialty materials, metallic stocks, clear films, unusual adhesives, or multiple artwork versions can push the cost back up.
Minimum order quantities vary. Digital sheet stickers may start at lower quantities, sometimes 100 to 250 pieces depending on the vendor. Custom roll labels, freezer adhesives, metallic materials, or exact color matching often need higher minimums, commonly 500, 1,000, or more. If you are also buying Custom Labels & Tags, combining specs can simplify quoting, but only if the materials and finishes actually match.
| Option | Typical Use | Common Quantity Range | Pricing Behavior |
|---|---|---|---|
| Kiss-cut sheets | Small batch packaging, samples, hand application | 100–2,000 pieces | Good for low volume, higher labor during application |
| Roll stickers | Jars, tubes, boxes, repeated product labeling | 500–50,000+ pieces | Better unit cost at scale, faster application |
| Individual cut pieces | Inserts, events, resale packs, promo kits | 250–10,000 pieces | More handling cost, polished presentation |
| Specialty film or foil | Luxury retail packaging, clear containers, premium branding | 500–10,000+ pieces | Higher material cost, better visual impact if artwork is simple |
Prepare quote details before asking for numbers. Send the final size, quantity, material preference, adhesive need, surface type, indoor or outdoor use, roll direction, number of designs, and whether the sticker is hand-applied or machine-applied. If budget is tight, order slightly more only when the design, product line, and compliance details are stable. Saving 2 cents per piece does not help if the ingredient statement changes next month.
Process and Timeline From Artwork to Delivery
The usual process is straightforward: send artwork and specs, receive a quote, approve a digital proof, approve a physical sample if needed, start production, complete quality checks, then ship. The clock usually starts after proof approval, not after the first email. That detail quietly wrecks launch calendars all the time.
Simple digital sticker orders can move quickly after proof approval, often in 3 to 7 business days for production if the material is standard and the artwork is clean. Custom roll labels may run closer to 7 to 12 business days. Specialty adhesives, exact color matching, metallic stocks, clear films, or physical sampling can push timelines to 12 to 20 business days or more. Shipping adds another 2 to 7 business days depending on destination and method.
What slows orders down? Missing vector files. Low-resolution logos. Vague size requests like “small, maybe half an inch.” Last-minute copy changes. Unknown application surfaces. No decision on roll direction. A buyer asking for “premium” without defining whether that means matte film, soft-touch coating, metallic stock, or just “please make it look expensive somehow.” Suppliers are printers, not mind readers.
Sampling is smart for tiny stickers used on curved tubes, cold glass, oily cosmetics, freezer packaging, frosted jars, or high-end unboxing. A digital proof shows layout and content. It does not prove adhesive performance on a squeeze tube after 48 hours, or whether a clear label disappears against amber glass. Physical testing does.
Quality control should be more than a quick glance at the top sheet. For micro stickers, check cut alignment, color consistency, missing print, edge lift, adhesive transfer, surface scuffing, and peelability. On rolls, confirm unwind direction and core size if the stickers feed into an applicator. On sheets, confirm spacing gives fingers enough room to peel without curling the edges.
For packaging projects tied to retail packaging, Custom Printed Boxes, or product launch kits, plan backward from the packaging deadline, not the launch announcement. Stickers may need to arrive before boxes are packed, bundles are assembled, or quality checks are finished. If stickers are part of a kit, build in time for receiving, counting, application testing, and repacking.
Standards can help if shipping or sustainability matters. For distribution testing, the International Safe Transit Association publishes packaging test procedures that many product teams use when validating packed goods. For paper-based packaging claims, FSC certification may matter if your brand requires responsibly sourced paper materials. A sticker is small, but it still sits inside a bigger packaging system.
Common Mistakes That Make Small Stickers Look Cheap
Overcrowded artwork is the first offender. Too many words, too many colors, too many icons, and a logo that was never designed to survive at half an inch will make even well-printed stickers look cheap. The press can only print what the artwork gives it. Brutal, but true.
Poor material matching is another common waste of money. Paper stickers on damp jars can wrinkle. Weak adhesive on textured boxes can lift. Glossy clear stickers over low-contrast packaging can vanish. Removable adhesive used where permanent adhesive was needed can peel before the customer even opens the product. That is not premium package branding. That is a tiny apology waiting to happen.
Application method gets ignored too often. If staff apply thousands of tiny stickers by hand, the sheet layout matters. Tight spacing can make stickers hard to peel without bending the edges. Roll stickers may be faster and cleaner, especially if placement has to stay consistent across jars, caps, tubes, or mailer boxes.
Shape choices can also sabotage the result. Ultra-thin points, delicate borders, and complex silhouettes can look ragged after cutting at micro scale. A tiny scalloped edge may look charming in a mockup and messy in a production run. Simple shapes look more intentional and usually cost less to produce.
Color surprises happen because screens are backlit and printed ink is not. Tiny stickers make shifts feel more obvious because there is less visual room to hide. A pale gray logo on a matte cream sticker might look refined on a laptop and nearly invisible under retail lighting. Ask for a printed proof if color is critical, especially for cosmetics, food, boutique goods, or any packaging design where the sticker sits next to other brand materials.
Surface testing is not optional for difficult applications. Curved caps, squeeze tubes, frosted glass, kraft paper, coated boxes, cold surfaces, and textured plastics all behave differently. Adhesive that works on a flat paperboard insert may fail on a chilled glass vial. This depends on surface energy, storage conditions, contact time, and adhesive chemistry, so blanket promises are usually nonsense.
Hard rule: if you cannot read it printed at actual size from normal viewing distance, your customer cannot either.
Next Steps Before You Request a Sticker Quote
Before requesting a quote, define the real use. Choose the exact application surface, measure the usable area, decide the sticker shape, and confirm whether it needs to survive moisture, rubbing, freezing, heat, oil, or outdoor exposure.
Then strip the artwork down. Use the smallest number of elements that still communicates the point. If the sticker is a brand mark, let it be a brand mark. If it is a batch identifier, make the code readable. If it seals tissue, focus on peel strength and presentation. The sticker does not need to explain your entire brand philosophy. Your packaging can carry the rest.
Send clean files. Vector artwork is best for logos and icons, usually AI, EPS, SVG, or press-ready PDF. Raster artwork should be high resolution at final print size, not a 300-pixel logo pulled from a website. Include Pantone references if color matching matters, but expect some variation depending on material, print method, coating, and lighting.
Build a basic spec sheet before asking for pricing:
- Final sticker size and shape
- Quantity and number of artwork versions
- Material preference, such as paper, white film, clear film, metallic, or holographic
- Finish, such as matte, gloss, uncoated, laminated, or varnished
- Adhesive type, including permanent, removable, freezer-grade, or high-tack
- Application surface and storage conditions
- Sheet, roll, or individual cut format
- Roll direction, core size, and machine requirements if applicable
If you are unsure, send a photo of the product or packaging surface with measurements. A supplier can make better recommendations when they can see the cap curve, paper texture, jar diameter, or available label area. “Small sticker for packaging” is not a spec. It is a wish.
The best micro sticker projects are boring in the right places: clear artwork, realistic sizing, compatible material, tested adhesive, confirmed format, and enough production time. That is how you avoid paying for tiny trash. If the sticker must coordinate with cartons, hang tags, sleeves, or other branded pieces, review it as part of the full packaging set rather than as an isolated graphic.
Frequently Asked Questions
How small can custom stickers be?
Many suppliers can produce stickers around 0.25 to 0.5 inch, but practical size depends on the shape, artwork, material, and cut tolerance. A plain color dot can be extremely small. A logo with text needs more room. For most branding uses, 0.5 inch is already tight, and 0.75 to 1 inch gives a much safer result.
Are very small custom stickers cheaper than larger stickers?
Sometimes, but not as much as buyers expect. Smaller stickers use less material, yet setup, proofing, cutting, packing, and handling still cost money. A 0.5-inch sticker may be cheaper than a 2-inch sticker at volume, but the difference can be modest on short runs. Format and application method can affect total cost more than size alone.
What is the best material for tiny packaging stickers?
For dry indoor packaging, paper often works well and keeps cost down. For moisture, rubbing, cosmetics, chilled goods, or curved containers, film materials such as polypropylene or polyester are usually safer. Clear film works only when the artwork has enough contrast against the surface underneath. Test before ordering a large run.
Can I print a QR code on a 0.5-inch sticker?
You can try, but it may not work reliably. QR codes need enough size, contrast, quiet zone, and print clarity to scan. Gloss coating, curved surfaces, metallic materials, and low contrast can all cause problems. If the QR code matters, print a physical sample at final size and test it with several phones before approving production.
Should I order sheets or rolls?
Use sheets for small batches, samples, and occasional hand application. Use rolls when applying hundreds or thousands of stickers to products, especially if speed and placement consistency matter. For machine application, rolls usually need the correct unwind direction, spacing, liner, and core size.
How much bleed do tiny stickers need?
Many suppliers ask for 0.0625 inch to 0.125 inch of bleed, but the exact requirement varies by equipment and cut style. Keep important text and logos inside the safe zone. Avoid thin borders close to the edge because normal cutting movement can make them look off-center.
How long do small custom sticker orders take?
Simple digital orders on standard materials may take 3 to 7 business days after proof approval. Roll labels, specialty materials, physical samples, or color matching can take 7 to 20 business days or more. Shipping time is separate. Proof approval is usually the real starting line.
What should I check before approving a proof?
Check the final size, spelling, logo clarity, cut line, bleed, safe zone, color expectations, material, adhesive, quantity, and format. For rolls, check unwind direction and spacing. For tiny stickers, print the proof at actual size. Looking at a zoomed-in PDF is useful, but it can be misleading for readability.