Buyer Fit Snapshot
| Best fit | Corrugated Boxes Design projects where brand print, material claims, artwork control, MOQ, and repeat-order consistency need to be specified before quoting. |
|---|---|
| Quote inputs | Share finished size, material target, print colors, finish, packing count, annual reorder estimate, ship-to region, and any compliance wording. |
| Proofing check | Approve dieline scale, logo placement, barcode or warning zones, color tolerance, closure strength, and carton packing before bulk production. |
| Main risk | Vague material claims, crowded artwork, missing packing details, or unclear freight terms can make a low unit price expensive after revisions. |
Fast answer: Corrugated Boxes Design: Board, Finish, Dieline, and Unit Cost should be specified like a repeatable production item. The safest quote records material, print method, finish, artwork proof, packing count, and reorder notes in one written spec.
Production checks before approval
Compare the actual filled-product size with the drawing, then confirm tolerance on folds, seals, hang holes, label areas, and retail display edges. Reserve space for logos, QR codes, warning copy, and material claims before decorative graphics fill the panel.
Quote comparison points
Review material grade, print process, finish, sampling route, tooling charges, carton quantity, and freight assumptions side by side. A quote is only useful when the supplier can repeat the same color, closure quality, and packing count on the next order.
Corrugated Boxes Design Tips: What Actually Moves the Needle start with a blunt reality check: a box that looks finished on screen can still fold itself into a failure after a rough carrier handoff, a stacked pallet, or a cold warehouse night shift. Appearance rarely tells you how a package behaves at 30 minutes of real handling. That mismatch is why corrugated boxes design tips are a performance discipline, not a decoration checklist.
People treat cartons as the easy last step, but that is where most damage problems are born. Corrugated structure has to carry load, vibration, compression, humidity, assembly speed, and the occasional rough treatment from a busy operator. Good corrugated boxes design tips are really decision rules that keep these pressures in check: Choose the Right board, lock in dimensions, validate weak points, then add branding intent.
If you buy packaging for e-commerce, retail, or wholesale, the same hierarchy keeps winning: function first, brand second, price optimization last. I have seen projects that looked beautiful for months because everyone approved the print file, only to discover at the dock that half the run came back bent. The sequence matters more than you want to admit because it keeps quality conversations real and avoids expensive surprises when volume arrives.
Below you get corrugated boxes design tips from the inside out: material behavior, where quotes get inflated, what breaks first in schedules, and exactly what to check before signing off production. Not theory. Field-tested moves.
What Are the Best Corrugated Boxes Design Tips for Protecting Products?
The strongest corrugated boxes design tips begin with one hard question: what will the package actually survive, not merely what is expected to hold. A box must be engineered for the real journey, including the route, lift method, and how long it will sit in transit.
For most jobs, you need a disciplined baseline: tune internal dimensions to restrict movement, pick the lightest board that still meets route stress, and test under realistic handling. Add barcode placement, seam placement, and finish layers only after structure tests behave. That might sound unsocially practical, but it is exactly what reduces returns.
The result you want is a carton with a good balance of compression strength, stackability, and printability. A carton that “looks right” but twists under load costs more than a plain-looking, stable one. In packaging, structure decides whether your brand story even reaches the customer.
Real shipping data from a camera accessory line I reviewed last year proved this: we lowered unit damage by roughly 27% after adding 2 mm more corner support and tightening tolerance control, while leaving the external visuals untouched. That is the kind of correction no slogan gives you, only test-driven design.
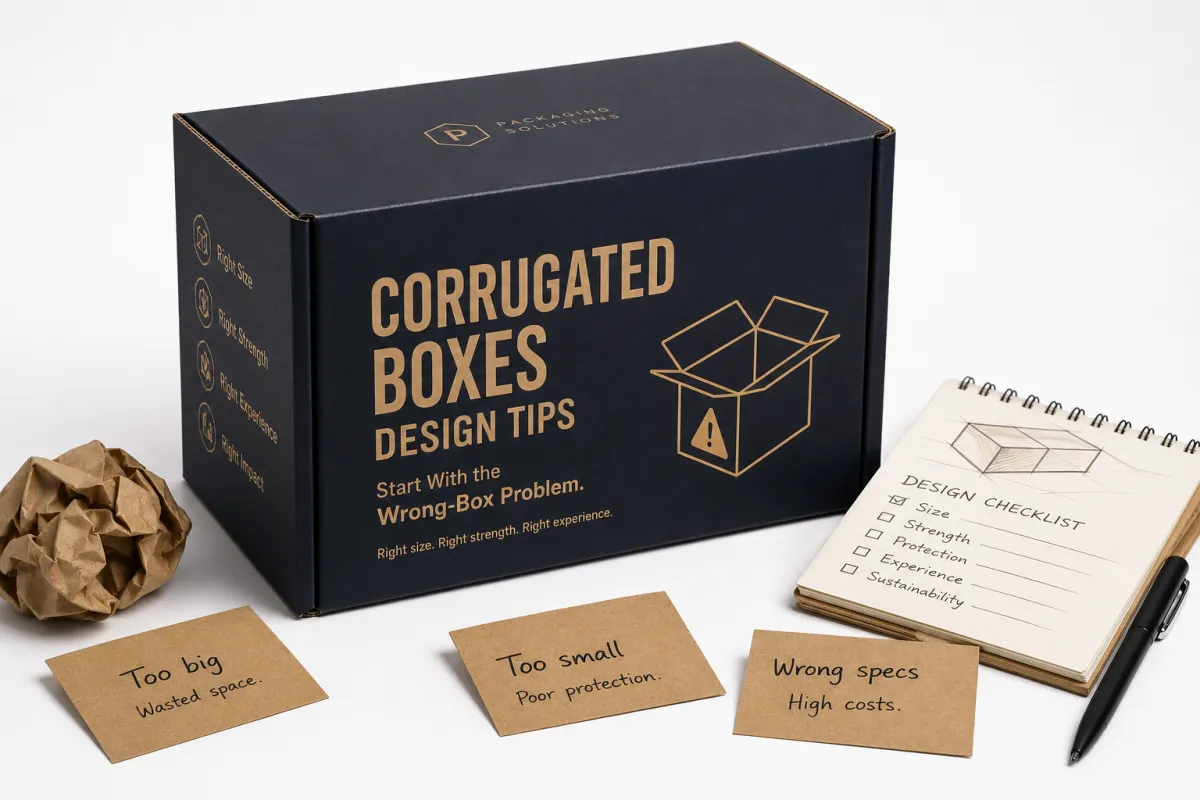
Corrugated Boxes Design Tips: Start With the Wrong-Box Problem
A lot of projects start from a wrong assumption, not a wrong board: teams decide on aesthetics first, then discover the load path is impossible. The wrong-box problem is not a single error. It is a chain of small assumptions: wrong loading direction, wrong closure behavior, wrong clearances.
Corrugated board is two linerboards wrapped around a fluted medium. That flute geometry is not decoration; it is a structural decision. A, B, C, and E flute remain common choices, but each changes how cushioning, bending, fold behavior, and print surfaces perform. A flute with larger profile generally improves cushioning and vertical performance; tighter flutes usually improve fold sharpness and graphics definition.
Two strength indicators matter again and again: ECT and burst strength. ECT (edge crush test) is a board’s resistance to compression when loaded from above. Burst strength is puncture resistance under pressure. Neither number replaces engineering of the full geometry. A design can post nice numbers on paper and still fail when the corner load bypasses the intended force path.
So connect these metrics to the actual trip path: stacked pallets, conveyor edges, manual tossing, drop impacts, and temperature swings. That is where corrugated boxes design tips stop being abstract and start protecting margin, customer trust, and your claim pipeline.
One-size mistakes are expensive in both directions. Over-size boxes create void movement and collapse risk. Under-size boxes crush into the pack and slow packing lines. The design must hit a narrow middle lane, and that lane is earned through measurement and testing.
A polished box that fails in transit is not premium packaging. It is expensive confetti.
For buyers the sequence has to stay simple: define use case, validate load profile, test structure, then add finishes. If your internal team starts with foils, spot coatings, or unboxing flourish before core strength, you are effectively signing an expensive rewrite contract.
If you need a quick practical comparison first, review your lineup against our Custom Shipping Boxes and compare current shipper dimensions. You can also browse the broader Custom Packaging Products catalog to benchmark how structure changes across use cases.
How Corrugated Boxes Work: Physics, Layers, and Process Limits
Good corrugated boxes design tips start with material behavior. Corrugated is not just paper; it is a thin-laminate structure with directional stiffness. Fold lines, scoring depth, seam width, and glue profile all determine whether the panel performs under stress or fails at the first compression cycle.
Flute choice alters three major things together: strength profile, print quality, and fold performance. Bigger flutes generally improve cushioning and edge resilience, while tighter flutes can sharpen graphics and cleaner edges. The trade-off is unavoidable: more cushioning usually means less visual crispness on extreme detail.
Products also load boxes differently. Tall, narrow products increase overturn risk from side forces. Dense SKUs stress bottom panels and corners. Fragile electronics penalize vibration and point impact. A carton that works for lightweight toiletries can absolutely fail for a 12-pound mechanical part, even if the drawing is almost identical.
Conversion limits are where many teams lose money. Complex dies with many internal features create more weak points and reject opportunities. You need controlled creasing depth to fold cleanly without cracking. Glue overlap has to be enough for retention, but not so much it creates assembly drag or visual distortion. Inner corner radii matter because sharp angles can split under repeated handling.
Printing has structural consequences, too. Keep heavy ink or large solid areas away from fold-critical zones when possible, because coatings and ink density can alter panel stiffness and local fold resistance. Small registration drift is normal in many workflows; what is not normal is ignoring where that drift lands on a fold or barcode area.
Before production, I always push these checks:
- Mock-up stack testing to watch panel behavior under real-height layering.
- Corner-to-corner load checks to catch weak post points early.
- Palletization simulation so the footprint matches actual shipping patterns.
- Drop and vibration checks matched to parcel route severity and transfer frequency.
For formal references, teams often use ISTA methods and ASTM compression practice like ASTM D642. You do not need a full lab for every run, but if you skip testing because it feels like delay, you are just paying delay later in returns, rework, and account-manager damage calls.
Corrugated Boxes Design Tips for Product Fit, Brand, and Protection
The best corrugated boxes design tips link product fit, structural integrity, and brand readability into one system. If internal dimensions are off by even a millimeter or two, every downstream step gets worse: packing gets slower, inserts shift, and claims rise.
Internal space is not a static number; it is a tolerance envelope. Products with slight batch variation can grow by a few millimeters through temperature and humidity changes. That variance is not an inconvenience. It is why “2 mm” errors become operational problems at quantity scale.
Weight distribution matters as much as total weight. A compact low-profile object can be forgiving with one flap style and fail spectacularly with another. A tall high-center-of-gravity item usually needs reinforced edges and more secure closure logic. If the weak face sits where the shipping force lands, the carton is setting itself up to fail.
Branding must support handling, not sabotage it. You need clear zones for barcodes, handling instructions, lot data, and anti-tamper cues. If artwork crowds critical seams, the printer may alter placement or compression tolerances to compensate, and print quality can drift.
A practical hierarchy works best: front panel for identity, side panel for logistics and compliance, and clearances around scan points. Keep QR and barcodes off folded creases and out of areas exposed to repeated friction, or scan reliability suffers on first unpack.
Sustainability choices need a reality filter. Recycled fibers and certified content can be excellent, but a lighter box is not automatically greener if it causes higher breakage and relabeling. The FSC framework can help align fiber claims. The EPA recycling guidance helps teams avoid vague packaging claims, but local recycling infrastructure still decides what happens after the customer takes delivery.
Closure style affects strength more than people admit. Regular slotted cartons, roll-end front-tuck, crash-lock bottoms, and taped mailer hybrids each behave differently in assembly speed and seam strength. Adhesive selection also matters: in dry climate tape can hold while humidity and rapid stacking can reveal poor compatibility.
Before release, these supplier-facing checks should be visible:
- Dieline accuracy against approved product dimensions and tolerances.
- Seam consistency measured through sample batches, not just first-off proof.
- Color tolerance checks for brand-critical shades and skin tones.
- Edge quality on cut and fold lines where crushing can start early.
- Barcode and QR read tests after folding, because folded distortion is common.
One rule from this section keeps projects steady: protect first, communicate second, optimize cost last. That order is boring on purpose, and it is hard to beat for reducing chaos.
Corrugated Boxes Design Tips for Costs, Pricing, and Trade-offs
Corrugated pricing has four buckets: tooling, setup, materials, and production rate impact. The trap is treating the quote as a flat number and not seeing which bucket is driving variance. A premium look often costs less than repeated rework if the structure is stable from day one.
At low volumes, startup costs dominate: die prep, initial proofing, setup, and approvals carry the weight. At higher volumes, recurring line cost, material grade, and print process become larger influences. The right board grade might look pricey on paper and still reduce total cost when handling losses decline.
Hidden costs are the real killer. Scope creep in color count, artwork changes after tool-up, over-complex die-lines, and uncontrolled tolerances all become expensive before first full-size production. The budget usually starts as a neat line item and grows teeth around delivery week.
| Option | Typical Use | Approx. Cost Impact | Main Trade-off |
|---|---|---|---|
| Standard single-wall with simple 1-color print | General shipping, internal logistics | $0.18-$0.32 per unit at 5,000 units | Lowest setup cost, less visual polish |
| Upgraded board with 2-3 color print | E-commerce, branded shipping | $0.26-$0.48 per unit at 5,000 units | Better branding, slightly higher press complexity |
| Heavy-duty grade with custom dieline | Dense products, fragile freight | $0.34-$0.70 per unit at 5,000 units | Stronger protection, more tooling and setup cost |
| Premium finish with coating or special effect | Retail presentation, unboxing emphasis | $0.42-$0.90 per unit at 5,000 units | Higher visual impact, greater process sensitivity |
The table is directional, not a guaranteed quote. Paper markets, coating chemistry, and print line capacity can move these numbers materially. What usually remains stable is the pattern: small runs are setup-heavy; big runs magnify the material and process penalties.
The cost formula is still your best shield against wishful procurement:
Total cost = tooling + setup + (unit cost × quantity) + freight + inspection overhead
If you are selecting between a simpler and a richer design, compare trade-off impact instead of visual confidence. Each extra fold, color, or coating carries process risk. Some are worth the spend. Many are just expensive decoration.
One practical example from a fulfillment pilot I worked on: we increased board quality by 8% and reduced unit rejections by 18%. That offset a modest per-box increase because less downtime, fewer returns, and fewer credit memos followed. Strange how often quality and margin move in the same direction.
Corrugated Boxes Design Tips for a Practical Timeline
A useful timeline keeps packaging projects from turning into recurring “urgent” nights. Most delays are preventable: undefined dimensions, late approvals, or unresolved tolerances. The fix is mapping gates to actual work stages, not vague deadlines.
Weeks 1–2 should be discovery and brief freeze. Capture SKU dimensions, stack heights, handling method, likely channel, and target volume. “Premium feel” is not a specification. “Survives 10-inch corner drop on conveyor and 5 layers stack” is a specification.
Weeks 3 focuses on structure and sample logic. Review dieline and closure strategy before final art. A fold error corrected at this stage is cheap; one corrected after print is often catastrophic in budget terms. Separate structure approval from art approval to avoid endless argument loops.
Weeks 4–5 are for prototypes and handling validation. Run compression stacking and assembly checks with actual operators, not just design engineers. A sample that looks clean but takes 30 seconds longer to close in line conditions can sink labor savings by the pallet.
Week 6 is prepress and proofing. Verify grain direction, glue tabs, and color proofs. If a barcode is near a cut line or fold, resolve it before release. Revisions late in the cycle rarely save money.
Week 7 is production start plus in-process QA. Review first-off and running checks, not only final acceptance. If drift appears, correct early before the job becomes a total run risk.
Common reasons timelines slip are predictable:
- Missing stack data in the initial brief.
- Undefined tolerance windows for weight and dimension variance.
- Cross-team approval lag among design, operations, and purchasing.
- Late copy or artwork edits after the die is locked.
- No dedicated testing window before release.
Build a fixed approval chain for every run: structure signoff, art signoff, sample signoff, then production signoff. That rhythm is not glamorous, but it is what keeps repeatable quality from becoming a meeting argument.
Step-by-Step Corrugated Boxes Design Process You Can Execute Today
Start with behavior, not visuals. If the package is going to move between warehouse, truck, and delivery touchpoints, write the real world in the brief and treat it like engineering input, not marketing copy.
Step 1: Write a disciplined brief. Capture max weight, min/max dimensions, fragile areas, handling assumptions, and temperature exposure. If batch variation exists, include worst-case variation. I’ve seen 2.2 kg swings create failure you only notice after a few thousand units.
Step 2: Lock orientation and core dimensions. Define which face carries the greatest loading and which side likely gets the rough handling. Then assign board thickness and flute profile. Pick C flute as a default only when test data and route conditions support it; don’t choose by habit.
Step 3: Draft the dieline before final graphics. Sequence of folds comes first. Confirm glue flap width, tuck depth, and locking mechanisms with the plant. If a manufacturer flags setup pain, simplify. You’re gonna get better outcomes from a clean structure than from a complicated one nobody runs smoothly.
Step 4: Build final print specs with strict zone logic. Separate bleed, safe zones, and variable data from the structural file. Give barcode and serial fields breathing room. Place machine-readable fields where cutter and fold tolerances won’t distort them. Use Custom Packaging Products only as a format benchmark, not as a design shortcut.
Step 5: Approve digital proof, then produce physical sample. A monitor can’t show seam drift, panel flex, or rattling behavior. Stack it, drop it, and run hand-packing where the carton will actually be assembled. That is where structure gets its real report card.
Step 6: Freeze documentation and QA standards. Your approval sheet should specify accepted seam alignment, color variance, edge quality, and structural tolerances. If two teams interpret “good enough” differently, one side will own the failure.
A practical internal checklist helps:
- Product geometry and tolerance range.
- Required board grade and flute family.
- Load path assumptions and shipping channel.
- Approved artwork, barcode zones, and safe margins.
- Prototype handling test results.
- Version-controlled final approval references.
Run this list before every campaign, even internal-only packaging. That is how corrugated boxes design tips move from tribal knowledge to reliable process.
Common Corrugated Boxes Design Mistakes That Cost Time and Goodwill
The most frequent mistake is treating graphics as the start and proof of success. A centered logo does not fix weak corner geometry or a bad loading face. Packaging teams discover the gap too late, after distribution has already done the damage.
Another recurring issue is “non-standard clearances” and hoping the material will compensate. It won’t. Glue spring-back, fold memory, and thickness variation are real effects. Tight clearances can crush and slow assembly; loose clearances cause impact movement and damaged contents.
Warehouse logic is often ignored. Palletized wholesale and e-commerce parcels behave like two different organisms. One may survive stacking but fail impact abuse. The other may pass drops but waste volume and shipping efficiency in pallet consolidation. Two channels can justify two development profiles, even with shared graphics.
Skipping print and color proofs because “the supplier knows best” is an avoidable gamble. Grain direction, ink set, and coating choices can alter fold and readability. The cure is straightforward: review proofs, inspect samples, and run press checks on details that affect handling, not just brand appearance.
One-size-to-all packaging is the same box for everyone problem. If product weight, accessory set, or seasonal insert kit changes, your box strategy should also change. You may keep one visual family and still run two internal structures.
Version control is the final hidden sinkhole. If dieline, artwork, and approved sample versions are not tracked clearly, a wrong file can slip into production with zero warning. The result is always a reprint cycle plus a bad review thread.
If a tired operator cannot identify the correct version in 10 seconds, your version control is not ready for production.
Project board reminders that earn trust:
- Validate corners first, then faces.
- Test with realistic full-product weight and handling.
- Verify both parcel and pallet behavior when both matter.
- Approve structure before artwork and keep that order visible.
- Track revisions like they are financial documents, because they are.
Expert Corrugated Boxes Design Tips and Action Steps That Actually Work
If I had to rank the highest-value moves, it would still be structural decisions first, content design second, premium finishing third. That is not a stylistic choice. It is a risk-control choice. A strong structure lowers failure faster than most visual upgrades ever will.
Action step 1: Run one focused stress test on your highest-risk SKU this week. Pick the most likely failure mode—edge strike, corner crush, vibration, or repeated stacking. Choose one test, execute, and document the failure mechanism before debating the next design.
Action step 2: Build and use a one-page brief template. Include load behavior, tolerance, approved colors, finish limits, and route assumptions. The clarity alone lowers quote cycles and reduces interpretation errors between marketing, operations, and purchasing.
Action step 3: Create a preflight checklist before each proof. Require confirmation of dieline clearance, ECT target, seam overlap, barcode margins, and proof-to-sample alignment. A checklist in one inbox is not a process; it is still a guess.
Action step 4: Define a pilot-run gate before pressing full volume. Set explicit pass/fail thresholds, recheck triggers, and pause conditions. It sounds formal only until you compare it to fixing a bad full run at week two of production.
Action step 5: Compare upgrades by total landed outcomes, not aesthetics. Ask whether stronger board or simplified structure reduces claims enough to cover the per-unit increase. Sometimes yes, sometimes no. The decision is never universal.
Action step 6: Pick a single design language per SKU family and repeat it only after test feedback. Consistent families reduce waste and make supplier communication much faster.
For a reliable buying framework, use this order:
- Confirm product risk profile.
- Choose board grade and flute structure.
- Lock dieline, folds, and assembly method.
- Fit artwork around structural logic.
- Test samples under real handling conditions.
- Release production only when tolerances are documented and signed.
That sequence keeps everyone aligned around the same box, not competing interpretations. If the output is fewer claims, fewer damaged units, and fewer surprises in invoices, the process is doing its job.
For clarity, trust this final takeaway: a successful package is not the one with the fanciest finish, but the one whose structure, dimensions, and handling assumptions are right from day one. Keep the structure honest, keep artwork disciplined, and keep the specs explicit enough that your next team can run the same method without guessing. That’s the most practical path to fewer returns and stronger shipping performance.
FAQs
What are the most important corrugated boxes design tips to prevent shipping damage?
Start with product load profile: weight, stack load, drop exposure, and route stress. Then choose flute and board grade that match those conditions. Reinforce corners before polishing aesthetics, and test with at least one collapse or stack simulation before the full run. This catches the biggest risks early and reduces repeat claims.
How do corrugated boxes design tips change for heavy products versus lightweight items?
Heavy loads usually need stronger wall structure, tighter closure control, and more attention to corner stability. Lightweight goods can often run on thinner board, but vibration and handling still matter, especially for e-commerce parcels. Tape helps retention, but it should not be treated as the structural solution.
How much can corrugated boxes design tips impact unit pricing?
Quite a lot. Setup complexity and repeatability usually move the quote more than raw board price. Standardizing dielines, reducing color count where possible, and avoiding late changes tend to cut cost faster than minor visual tweaks. A slightly heavier board can still reduce total cost if it lowers damage and returns.
Can corrugated boxes design tips reduce the time from concept to shipping?
Yes, when the brief includes concrete handling specs, approval gates, and a fixed test stage. Structure should be locked before final art for most programs. A visible checklist plus QA gate usually shortens loops more than adding staff at the end of execution.
Are corrugated boxes design tips different for e-commerce versus wholesale pallet shipments?
They are different enough that both profiles should be considered. E-commerce usually demands higher drop and abrasion tolerance. Pallet freight prioritizes corner strength, stack stability, and footprint efficiency. Even with identical artwork, structure often needs to differ for these channels.