Buyer Fit Snapshot
| Best fit | Custom Carton Windows Die Cut projects where brand print, material claims, artwork control, MOQ, and repeat-order consistency need to be specified before quoting. |
|---|---|
| Quote inputs | Share finished size, material target, print colors, finish, packing count, annual reorder estimate, ship-to region, and any compliance wording. |
| Proofing check | Approve dieline scale, logo placement, barcode or warning zones, color tolerance, closure strength, and carton packing before bulk production. |
| Main risk | Vague material claims, crowded artwork, missing packing details, or unclear freight terms can make a low unit price expensive after revisions. |
Fast answer: Custom Carton Windows Die Cut: Design, Cost, and Specs should be specified like a repeatable production item. The safest quote records material, print method, finish, artwork proof, packing count, and reorder notes in one written spec.
Production checks before approval
Compare the actual filled-product size with the drawing, then confirm tolerance on folds, seals, hang holes, label areas, and retail display edges. Reserve space for logos, QR codes, warning copy, and material claims before decorative graphics fill the panel.
Quote comparison points
Review material grade, print process, finish, sampling route, tooling charges, carton quantity, and freight assumptions side by side. A quote is only useful when the supplier can repeat the same color, closure quality, and packing count on the next order.
Custom Carton Windows Die Cut: Design, Cost, and Specs sounds straightforward until the sample arrives, the quote lands, and everyone starts asking why the opening looks great on screen but not so great on the actual carton. A clean window can make a box feel more premium in a hurry. A bad one does the opposite. It weakens the structure, complicates production, and makes the product look like it needed a second draft. That is the tradeoff with custom carton windows die cut packaging: visibility can help sell the item, but the wrong cutout can add cost, delay, and structural risk.
For brands selling retail packaging, gift sets, food items, candles, cosmetics, or promotional kits, the window is not just decoration. It is part of the pitch. The shopper wants proof. The carton has to give that proof without turning into a flimsy frame around the product. If you are comparing options on Custom Packaging Products or building a new line of custom printed boxes, the real decision usually comes down to size, placement, board strength, and how much protection the product needs in transit and on shelf.
Size the window for the product, not the mood board. Pretty is nice. Functional pays the bills.
What Custom Carton Windows Die Cut Really Means
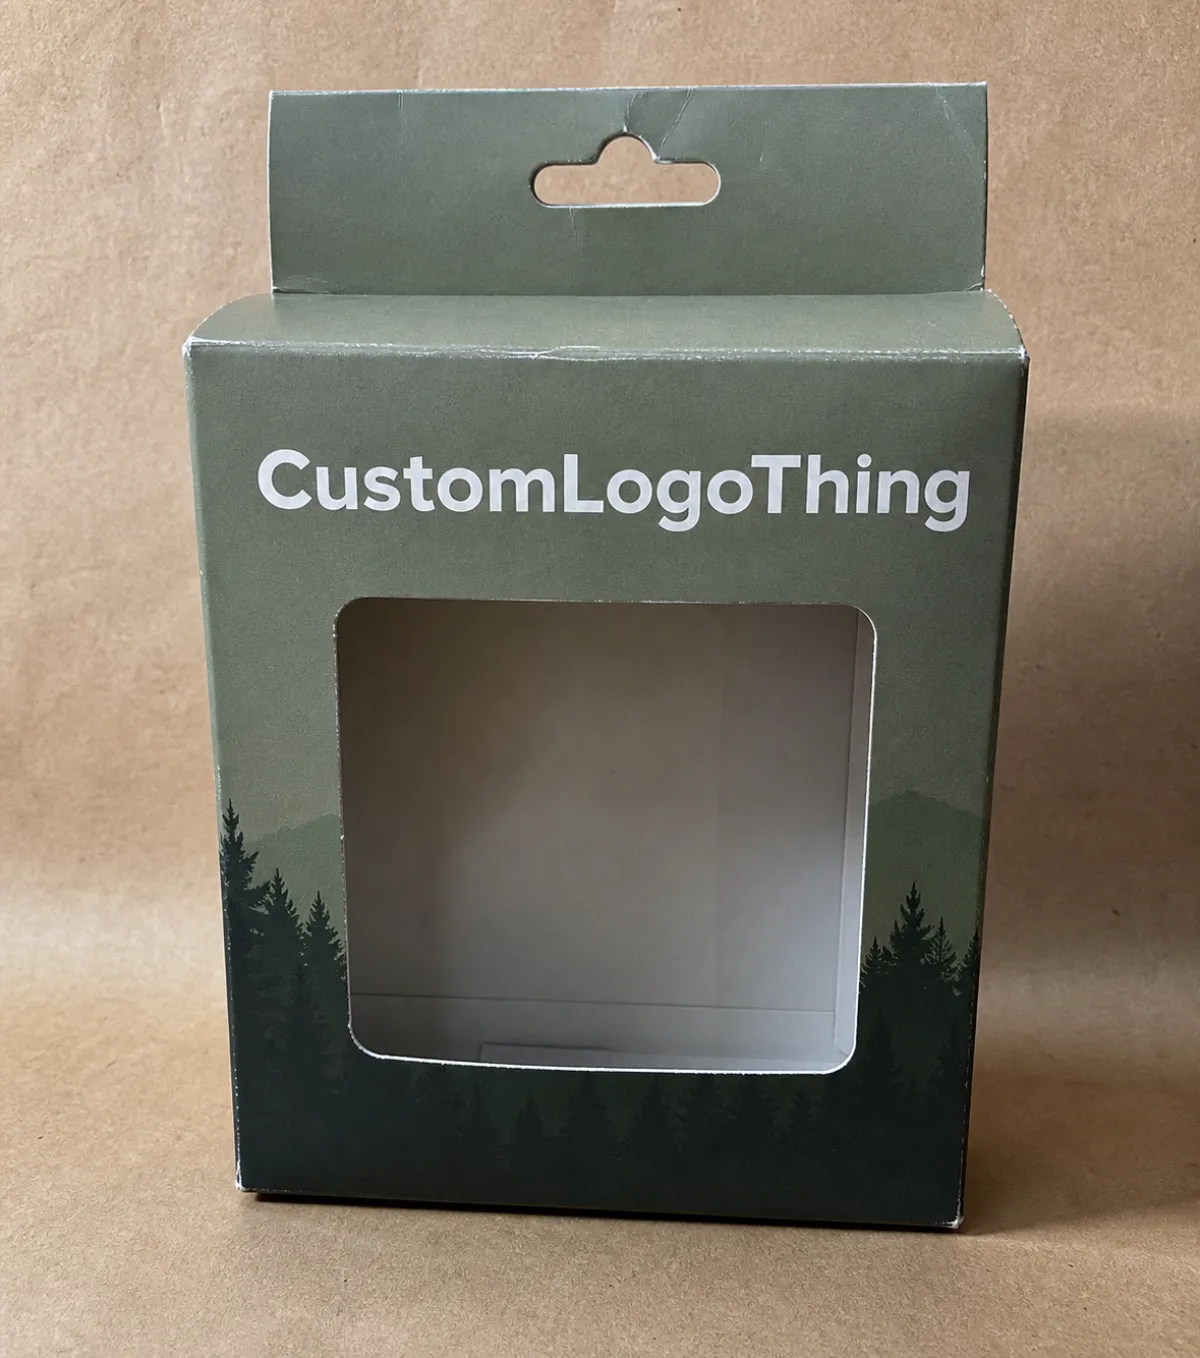
Custom carton windows die cut means a carton has a shaped opening cut with a die so part of the product can be seen from outside the box. The opening can be a rectangle, a curved reveal, a branded silhouette, or a precise cut that shows only the part of the item you want customers to notice. Done well, the window does some of the selling before the carton is even opened.
The simplest version is an open cutout in the board. That works best for sturdy products that do not need much barrier protection. A more common retail version uses a clear film or acetate behind the opening so the product stays visible but is protected from dust, fingerprints, and light scuffs. There is also the decorative cutout, which is less about direct visibility and more about styling the carton or hinting at the shape inside. They are all window approaches. They just solve different problems, and they do not cost the same.
Brands use window cartons for a few predictable reasons:
- Retail appeal: the product is the main selling point, so showing it helps the shelf conversation.
- Trust: visible contents make customers feel more certain about what they are buying.
- Display value: the front face can feel more premium when the product becomes part of the design.
- Gift presentation: a window lets the buyer preview the item without opening the carton.
- Product education: shape, color, finish, and count are easier to communicate visually than with copy alone.
From a buyer's point of view, the real question is not whether a window looks good. Of course it does. The question is whether that window helps the carton do its job without creating weak corners, awkward reveal lines, or a production headache that turns a neat concept into a slow one.
| Window Type | Visibility | Protection | Typical Cost Impact | Best For |
|---|---|---|---|---|
| Open die cut window | High | Low | Lowest tooling and assembly cost | Dry, sturdy products, display cartons, simple retail packaging |
| Film-covered window | High | Medium to high | Moderate increase from film insertion and labor | Cosmetics, candles, gifts, food cartons, products that need dust protection |
| Decorative cutout | Partial | Low to medium | Can rise if the shape is complex | Branded packaging, premium cartons, special edition sets |
If you want a broader sense of how the industry handles packaging materials, specifications, and sustainability claims, the ISTA site is useful for transit testing context, and FSC is a practical reference point for responsibly sourced fiber claims. Those details matter because a window does not live in a vacuum. It has to fit the board, the shipping method, the shelf plan, and the brand story at the same time. If the product is food or cosmetic, local compliance rules may also apply to inks, coatings, and any film that touches or sits near the contents.
How the Die Cut Window Process Works
The process starts with the dieline. That is the flat layout that defines every panel, fold, glue tab, and cut line. Once the structure is set, the window shape is drawn into the artwork and turned into a steel rule die. The die is then used on a press to cut the carton board at the exact spot where the window belongs. That is the basic mechanism behind die cut packaging, and it is why carton design and manufacturing should be discussed together instead of treated like separate tasks.
The part people miss is simple: the carton structure affects the window almost as much as the window affects the carton. If the cut lands too close to a fold, the panel can weaken. If it crosses a glue area, the carton can jam in production. If the window sits too close to a score line, the board may crack when it folds. Those are not rare edge cases. They show up in real production runs, usually after someone says, "It looked fine on screen."
For most projects, the workflow looks like this:
- Measure the product and confirm the target carton size.
- Create or review the dieline around the product dimensions.
- Place the window on the front, side, or top panel based on shelf view.
- Approve the artwork with the cut line and any film placement.
- Fabricate the steel rule die.
- Run a proof or sample, then inspect fit and appearance.
- Move into full production after sign-off.
If the carton needs a clear film, that can be hand-applied or machine-assisted depending on volume and equipment. Film helps with dust protection, tamper resistance, and a cleaner retail finish. It also adds labor and one more place where things can go sideways. A badly aligned film patch looks worse than no film at all. Buyers notice that instantly, even if they cannot explain why.
A window can work with other finishes if the design is handled carefully. Embossing can give the brand mark physical depth. Foil can pull the eye to the logo or a claim. Matte coating or soft-touch lamination can keep the carton from feeling like plain commodity board. Spot UV can highlight specific artwork without fighting the opening. The trick is restraint. If the carton already has a window, the rest of the package should support it, not compete with it.
A window is not decoration first. It is a structural decision wearing a marketing hat.
For transit-sensitive products, ask whether the carton should be checked against a relevant test method or distribution profile. In many projects, that means some mix of drop, vibration, and compression testing aligned with ISTA or ASTM-style procedures. If the carton is going through parcel networks or retail distribution, a pretty box that fails on the truck is still a failed box.
Key Design Factors That Shape the Final Window
Window size comes first. Too small, and the shopper sees nothing useful. Too large, and the board loses strength or exposes rough edges inside the pack. The right opening depends on what the customer needs to see: a product front, a label, a texture, a count, or an arrangement. For a candle carton, maybe only the jar shoulder needs to show. For a gift set, the full arrangement may matter. For cosmetics, one clean face is often enough.
Board choice matters just as much. A thicker paperboard or carton board can handle larger cutouts better than a thin stock, especially if the window sits on the main display panel. Heavier materials tolerate more aggressive shapes, while thinner board may need a smaller opening or some kind of reinforcement. If the product is heavy, the panel also has to carry that load without bowing. A strong window on weak board is a neat idea that loses every time.
Product stability is where many window cartons go wrong. If the item shifts in transit, the opening may highlight the exact thing you did not want customers to see: crooked placement, scratches, gaps, or a product leaning against the cut edge. Inserts, trays, snug internal dimensions, and simple partitioning can fix that. Those features are not glamorous, but they save reprints and awkward conversations.
Brand visibility still matters. The window should not swallow the whole carton and leave the brand name stranded like an afterthought. Good packaging design gives the logo, product name, and key claim enough space to frame the opening. That balance is what makes a carton feel intentional. The shopper should see the product and still know who made it.
Practical design checks before approval
- Confirm edge clearance around the cut so the board does not split at the folds.
- Look at the product through the actual shelf-facing side, not only the flat dieline.
- Check whether the visible product finish is attractive enough to be exposed.
- Verify that inserts, hang tags, or seals do not block the reveal.
- Make sure the window still works after coating, folding, and gluing.
A small mistake in positioning can undo the whole concept. If the opening shows a seam, a barcode, or the back of a label, the packaging is technically correct and commercially awkward. That is not a win. That is expensive embarrassment.
Think about stacking and handling too. A window on the wrong panel can reduce compression strength or make the pack behave badly in outer cartons. If the product is going into a retail shipper, warehouse, or subscription kit, the structural side of the decision needs to be part of the brief from the start.
Process and Timeline: From Dieline to First Run
Most buyers want a simple answer here, so here it is: a straightforward window carton can move quickly if the dieline is clear and the artwork is ready. A more complex project with a Custom Die Cut opening, film insertion, and several finishing steps will take longer. The difference between those two cases is often several business days, and sometimes more if the proofing cycle drags.
The cleanest production path usually follows this sequence:
- Brief and measurements: confirm product dimensions, weight, and shelf orientation.
- Dieline and layout: build the carton structure and window placement.
- Prepress review: check artwork, bleed, cut lines, glue areas, and safety margins.
- Die fabrication: produce the cutting tool for the exact shape.
- Sample or prototype: inspect fit, appearance, and assembly behavior.
- Full run: print, cut, glue, and pack once the sample is approved.
Where do delays happen? Usually in the parts people underestimate. Tight tolerances on the window shape can require extra inspection. A curved cut may need more careful tooling than a plain rectangle. Film insertion adds another assembly step. Special coatings can require separate curing or finishing time. If the carton has a tricky fold pattern, the production line may need additional setup and test pieces before the run is stable.
My advice is plain: build in time for one sample round if the carton is anything other than basic. That one step can catch alignment issues, product fit problems, and weak structural choices before you print thousands of units. In packaging, the cheapest sample is usually the one that stops a bad order from becoming a very expensive one.
To speed things up, the manufacturer needs a brief that leaves less room for guesswork. Include the exact dimensions, board type, finish, target quantity, whether the opening needs film, and how the box will be shipped. If the supplier has to interpret half the project, the timeline stretches. If the brief is tight, the job moves like a production plan instead of a puzzle.
For buyers comparing retail packaging programs, it helps to separate design time from manufacturing time. Design time is where the layout gets solved. Manufacturing time is where the approved plan gets turned into cartons. When teams blend those together, deadlines get fuzzy. When they separate them, the schedule becomes much easier to manage.
Cost and Pricing: What Actually Moves the Quote
Window packaging pricing is not random. It follows a few predictable drivers, and once you know them, the quote makes a lot more sense. The biggest factors are die tooling, board stock, print coverage, finishing, assembly labor, and quantity. If any one of those gets more complicated, the price moves up. If the order volume rises, the unit cost usually comes down because the setup gets spread over more cartons.
That is why the first run often looks more expensive per unit than a repeat order. You are paying for the die, the setup, the approval work, and the manufacturing coordination on top of the boxes themselves. On a repeat run, much of that overhead is already solved. The same carton can be significantly cheaper the second time around, assuming the spec does not change.
Complexity adds cost fast. Curved windows take more careful cutting than straight ones. Multi-window layouts need tighter registration. Film-covered openings add material and labor. Specialty coatings, foil, embossing, and hand assembly all increase production time. If the window design requires a lot of manual intervention, do not pretend it is a simple carton. It is a display-driven pack, and the price should reflect that.
| Cost Driver | Lower-Cost Range | Higher-Cost Range | What Usually Changes the Quote |
|---|---|---|---|
| Tooling | Simple rectangular die | Custom curved or branded silhouette | More complex shapes, tighter tolerances, more setup |
| Board stock | Standard folding carton board | Heavier board or specialty substrate | Strength needs, print quality, premium feel |
| Window finish | Open cutout | Film-covered or reinforced opening | Dust protection, tamper resistance, cleaner presentation |
| Assembly | Basic fold-and-glue | Manual film placement or inserts | Labor intensity and line speed |
| Quantity | Smaller runs | Larger runs | Setup amortization and unit efficiency |
A useful way to think about this is not "How cheap can I make the box?" but "Where is the money actually going?" A slightly larger order can sometimes reduce the unit cost enough to justify better board or a better finish. A tiny order with a complex window, by contrast, can look inexpensive on paper and still land in a painful price band once tooling and labor are added.
Here is a practical quote checklist:
- Exact carton dimensions in millimeters or inches.
- Window size, shape, and placement.
- Board specification and any coating or lamination.
- Quantity per run and expected repeat volume.
- Whether the opening is open, film-covered, or reinforced.
- Print coverage, special effects, and brand requirements.
- Target ship date and destination.
If a supplier gives you a price without asking those details, be careful. That usually means the quote is carrying assumptions, and assumptions are where budgets go to die.
Common Mistakes That Make Window Packaging Fail
The first mistake is making the window too large for the board strength. A big opening can look impressive in a mockup and terrible in real life if the corners warp or the panel loses stiffness. In transit, that weakness shows up quickly. Once the carton starts buckling, the display value disappears and the product starts looking underprotected. That is the opposite of premium.
The second mistake is ignoring the shelf view. A window should reveal the good side of the product, not the seam, the back label, or a blank surface with no visual payoff. This happens a lot when the design team thinks from the flat artwork first and the shelf second. The customer does not care how clever the dieline looked in the file. They care what they can see in the store.
The third mistake is skipping fit tests. If the product shifts, the opening can expose crooked placement or scrape the item itself. Cosmetics can scuff. Glass jars can rattle. Printed inserts can move. Once that happens, the pretty front panel starts telling customers that nobody checked the inside.
The fourth mistake is choosing a complicated shape because it feels different in design review. Different is fine. Unbuildable is not. Every curve, notch, and extra cut adds tooling complexity and potential waste. If the product margin is narrow, a fancier cutout may be a bad business decision even if it looks sharp on the screen.
The fifth mistake is forgetting retail reality: dust, tamper concerns, shipping stress, and stacking. An open window may be perfect for a showroom sample and completely wrong for a product that will sit in a warehouse, ride in a parcel network, and arrive on a shelf three weeks later. If the carton has to do more than look good for ten seconds, the protection spec needs to be part of the conversation.
What failure usually looks like
- Warpage around the cut edge.
- Product visible but crooked.
- Loose film that wrinkles or bubbles.
- Too much empty space around the item.
- Window placement that conflicts with logos or claims.
None of that is hard to avoid, but it does require discipline. The fix is usually boring: better measurements, a tighter internal fit, a clearer brief, and a sample that gets judged by people who actually buy packaging for a living.
One more warning: if the carton is supposed to communicate sustainability, do not let the window wreck the message. Use responsible board sourcing, keep the structure efficient, and do not pile on finishes just to create noise. If the board is FSC-certified, make sure the documentation supports the claim. If the package is meant to feel environmentally considered, the structure should look like it was designed on purpose, not assembled from leftover parts.
Expert Tips and Next Steps for a Smarter Launch
Start with the product. Not the box. Measure the visible face, decide what the shopper must see, and shape the window around that reality. If the product is tall and narrow, a vertical opening may make more sense than a square one. If the item has a strong front label, frame that label. If the product sells through color or texture, give that feature enough exposure to do its job.
Then decide how much protection the carton actually needs. A dry, rigid product might be fine with an open cutout. A premium candle, food carton, or cosmetic set often benefits from a clear film. A fragile item may need an insert, a tray, or a tighter internal lock-up. That is where good product packaging stops being generic and starts being specific to the item.
If the project matters, ask for a prototype or short-run sample before committing to full volume. That is especially true if the carton uses custom carton windows die cut features that affect structure. A sample lets you check visibility, assembly, board behavior, and whether the final reveal actually supports the brand story. It is a lot cheaper to reject a sample than a warehouse full of cartons.
Build a simple spec sheet. Keep it plain. Add the carton dimensions, board type, finish, window location, whether the window is open or film-covered, the quantity range, and the launch date. If the carton is part of a broader branded packaging program, include the print standards and the shelf objective too. The clearer the brief, the fewer ugly surprises later.
If you are comparing alternatives, look at two versions of the same concept:
- One optimized for shelf impact, with a larger or more distinctive opening.
- One optimized for unit cost, with a simpler shape and lighter labor load.
That comparison usually makes the business decision obvious. Sometimes the higher-spec version is worth it because the product margin supports it and the display effect is strong. Sometimes the simpler version wins because the retail price point is already tight and the packaging should stay disciplined. Good package branding is not about showing off every option you can afford. It is about choosing the one that helps the product move.
If you are still early in planning, a conversation with a packaging supplier can save time, but only if you bring real numbers. Product dimensions. Target quantity. Finish preferences. Shipping method. Whether the carton needs to be retail-ready or just look good in a secondary pack. That is the difference between getting an actual recommendation and getting a polite sales answer that helps nobody.
Done well, custom carton windows die cut packaging gives you a better-looking carton, a clearer product reveal, and a stronger retail case without wasting money on unnecessary decoration. Done badly, it becomes a weak box with a hole in it. The practical takeaway is simple: lock the product size, board strength, and window placement before you approve the artwork, and insist on a physical sample before full production. That order of operations saves time, money, and embarrassment.
What is custom carton windows die cut packaging?
It is a carton with a shaped opening made by a cutting die so customers can see part of the product. The window can be open, film-covered, or used as a display feature, depending on how much protection and visibility the pack needs.
How much does a custom carton windows die cut add to pricing?
The added cost usually comes from tooling, setup, and any extra film or manual assembly. Small runs feel the increase more sharply because those fixed costs are spread across fewer boxes. Complex shapes, large cutouts, and hand-applied film raise the price faster than simple rectangular windows.
How long does the process and timeline usually take?
Simple projects can move quickly if the dieline is clear and the artwork is ready. A custom die, sample approval, and finishing steps add time. Build extra schedule room if the window shape is unusual, the board is heavy, or the carton needs film insertion.
Do I need a film window or can the carton stay open?
Use film when you want dust protection, tamper resistance, or a cleaner retail presentation. An open window works better for sturdy products where direct visibility matters more than coverage. If the product can shift or scratch, a film or insert is usually the safer choice.
What files or information do I need for a quote?
Send product dimensions, target quantity, window size and shape, board material, and artwork files. Include whether the opening needs film, special coating, or a nonstandard cut. A clear target launch date helps the supplier give you a real production schedule instead of a guess.

