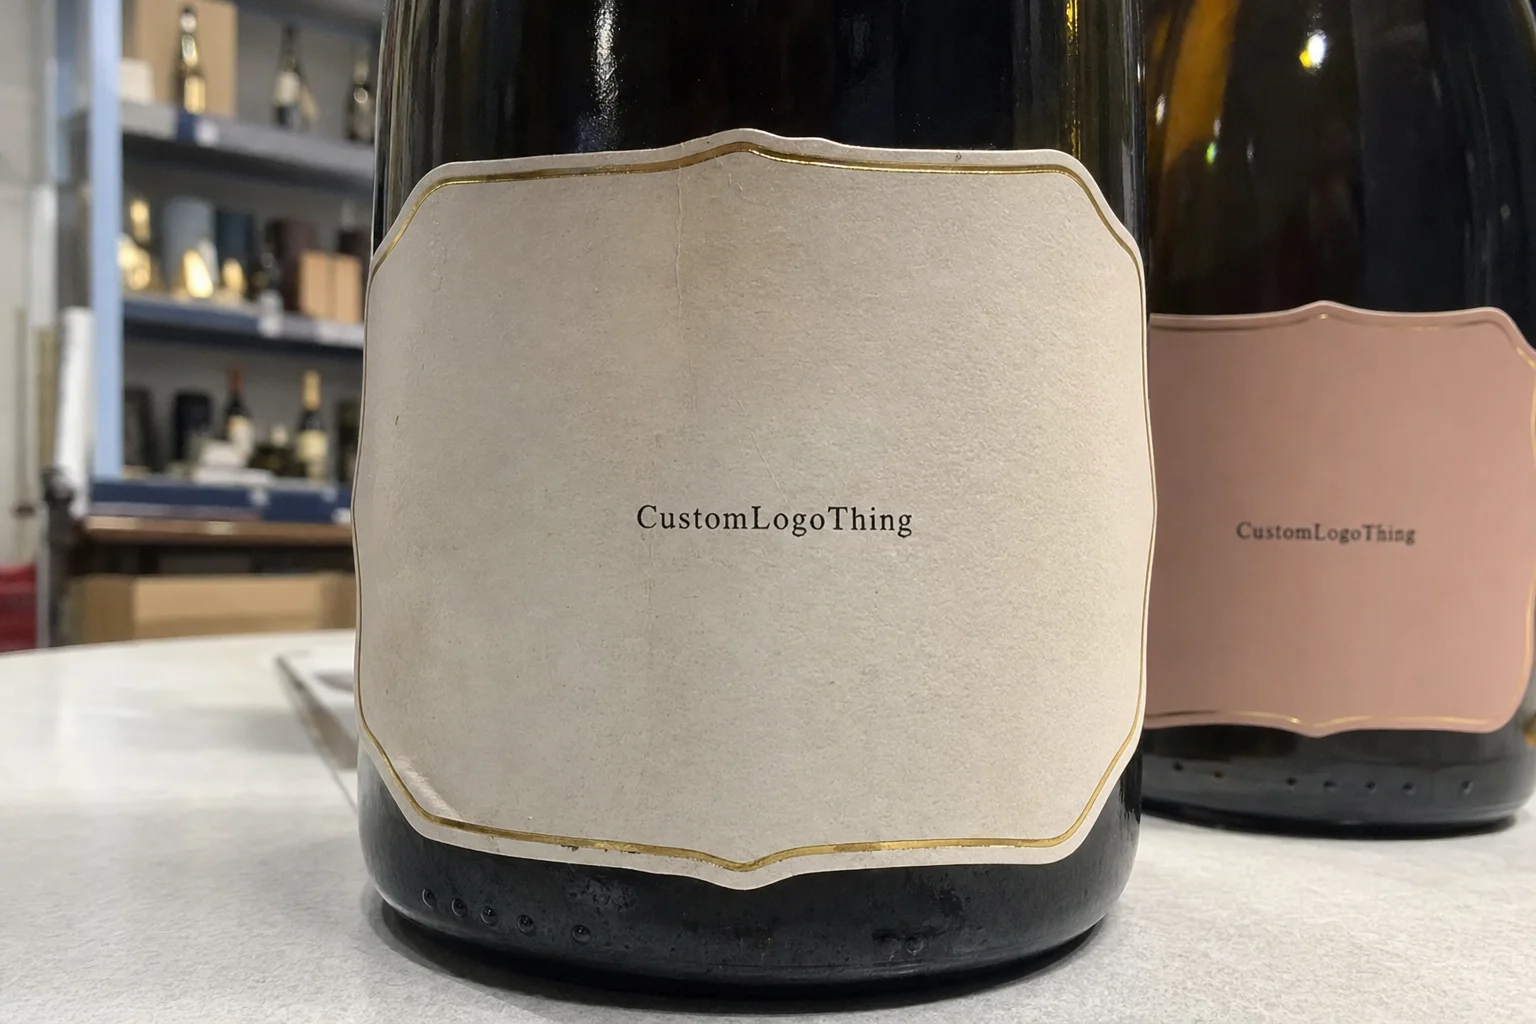
Custom Champagne Bottle Labels: Specs, Pricing, and Orders
custom Champagne Bottle Labels are judged in the harshest place possible: on cold glass, under condensation, after a server has handled the bottle three times and nobody is being careful anymore. That is the real test. A label can look polished on screen and still lift at the corner the first time it hits an ice bucket.
Why Custom Champagne Bottle Labels Fail in the Real World
Champagne bottles are not friendly real estate. The glass is curved, the shoulders can narrow quickly, and the bottle is often chilled before the label has fully settled. That combination exposes every weak point in the spec. If the adhesive is wrong, the edge lifts. If the stock is too rigid, it bridges instead of laying flat. If the finish cannot handle moisture, the print starts looking tired before the bottle leaves the table.
That is why custom champagne bottle labels are not just a design choice. They are a production decision. In packaging terms, they are pressure-sensitive labels built for glass, with materials, adhesives, and finishes selected for wet handling, visual impact, and a bottle shape that usually does not behave like a clean flat panel. The same logic applies across branded packaging, but bottles are less forgiving than custom printed boxes or most retail packaging because the label has to perform while the surface is cold, slick, and constantly touched.
“If the label cannot survive a cold bucket, it was never really finished.”
One of the most common misses is approving a beautiful mockup and forgetting the conditions that matter most: condensation, cold-glass adhesion, and handling under pressure. A premium bottle can end up looking cheap fast if the corner curls, the ink scuffs, or the finish goes cloudy after a few minutes on ice. That is not a print failure alone. It is usually a spec problem that started earlier, before anyone checked how the label would behave on actual glass.
For buyers planning product packaging or package branding around events, the label has to do more than sit there. It has to survive handling, moisture, and the visual clutter of a bucket, a bar rail, or a crowded table. That is the bar. A design that only works in a dry studio is not enough.
There is also a practical quality issue that gets overlooked: the best-looking artwork can hide a weak build. Heavy black coverage on a matte stock, for example, may look elegant in a proof, but on a curved bottle it can show every wrinkle if the dieline is off by even a little. Thin metallic type can vanish under warm light. Clear labels can look striking until the glass behind them changes the contrast. Every material choice has a real tradeoff.
How the Labeling Process Actually Works
The process is more mechanical than most people expect. First, the bottle gets measured. Not guessed. Measured. The usable label panel matters more than the overall bottle height, because a shoulder curve or taper can reduce usable space by a lot. Then the printer builds a dieline, sets up the artwork, proofs the file, prints the run, cuts the labels, and packs them for shipment. Each step is ordinary on paper and costly when skipped.
- Measure the bottle for usable width, height, and curvature.
- Create the dieline so the label fits the panel instead of fighting it.
- Set artwork with bleed, safe area, and any foil or finish callouts.
- Approve a proof after checking stock, adhesive, and trim.
- Print and finish the labels, then inspect and pack them.
Sheets, rolls, and individual labels are not interchangeable. Sheets are common for hand application and short runs. Rolls make more sense if a machine applies the labels, or if a bottling line needs cleaner dispensing. Individual labels can work for very small jobs, but they usually make sense only when quantity and handling are simple. If you choose the wrong format, someone pays for it later in labor, waste, or slowed application.
Artwork details matter more than most people expect. Bleed keeps the design from showing a white sliver at the edge after trimming. The safe area protects text from getting cut off. Foil layers need their own callouts, because the printer cannot guess which line should be metallic and which should stay flat. A good proof shows all of that clearly before a single sheet runs.
And yes, bottle shape matters before design is finalized. A label that looks perfect on a flat mockup can fail on a curved shoulder or narrow neck. That is one of the fastest ways to burn budget without improving the final result. For a bottle that will be chilled, handled, and viewed in low or mixed lighting, the geometry matters just as much as the artwork.
Good production teams ask for dimensions, bottle photos, and a sample label area before they talk about finishes. That may feel fussy, but it prevents rework. On a curved bottle, the difference between a label that sits cleanly and one that wrinkles can be a few millimeters. That is a small number with a large cost attached.
Materials, Adhesives, and Finishes That Hold Up
Start with the stock. Paper labels are fine for short display windows and dry service, especially when the bottle is not spending time in ice. Film stocks, usually BOPP or a similar polypropylene, handle moisture better and are the safer choice if the bottle is going to sweat, sit in a bucket, or be handled a lot. For premium projects, specialty facestocks can add texture or visual depth, but they should be chosen for a reason, not just because they look expensive in a sample book.
Adhesive is where a lot of nice-looking labels go to die. A permanent adhesive designed for cold, wet glass is the default for most event or hospitality use. Removable adhesive only makes sense when clean removal is a real requirement later, and that is not the same as durability. If the label needs to stay put through condensation, cold storage, and serving, then it needs to bond like it means it.
Finishes change both look and performance. Gloss gives strong shine and can make foil pop harder. Matte feels calmer and often reads better under bright room lighting. Soft-touch adds a velvety surface that signals premium, but it can show scuffs if the bottle is handled heavily. Clear labels create a floating effect on glass, though they need careful color control because transparent areas reveal everything behind them. Foil can add a strong premium cue, but it also adds cost and can complicate proofing because metallic areas reflect differently than a screen preview.
| Option | Best Use | Typical Cost Impact | Practical Notes |
|---|---|---|---|
| Paper stock | Dry display, short event use | Lowest | Good for simple branding, less forgiving with condensation |
| Film/BOPP | Ice buckets, cold storage, frequent handling | Moderate | Better moisture resistance and cleaner edge performance |
| Soft-touch finish | Premium gifting and luxury presentation | Moderate to high | Feels expensive, but can mark up if abused |
| Foil or specialty finish | High-visibility events and upscale retail packaging | High | Strong visual lift, extra setup, tighter proofing needed |
If you need a sustainability angle, ask for FSC-certified paper where it makes sense. That is a real claim with a real chain of custody, not a vague green sticker. For packaging buyers managing broader product packaging programs, that matters more than people admit. You can read more at FSC.
For bottles that will be tested like real shipping or event inventory, a simple cold-bottle check is worth doing: chill the bottle, let it sweat, then inspect edge lift, smudging, and whether the label slides after handling. That is a better test than staring at a render. If you are building a broader launch, coordinate the label with Custom Labels & Tags and the rest of your Custom Packaging Products so the package branding feels deliberate instead of patched together.
One more practical point: if the bottle is going into mixed cases or event transport, transit stress matters too. Packaging people often use ISTA-style thinking for a reason. A label that survives shelf display can still fail once cartons shift, rub, and cool down. The outer pack and the label are separate systems, but they affect the same customer-facing result.
Pricing, MOQ, and What Moves the Quote
Pricing is driven by setup and complexity more than most buyers expect. Quantity matters, obviously. So does label size, shape, print coverage, foil, embossing, and whether the artwork needs specialty finishing. A simple rectangular label on film is one thing. A die-cut piece with foil, a metallic accent, and a custom shape is another. They do not belong in the same mental price bucket.
MOQ, or minimum order quantity, is where many projects go sideways. Some suppliers will quote 100 pieces, but the per-label cost can be ugly because setup is spread across very few units. Once you add custom cuts, specialty stock, or foil, the minimum can climb quickly. That is not a trick. It is how press setup and finishing labor work. The machine time is fixed whether the run is 100 labels or 1,000, and the smaller order carries more of that burden.
Here is a realistic framework for planning:
- Simple paper labels at higher quantities usually price lower per unit because setup gets diluted.
- Film labels cost more, but they are safer for chilled service and handling.
- Foil, embossing, and custom shapes increase setup time and often push the minimum order upward.
- Short runs almost always pay more for setup than for material.
As a rough buying range, simple custom champagne bottle labels might land around $0.18 to $0.45 each on larger runs, while specialty film, foil, or custom-cut versions can move into the $0.55 to $1.20 range or higher depending on quantity and finish. Smaller orders can price well above that. I would rather give a usable range than fake precision. Pricing always depends on the actual spec, and quotes change when the bottle shape, artwork, or finish changes.
Here is the tradeoff I push buyers toward: if a fancy finish barely shows once the bottle is cold, wet, and under room lighting, do not burn money on it. A cleaner layout, stronger contrast, and the right stock often sell better than a finish nobody can appreciate after the ice bucket gets involved. That is true for labels, and it is true across retail packaging.
For team planning, ask for tiered pricing at 100, 250, 500, and 1,000 units. That gives you a real view of where the unit cost drops and where setup stops hurting so much. Without that, you are just guessing. If the project has a hard budget, compare the numbers against simple variants before you commit to foil or specialty stock.
Production Process, Timeline, and Lead Time
The timeline is straightforward if the art is ready. Quote first. Then art review. Then proof approval. After that, the job enters print queue, moves through finishing, gets checked, and ships out. Every delay tends to happen before the press run, not after it. That is the part buyers control. A clean file and a clear spec save more time than any rush fee.
For standard orders, production often takes a few business days after proof approval, with shipping added on top. Fast jobs can move quicker if the artwork is clean and the specs are final. Foil, custom shapes, and large quantities add time. If the printer has to rebuild the dieline or fix low-resolution files, the schedule stretches. That is not a surprise. It is the cost of bad prep.
Typical planning windows look something like this:
- Quote and intake: same day to 1 business day
- Proofing: 1 to 2 business days
- Production: often 4 to 8 business days after approval for standard work
- Finishing and inspection: included in the production window, but specialty work can add more time
- Shipping: depends on carrier and destination
Rush orders are real, but they are not magic. Rush service only helps if the art is final, the bottle dimensions are correct, and the printer is not rebuilding the label from scratch. A rushed file with unresolved questions does not become a good file just because the date is close. That is usually the moment where people lose days arguing over a proof instead of approving it.
If your event date is fixed, build buffer. Not because printers are slow, but because approvals are. The most common delay is a buyer waiting until the last minute to request a color tweak, a size change, or a new line of copy. One small change can reset a lot of the schedule. The cleanest orders are the ones where the bottle spec, artwork, and delivery date are locked before the quote is accepted.
Common Mistakes That Cause Peeling, Wrinkles, or Reprints
Most reprints start with bad measurements. The label is too tall for the panel, too wide for the curve, or placed where the bottle narrows too quickly. If the label crosses a shoulder transition, it often wrinkles or lifts. That is geometry, not bad luck. Once the label has to bend across two different curves, the adhesive and facestock start working against each other.
Another problem is approving a label from a screen mockup alone. Screens do not show how foil will reflect under warm lighting. They do not show how tiny text turns out once printed. They certainly do not show how a matte label will read after condensation hits it. A proof is not a decorative formality. It is the last checkpoint Before You Buy the whole run. Skip it and you are paying to learn a lesson the hard way.
Handling mistakes matter too. Do not apply labels to damp glass. Do not chill bottles so hard that condensation forms before adhesion can set. Do not use a finish that looks great in a dry room but starts to smear or cloud the minute it meets ice. That is a poor spec, not a bad bottle. Application conditions matter, and so does the window between labeling and service.
Then there is the inventory mistake. People order too few extras. The event needs 20 more bottles than planned, and suddenly the label job is short. If you are producing for hospitality, gifting, or launch inventory, extras are not waste. They are insurance against breakage, damaged samples, and last-minute demand. A small overage is cheaper than an emergency rerun.
Finally, remember the broader system. If the bottle is part of a gift set with custom printed boxes, tissue, and inserts, the label should match the whole package system. Package branding works best when the components look like they were planned together instead of bought in separate panic sessions. The bottle label should support the larger presentation, not fight it.
There is a subtler mistake too: overdesigning the label because the bottle feels like a premium canvas. Strong labels are not always busy labels. Under event lighting, simple type, controlled contrast, and one sharp finishing detail often read better than multiple competing effects. That does not mean plain. It means intentional.
Expert Checks Before You Place the Order
Start with the bottle, not the mood board. Measure the usable label panel height and width, then confirm the curvature and the area near the shoulder and neck. If the bottle shape is unusual, ask for a sample test. That saves a lot of pain later. A quick physical check tells you more than a dozen emails about aesthetics.
Then request a proof and actually inspect the details that matter:
- Stock: paper, film, clear, or specialty
- Adhesive: permanent or removable
- Finish: matte, gloss, soft-touch, foil, or clear effect
- Trim size: exact dimensions and dieline fit
- Use case: dry display, chilled service, or ice bucket handling
Print-ready files should be clean. A vector PDF is usually the safest path. Fonts should be outlined or embedded. Images need enough resolution to hold up in print, not just on a laptop. Bleed, trim, and safe area should be set before the file gets sent. If foil is involved, mark it clearly. Do not make the printer guess. Guessing is how expensive mistakes happen.
For important events, order a small test run or sample first. Then chill the bottle and inspect it under the same conditions the finished product will face. That tells you more than a desktop preview ever will. If the label survives that test, you have a strong signal. If it does not, fix the spec Before You Buy the full run. The cost of a test is small compared with the cost of a reprint after bottles are already in motion.
Last check: make sure quantity, bottle dimensions, artwork files, and the delivery date all line up before you place the order. That is the shortest path to getting custom champagne bottle labels quoted correctly, produced on time, and ready to do their job without drama. The best orders are the ones where the label, the bottle, and the service conditions all agree with each other.
How much do custom champagne bottle labels cost per label?
Cost depends on quantity, label size, finish, and whether the job uses foil, specialty stock, or a custom cut. Small runs usually cost more per label because setup gets spread across fewer pieces. Ask for tiered pricing at 100, 250, 500, and 1,000 units so you can see the breakpoints instead of guessing.
What adhesive works best for custom champagne bottle labels in ice buckets?
A permanent adhesive designed for cold, wet glass is usually the right call if the bottle will be chilled or submerged in ice. Removable adhesive is only sensible when clean removal matters more than staying put. Test a chilled bottle before the full run, because condensation changes performance.
How long do custom champagne bottle labels usually take to produce?
Simple orders move faster when artwork is final and the proof gets approved quickly. Most standard runs need a few business days for production after approval, plus shipping time. Foil, custom cuts, and rush scheduling can change the timeline, so build in buffer.
Can custom champagne bottle labels fit curved or irregular bottles?
Yes, but only if the usable panel is measured correctly and the design fits the bottle shape. Flexible film stocks usually handle curves better than rigid paper stocks. If the neck, shoulder, or taper is unusual, ask for a sample test before you commit to the full order.
What file do I need for print-ready custom champagne bottle labels?
Send a vector PDF or editable artwork with fonts outlined or embedded. Include bleed, trim, and safe area so cutting does not ruin the design. If foil or specialty finishing is involved, call that out clearly so the printer knows what should be metallic and what should stay flat.


