What Custom Clear Product Labels Actually Do
A clear label can make a bottle, jar, pouch, or box look premium in about three seconds. It can also expose every lazy design shortcut just as fast. Transparent packaging is honest like that. Annoyingly honest.
Custom clear product labels are transparent printed labels made from clear film, usually BOPP polypropylene, PET polyester, or flexible vinyl. They carry brand graphics, product names, ingredients, barcodes, warnings, batch codes, and regulatory information while allowing the container, liquid color, jar texture, or box surface to show through.
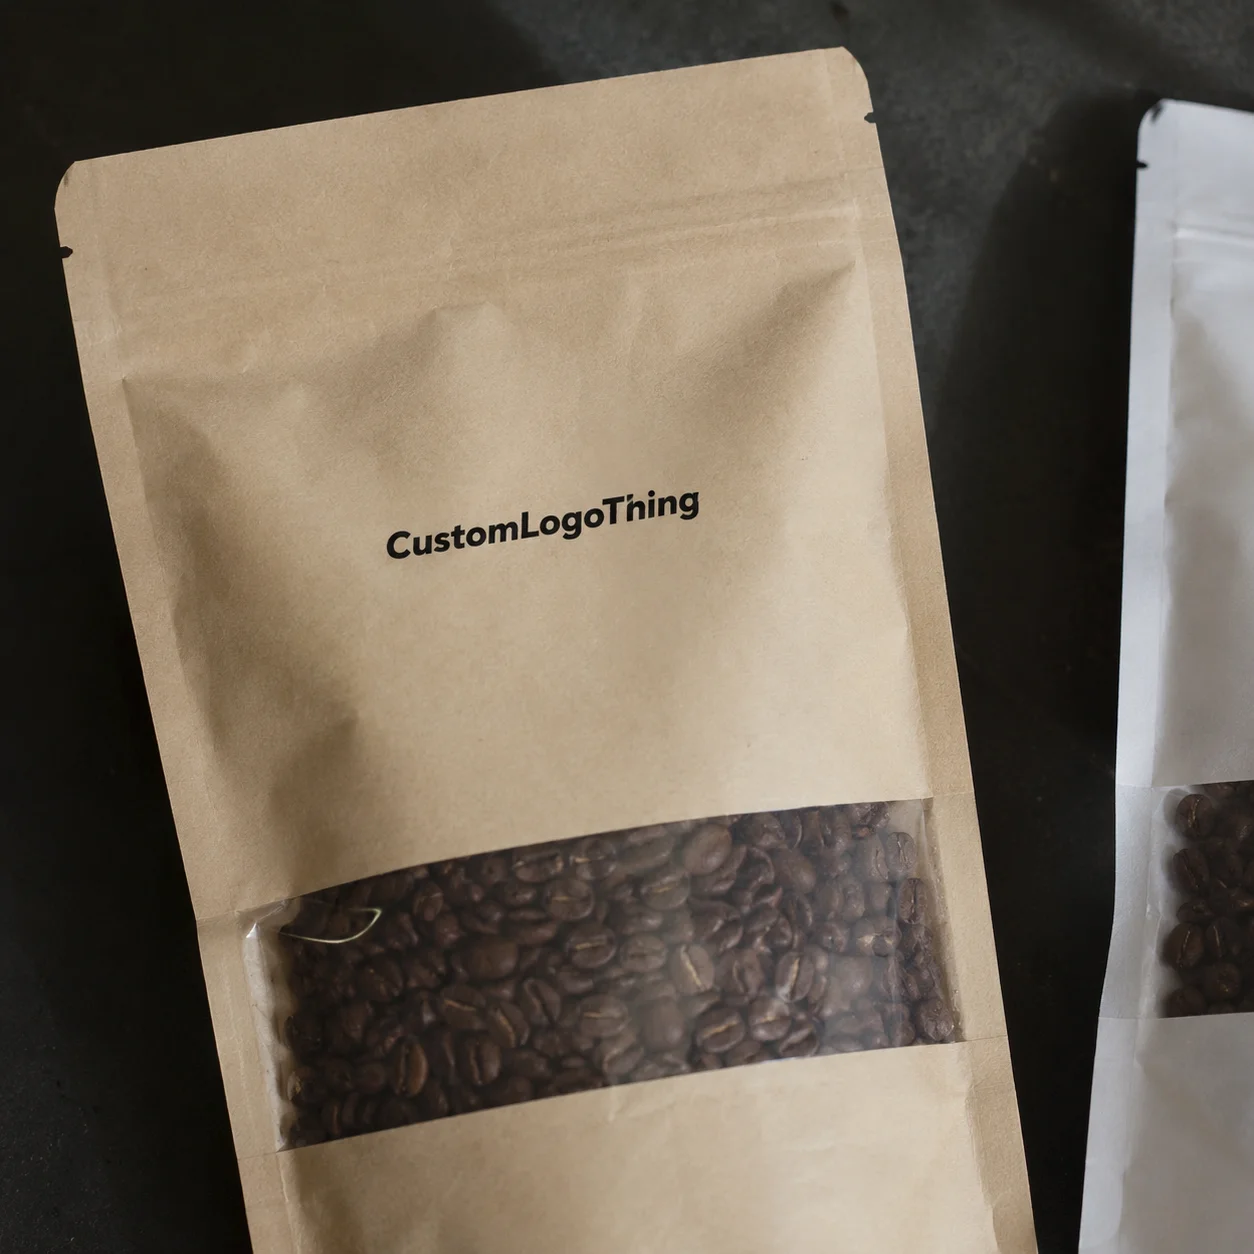
The main visual trick is simple: the printed areas look like they are floating on the package. On a clear glass sauce bottle, the red sauce becomes part of the branding. On a frosted skincare bottle, the label can feel restrained and expensive. On a kraft box, clear film lets the paper texture show through, which is appealing until the barcode disappears into brown fiber because nobody planned a white backup panel.
Clear labels are not the same as white labels. White labels start with an opaque face stock, so colors print closer to the artwork file. Transparent stickers are often used for giveaways, seals, laptops, or decorative placement. Product labels have a harder job: they need to survive handling, storage, scanning, shelf display, and compliance review. “No-label-look” labels are a specific style of clear label designed to disappear as much as possible on the container. Window labels are different again; they usually use a cutout or transparent section to reveal the product through a mostly opaque label.
Common uses include cosmetics, candles, beverages, supplements, sauces, skincare, cleaning products, CBD, specialty foods, and boutique retail packaging. They work best when the product itself is attractive enough to participate in the design. If the product is cloudy, inconsistent, or likely to change color during shelf life, the label will not politely hide it.
Set expectations early: clear does not mean invisible. Edges, adhesive, print opacity, condensation, container texture, and lighting all affect the finished result. A label that looks invisible on a dry mockup can show a faint edge under retail lighting or develop cloudy patches on a cold bottle. Not always, but often enough that testing beats guessing.
How Transparent Labels Are Printed and Applied
Most clear labels are printed digitally or flexographically on transparent pressure-sensitive film. After printing, they may receive a gloss laminate, matte laminate, varnish, soft-touch coating, or spot finish. Then they are die cut into shape and supplied on rolls or sheets. Roll labels are usually better for production runs and machine application. Sheet labels can work for samples, short runs, hand application, or limited seasonal products.
White ink is the part buyers underestimate. Colors printed directly on clear film can look translucent, darker, or washed out because light passes through the ink and bounces off whatever sits behind it. If you want opaque logos, crisp small type, readable barcodes, or bright colors, the printer usually needs to lay down white ink under selected artwork.
There are four common print builds:
- Color only: creates a stained-glass effect and works best for bold graphics, not tiny text.
- White ink behind graphics: keeps logos, icons, and key text opaque without turning the whole label white.
- Full white panels: useful for nutrition facts, ingredients, warning copy, and UPC codes.
- Selective white details: creates premium contrast, especially on dark glass, amber bottles, or metallic tins.
Most product labels use face printing on pressure-sensitive adhesive stock. The ink sits on the outward-facing side of the film, then gets protected by varnish or laminate if needed. Reverse printing, where graphics print behind the clear film, can protect ink from abrasion, but it requires a different construction and is not the default for standard roll labels. Ask before assuming.
Application sounds boring because it is. Clean the surface. Dry it. Remove oil. Apply steady pressure. Avoid touching the adhesive. That small sequence prevents bubbles, lifting edges, and cloudy adhesive patches. Labels hate moisture, dust, silicone residue, and rushed hands. Very dramatic of them, but there we are.
Container shape matters more than most packaging mockups admit. Tapered jars can make rectangular labels drift uphill. Squeeze bottles need flexible films and adhesives that tolerate movement. Textured glass reduces contact area. Small-radius tubes may require narrower labels to avoid edge lift. Curved shoulders are usually a bad place for a label unless the shape is engineered for it.
If your brand uses an automatic label applicator, confirm roll direction before ordering. Leading edge, unwind direction, core size, outside or inside wound rolls, and gap spacing all need to match the equipment. A label facing the wrong way on the roll is a very expensive way to discover gravity.
Material, Adhesive, and Finish Choices That Matter
The label material should follow the product environment. Brand aesthetics come second. Pretty labels That Peel Off in a cooler are not premium. They are evidence.
Clear BOPP is the standard workhorse for many retail products. It balances clarity, durability, and cost, and it handles light moisture better than paper. For food jars, cosmetic containers, candles, dry retail goods, and many household products, clear BOPP is usually the first material to price.
Clear polyester, often called PET, costs more but gives better dimensional stability, abrasion resistance, heat tolerance, and moisture resistance. It is a smart option for bath products, chemical exposure, oily products, or packages handled heavily. Clear vinyl is more flexible, which can help on curved or squeezable containers, though it may not suit every food, cosmetic, or premium retail application. Specialty films exist for freezer exposure, wet environments, or chemical contact, but they need proper testing.
Adhesive choice is just as important as the film. Permanent adhesive fits most products. Removable adhesive works for temporary labels, promotional labels, or reusable containers. Freezer-grade adhesive is built for cold storage. Aggressive adhesive helps on rough, low-energy, or difficult surfaces. The tricky surfaces are usually oily cosmetics, refrigerated drinks, rough kraft tubes, flexible pouches, coated glass, and some plastics with surface treatments.
| Material or Adhesive | Best Use | Watchout | Typical Buyer Fit |
|---|---|---|---|
| Clear BOPP | General retail, jars, bottles, candles | Not ideal for every chemical or high-heat use | Balanced cost and durability |
| Clear PET | Moisture, abrasion, chemical, or heat exposure | Higher unit cost than BOPP | Premium or demanding product packaging |
| Clear vinyl | Curved, flexible, or squeezable containers | May not suit every compliance requirement | Flexible retail packaging applications |
| Freezer-grade adhesive | Cold storage and refrigerated goods | Needs testing through temperature cycling | Beverages, sauces, frozen specialty foods |
| Aggressive adhesive | Textured, rough, or low-energy surfaces | Harder to remove or reposition | Kraft tubes, coated plastics, difficult jars |
Finish changes both appearance and survival. Gloss gives high clarity and shine. Matte looks softer, especially for skincare, wellness, and boutique goods. Soft-touch feels upscale but can show scuffs and fingerprints depending on handling. Laminate adds scratch and moisture resistance, which is often worth the added cost for products that move through distribution or sit in damp environments.
Clear labels also react to container color. Dark liquids can swallow black type. Amber glass warms every printed color. Frosted bottles reduce contrast. Kraft boxes make transparent areas look earthy but can destroy fine detail. Metallic tins can create sharp contrast or ugly glare depending on finish. For a product line with several container colors, test the same artwork on every SKU, not just the prettiest one.
Readability is not optional. Small type, supplement facts, nutrition panels, warnings, ingredient lists, and barcodes often need white backup panels. For barcode quality, many buyers use ISO/IEC grading through their own retail channels, while broader packaging performance testing may reference standards from groups such as ISTA for transport simulation. If your product ships through retail distribution, scannability and durability are operational requirements, not design trivia.
Cost, Pricing, and MOQ Factors for Clear Labels
Pricing for custom clear product labels depends on size, material, shape, quantity, colors, white ink coverage, finish, roll format, proofing needs, and shipping requirements. That sounds like a long list because it is. Labels are small, but the quoting math is not magic.
For a simple digitally printed clear BOPP roll label, a short run of 250 to 500 labels may land roughly in the $0.45 to $1.20 per label range, depending heavily on size and finish. A run of 1,000 to 2,500 labels may drop into the $0.18 to $0.55 range. Larger roll orders of 5,000 to 25,000 pieces can move into the $0.05 to $0.25 range for many standard specs. Specialty adhesives, large labels, heavy white ink, complex shapes, laminates, and rush schedules push those numbers up. Treat these as planning ranges, not a contract written in stone.
Clear labels often cost more than plain white paper labels because the stock costs more, white ink adds a production layer, and the quality tolerance is tighter. Dust, print misregistration, adhesive haze, and edge flaws are more visible on transparent film. Clear packaging is less forgiving. Surprise.
MOQ decisions are a tradeoff. Lower minimums are useful for product launches, seasonal SKUs, test markets, and brands still finalizing packaging design. Higher quantities usually reduce unit cost, but they lock cash into inventory. If ingredients, compliance copy, UPC, net weight, or claim language might change, ordering 20,000 labels to save a few cents can become a very neat stack of waste.
Setup and tooling also affect the quote. Standard rectangles, circles, ovals, and common rounded-corner shapes may avoid custom die costs, especially on digital equipment. Custom shapes can require tooling unless the supplier uses digital die cutting. Tooling fees often range from about $75 to $250 for common custom dies, though complex shapes or larger formats may cost more.
Hidden cost traps are predictable: ordering too small, changing artwork after proof approval, requesting rush production, choosing oversized labels, skipping material testing, or asking for five finishes after the quote is approved. If you want fewer surprises, send complete specs from the start.
| Order Factor | Lower-Cost Choice | Higher-Cost Choice | Practical Tradeoff |
|---|---|---|---|
| Quantity | 5,000+ labels | 250 to 500 labels | Higher volume lowers unit cost but increases inventory risk |
| Shape | Standard rectangle or circle | Custom die-cut shape | Custom shapes stand out but may add tooling |
| Ink Build | Color only | Heavy selective white ink | White ink improves opacity and readability |
| Finish | No laminate or standard varnish | Matte, gloss, or soft-touch laminate | Laminate improves feel and durability |
| Timeline | Standard production | Rush production | Rush fees buy calendar time, not better planning |
For a clean quote on Custom Labels & Tags, prepare the label dimensions, quantity, container material, use environment, artwork files, finish preference, roll direction, and whether white ink is needed. If you are also building out shipper cartons, inserts, or Custom Packaging Products, keep those specs aligned so the whole retail packaging system looks intentional.
Process, Timeline, and Production Steps From Quote to Delivery
A normal label order moves through quote request, spec review, artwork check, digital proof, proof approval, printing, finishing, quality check, packing, and shipment. The clock usually starts after usable artwork and final approval, not when someone sends a blurry logo screenshot and says, “Can you make this work?” Technically, yes. Efficiently, no.
Simple digital clear label jobs may produce in about 5 to 10 business days after proof approval. More complex orders can take 10 to 18 business days. Custom materials, large volumes, physical samples, complex white ink, specialty laminates, or machine-specific roll requirements can add several days. Shipping time is separate. If freight has to cross the country, do not pretend it teleports because the launch date is uncomfortable.
Artwork review usually checks bleed, safe zones, dielines, resolution, color mode, barcode placement, white ink callouts, and panel positioning. For print resolution, 300 dpi at final size is a common minimum for raster images. Vector logos are better. Bleed often runs 0.0625 inch to 0.125 inch beyond the cut line, depending on the supplier. Safe zones may also sit 0.0625 inch to 0.125 inch inside the cut line so text does not flirt with the blade.
White ink callouts deserve their own attention. Printers need to know exactly where white prints, where it does not print, whether it sits behind color, and whether any white is visible as a design element. Flattened art files can accidentally hide that information. A proper layered PDF or Adobe Illustrator file with clearly named spot color layers helps prevent expensive interpretation.
Digital proofs are fast and confirm layout, size, spelling, copy, barcode position, and general color intent. They do not prove exact material feel, adhesive performance, or final opacity on your container. Physical samples or press proofs provide better confidence, but they add time and cost. For a premium launch, a new material, or a label going on glass, plastic, metal, or a cold-fill product, samples are often worth it.
Production rule: approve the proof like you are paying for every typo, because you are. Check UPCs, net weight, warnings, claims, flavor names, and white ink notes before saying yes.
The biggest approval bottlenecks are incomplete specs, missing UPCs, undecided finishes, late compliance copy, and last-minute SKU changes. If a product needs FDA, state, or category-specific copy, confirm that before artwork review. For sustainability claims or material disposal language, use credible references such as the EPA recycling guidance rather than vibes from a competitor’s label. Vibes are not a compliance strategy.
Build in buffer for packaging line testing, especially for machine-applied labels. A roll that looks perfect on the desk can reveal application issues at speed: skew, flagging, edge lift, web tension problems, or labels dispensing poorly from the liner. For refrigerated, wet, oily, squeezable, or textured surfaces, test through the actual storage and handling conditions before committing to the full run.
Common Design and Ordering Mistakes to Avoid
The most common mistake is designing on a bright white screen and forgetting that the real product will show through every transparent area. White artboards lie. A mockup on a laptop will not behave like amber glass filled with honey, a black cosmetic jar, or a frosted bottle sitting under store lights.
Missing white ink instructions cause another familiar mess. Custom clear product labels need clear artwork direction: where white prints, where clear areas remain, and whether white sits under colors or appears as its own visible graphic. If the printer has to guess, the result may be technically printable and visually wrong. That is a very special kind of disappointment.
Tiny low-contrast text is a bad idea on transparent backgrounds. Ingredients, warnings, directions, compliance copy, and barcodes need enough contrast to survive real lighting and container variation. For UPCs, a white box is often the boring correct answer. Retail scanners do not care about your minimalist aesthetic.
Sizing errors create physical problems. Labels that wrap too far around a jar can hide important copy and distort the front panel. Labels placed over seams may lift. Labels sitting on a taper can wrinkle or look crooked. Labels pushed onto curved shoulders may fight the container geometry. Measure the flat application area, then leave a practical margin. For round containers, a label width that covers 30% to 40% of the circumference often feels safer for front panels than a near-full wrap, unless the artwork and application method are built for it.
Adhesive mismatch is another expensive lesson. Standard adhesive may fail on cold bottles, oily jars, rough kraft tubes, low-surface-energy plastic, or flexible squeeze packaging. If your product will sit in a shower, fridge, cooler, warehouse, shipping carton, or handbag, say that during quoting. Nobody should have to learn about coconut oil exposure after 8,000 labels start lifting.
File problems are painfully common: low-resolution logos, missing bleed, RGB colors, no dieline, flattened white ink layers, incorrect dimensions, and artwork that does not match the approved size. CMYK is the normal print color mode for process work, though spot colors may be used for brand control or white ink layers. If color accuracy is critical, ask about press proofs or drawdowns. ASTM test methods may also be relevant for adhesive, abrasion, or environmental performance depending on the application, but the exact test depends on the material and use case.
Ordering without testing is risky for new containers. Glass can have coatings. Plastic can have surface treatments. Metal tins can be oily. Kraft paper can be dusty. Products exposed to water, oils, alcohol, abrasion, or temperature swings can make a label fail even if the same label worked beautifully on another package. Similar is not identical. Packaging loves technicalities.
Next Steps Before You Place a Clear Label Order
Before ordering, slow down and collect the basics. Measure the container. Photograph the application area. Confirm storage conditions. Choose the label shape. Decide whether the design needs white ink. That first hour of prep can save days of quoting back-and-forth.
Create a simple spec sheet with the product name, label size, quantity per SKU, total quantity, material preference, finish, roll or sheet format, application method, and target delivery date. Add container details too: glass, PET, HDPE, metal, kraft paper, coated carton, pouch, or tube. If the label will be machine applied, include core size, roll direction, maximum roll outside diameter, and gap requirements.
Test with the actual container and real product conditions before scaling. Refrigerated drinks should be chilled, handled wet, and allowed to sweat. Bath products should be exposed to water and steam. Oily cosmetics should be handled after product contact. Squeeze bottles should be flexed repeatedly. Textured packaging should be tested for adhesive contact, not just photographed under nice lighting.
Request samples if you are launching premium product packaging, using unfamiliar material, switching suppliers, applying labels by machine, or selling through retailers where failure creates waste and complaints. A sample can reveal haze, edge visibility, white ink opacity, finish feel, barcode contrast, and adhesive behavior. It will not answer every question, but it catches the obvious disasters early. We like early disasters. They are cheaper.
Ask direct supplier questions:
- Which clear film fits this product environment?
- What adhesive is safest for this container surface?
- How should white ink be set up in the artwork file?
- What MOQ applies at the best price breaks?
- What production timeline is realistic after proof approval?
- Do you recommend gloss, matte, varnish, or laminate for this use?
If your packaging system includes labels, Custom Printed Boxes, inserts, and shipping cartons, treat everything as one branded packaging plan. The clear label might be the front-facing hero, but the box, closure, carton, and retail display all influence customer perception. Good package branding looks coordinated because the specs were coordinated.
Custom clear product labels work best when buyers treat them like engineered packaging, not transparent decoration. Lock specs first, approve the proof carefully, test application, then order the production quantity. Boring sequence. Excellent results.
FAQ
Are custom clear product labels waterproof?
Clear film labels can be water-resistant or waterproof depending on the material, adhesive, ink system, and laminate. For refrigerated drinks, bath products, or anything handled wet, ask for clear BOPP or polyester with a moisture-resistant adhesive and protective finish. Paper-based clear-look options are not the same thing and usually should not be used where water exposure is expected.
Do clear product labels need white ink?
White ink is usually needed when colors, text, logos, barcodes, or compliance details must stay opaque and readable. Without white ink, printed colors may look transparent, darker, or less vibrant because the product or container shows through. Some designs intentionally skip white ink for a subtle stained-glass effect, but that choice should be deliberate.
What is the best material for transparent product labels?
Clear BOPP is a strong general choice for many retail products because it balances clarity, durability, and cost. Clear polyester is better when labels need higher heat, chemical, abrasion, or moisture resistance. The best material depends on the container surface, storage conditions, handling, and whether the product faces water, oil, cold, or squeezing.
How much do custom transparent labels cost?
Cost depends on label size, order quantity, material, adhesive, white ink coverage, finish, die shape, and roll format. Small digital runs typically cost more per label, while larger runs reduce unit cost but require a bigger upfront order. For an accurate quote, provide dimensions, quantity, container type, artwork, finish preference, and use environment.
Can clear labels be used on dark bottles or colored packaging?
Yes, but artwork usually needs white ink behind key design elements so text and graphics stay visible. Transparent areas will show the dark bottle or colored packaging underneath, which can reduce contrast. Always review a proof or sample on the actual container because screen mockups rarely tell the whole truth.

