Buyer Fit Snapshot
| Best fit | Custom Embossing on Boxes projects where brand print, material claims, artwork control, MOQ, and repeat-order consistency need to be specified before quoting. |
|---|---|
| Quote inputs | Share finished size, material target, print colors, finish, packing count, annual reorder estimate, ship-to region, and any compliance wording. |
| Proofing check | Approve dieline scale, logo placement, barcode or warning zones, color tolerance, closure strength, and carton packing before bulk production. |
| Main risk | Vague material claims, crowded artwork, missing packing details, or unclear freight terms can make a low unit price expensive after revisions. |
Fast answer: Custom Embossing on Boxes: Design, Cost, and Process should be specified like a repeatable production item. The safest quote records material, print method, finish, artwork proof, packing count, and reorder notes in one written spec.
Production checks before approval
Compare the actual filled-product size with the drawing, then confirm tolerance on folds, seals, hang holes, label areas, and retail display edges. Reserve space for logos, QR codes, warning copy, and material claims before decorative graphics fill the panel.
Quote comparison points
Review material grade, print process, finish, sampling route, tooling charges, carton quantity, and freight assumptions side by side. A quote is only useful when the supplier can repeat the same color, closure quality, and packing count on the next order.
Custom Embossing on Boxes: Design, Cost, and Process starts with a packaging truth that gets overlooked pretty often: a plain carton and a raised logo do not tell the buyer the same story. The dimensions may be identical, the print can match exactly, and the shipping weight may barely move, yet custom embossing on boxes changes the way quality is perceived before anyone reads a line of copy. The hand notices texture first. The eye follows after that. That order matters more than most teams expect.
Packaging does more than protect a product. It signals care, price point, and the amount of intention behind the brand. When custom embossing on boxes is planned with discipline, it can help custom printed boxes feel more considered, strengthen retail packaging presence, and give product packaging a tactile memory that flat print rarely matches on its own. The hard part is not understanding that embossing looks premium. The hard part is knowing what it actually delivers, what it costs, and where the process tends to go sideways.
If you are comparing finishes, think of embossing as a dimensional decision rather than a decorative flourish. Used well, it supports package branding without becoming loud. Used carelessly, it turns into an expensive detail that disappears in the final piece. A good spec keeps the raised area working with the rest of the structure instead of fighting it.
What Custom Embossing on Boxes Does
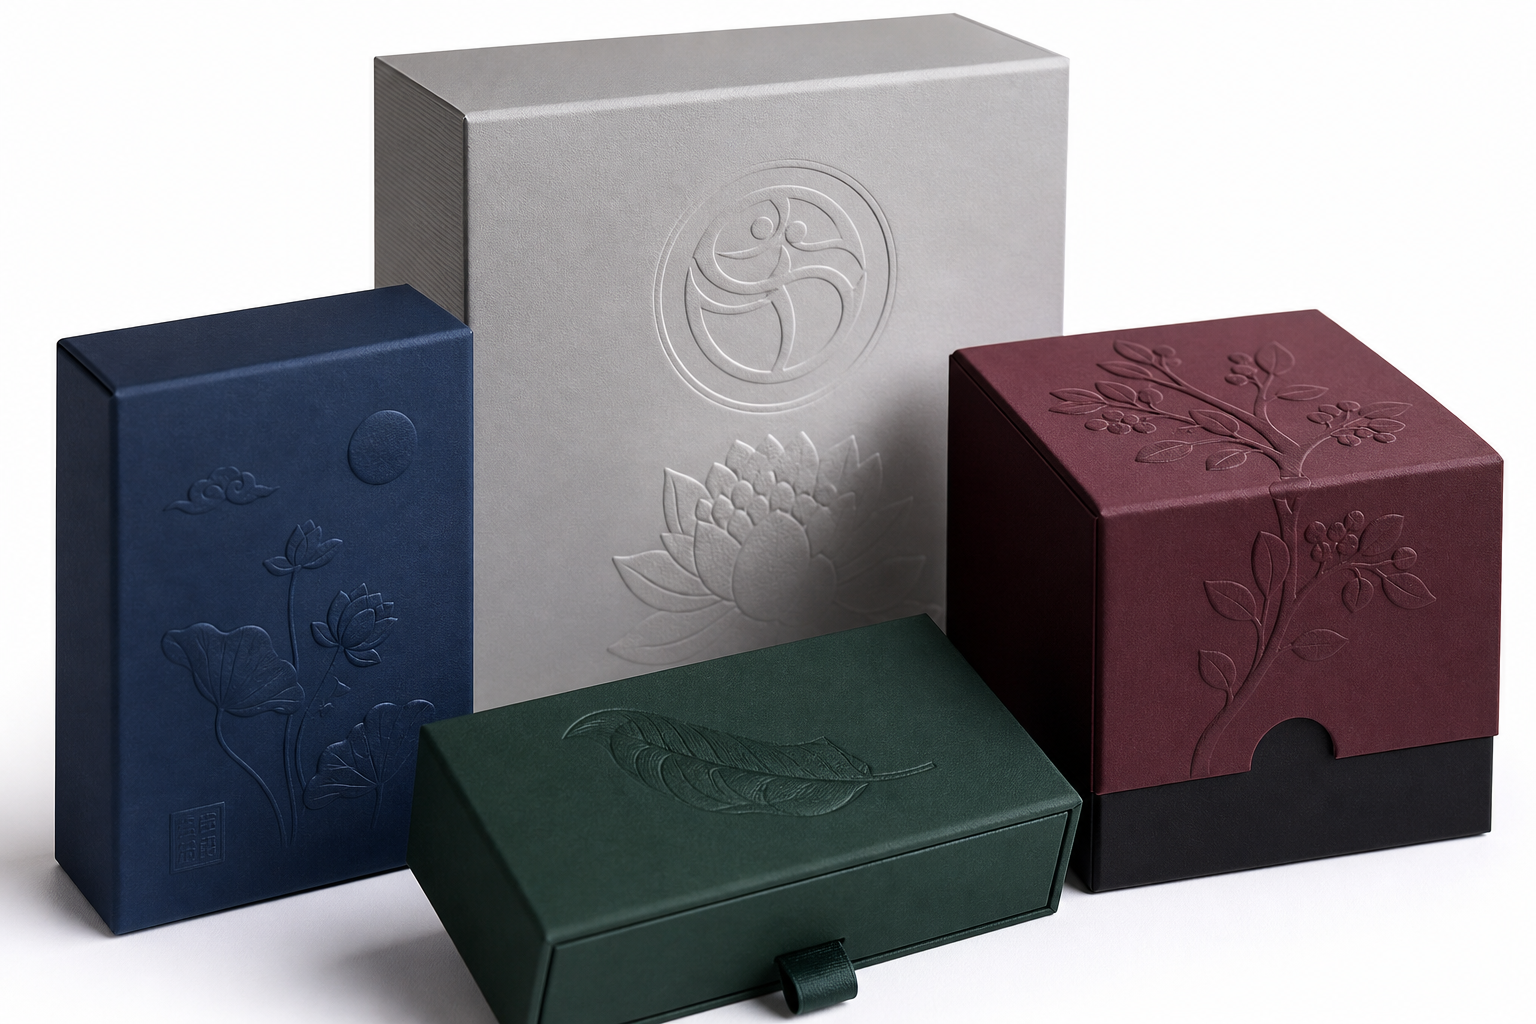
Custom embossing on boxes pushes selected artwork upward from the surface of paperboard or rigid board, creating a raised area that can be felt with the fingertips. In plain terms, the substrate is formed under pressure so the logo, mark, pattern, or border sits above the surrounding plane. The effect itself does not depend on ink, although embossing is often paired with foil stamping or print to build a fuller package design. Blind embossing, specifically, leaves the raised image unprinted so the texture does all the talking.
The finish is restrained, and that restraint is what gives it value. A strong emboss does not need to shout to be effective. It introduces a controlled tactile cue that can make branded packaging feel more refined, especially on shelf or in the hand during the unboxing moment. Buyers often describe the result as more finished, more expensive, or more intentional, even when the design uses only a single raised element.
It also helps to clear up a common point of confusion. Embossing is not the same as debossing. Embossing raises the image; debossing presses it inward. Foil stamping adds metallic or pigmented contrast. Print contributes color and typography. Custom embossing on boxes can stand alone, but it is often strongest when it behaves like a tactile accent that supports the rest of the packaging system instead of competing with it.
From a packaging buyer’s point of view, the effect is useful in a very direct way. If a carton sits on a retail shelf surrounded by similar SKUs, custom embossing on boxes can help the pack feel more premium in the hand even when the graphics stay restrained. That makes it especially relevant in cosmetics, specialty food, wellness, and gift packaging, where surface detail is often read as a cue for product care.
There is a practical side to this too. Embossing changes how the board moves, how light breaks across the surface, and how the box feels once the printer and converter have finished their work. When the artwork is simplified correctly, custom embossing on boxes can create a strong impression with a very small visual footprint. That is a rare advantage in product packaging, where every square inch tends to be crowded with information. I have watched otherwise strong artwork lose its edge because there was simply too much going on. A single raised mark usually lands better than a busy panel.
A well-placed emboss does something quietly persuasive: it makes a box feel more expensive without necessarily making it look busier. For many brands, that restraint is the premium signal.
On high-volume retail packaging, embossing is often used sparingly because it adds tooling and press time. On shorter runs, it may be reserved for a logo lockup, monogram, seal, or short phrase. That approach keeps package branding clean and avoids the overworked look that can happen when every panel is treated as a place to add texture. In practice, restraint is usually what buyers remember most. A tiny serif face that looks lovely on screen can kinda fall apart once the die presses into the board, so the simplest version often wins.
How Custom Embossing on Boxes Works: Process and Timeline
The production flow for custom embossing on boxes is simple at a high level, but the details decide whether the result feels crisp or flat. The work usually starts with approved vector artwork, then moves into tooling, sampling, press setup, and final production. The die maker translates the design into a metal tool that transfers pressure into the board. Depending on the job, that may involve a single male die or a matched male-and-female tooling pair for sharper, more controlled depth.
Artwork needs to be simplified before toolmaking begins. Tiny type, hairline strokes, and dense textures can collapse under pressure, especially on lighter stock. Bold shapes and thicker letterforms emboss more cleanly than delicate ornament, which is why a supplier may recommend minimum stroke widths around 0.5 to 0.75 pt for line elements. The exact tolerance still depends on stock, depth, and box style. Custom embossing on boxes should never be treated as a last-minute add-on once the artwork is already locked. If you rush that step, you're gonna pay for it later.
The sample stage is the most valuable checkpoint in the whole process. A physical proof shows whether the image sits in the right place, whether the raised area has enough depth to read, and whether the board springs back after the press. On many folding cartons, registration within about 1 mm is a realistic target, although the exact allowance depends on the material and the equipment. If the emboss is part of a larger printed design, the sample also confirms whether the logo still reads after folding, gluing, and die cutting.
Timelines vary quite a bit. A simple one-location emboss on a standard carton can move from proof approval to production in roughly 10 to 15 business days when tooling is already available or can be turned quickly. Add a complex board, a rigid box, foil, multiple revisions, or a longer sampling cycle, and the schedule stretches. Custom embossing on boxes is rarely the slowest part of packaging, yet it can become the pacing item if artwork changes arrive late.
There are a few production variables that consistently affect lead time:
- Stock thickness and coating, which determine how easily the board takes an impression.
- Emboss area size, because larger raised fields need more controlled pressure.
- Box format, since folding cartons, rigid boxes, and mailers respond differently under press.
- Whether embossing must align with foil, print, or another structural detail.
- Vendor capacity, which is often the hidden driver that does not show up in a quote at first glance.
For brands that care about transit performance, this is also the stage to think about distribution testing. A carton that embosses beautifully but crushes in shipping is not a success. Many packaging teams cross-check with ISTA transit profiles, and some also review material performance against ASTM-based methods. If you want a practical reference point for packaging performance resources, the ISTA standards library is useful.
One more detail matters here: custom embossing on boxes works best when the team knows the intended finish before the tool is made. If foil, soft-touch lamination, or spot UV are part of the plan, those choices affect pressure and release. Treat the embossing as one part of the package system, not as a decorative finish added after everything else is already settled.
How Much Custom Embossing on Boxes Costs
Pricing for custom embossing on boxes usually falls into four buckets: tooling, setup, press time, and the board itself. A quote that only shows the per-unit price leaves out most of the economics. Tooling may be modest on a simple logo, but it is still an upfront cost, and that is the reason small runs can look expensive next to standard print. The press is not doing just one thing here; it is managing pressure, depth, alignment, and material behavior at the same time.
In practical terms, a simple emboss die might sit somewhere around $120 to $450, while more complex or larger tooling can run higher depending on size and finish requirements. Production pricing often lands in the roughly $0.20 to $0.80 per unit range for small runs of custom embossing on boxes, while larger quantities can fall into the $0.06 to $0.25 range when the design is straightforward and the board behaves well. Those numbers are directional rather than universal because stock choice, press method, and region matter a great deal. Treat them as planning figures, not a promise from every supplier.
That spread explains why custom embossing on boxes can look expensive at 300 pieces and much more reasonable at 5,000 pieces. The tooling charge does not vanish, but it gets distributed across more units. From a packaging buyer’s perspective, the better question is not whether embossing is cheap. The better question is how much value the raised effect adds to each unit in the context of the full package.
A few cost drivers move the number in the same direction every time:
- Depth: deeper embosses need more controlled tooling and closer press attention.
- Coverage: a small logo is easier than a full-panel pattern or border treatment.
- Stock weight: thicker, better-quality board usually holds detail more cleanly, but it can cost more.
- Registration: if embossing must line up with foil or print, setup becomes more demanding.
- Format: rigid boxes and specialty cartons often require more handling than flat folding cartons.
It helps to quote custom embossing on boxes using the same structure every time. Ask for the tooling cost separately, the unit cost separately, and the price impact if the stock or artwork changes. That gives you a real comparison instead of a blended number that hides where the money is going. If the supplier can quote sample cost as well, that usually saves trouble later, because prototype pricing is where many projects either stay controlled or start drifting.
| Embossing Option | Typical Setup Load | Visual Result | Cost Pressure |
|---|---|---|---|
| Blind emboss | Lower tooling complexity | Quiet, tactile, premium | Usually the most economical |
| Emboss + foil | Two finishing steps, tighter registration | Shine plus dimension | Moderate to high |
| Deep emboss | Higher pressure, more test runs | Stronger tactile impact | Higher due to setup and yield risk |
| Large-area pattern | Largest tooling and press demand | Textured, decorative field | Highest in most cases |
One useful comparison: a brand that spends an extra $0.12 per box on custom embossing on boxes across 10,000 units adds $1,200 to the project. That is not trivial, yet it can still make sense if the finish improves perceived value, eases discount pressure, or supports a stronger shelf position. Packaging economics tend to work this way. Small per-unit changes can produce outsized brand effects.
For broader sourcing, it can help to compare the embossing quote with other Custom Packaging Products so you can decide whether the finish belongs on the main carton, an insert, or a secondary sleeve. That comparison often reveals a more efficient place to spend the money.
Key Factors That Shape the Final Result
Stock choice is the first thing to get right. Custom embossing on boxes works best when the paperboard has enough body to hold shape after pressure is applied. A thick, stable board usually shows cleaner detail than a soft or highly compressible one. Very glossy coatings can also resist crisp formation because the surface wants to spring back. In practice, uncoated or lightly coated surfaces tend to show the most readable depth.
Artwork complexity is the second major variable. Custom embossing on boxes handles bold forms much better than tiny serif type or fine illustration lines. A logo with generous counters and thicker strokes embosses more cleanly than a crowded symbol with nested detail. That is not a flaw in the process; it is simply how pressure behaves on fiber-based substrates. If a design depends on tiny visual cues, print may carry that information better than embossing ever will.
Depth and coverage area matter just as much. A small seal in the center of a lid behaves differently from a full-panel texture that runs close to fold lines. As the embossed area gets larger, the risk of uneven pressure, board distortion, or an inconsistent finish rises. For custom embossing on boxes, a restrained treatment often gives the best ratio of cost to impact. A single raised mark can do more work than a busy surface full of effects.
Box structure also changes the equation. Folding cartons, Rigid Setup Boxes, corrugated mailers, and sleeve packs do not react the same way. Folding cartons are common because they are efficient and light, but rigid boxes usually deliver a more luxurious tactile response. Corrugated structures can be embossed too, yet the result is usually more limited because flute and liner construction affect definition. That is why the same design can look elegant on one format and muddy on another.
It is also worth thinking about the rest of the production stack. When custom embossing on boxes is paired with print, foil, lamination, or die cutting, the sequence matters. If the board is printed first and then embossed, the ink system must tolerate the pressure. If foil is added, registration tolerance becomes tighter. If die cutting happens nearby, the blank design needs enough safety margin so the emboss does not crowd a crease or cut edge.
For brands aiming at FSC-certified materials, board choice can also affect sourcing conversations. FSC papers can fit well in premium branded packaging when the supply chain is being documented carefully. The label does not improve embossing by itself, but it can support a broader sustainability story that some retailers and consumers expect. You can review certification basics at FSC.
Step-by-Step: Planning the Embossing Job
The smartest way to plan custom embossing on boxes is to start with the goal rather than the effect. Are you trying to signal premium quality? Improve shelf visibility? Add a tactile moment to unboxing? Reduce the amount of ink coverage while keeping the pack memorable? The answer shapes the design. A logo embossed for quiet luxury should not be spec’d the same way as a retail promotional carton that needs to read from a distance.
Once the goal is clear, build the brief around the physical package. A supplier needs vector artwork, box dimensions, target board, finishing references, and a realistic quantity estimate. If you already know the box style, include it. If not, state whether you are planning folding cartons, rigid boxes, or another format. Custom embossing on boxes becomes easier to price when the production team knows where the raised area sits relative to folds, glue flaps, and any die-cut windows.
A prototype or sample is worth the time. A screen preview cannot show how a board behaves under pressure. Request a sample that uses the exact stock whenever possible, not just a similar one. Then review three things: the depth of the impression, the sharpness of the edges, and whether the raised area still reads after assembly. If the emboss is part of a larger package system, check how it looks next to print, foil, or a soft-touch laminate. Custom embossing on boxes often appears smaller on paper than it does in the hand, so the sample is the reality check.
Approval should be structured, not casual. A good proof review covers registration, edge quality, and the relationship between the emboss and nearby artwork. If the logo is too close to a crease or if the press makes the stock warp, the fix is usually easier before tooling is locked. A late change can cost more than the emboss itself, which is why this step deserves more attention than it usually gets.
Here is a practical checklist many teams use before release:
- Confirm the exact box style and dimensions.
- Send vector art with clean paths and simplified detail.
- Choose the board grade and finish before tool approval.
- Request a sample or prototype for physical review.
- Lock the specification sheet so production does not drift.
- Schedule enough buffer for sampling, correction, and transit.
Production handoff is where small mistakes become expensive. Keep one approved reference sample, one final spec sheet, and a clear note on packing and delivery expectations. If the job also includes other Custom Packaging Products, make sure those items are aligned on the same timeline so custom embossing on boxes does not sit waiting for another process to catch up.
That kind of planning may sound ordinary, but it is where the best packaging work usually happens. The finish looks effortless because the prep was not.
Common Mistakes With Embossed Packaging
The most common mistake with custom embossing on boxes is over-detailing the design. Tiny type, narrow lines, and densely packed artwork often collapse once pressure hits the board. On screen, those elements can look elegant. In production, they may turn muddy or disappear altogether. If a mark needs to be read quickly, it needs room to breathe. Embossing rewards confidence and clear shape.
The second mistake is choosing the wrong substrate. A stock that is too soft may not hold the raised form. A stock that is too thin may warp or telegraph unevenly. A very slick coating may resist detail. Custom embossing on boxes is not only about the die; it is also about the board’s fiber structure and finish chemistry. That is why a supplier should test the exact stock whenever the design is delicate.
Skipping sample approval is another expensive error. Embossing can look precise in a design file and still feel underpowered in real life. The sample shows whether the logo has enough height, whether the pressure is distributed evenly, and whether the board recovers after the press. Without that checkpoint, the first full run becomes the sample, and that is a rough place to learn.
Treating embossing as an afterthought creates a different set of problems. If the artwork is finalized before the finish is considered, the team may have to move key details away from folds, reduce line work, or pay for rushed toolmaking. Custom embossing on boxes is easiest and least disruptive when it is built into packaging design early. Late changes rarely feel graceful, even when the final result is workable.
Timelines are another trap. Some brands approve print and then realize the embossing has not been sampled, or they try to combine too many finishing steps without enough production buffer. That is how jobs slip. If the delivery date is fixed, the schedule should include room for tooling, proofing, and a second pass if needed. Packaging buyers who work that way usually get better results and fewer emergency calls.
There is also a subtle strategic mistake: overusing the effect. If every panel is embossed, the box can lose the clarity that made the finish appealing in the first place. Strong branding is often a matter of editing. Custom embossing on boxes works best when it has a job to do, not when it is filling space for its own sake.
For brands chasing retail packaging impact, that restraint matters. A raised logo at the lid, a monogram on the front panel, or a soft pattern inside the unboxing area can do more than a full-surface treatment. In other words, the smartest use of embossing is often the one that leaves some surface untouched.
Expert Tips and Next Steps for Custom Embossing on Boxes
Start with one high-impact element. That is the simplest way to make custom embossing on boxes feel intentional rather than overloaded. A logo, seal, or border can create a premium cue without turning the whole package into a texture exercise. When a buyer opens the box and notices the raised mark naturally, the finish has done its job.
Compare the sample in the actual lighting where the package will live. That sounds obvious, yet it gets skipped often. Texture reads differently under showroom spots, in mass retail aisles, and in product photography. A raised area that looks strong on a bench may disappear under a bright diffuse light. Custom embossing on boxes should be judged in context, because context changes how much depth the eye perceives.
Build a vendor brief that includes the design intent, target quantity, preferred stock, and acceptable budget range. Quotes are easier to compare when they are structured the same way. If one supplier quotes a flat unit price and another breaks out tooling, ask both for the same format. The real value of custom embossing on boxes becomes clearer when the numbers are being compared on equal terms.
It also helps to think about the broader packaging system instead of the finish alone. If the board, ink, and structure are all working together, the emboss does less heavy lifting. If the rest of the pack is generic, embossing may have to carry too much of the brand story. The best branded packaging usually comes from a balanced set of choices, not one dramatic move.
Before you release the order, check this short list:
- Choose the box style and exact board grade.
- Reduce the artwork to the most important element.
- Confirm whether the finish is blind emboss, foil plus emboss, or a different combination.
- Request a sample on the actual stock.
- Confirm schedule, freight, and packing instructions.
If you are building a new product packaging line, custom embossing on boxes can be one of the cleanest ways to lift perceived value without adding visual clutter. It is not the cheapest finish, and it is not always the fastest, but it can be remarkably efficient when the design is disciplined and the production plan is honest about constraints. That is especially true for premium retail packaging, seasonal launches, gift sets, and other items where touch matters as much as color.
There is a reason experienced buyers return to embossing. It is tactile, quiet, and hard to fake. Used with care, custom embossing on boxes can make a package feel considered before the product is even seen. Used without discipline, it can become an unnecessary cost. The difference sits in the spec, the sample, and the timing. Handle those well, and the finish stops being a decorative extra and starts acting like a real brand signal.
How much does custom embossing on boxes usually cost?
Cost depends on tooling, material, design complexity, and order quantity. Small runs usually have a higher per-unit price because setup costs are spread across fewer boxes. Ask for separate tooling and unit pricing so you can compare quotes accurately, and make sure sample charges are listed too so the budget does not drift later.
What materials work best for custom embossing on boxes?
Thicker paperboard and rigid board usually hold detail better than soft, lightweight stock. Uncoated or lightly coated surfaces often show sharper depth than very glossy finishes. Your vendor should test the exact board before full production if the design is detailed, because a material that looks fine on a spec sheet can behave differently under pressure.
Is custom embossing on boxes better than foil stamping?
Embossing adds touch and dimension; foil stamping adds shine and contrast. Many premium packages use both, but they serve different visual goals. Choose embossing when texture matters most and foil when reflectivity is the priority. If you need one finish to do all the work, embossing usually carries more quiet sophistication.
How long does the custom embossing on boxes process take?
Lead time depends on artwork approval, tooling, sampling, and production capacity. Simple jobs move faster; complex jobs with multiple finishes take longer. Build in extra time for proofing if the embossing must align with print or foil, because a small registration adjustment can save a lot of trouble at press.
Can small businesses use custom embossing on boxes without ordering huge volumes?
Yes, but smaller orders usually cost more per box because setup is not spread out. A focused design with limited coverage can keep the budget more manageable. Ask suppliers about low-MOQ options and prototype pricing before committing, and be honest about your run size so the quote reflects the real job.
What should I approve before production starts?
Approve the exact artwork, the board grade, the emboss placement, the sample, and the final spec sheet. If the box also includes foil, print, or lamination, confirm the sequence too. That approval stack keeps custom embossing on boxes from turning into guesswork once the press is running.
Practical takeaway: If you are specifying custom embossing on boxes, lock three things first: the exact board, the single raised element you want buyers to notice, and the sample deadline. That one decision set keeps the finish premium, the cost controlled, and the production schedule honest.