Custom Embroidered Clothing Labels: Design, Cost, and Order Decisions That Matter
Custom embroidered clothing labels sit in a narrow but commercially useful corner of apparel branding. They do not just identify a garment. They change the way the garment feels in the hand, how finished it looks on a rack, and whether the buyer reads the product as basic or deliberate. That effect is small in isolation. Across a line of products, it becomes part of the price story.
The label is one of the first brand elements a customer touches before the item is worn. That makes texture, edge finish, and thickness part of the buying experience, not a side issue to be solved later in production. A label that feels too stiff, too flimsy, or too generic can undermine an otherwise strong package.
For brands building out Custom Labels & Tags, the goal is usually straightforward: make the garment feel finished, recognizable, and aligned with the price point. For broader launch kits, Custom Packaging Products can keep the apparel label, hangtag, and box design on the same visual track so the customer sees one system rather than a series of disconnected parts.
A good label does not compete with the garment. It supports the garment, reads clearly at a glance, and holds up after repeated wear.
What Makes Custom Embroidered Clothing Labels Feel More Premium Than Printed Tags
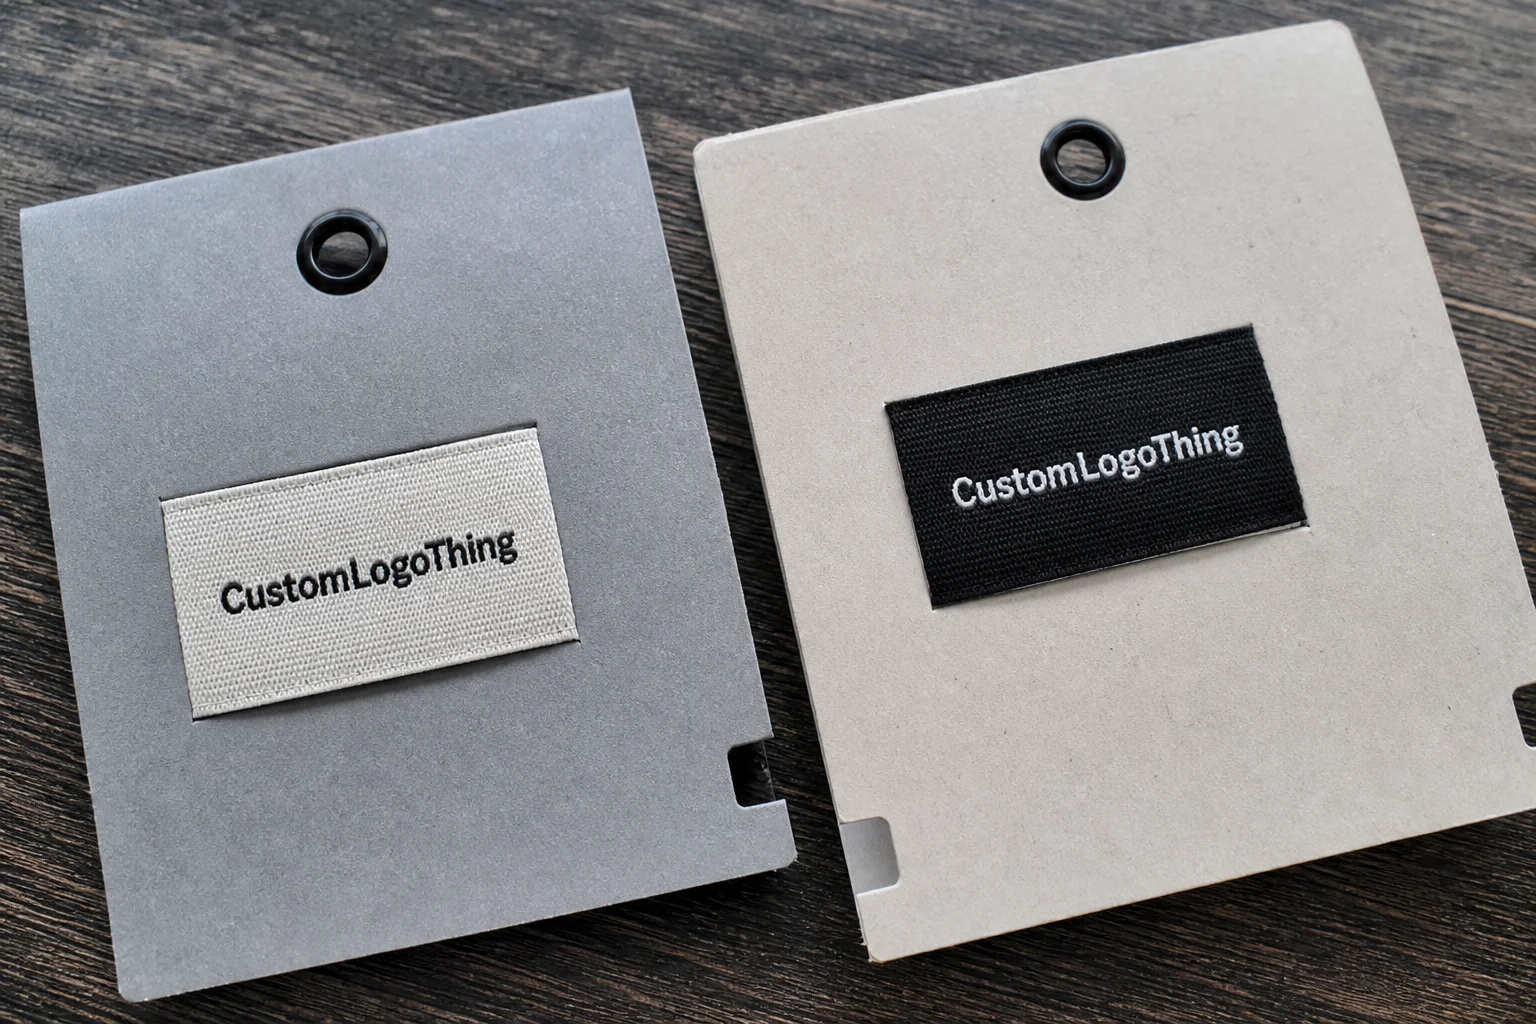
Embroidered labels feel premium because they introduce depth. Thread catches light differently than ink, which gives the brand mark a physical presence. A printed care tag can carry compliance copy well, but it rarely creates the same tactile response as embroidery. That difference shows up quickly on outerwear, denim, uniforms, kidswear, and heavier basics where the buyer expects a stronger finish.
There is also a production reason buyers choose this format. Embroidery is forgiving on garments that need visual weight. A brushed hoodie, a heavy canvas tote, or a structured jacket can carry a label that would look flat in print. The texture helps the brand feel intentional rather than temporary.
Here is the practical distinction:
- Embroidered labels use thread to create a raised surface with visible texture.
- Woven labels use fine weaving for smaller text and tighter detail.
- Printed care tags are better for fiber content, wash symbols, and legal text.
Those three are not interchangeable. If you need tiny legal copy, embroidery is the wrong tool. If you need a visible identity marker on a collar, hem, cuff, or patch panel, embroidery can be the better fit. That is why many apparel buyers treat custom embroidered clothing labels as a branding layer, not a documentation layer.
The useful comparison is not premium versus cheap. It is visible versus invisible. Woven and printed tags often disappear into the garment. An embroidered patch-style label can become part of the product architecture. That matters on items where the label is meant to be seen, not hidden.
For packaging teams, the real question is whether the label reinforces the price point. If a brand is investing in custom printed boxes, tissue, and premium inserts, a flat utilitarian tag can create a mismatch. A well-built embroidered label closes that gap without adding a lot of visual noise.
There is a limit, though. Embroidery should not be forced into jobs that need ultra-fine detail or dense legal copy. Buyers sometimes ask for too much information in too little space, then blame the supplier when the result is crowded. That is a design problem, not just a production one.
How the Production Process and Timeline Work
The production flow is usually predictable if the artwork is clean at the start. A typical order moves through artwork intake, digitizing, thread selection, proofing, sample approval, bulk stitching, trimming, finishing, and final inspection. Most delays happen before stitching begins, not during the run.
Digitizing is the step that turns artwork into stitch instructions. The file becomes a map for stitch direction, density, border behavior, and layering. A logo that looks simple on screen may need multiple technical choices to hold shape in thread. Small text, thin outlines, and tight gradients are the usual trouble spots.
Thread selection follows. Suppliers usually match against a physical shade card or a close Pantone reference, but the final result still depends on thread type and stitch density. After that comes the proof or strike-off. That approval point matters because it is the last practical chance to catch proportion errors, unreadable text, or a border that feels too heavy for the garment.
Lead time changes for a few reasons:
- Logo complexity increases digitizing time and stitch count.
- Color changes add setup steps and thread swaps.
- Backing choice affects finishing and application labor.
- Sample revisions push the schedule back by a few days.
- Order volume changes how quickly the line can run and pack.
A simple repeat order can often move in 8 to 12 business days after proof approval. First-time custom work is usually slower, often 12 to 18 business days, because the sample stage is doing more work. If the supplier is also applying the labels to garments, add labor time for sorting, placement, and quality checks. Apparel programs behave differently from raw label orders for that reason alone.
If timing is tight, the fastest way to reduce back-and-forth is to send vector artwork, exact dimensions, a placement mockup, and clear color references in the first request. A clean spec sheet usually saves more time than a rush fee. It also keeps the label aligned with the rest of the packaging system, including inserts and hangtags.
For transit-sensitive programs, packaging and shipping tests from ISTA are a useful reference point. They do not tell you whether a label looks good, but they do help teams think more clearly about how apparel components hold up once they leave the factory.
Custom Embroidered Label Pricing: What Changes Unit Cost
Pricing is mostly setup plus material and labor. For custom embroidered clothing labels, the biggest cost drivers are quantity, size, stitch density, thread colors, edge finish, backing type, and whether the factory is shipping labels only or applying them to garments.
MOQ matters a lot. A 200-piece order can look expensive on a per-unit basis because digitizing and setup costs are spread over fewer labels. At 5,000 pieces, those same fixed costs get diluted, so unit pricing drops sharply. That is normal. It does not mean one vendor is overcharging.
Two labels with identical dimensions can still price differently. One may use dense satin stitching, three thread colors, and a shaped border. The other may use a simpler build with fewer color changes and lower stitch count. On paper, those differences can look small. On the invoice, they are not.
| Order Profile | Typical MOQ | Estimated Unit Price | Typical Timeline After Proof | Best For |
|---|---|---|---|---|
| Simple one-color label | 100-300 pcs | $0.65-$1.40 | 12-18 business days | Small-batch apparel, placement testing |
| Mid-complexity logo label | 1,000-3,000 pcs | $0.22-$0.55 | 10-15 business days | Core product lines, retail packaging programs |
| Dense multi-color label | 5,000+ pcs | $0.12-$0.32 | 8-12 business days | Scaled launches, repeat seasonal runs |
Those ranges are practical, not guaranteed. Actual pricing depends on stitch count, shape complexity, size, and whether you need sewn-on finishing, heat-apply backing, or extra packaging. Rush fees can add 20% to 40% if a supplier agrees to compress the schedule. Sampling can add a fixed cost, especially for first-time artwork.
Comparing quotes only works if the specs are identical. Lock the same size, quantity, backing, thread count, and delivery target before comparing vendors. Otherwise, one quote may look cheaper simply because it excludes sampling, packing, or application labor. Buyers often discover the low bid was built on a different job entirely.
For brands evaluating multiple product formats at once, the label quote should be judged next to the rest of the packaging stack, not in isolation. A slightly higher unit price can make sense if it aligns with the quality of the box, insert card, and retail packaging the customer sees on arrival.
For broader packaging benchmarking, the industry resources at Packaging School are useful for understanding how material and finish choices influence perceived value across a brand system.
Which Specs Decide Durability, Comfort, and Edge Cleanliness
Size is the first spec many buyers underestimate. A label that looks balanced in a mockup can turn oversized on a narrow neckline, or too small to read once thread replaces ink. For most apparel brands, the useful range is somewhere around 25 x 50 mm to 40 x 70 mm, but the right size depends on garment scale and placement. A kid’s tee and a work jacket do not share the same visual math.
Stitch density is the other major quality variable. Too sparse, and the label looks thin or broken. Too dense, and it can become stiff, heavy, or curl at the edge after washing. The goal is not maximum thread. It is controlled coverage that preserves shape without turning the label into a thick patch where a soft tag should be.
Backing choice matters just as much as the front face:
- Sew-on is the most common and durable option for long wear.
- Iron-on is convenient, but it depends heavily on heat and fabric type.
- Adhesive is useful for temporary placement or sampling, not permanent use.
- Patch-style builds work well on outerwear, denim, and structured accessories.
Comfort is not separate from durability. A label can look excellent in a flat photo and still fail if it scratches the neck, loosens at the seam, or distorts after laundering. Fabric context matters. A brushed fleece hoodie wants a softer hand than a waxed canvas bag. A performance layer needs less bulk than a varsity jacket. The same construction rarely suits both.
Wash performance should be treated as a design criterion, not an afterthought. If a label will live on a garment that sees frequent laundering, look for stable thread tension, edge trimming that does not fray, and a backing that does not separate under heat. For brands that need formal verification on components or transit behavior, standards and test methods from groups like ISTA offer a useful benchmark for thinking about stress and handling.
The cleanest label is often the one that matches the garment structure. Thick denim jacket? A more substantial label can work. Soft tee? Keep the profile lighter. Structured tote? Use enough density to read clearly from a distance. That kind of detail separates a product that feels considered from one that just has branding attached to it.
Step-by-Step Ordering Guide for First-Time Buyers
If this is the first order, start with the garment, not the artwork. Identify the fabric, placement area, expected wash cycle, and the visual job the label has to do. A label meant to be decorative should be treated differently than one meant to sit discreetly inside a collar or along a hem.
- Confirm the garment and placement. Measure the available area on the real product, not only the pattern file.
- Finalize the artwork. Lock the logo version, text hierarchy, and minimum readable size before you ask for pricing.
- Set the spec sheet. Define size, shape, thread colors, border style, backing, and finish.
- Request a proof or sample. Review it under natural light, and check both front-face legibility and hand feel.
- Approve with context. Compare sample quality against cost, lead time, and intended use before releasing bulk production.
That sequence sounds obvious, but many buyers reverse it. They ask for a price before they know the exact placement. They approve a mockup on screen, then discover that the sewn label clashes with seam thickness or neck comfort. The extra hour spent on the spec sheet usually saves days later.
A reusable spec sheet also makes reorders cleaner. Once the size, backing, and thread set are approved, future runs move faster and are less likely to drift. That matters for seasonal apparel, team uniforms, and branded merchandise where consistency is part of the value. It also keeps the label aligned with the rest of the branded packaging system, especially if the product ships in a premium box or folded with inserts.
If your program includes paper components, recycled content, or sustainability claims, note the materials used in the broader package. FSC-certified paper options can support those claims, but only if the supply chain is documented correctly. That matters more in retail packaging than many teams admit.
For buyers expanding into broader launch kits, pairing the label order with Custom Packaging Products can simplify the rollout. The same spec discipline that protects the label also keeps the hangtag, mailer, and insert card on the same visual track.
Common Mistakes That Delay Production or Inflate Quotes
Low-resolution artwork is the most common mistake. A fuzzy logo forces cleanup before digitizing, which slows approval and can make the stitched version heavier than expected. If the design has tiny letters or thin lines, the factory may need to simplify it just to preserve readability.
Under-sizing is close behind. Text that is readable on a computer screen may turn illegible once translated into thread. Embroidery has limits. At a certain point, the thread cannot hold the same detail as a vector file. The better suppliers will say that plainly instead of pretending every design can be stitched at any scale.
Placement errors cost time too. Labels near seams, cuffs, collars, and layered panels often require a sanity check on the actual garment. If the area is too thick, the final stitch can look puckered or sit awkwardly against the skin. That is not a minor issue if the product is a premium basic or a uniform worn all day.
Another trap is choosing the cheapest quote without asking what was removed to get there. Sometimes the lower price comes from lighter stitch density, simpler edge finishing, or thinner backing. That can create rework later, especially if the label frays or arrives with a hand feel that does not match the rest of the collection.
Changing specs after proof approval is one of the fastest ways to trigger extra charges. A size change may require a revised proof. A color change may require new thread matching. A shape change may need fresh digitizing. Each of those steps is legitimate, but none is free. Buyers who know this upfront avoid a lot of friction.
Here is the hard rule: if the label is part of the product’s retail packaging story, treat it like a controlled component, not a decorative afterthought. That mindset reduces misses and protects margin.
Expert Checks Before You Approve the Final Sample
Before you green-light production, ask for one pilot run on a single style if the label will eventually move across different fabrics or size ranges. A label that works on a heavyweight hoodie may behave differently on a lightweight tee or a performance layer. One sample tells you much more than a screen proof ever will.
Review thread colors in natural light. Indoor lighting can hide a mismatch that becomes obvious as soon as the shipment lands in a retail environment or photo shoot. If the label is tied to brand color identity, request physical thread cards rather than relying on a monitor. Screens are not color standards.
Build a reusable checklist for the next reorder:
- Exact size and shape
- Approved artwork file
- Thread colors and references
- Backing type
- Placement location
- Target quantity and delivery window
That checklist is basic on paper, but it separates a smooth repeat order from a string of small corrections. Buyers who document the approved spec tend to get faster reorders and fewer surprises. They also make it easier to compare vendors later, because the same spec sheet can be sent to two or three suppliers without rewriting the job each time.
Compare vendors on more than price. Look at proof clarity, lead time, minimum order quantity, finishing quality, and how directly they answer technical questions. A supplier that can explain stitch count, backing behavior, and edge finish is usually a better fit than one that only sends a low quote. For many brands, that is the point where custom embroidered clothing labels stop being a recurring problem and become a predictable part of the product system.
Approve the sample only after it matches the garment, the budget, and the brand standard. If all three line up, the order is ready. If one does not, fix it before bulk production. That is the cleanest way to keep the label aligned with the product and avoid paying twice for the same lesson.
Are custom embroidered clothing labels better than woven labels?
Embroidered labels usually feel more textured and premium, which helps when the brand wants a tactile look. Woven labels are better for very small text, flatter construction, and ultra-detailed artwork. The right choice depends on the garment, the reading distance, and whether comfort or visual depth matters more.
How much do custom embroidered clothing labels cost per piece?
Unit cost drops as quantity rises because setup and digitizing are spread across more labels. Size, stitch density, thread colors, backing, and rush timing all move the price up or down. The cleanest way to compare pricing is to request the same specs from each supplier at two different quantities.
What artwork do I need to order embroidered clothing labels?
A vector file is best because it keeps edges clean when the design is digitized for stitching. Include exact dimensions, logo placement, and clear color references so the factory does not have to guess. If the text is tiny, expect to simplify the design so it still reads well once translated into thread.
How long does turnaround usually take for custom embroidered labels?
Simple repeat orders can move faster than first-time custom jobs because the artwork and spec are already approved. Sampling, dense stitch patterns, and multiple revisions add Lead Time Before bulk production starts. If timing is tight, ask about rush options early because they usually cost more and still need proof approval.
Can custom embroidered clothing labels work for small-batch apparel?
Yes, but small batches usually carry a higher per-unit cost because setup is spread over fewer pieces. Small runs are useful when you want to test placement, comfort, and brand perception before a larger reorder. Choose the backing and label size carefully so the finish feels intentional rather than oversized or scratchy.