A plain envelope can make an expensive product feel cheaper before anyone sees what is inside. That little flap seal may be the first real brand signal a customer touches, which is why custom envelope stickers deserve more attention than they usually get.
What Custom Envelope Stickers Actually Do for Your Mail
Custom envelope stickers are branded adhesive labels used to close, decorate, identify, or secure envelopes, mailers, invitation sleeves, retail packets, and document folders. Simple idea. Plenty of ways to get it wrong. A 1.5-inch matte paper seal on a wedding invitation is not doing the same job as a 2.25-inch tamper-evident tab on a legal packet or a clear BOPP label sealing an ecommerce thank-you mailer.
Buyers often lump every envelope sticker into one category. That gets expensive fast. Decorative seals add polish. Tamper-evident seals show opening or attempted removal. Return-address labels identify the sender and usually sit on the front or back face. Campaign stickers carry a QR code, offer, hashtag, or event message. Branded closure tabs physically bridge the envelope flap and help keep the piece shut during handling.
You’ll see them on ecommerce inserts, subscription envelopes, boutique retail receipts, gift card sleeves, PR kits, wedding stationery, event invitations, warranty cards, legal packets, and sample mailers. For brands already using Custom Packaging Products such as mailer boxes, inserts, or tissue, the envelope seal becomes a small extension of the same packaging system.
The goal is not to buy the fanciest sticker. The goal is to Buy the Right sticker for the job. That means getting clear on material, sizing, artwork, adhesive, finish, quantity, price, lead time, and application workflow before anyone starts arguing about “premium vibes.” Vibes do not survive postal machinery. Specs do.
How Envelope Seals Work: Adhesive, Shape, and Placement
A seal works because three things cooperate: the envelope surface, the sticker adhesive, and the placement. If one fights the other two, the result is edge lift, crooked application, weak closure, or a sticker that looks like an afterthought. Nobody orders branded packaging hoping for “afterthought.”
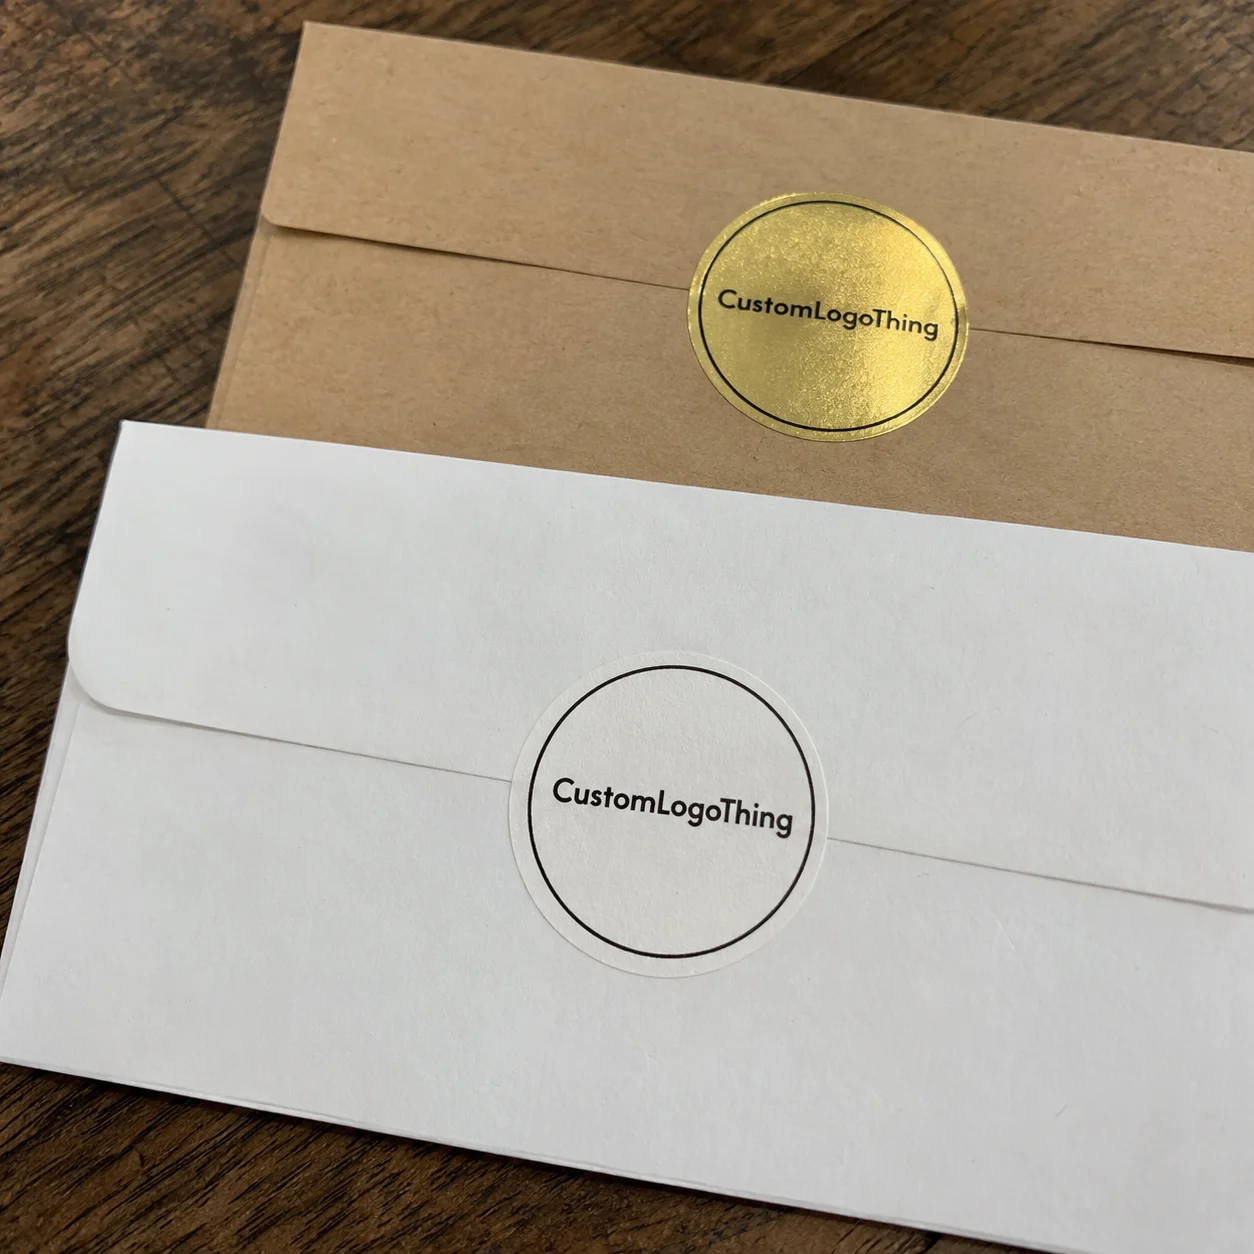
Shapes carry different signals. Circle seals feel classic and formal, which is why they work well for invitations, stationery, and boutique thank-you envelopes. Rectangles handle horizontal logos, URLs, promo codes, and return information better. Ovals soften the look and suit stationery or gift packaging. Custom die-cut shapes add personality, but expect higher setup costs, more proofing attention, and sometimes slower production.
Size matters more than people admit. Small flap seals usually sit between 1 inch and 1.5 inches. A 2-inch seal gives stronger visual branding on A7 envelopes, small mailers, and ecommerce inserts. Move to 2.5 inches or larger only if the sticker also needs to carry messaging, a QR code, a campaign line, or security language. Tiny type on a tiny sticker is not elegant. It is just tiny.
For adhesive, stay practical. Permanent adhesive is the standard choice for mailed envelopes and retail packets. Removable adhesive works for temporary filing, organization, or reusable folders. High-tack adhesive is worth considering for textured stock, recycled fibers, or envelopes that see heavier handling. Freezer-grade adhesives are usually overkill unless the mailer faces cold-chain exposure or warehouse conditions that justify it.
Surface compatibility needs testing. Matte paper envelopes are usually friendly. Heavily textured, metallic, vellum, coated, or high-recycled-content stocks can reduce adhesive contact. Adhesive does not care about your packaging design mood board. It cares about fibers, coatings, pressure, temperature, and dwell time.
Placement is the last piece. Center the seal across the flap if it must close the envelope. Put it on the front lower corner if it is mainly a brand mark. Use the back flap for formal stationery. Keep it away from postage, address blocks, and postal barcode zones if the envelope is traveling through USPS or carriers. The USPS publishes automation and barcode guidance for mailpiece design, and ignoring machine-read areas is a cute way to create delivery headaches.
Key Specs That Decide Whether Your Seal Looks Premium
Premium is not one finish. It is the right combination of stock, ink, adhesive, cut, and application. A clean matte paper seal can look more expensive than a foil sticker if it matches the envelope and brand tone. Loud foil on the wrong stationery line looks like a coupon pretending to be jewelry.
Material selection sets the base. Matte paper works beautifully for stationery, invitations, note cards, and restrained retail packaging. Gloss paper makes color pop and can suit brighter ecommerce brands. Kraft paper fits earthy, handmade, organic, or apothecary-style packaging. Clear BOPP creates a no-label look, especially on white or colored envelopes, but light artwork may require white ink behind it. Foil or metallic stock adds a luxury cue, best used with restraint.
Finishes change both look and handling. Matte hides fingerprints and feels refined. Gloss gives brighter color but can show scuffs. Soft-touch lamination feels upscale, though it adds cost and may be unnecessary for short-life stationery. Foil stamping adds impact for monograms, crests, initials, or short logos; it usually involves a plate or die charge and can extend lead time.
Print method depends on quantity and complexity. Digital printing is usually better for short runs, seasonal designs, variable artwork, and quick changes. Flexographic printing can make sense for larger repeat runs on rolls, especially when the same design will be reordered. Foil stamping, embossing, debossing, and specialty coatings add setup, proofing, and cost. Fancy effects are not bad. Random fancy effects are bad.
Color expectations need to be realistic. Standard label printing uses CMYK. Pantone matching may cost extra and may not be exact on every stock. White ink matters on clear film, dark papers, kraft, and metallic stocks. Without white ink support, pale colors can disappear or shift. If color accuracy is critical, request a physical proof or production sample, not just a digital PDF viewed on a laptop in night mode.
Artwork should include vector logos, correct dimensions, bleed, safe margins, readable type, and tested QR codes. A common label setup uses 0.0625 inch to 0.125 inch bleed, though suppliers vary. Keep small type above roughly 5 to 6 pt for simple text and larger for reversed-out or foil work. QR codes should usually be at least 0.8 inch wide, with enough quiet zone around the code to scan reliably.
Durability depends on the mailing environment. Indoor invitation seals do not need the same scuff resistance as ecommerce mailers moving through bins, belts, trucks, and the postal system’s charming little obstacle course. For mailers under heavier handling, ask about BOPP film, varnish, lamination, or abrasion resistance. If you are shipping product samples, pairing seals with strong Custom Labels & Tags can keep the full branding system consistent.
Practical rule: if the envelope stock is unusual, test the adhesive before ordering thousands. Textured paper, metallic coatings, and recycled fibers can turn a normal seal into a curling little disappointment.
Cost and Pricing Factors for Branded Envelope Seals
Pricing depends on quantity, size, material, finish, number of colors, adhesive, roll versus sheet format, proofing needs, shipping speed, and whether the shape needs a custom die. “Small round sticker, nice quality” is not a spec. That is a wish wearing a tiny hat.
For basic paper envelope seals, small orders may land around $0.12 to $0.40 per sticker, depending on quantity and size. At higher quantities, standard 1.5-inch paper seals can drop closer to $0.04 to $0.12 per unit. Clear film, foil stamping, metallic stocks, specialty adhesives, Custom Die Cuts, and rush production can push costs higher, sometimes into the $0.20 to $0.75+ range for smaller runs. These are planning ranges, not universal quotes. Material markets, artwork, and supplier setup all move the number.
| Option | Best Use | Typical Cost Level | Buyer Tradeoff |
|---|---|---|---|
| Matte paper seal | Stationery, invitations, boutique packets | Low to moderate | Elegant feel, limited moisture resistance |
| Gloss paper seal | Colorful campaigns, retail inserts | Low to moderate | Bright color, more visible scuffing |
| Clear BOPP seal | No-label look, ecommerce mailers | Moderate | Durable, may need white ink |
| Foil stamped seal | Luxury stationery, gift packaging | Moderate to high | High impact, setup cost and longer timing |
| Custom die-cut seal | Brand icons, campaign shapes | Moderate to high | Distinctive shape, more proofing attention |
MOQ matters. Low minimum order quantities are useful for testing seasonal stationery, event mailers, or a first ecommerce campaign. Larger runs reduce unit cost if the design will stay stable for several months. If the logo, URL, address, or campaign message may change next week, do not buy 50,000 just because the unit price looks cute.
Rolls and sheets change both price and workflow. Rolls are better for higher-volume packing stations and label dispensers. Sheets are easier for small teams, wedding assembly, events, and hand-applied stationery. If five people are sealing 3,000 envelopes on a deadline, rolls may save real labor. Labor is a cost too, even if nobody puts it on the sticker quote.
Hidden cost drivers include rushed production, multiple artwork versions, exact color matching, complex kiss-cut shapes, premium liners, split shipments, and last-minute address changes. Ask for quotes using real specs: quantity, size, shape, stock, finish, adhesive, roll or sheet format, artwork file, destination, deadline, and whether a physical sample is required. That one clean email can save three days of back-and-forth.
Process and Timeline: From Artwork to Ready-to-Apply Stickers
The usual production path is straightforward: choose specs, submit artwork, receive a digital proof, approve or revise, print, finish, cut, quality check, pack, and ship. Simple digitally printed stickers may move in roughly 3 to 7 business days after proof approval. Foil, custom dies, large volumes, specialty adhesives, or physical proofs can push the timeline toward 8 to 15 business days or more. Transit is separate unless the quote clearly says otherwise.
Digital proofing is your last cheap chance to catch problems. Check spelling. Check dimensions. Check the cut line. Check that the artwork is centered. Check that bleed exists. Scan the QR code. Then scan it again from the printed-size proof if possible. A QR code that leads nowhere useful is not a tech feature. It is a tiny square of regret.
Orders slow down for boring reasons: incomplete artwork, low-resolution logos, late approvals, unclear sizing, missing shipping addresses, color debates after proofing, or quantity changes after production starts. None of these are dramatic. All of them can wreck a launch calendar.
Order ahead for product launches, weddings, event invitations, PR kits, holiday mailers, and subscription drops. Stickers are small, but scheduling mistakes are loud. If your launch date is fixed, build in time for proofing, sampling, production, shipping, internal receiving, and assembly. A realistic plan might allow 2 to 3 weeks for a polished order with sampling, even if the actual print time is much shorter.
Request samples before a large run, when using textured envelopes, when brand color accuracy matters, or when adhesive strength is mission-critical. For packaging performance, larger shipping systems may be tested under standards from groups like ISTA, while paper sourcing claims may involve FSC-certified stocks from suppliers aligned with FSC guidelines. Envelope stickers are smaller than custom printed boxes, sure, but the same discipline applies: know the substrate, know the handling conditions, and test the weak points.
Step-by-Step Ordering Guide for Better Envelope Stickers
Use a process. Wild concept, I know.
- Define the job. Decide whether the sticker must seal, brand, organize, promote, identify, or signal security. One sticker can do more than one job, but one job should lead.
- Measure the envelope flap. Check flap height, flap angle, paper texture, and the available landing area. Decide whether the sticker should bridge the closure, sit fully on the flap, or act as a front-facing brand mark.
- Choose shape and size from the artwork. A detailed horizontal logo rarely looks good crammed into a 1-inch circle. For horizontal logos, start with rectangles or ovals. For monograms, circles usually work.
- Select material and finish. Match the envelope stock, brand tone, and handling conditions. Matte paper for quiet polish. Gloss for color. Clear film for durability. Foil for controlled luxury.
- Prepare artwork correctly. Supply vector logo files, CMYK artwork, bleed, safe area, readable text, and tested QR codes. If the supplier asks for outlined fonts, provide them.
- Request a complete quote. Include quantity, size, shape, stock, finish, adhesive, roll or sheet format, destination, deadline, and sample needs. Compare suppliers on clarity, proofing process, material options, and realistic timing, not just the lowest unit price.
- Review the proof at actual size. Print it on paper if needed. Check spelling, alignment, color notes, cut lines, and QR function before approval.
- Store finished stickers properly. Keep sheets flat or rolls upright, away from heat, dust, and moisture. Many pressure-sensitive labels behave best around normal room temperature, roughly 60°F to 80°F, depending on adhesive system.
If you already have retail packaging, tissue, hang tags, or inserts, pull those samples before choosing the seal finish. The sticker should look like it belongs with the rest of the product packaging, not like it wandered in from a different brand meeting.
Common Mistakes That Make Envelope Stickers Look Cheap
The fastest way to cheapen custom envelope stickers is to make them too small for the logo. A 1-inch seal can look beautiful with a monogram, icon, or short wordmark. It looks painful with a long business name, tagline, URL, and QR code stuffed together like a luggage compartment.
Low contrast is another classic problem. Pale gray ink on kraft stock may look tasteful on a screen, then vanish in print. White artwork on clear material needs white ink support or it may disappear against the envelope. Dark envelopes need a plan for opacity. Ask the printer what can actually be produced on the chosen stock.
Texture gets ignored constantly. Ribbed papers, handmade fibers, recycled envelopes, metallic finishes, and coated stocks can reduce adhesive contact. The sticker may look fine for the first hour, then lift at the edges overnight. If the seal is functional, not just decorative, test it after 24 to 48 hours and again after handling.
Fancy finishes can also fight the brand. Loud metallic foil may clash with handmade stationery. Soft-touch may be wasted on a sticker that gets peeled off immediately. A custom die-cut edge may create delicate points that lift during mailing. Premium choices need a reason.
Placement can ruin a good seal. Avoid postal machinery paths, barcode zones, postage areas, and spots likely to rub against bins or other mail. For mailed pieces, review carrier guidance and keep the front address area clean. Pretty does not beat deliverable.
Then there is proof approval by phone screen. Screens lie. Print specs do not. If the final sticker looks exactly like the low-resolution file submitted, that is not a production mystery. That is cause and effect wearing a shipping label.
Application workflow matters too. A beautiful sheeted sticker can slow fulfillment if the team needs rolls for a dispenser. For higher-volume mailings, test how many envelopes one person can seal in 10 minutes using sheets versus rolls. Multiply the difference by the full order quantity. Suddenly the cheaper format may not be cheaper.
Next Steps Before You Request a Quote
Before asking for pricing, gather the basics in one place. You can do this in 15 minutes if nobody turns it into a committee sport.
- Envelope size: A2, A6, A7, #10, square, catalog, or custom dimensions.
- Flap style: pointed, wallet, square, euro flap, peel-and-seal, or tuck flap.
- Envelope material: matte paper, textured paper, kraft, vellum, metallic, recycled, coated, or dark stock.
- Sticker location: back flap, front corner, full closure bridge, campaign area, or document ID zone.
- Quantity: include current need plus realistic overage, often 5% to 10% for hand application.
- Deadline: separate in-hands date from event date, launch date, or mailing date.
- Artwork status: ready vector file, rough concept, Canva file, PDF, or needs design help.
Print paper mockups before production. Use a home or office printer, cut two or three sizes, and physically place them on the envelope. Try 1.25 inch, 1.5 inch, and 2 inch if you are undecided. This low-tech test catches awkward proportions faster than a 14-message email thread.
Decide whether the sticker is mostly decorative, functional, promotional, or security-focused. That choice drives adhesive, material, shape, finish, and placement. Decorative seals can prioritize feel. Functional closures need grip. Promotional seals need readability. Security seals need evidence of opening or removal, and that is a different product category than a cute logo dot.
Narrow finishes before quoting. Two options are reasonable. Six finishes across five quantities is how a simple label project becomes spreadsheet punishment. If you are unsure, ask for one standard recommendation and one premium recommendation. A good supplier should be able to explain the tradeoff in plain language.
Send a photo of the actual envelope with your quote request, especially if the material is textured, metallic, dark, handmade, or unusually coated. Include the front, back, flap, and a close-up of the surface. Experienced printers can often spot size, cut, adhesive, or contrast problems before money gets wasted.
Ask for recommendations, not only price. If a supplier flags that your detailed logo will not read at 1 inch, listen. If they suggest a roll format because your team is applying 10,000 seals, listen harder. The best print quote is not always the cheapest line item; it is the one that prevents reprints, delays, and boxes of labels nobody wants to use.
Once the specs, artwork, and deadline are clear, custom envelope stickers are easy to quote, fast to produce, and one of the simplest ways to make mailed packaging feel intentional. Small seal. Big first impression. Funny how often packaging works that way.
FAQ
What size should custom envelope seals be?
Most flap seals work well between 1 and 2 inches wide, depending on envelope size and logo shape. Use 1 inch to 1.5 inches for small invitations or stationery, and 2 inches or larger for ecommerce mailers, QR codes, or campaign messaging. Test the size on the actual envelope before ordering; a paper mockup catches awkward proportions fast.
Are paper or vinyl envelope stickers better?
Paper is usually better for stationery, invitations, retail packets, and premium unboxing where texture matters. Vinyl or BOPP film is better when the sticker needs moisture resistance, scuff resistance, or a clear no-label look. Paper costs less in many standard jobs, while film materials are stronger but usually more expensive.
How much do branded envelope stickers cost?
Cost depends on quantity, size, material, finish, adhesive, shape, roll or sheet format, and turnaround speed. Simple paper stickers are usually the most budget-friendly; foil, clear film, custom shapes, and rush orders raise the price. For an accurate quote, provide quantity, dimensions, artwork, stock preference, finish, deadline, and shipping location.
How long does it take to produce custom mailer seals?
Simple digitally printed seals can often move faster than specialty finishes, sometimes within several business days after proof approval. Foil stamping, custom die cuts, specialty adhesives, physical samples, and large runs typically need more lead time. Always ask whether the quoted timeline includes production only or production plus transit.
Can envelope stickers be used for mailing through USPS or carriers?
Yes, but placement matters. Keep stickers away from barcode zones, postage areas, and machine-read sections. Use an adhesive strong enough for the envelope material and expected handling conditions. If the sticker is sealing the flap, test it before a large mailing so it does not lift during transit.

