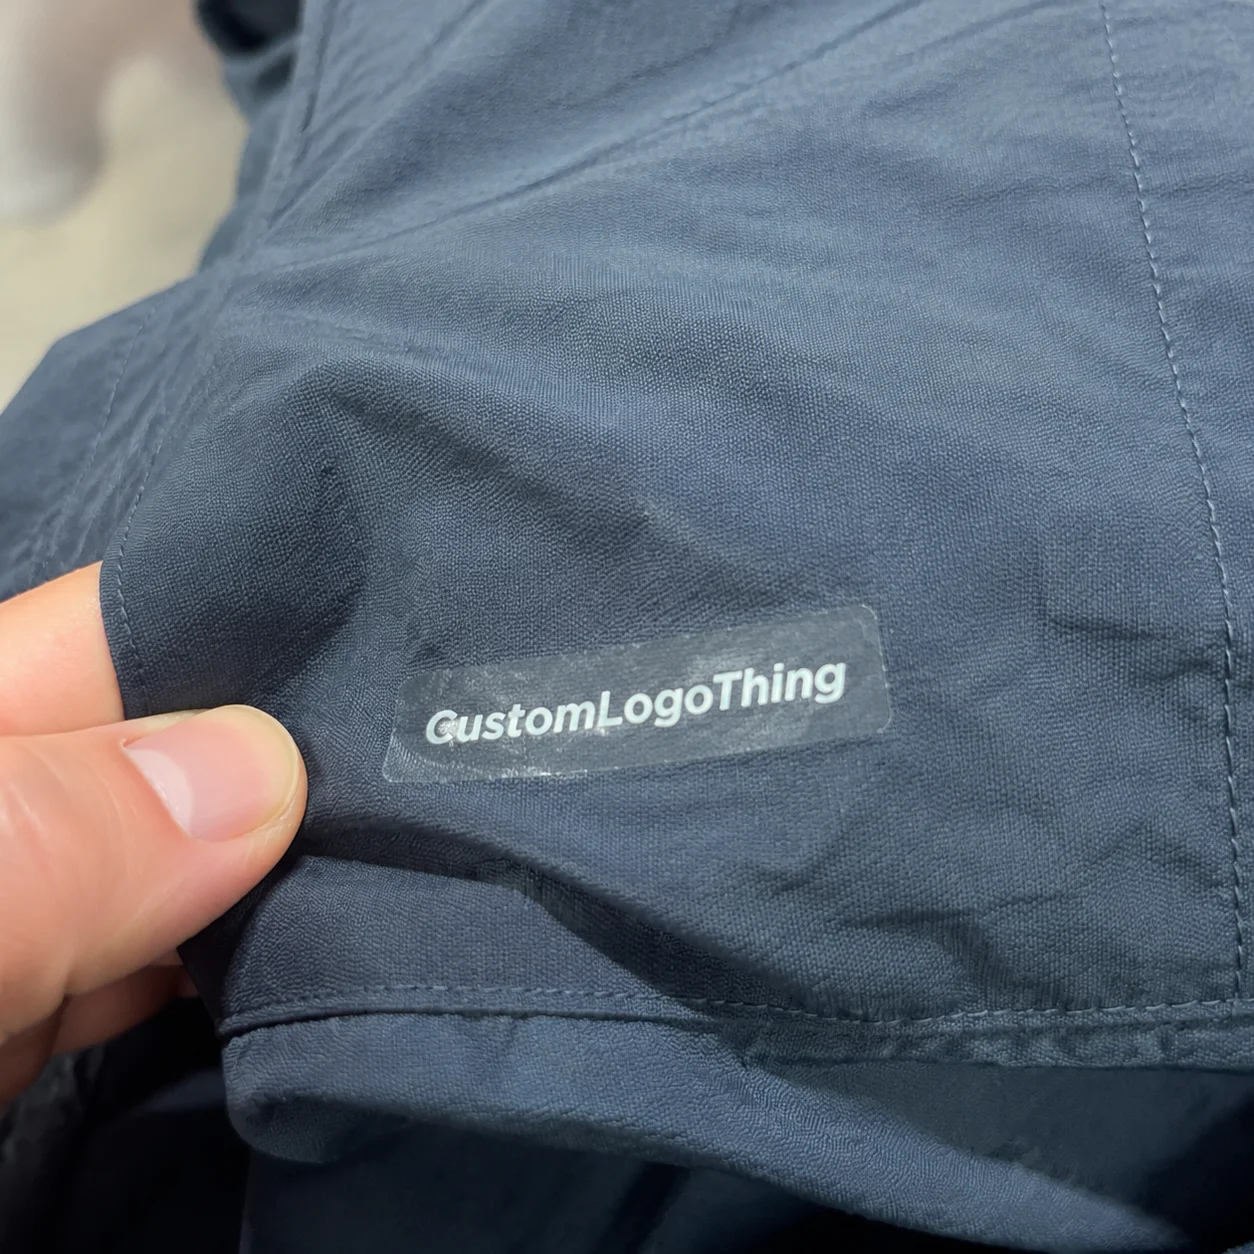
The logo on a hoodie sleeve might look screen printed. It may actually be one of thousands of custom heat transfer stickers, built from film, ink, adhesive, heat, pressure, and timing rather than wet ink pushed through a mesh screen.
That difference matters. A heat transfer is not a regular peel-and-stick label, and it is not automatically the same as vinyl lettering. It is a printed or cut graphic designed to bond to fabric and other compatible surfaces after controlled heat pressing. Done well, it gives a small apparel run the consistency of a larger program. Done casually, it can lift at the edge after a few washes, crack across a stretch panel, or look slightly off on every size in the order.
What Custom Heat Transfer Stickers Really Do
Custom heat transfer stickers sit between one-off craft decoration and high-volume garment printing. They help buyers decorate hoodies, totes, uniforms, neck labels, event apparel, and merchandise without always committing to screen setup, color separations, or finished inventory before demand is known.
The practical version is simple. A supplier creates the logo or graphic on a carrier sheet using a transfer system: cut vinyl, printed film, plastisol ink, direct-to-film printing, sublimation, or another compatible method. The transfer is then applied with a heat press. Typical settings often fall around 285°F to 325°F with 8 to 20 seconds of dwell time, though material specifications override any general range. Pressure matters as much as temperature. Too little pressure leaves adhesive sitting on the textile surface. Too much pressure can flatten fleece, distort stretch fabric, or create shiny marks on synthetics.
Buyers often lump four different products under the same name:
- Heat transfer vinyl: cut polyurethane or PVC-based film, commonly used for names, numbers, simple shapes, and solid-color logos.
- DTF transfers: full-color printed designs with powdered adhesive, useful for gradients, small details, and multi-color marks.
- Screen print or plastisol transfers: ink-based transfers that can produce opaque, durable, screen-print-like decoration.
- Adhesive stickers: pressure-sensitive labels for boxes, jars, mailers, laptops, or hard surfaces, not heat-pressed fabric decoration.
That last category causes real quoting confusion. If the job is for cartons, jars, mailers, or branded packaging, you may need Custom Labels & Tags, not apparel transfers. Both carry a logo. Both affect brand perception. Only one relies on heat and pressure to bond with fabric.
Why choose transfers? Lower setup barriers on short runs. Full-color detail. Repeatable logo placement across uneven size breakdowns. Easier fulfillment when an order needs 12 small shirts, 31 mediums, 18 larges, and five 3XLs. The buying question is not only “which sticker looks best?” It is “which transfer system matches the fabric, design, quantity, use case, and washing expectations?”
Buyer reality check: the transfer is not just artwork. It is a production system involving film, ink, adhesive, carrier sheet, temperature, pressure, dwell time, peel method, and fabric compatibility.
How Heat Transfer Decoration Works on Fabric
The science is direct. Heat softens the adhesive layer. Pressure pushes that layer into the textile surface. Cooling helps the design lock into place. If one step is weak, the finished logo may pass a quick visual check and still fail in laundry.
Fabric chemistry is the quiet troublemaker. Cotton behaves differently from polyester. A 60/40 cotton-poly blend may accept heat differently than 100% polyester performance wear. Nylon often needs a lower-temperature adhesive. Spandex-rich garments stretch aggressively, so a rigid transfer can crack. Coated fabrics, water-resistant jackets, and treated workwear may resist adhesion because the surface finish blocks adhesive from gripping the fiber structure.
Each transfer type has its own temperament:
- Heat transfer vinyl: strong for clean shapes, single-color marks, player names, and low-complexity designs. It usually feels slightly raised.
- DTF transfers: practical for full-color logos, shadows, gradients, small type, and short runs where digital print flexibility matters.
- Plastisol transfers: useful for repeatable, screen-print-like results, especially when opacity and durability are priorities.
- Sublimation: best on white or light polyester because the dye bonds into polyester fiber rather than sitting on top.
A heat press is not a household iron with better branding. It is production equipment. Uneven platen temperature can create one sleeve logo that bonds cleanly and another that lifts at the top corner. A five-second timing difference can matter on heat-sensitive fabric. Peel method matters too. Hot peel, warm peel, and cold peel films are not interchangeable. Some transfers also benefit from a short post-press with parchment or finishing paper to improve wash performance and surface feel.
The substrate always gets a vote. In packaging, a soft-touch coating changes how ink looks, rubs, and dries on a folding carton. In apparel decoration, garment fibers change how the transfer bonds, feels, stretches, and ages. The same design can behave differently on cotton fleece, ribbed fabric, a polyester tote, and a coated jacket.
Key Specs Buyers Should Confirm Before Artwork Approval
Approval should not mean “the logo looks right on my screen.” It should mean the production details are locked. Many decoration disputes begin with vague approval: no finished size, no fabric content, no placement reference, and no discussion of how the logo should feel after pressing.
Start with finished width and height in inches. A left-chest mark may be 3 to 4 inches wide. A center-chest graphic may run 9 to 12 inches. A sleeve transfer may need to stay under 2.5 inches high to avoid seams or tapering. Tote fronts, hat patch areas, and neck labels carry their own limits. Irregular surfaces need testing, not optimism.
Artwork requirements depend on the production method. Cut vinyl needs clean vector art, usually AI, EPS, SVG, or a production-ready PDF. Full-color DTF or printed transfers often work from high-resolution transparent PNG files, layered PSD files, or properly prepared vector files. A 72 dpi screenshot from a website is rarely acceptable. For many printed transfers, 300 dpi at final size is a safer target. Minimum line thickness may reach 0.5 mm on some systems, but adhesive, fabric texture, and wash expectations can push that limit higher.
Color needs written documentation. A logo matched to a website hex code may not match on black fleece, white polyester, kraft mailers, and coated product packaging. Light ink on dark garments needs opacity. Brand reds can drift orange under certain transfer methods. If apparel must coordinate with hang tags, package branding, or Custom Packaging Products, request a physical proof or at least a supplier-approved color target.
Use this checklist before releasing an order:
- Finished size in inches, not “small” or “large.”
- Placement mockup with distance from collar, seam, pocket, or hem.
- Garment fabric content, including coating or stretch percentage if known.
- Finish target: matte, glossy, soft hand, bold hand, stretch, or high opacity.
- Wash durability expectation, especially for uniforms and merchandise.
- Proof approval path, including who signs off and by what date.
For premium apparel, retail merchandise, uniforms, or artwork with fine type and gradients, sample first if the schedule allows. A single test press can reveal edge detail, hand feel, color shift, opacity, and stretch behavior before hundreds of garments are at risk.
Process and Timeline From File Upload to Pressing
A typical order follows a predictable chain: quote request, artwork review, proofing, material selection, test press when needed, production printing or cutting, quality check, packing, shipping, and final application. If the supplier is also pressing garments, add receiving, sorting, size verification, placement setup, pressing, cooling, folding, and possibly individual bagging.
Timelines vary, but buyers should think in business days rather than hours. A straightforward short run of loose transfers usually moves faster than a multi-placement apparel order with supplied garments, specialty film, individual packaging, and a fixed event date. A practical planning window is often 7 to 15 business days after proof approval for many standard jobs. Larger or more complex orders can take longer. Rush service may compress the schedule, but it does not remove artwork checks, curing requirements, or pressing discipline.
The slowdowns are usually boring. Low-resolution art. Missing garment details. Unclear sizing. A late switch from cotton tees to coated nylon jackets. Color changes after proof approval. Approvals sitting in an inbox for three days while the launch date stays fixed.
| Project Factor | Typical Buyer Question | Why It Affects Timing |
|---|---|---|
| Artwork quality | Is the file production-ready? | Cleanup or redraw work can add 1 to 3 business days before proofing. |
| Transfer type | Do we need vinyl, DTF, plastisol, or sublimation? | Each method has different setup, curing, cutting, or sheet preparation steps. |
| Fabric choice | Will this bond to our garment? | Coated nylon, stretch apparel, and performance fabrics may require test pressing. |
| Application scope | Are we ordering loose transfers or finished apparel? | Pressing, cooling, inspection, folding, and packing add labor time. |
| Deadline | Is this for an event or launch? | Shipping method, approval speed, and production capacity become critical. |
For trade shows, employee uniforms, product launches, and seasonal merchandise, build in a buffer. Heat pressing is repetitive, but it is not careless work. Each garment needs alignment, pressure, temperature, dwell time, peel timing, and inspection. Small setup choices repeat across every unit, which is why a weak placement guide can become a full-carton problem.
Keep version control tidy. The approval packet should include final design, size in inches, placement mockup, fabric content, press instructions, peel method, wash guidance, delivery date, and reorder plan. “Black hoodie logo final final” is not a production system.
Cost, Pricing, MOQ, and Unit Cost Drivers
Price is shaped by more than square inches. Transfer type, print method, color count, material waste, finishing, proofing, setup labor, order volume, and application labor all affect the quote. Two 4-inch designs can price differently if one is a single-color vinyl mark and the other is a full-color DTF logo with fine outlines and a white underbase.
As a broad planning range, small loose transfer orders may land around $0.75 to $3.00 per piece depending on size, method, and quantity. Larger runs can drop lower, sometimes $0.20 to $0.90 per transfer for simple or efficiently produced designs. Finished pressed apparel adds labor. Pressing a single chest logo might add $1.00 to $3.50 per garment. Multiple placements, sleeve work, relabeling, folding, and bagging can raise that number. These are planning ranges, not promises, because equipment, artwork complexity, garment handling, and local labor costs change the quote.
Minimum order quantity deserves an early question. Some suppliers accept very small batches, especially for DTF gang sheets or basic vinyl. Others set higher minimums for screen-based plastisol transfers because setup, screens, and washout make tiny runs inefficient. Specialty materials such as reflective, metallic, puff, glitter, flock, or stretch films may carry higher minimums or longer lead times.
| Option | Best Fit | Typical Cost Behavior | Buyer Watchout |
|---|---|---|---|
| Cut heat transfer vinyl | Simple names, numbers, solid logos | Efficient for small runs; labor rises with weeding complexity | Tiny details and thin strokes can be difficult to weed cleanly |
| DTF transfer | Full-color artwork and short-to-mid runs | Often flexible on quantity; gang sheets can reduce waste | Hand feel and edge softness vary by ink, powder, and curing quality |
| Plastisol transfer | Opaque, screen-print-like logos | Better economics as quantity rises | Setup can make very small orders less attractive |
| Sublimation | Light polyester products | Strong for compatible polyester items | Not suited to dark cotton or many non-poly fabrics |
Hidden costs can irritate more than the transfer price itself. Ask about shipping, rush fees, artwork cleanup, sampling, failed garment replacement, individual bagging, relabeling, and application labor. If garments are supplied by the buyer, clarify who carries the loss if a garment scorches, arrives mislabeled, or fails a test press. Not every problem is the decorator’s fault; not every risk should land on the buyer either. Get the policy in writing.
For an accurate quote on custom heat transfer stickers, send design dimensions, quantity, garment fabric, number of placements, transfer preference, deadline, packaging needs, and whether you need loose transfers or finished apparel. If the decorated items are part of a retail packaging program, add folding, bagging, size labels, barcode labels, or carton packing instructions. Apparel and product packaging often meet at the warehouse, not the design screen.
External standards can help frame the larger program. For shipping finished garments or boxed merchandise, the International Safe Transit Association publishes package testing resources at ista.org. If the project includes paper-based retail packaging, FSC sourcing information at fsc.org can support material decisions beyond the transfer itself.
Common Mistakes That Cause Peeling, Cracking, or Delays
The most common failure is treating press instructions as friendly advice. They are production parameters. If a transfer calls for 300°F, medium pressure, 12 seconds, cold peel, and a 5-second post-press, changing two of those variables can cause weak adhesion, scorch marks, ghosting, or early edge lift.
Design mistakes come next. Type gets too thin. A huge logo is placed across a stretchy chest panel. A low-contrast gray mark disappears on heather fabric. Raster artwork has jagged edges because the only available file came from a social media profile image. Pockets, zippers, seams, and curves get ignored until the press operator has to make a judgment call under deadline pressure.
Material mismatch is where optimism gets expensive. A transfer intended for cotton may not bond well to coated nylon. High-stretch activewear can crack a rigid graphic. Heat-sensitive synthetics may shine, shrink, or scorch under settings that work beautifully on heavyweight cotton fleece. Performance apparel often includes finishes that improve moisture management but complicate adhesion. Testing is not bureaucracy. It is loss prevention.
Small operating mistakes compound quickly:
- Uneven pressure because seams, collars, or pockets sit under the platen.
- Moisture trapped in garments because fabric was not pre-pressed.
- Dirty fabric, lint, or loose fibers under the transfer.
- Wrong peel timing, especially confusing warm peel and cold peel films.
- Hot garments stacked too soon, which can imprint or disturb the graphic.
- Washing too quickly after pressing instead of allowing a 24-hour cure period when recommended.
Delays are often human rather than technical. Vague feedback slows proofing. Changing sizes after proof approval forces a new setup. Adding garment styles late can trigger new testing. Approving a mockup without checking real-life placement can create a batch that is technically correct but visually wrong.
Placement deserves more attention than it usually gets. A logo half an inch too low on a tee can look sloppy. On a sleeve, that same half inch may run into a taper or seam. On uniforms, consistency is part of the brand promise. The logic matches branded packaging: alignment, repeatability, and finish quality tell customers whether the business pays attention.
Next Steps Before You Place an Order
Start with the product being decorated. Measure the printable area. Confirm fabric content from the garment label or supplier spec sheet. Decide whether the transfer should feel soft, bold, stretchy, glossy, matte, reflective, or highly durable. Those choices narrow the production options quickly.
Then build a simple order brief. It does not need polish. It needs specifics. Include artwork files, brand color references, quantity by design, placement notes, target delivery date, and whether the transfers will be applied in-house or by the supplier. If application happens in-house, confirm that the heat press can meet the required temperature and pressure. A small clamshell press can handle many jobs, but thick seams, bags, and uneven surfaces may need pillows, pads, or a different platen.
Request one proof for visual approval. Request one application test when the garment is expensive, the logo is detailed, or the order will be washed frequently. For uniforms, staff apparel, and merchandise sold to customers, the cost of a test is usually smaller than the cost of explaining failures later.
Before approving production, ask for these operating details:
- Press temperature, dwell time, and pressure guidance.
- Peel method: hot, warm, or cold.
- Post-press recommendation, if any.
- Wash care instructions, including first-wash timing.
- Reorder file name, version number, and saved size.
- Packing requirements for finished apparel or loose transfers.
If the order connects to broader package branding, align the apparel decoration with product packaging, inserts, labels, and shipping materials. A black hoodie logo, a kraft mailer label, and a retail box do not need to match perfectly, but they should feel like they came from the same brand system. Disciplined specs beat guesswork.
Custom heat transfer stickers are practical when buyers need flexible decoration, predictable branding, and a clean path from artwork to finished product. The confident order is not the one with the prettiest mockup. It is the one with the right file, the right fabric, the right transfer system, and the right production instructions before the first press cycle starts.
FAQ
Are custom heat transfer stickers the same as vinyl stickers?
No. Vinyl stickers usually use pressure-sensitive adhesive for hard surfaces, while heat transfer stickers bond to fabric or compatible materials using heat, pressure, and time. Some heat transfers are made from heat transfer vinyl, but the application method and end use are different from peel-and-stick decals.
What fabrics work best with custom heat transfer decals?
Cotton, polyester, and many cotton-poly blends are common choices, but the best option depends on the transfer type and press settings. Nylon, coated fabrics, spandex-heavy garments, and performance textiles should be tested before full production because adhesion and heat tolerance can vary sharply.
How long do heat transfer logo stickers last after washing?
Durability depends on transfer material, fabric, application accuracy, wash temperature, detergent, drying method, and garment stretch. A properly applied transfer on compatible fabric can last through many washes, while poor pressure, wrong temperature, or rushed washing can shorten its life quickly.
Can custom heat press stickers include full-color artwork?
Yes. DTF and certain printed transfer methods can reproduce gradients, small details, and full-color logos better than basic cut vinyl. For best results, supply high-resolution artwork with transparent backgrounds and confirm minimum line thickness before proof approval.
What should I send to get an accurate quote for heat transfer stickers?
Send artwork, finished size, quantity, garment fabric, placement location, transfer type preference, deadline, and whether you need loose transfers or finished pressed products. Include brand color targets, packaging requirements, and wash durability expectations to reduce quote revisions.


