Buyer Fit Snapshot
| Best fit | Custom Lamination for Rigid Boxes projects where brand print, material claims, artwork control, MOQ, and repeat-order consistency need to be specified before quoting. |
|---|---|
| Quote inputs | Share finished size, material target, print colors, finish, packing count, annual reorder estimate, ship-to region, and any compliance wording. |
| Proofing check | Approve dieline scale, logo placement, barcode or warning zones, color tolerance, closure strength, and carton packing before bulk production. |
| Main risk | Vague material claims, crowded artwork, missing packing details, or unclear freight terms can make a low unit price expensive after revisions. |
Fast answer: Custom Lamination for Rigid Boxes: Cost and Finish should be specified like a repeatable production item. The safest quote records material, print method, finish, artwork proof, packing count, and reorder notes in one written spec.
Production checks before approval
Compare the actual filled-product size with the drawing, then confirm tolerance on folds, seals, hang holes, label areas, and retail display edges. Reserve space for logos, QR codes, warning copy, and material claims before decorative graphics fill the panel.
Quote comparison points
Review material grade, print process, finish, sampling route, tooling charges, carton quantity, and freight assumptions side by side. A quote is only useful when the supplier can repeat the same color, closure quality, and packing count on the next order.
Custom Lamination for Rigid Boxes: Cost and Finish
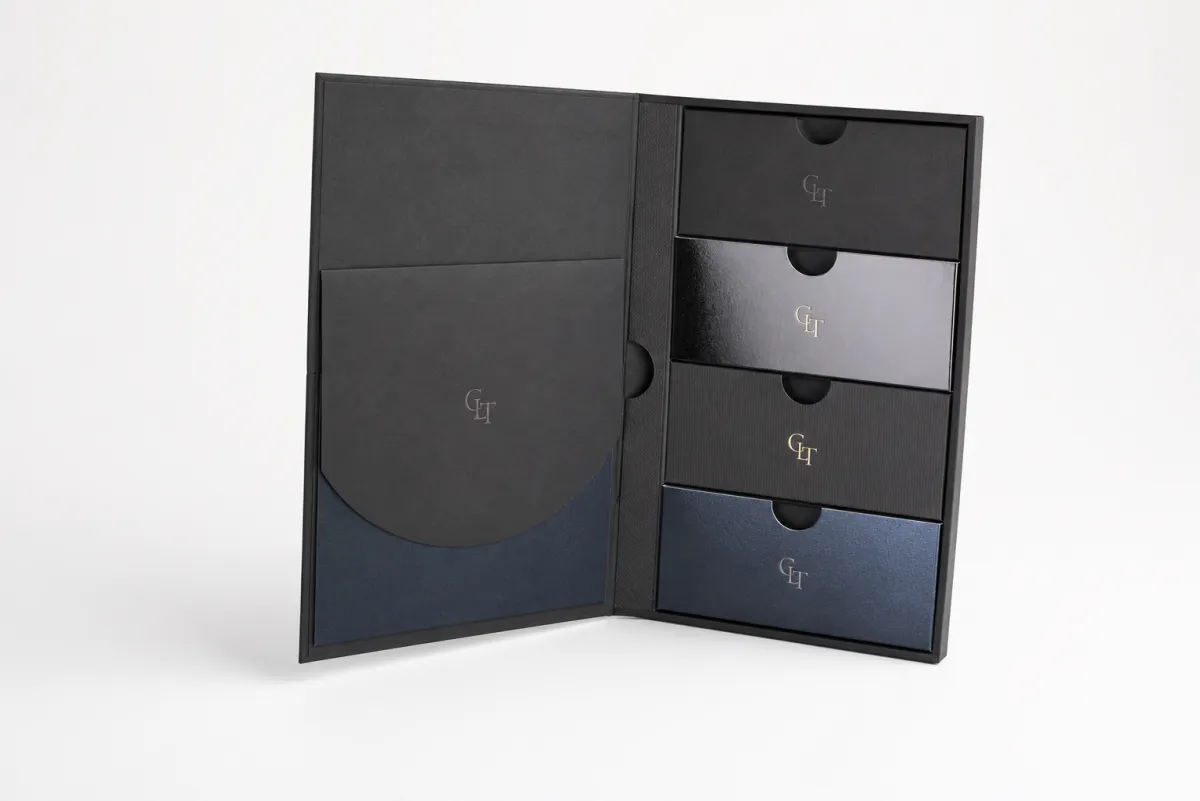
Custom lamination for rigid boxes can look like a line item on a quote and behave like the whole package. I have seen a box look immaculate on a digital proof, then arrive with a surface that felt dull, fingerprint-prone, and just a little too disposable for the product inside. That is the real power of custom lamination for rigid boxes: it protects the print, changes the hand-feel, and sets the tone before the lid lifts.
For cosmetics, electronics, gift sets, and premium retail, the finish is not an afterthought tucked into production notes. It belongs in the design conversation from the beginning. The same artwork can read crisp under gloss, quiet under matte, plush under soft-touch, or sharply textured under a specialty film. Custom lamination for rigid boxes can take one print file and turn it into several distinct packaging identities, which is useful and a little dangerous if the team skips sampling.
There is a price to that flexibility. A cleaner surface can cost more. A tactile finish can wear differently. A coating that looks rich under studio lights may not behave the same under warehouse LEDs or store fluorescents. Custom lamination for rigid boxes affects Cost, Lead Time, durability, and the odds of having to fix mistakes later. If you are comparing structure and finish side by side, the Custom Packaging Products page gives a good sense of how those choices interact.
In practice, the finish often decides whether a package feels intentional or merely assembled. That sounds like a small distinction, but on a retail shelf it is the difference between a box people notice and a box they just handle. A matte wrap can make a black rigid box feel composed. Gloss can make the same box feel louder, almost theatrical. Soft-touch can read as expensive without shouting. None of that is accidental.
Custom Lamination for Rigid Boxes: What Actually Changes
Begin with the mechanics. Lamination is a thin film or coated layer applied to the printed wrap before the wrap is mounted onto the rigid board. In custom lamination for rigid boxes, that layer does three jobs at once: it protects against scuffs and fingerprints, alters the tactile surface, and shifts the way color behaves under light. A black wrap with matte lamination looks denser and calmer than the same art under gloss, which can kick back light and make the surface feel lighter than intended.
That visual shift is why custom lamination for rigid boxes changes perceived value so quickly. Most buyers do not say, “The lamination is slightly off.” They notice that the box feels wrong. The usual culprits are glare, fingerprints, weak color depth, or a surface texture that clashes with the brand story. Luxury skincare often benefits from a lower-sheen look. Electronics can handle a sharper, more polished surface. Gift packaging sits somewhere in the middle and usually depends on how much visual energy the brand wants to project.
The common finishes are matte, gloss, soft-touch, and specialty films. Matte lowers glare and tends to hide fingerprints better. Gloss raises contrast and makes colors appear brighter, which helps when a box has to stand out on a crowded shelf. Soft-touch adds a velvety feel that people either love immediately or notice instantly. Specialty films can include anti-scratch layers, linen textures, or subtle grains that support a premium position without shouting. In custom lamination for rigid boxes, each choice signals something different.
One myth deserves to disappear: lamination is not just about protection. If that were the whole job, every box would use the cheapest film available and stop there. Custom lamination for rigid boxes is part of package branding. It helps decide whether the box feels restrained, vivid, editorial, tactile, or overly shiny. The surface treatment can steer a design toward modern luxury or toward bargain-bin promo with almost no effort at all.
From a buyer’s point of view, the finish matters because customers touch the box before they study the copy. A wrinkled or bubbly surface can make a strong layout look rushed. A crisp, well-chosen lamination can make a plain design feel far more expensive than the print budget suggests. That is why custom lamination for rigid boxes usually gets locked early in the spec review.
A box can be expensive and still feel cheap if the lamination fights the artwork. That mismatch shows up immediately.
When the finish is right, the board feels tighter, the print reads with more intention, and the box handles more wear. When the finish is wrong, every fingerprint, scuff, and reflection becomes part of the design whether you wanted it or not. That is the practical difference custom lamination for rigid boxes makes.
How Custom Lamination for Rigid Boxes Works
Custom lamination for rigid boxes usually follows a familiar production path. The wrap gets printed and cured first. The selected film is applied to the sheet. Then the laminated wrap is mounted onto the rigid board, folded around the edges, and pressed into place so the seams and corners stay clean. The sequence sounds simple because the concept is simple. The trouble lives in the details.
Dry or thermal lamination is common for rigid box wraps because those methods give better control over flatness and adhesion. Wet lamination exists, but premium paper-based wraps often avoid it because moisture can cause curl or introduce long drying windows. Pressure-sensitive films also appear in some workflows, especially where a particular surface feel or lower-heat application is needed. The method matters because custom lamination for rigid boxes has to stay flat and consistent across the full wrap, not only in the center panel that appears in product photos.
Edges and corners are where weak lamination reveals itself first. A film that is too stiff can lift at the score lines. A film that is too soft can wrinkle when the wrap folds around the board. Uneven adhesive leads to bubbles or silvering near the folds, and that is exactly the kind of defect people notice during unboxing. Custom lamination for rigid boxes needs enough stretch and bond strength to survive mounting, corner wrapping, and transport.
The finish also has to play nicely with other effects. Foil stamping can sit under lamination, but the order and compatibility need checking. Embossing and debossing add dimension, though strong texture under a film can soften the edges. Spot UV can look sharp over soft-touch, provided the board stays stable and the file is built with the right spacing. Custom lamination for rigid boxes works best when the finish stack is planned as a single system instead of a checklist of add-ons.
Sample approval should not be treated as a luxury. A deep black background, fine serif text, or dense color coverage can change noticeably once the finish is applied. Soft-touch and high-gloss films are the biggest wildcards because they alter contrast more than most screens suggest. Thin rules, tiny type, and layered gradients deserve a physical sample before production gets the green light. Custom lamination for rigid boxes can hide certain flaws, but it can also make others impossible to ignore.
Good suppliers will review the board stock, adhesive compatibility, and scoring tolerances before the run begins. That part matters more than it sounds. A finish that behaves well on one board caliper can fail on another. In real packaging runs, the lamination is only one piece of the system. Board, print, score, and wrap all have to cooperate.
For brands that want a stronger grasp on shipping durability, it helps to look at packaging test methods rather than guessing. The ISTA test library is a solid reference for transit stress, drop testing, and vibration exposure. Custom lamination for rigid boxes is not a shipping test by itself, but the finish still has to survive the environment the box will live in.
That is the workflow in plain terms: print, cure, laminate, mount, inspect. Easy to say. Harder to do cleanly. Custom lamination for rigid boxes is usually where the difference between a promising sample and a production-ready package becomes visible.
Custom Lamination for Rigid Boxes Cost and Pricing Factors
Cost is where the decision becomes concrete. Custom lamination for rigid boxes is rarely the biggest quote item, but it can move the unit price enough to matter, especially on shorter runs. Film type, box size, total surface area, quantity, print coverage, and whether the finish is standard or specialty all affect the number. Larger boxes consume more material. Complex wraps take more labor. Specialty finishes cost more because the material and the handling both cost more.
On a mid-size rigid box run, standard matte or gloss lamination often adds roughly $0.08-$0.20 per unit at higher quantities, though shorter runs can land higher. Soft-touch usually costs more, often around $0.15-$0.35 per unit depending on volume and size. Specialty films, anti-scratch upgrades, and textured finishes can reach $0.20-$0.45 or more when the order is small or the wrap is large. Those figures are planning ranges, not promises. Real quotes move with the spec.
Custom lamination for rigid boxes shifts price because the film choice changes both material use and handling. Soft-touch and textured finishes often need more careful application and can create more waste if the setup is not dialed in. Gloss is usually easier on the line, yet it can expose dust and surface marks more readily, which may raise inspection standards. Full-bleed artwork, deep blacks, and heavy ink coverage can also nudge pricing upward because defects show more clearly.
Hidden variables matter too. Setup fees may appear for the lamination step if the film is not already stocked. Minimum order quantities can push the unit price up on small orders. Sample charges matter if you need prototypes in multiple finishes. Rework risk matters if the spec is vague, because a misunderstood finish choice can lead to remakes, and remakes are never cheap. Custom lamination for rigid boxes rewards precise specifications. Vague specs have a way of collecting costs.
The simplest buying rule is to request a quote that separates the board, printed wrap, lamination, and assembly. If everything is bundled into one number, comparison gets murky. A cheaper headline price may hide higher setup charges or a weaker finish. Once the pieces are broken out, custom lamination for rigid boxes becomes easier to judge on value instead of sticker shock.
| Finish | Typical Look and Feel | Common Cost Impact | Best Use Case |
|---|---|---|---|
| Gloss | Bright, reflective, high color pop | About $0.08-$0.20 per unit on mid-to-higher runs | Retail packaging that needs shelf impact |
| Matte | Low sheen, cleaner reading, reduced glare | About $0.08-$0.22 per unit | Premium product packaging and restrained branding |
| Soft-touch | Velvety, tactile, understated luxury | About $0.15-$0.35 per unit | Cosmetics, gift sets, high-value custom printed boxes |
| Anti-scratch matte | Matte surface with extra abrasion resistance | About $0.14-$0.30 per unit | Shipping-heavy programs and repeated handling |
| Textured specialty film | Linen, grain, or custom surface texture | About $0.20-$0.45+ per unit | Branded packaging that needs a distinct tactile signature |
Short-run math is usually harsher. A few hundred boxes mean the setup and labor take a larger share of the total, so the spread between matte and soft-touch can look dramatic. At higher volumes, the unit gap narrows and the upgrade becomes easier to defend if the finish strengthens the brand story. That is why custom lamination for rigid boxes often becomes a volume question as much as a design question.
There is a detail many teams miss: the cheapest finish is not always the cheapest result. A weak laminate can scuff in transit, and damaged boxes can trigger reprints or customer complaints. If a product launch depends on the box arriving clean, a better finish may save more than it costs. Custom lamination for rigid boxes should be measured against risk, not only against invoice price.
If you are comparing vendors, ask what stock they use, whether the film is anti-scratch, how they handle minimums, and whether they can show a sample from a similar job. A good supplier answers directly. A vague one wanders. That difference tells you plenty.
Choosing the Right Lamination: Finish, Feel, and Durability
The right finish depends on how the box will be seen, touched, shipped, and stored. That sounds plain enough, yet many teams still pick a finish because they liked one chip on a sample board. Custom lamination for rigid boxes should match the product category first. Cosmetics often benefit from matte or soft-touch because those finishes support a controlled luxury look. Electronics can work well with gloss or anti-scratch matte, depending on whether the brand wants a crisp technical feel or a quieter premium presentation. Gift sets usually need more tactility because the unboxing moment carries real weight.
Gloss is the loudest option. It produces strong contrast, bright color, and a polished retail impression. It also shows fingerprints and glare, which can be a problem under bright lighting or in high-touch environments. Matte usually plays as the safest middle ground because it reduces glare and keeps copy easier to read. Soft-touch is different again. It signals luxury in a quieter register. On the right artwork, it can feel expensive in a way that does not try too hard. Some buyers still dislike how it behaves if the surface lacks scratch resistance.
For shipping-heavy programs, durability matters more than visual drama. Anti-scratch matte often earns its keep because corners, stacked cartons, and warehouse handling can wear through standard films. In custom lamination for rigid boxes, that extra resistance can preserve the first impression long enough for the customer to see it. If the box mostly sits on a shelf and is handled lightly, standard matte may be enough. If the box moves through fulfillment, retail backstock, and repeated customer handling, stronger protection starts to make sense.
Textured films help when package branding needs a distinct tactile memory. A light linen or grain can make a box feel deliberate without leaning on extra print effects. Texture is not a free win, though. Fine typography can lose crispness if the film is too heavy. Detailed artwork can feel busy if the surface already has a strong pattern. Custom lamination for rigid boxes works best when the finish is chosen alongside the layout, not bolted on afterward.
A useful way to decide is to ask four questions:
- How close will the buyer get to the box before opening it?
- How much direct handling will the box take in storage, retail, or fulfillment?
- Does the artwork depend on color depth, reflection, or a quieter tactile feel?
- Does the finish need to support embossing, foil, or spot UV without visual conflict?
If the answers point toward heavy handling and low glare, matte or anti-scratch matte is usually the safer choice. If they point toward shelf impact and vivid color, gloss can make sense. If the answer is “we need the box to feel expensive the second someone touches it,” soft-touch moves up the list. That is the useful thing about custom lamination for rigid boxes: the same structure can serve different market positions without redesigning the entire box.
The finish also has to match the rest of the build. Rigid boxes with sharp die cutting, wrapped corners, and tight panel alignment can support a more refined finish because the structure reinforces the look. If the board or wrap is less consistent, a forgiving matte finish often hides more flaws than gloss. No drama there. Just packaging reality.
If sustainability sits inside the brief, speak with the supplier about board sourcing and certification instead of assuming every surface treatment is equal. The FSC system is a common reference for responsible forest management, and it matters when branded packaging needs both visual polish and a cleaner material story. Custom lamination for rigid boxes does not replace responsible sourcing, but it can fit inside it cleanly.
A practical rule still holds: choose the finish based on how the box will behave in real conditions, not under studio lights. That keeps custom lamination for rigid boxes from turning into a very expensive guess.
Process and Timeline: From Artwork Proof to Production
Timeline planning is where many jobs slip. Custom lamination for rigid boxes is not a one-step process. It starts with artwork preparation, then proofing, then finish selection, then sample approval, then production, then mounting and final inspection. Rush any one of those stages and the schedule can wobble. Premium retail packaging is especially sensitive because color and feel have to match the brand promise exactly.
A realistic turnaround for standard custom lamination for rigid boxes is often 12-18 business days after proof approval, though repeat runs can move faster and specialty finishes can take longer. Sampling adds days. Artwork changes after sampling effectively reset the clock. Teams that need a launch date should lock the spec early. Late design changes are a fast path to stress.
Several things slow the job down. Late artwork changes are the obvious one. Color matching issues are another, especially with deep blacks, metallic details, or brand-critical hues. Specialty film sourcing can add time if the supplier does not already stock the finish. Approval delays can be the slowest part of all, because production often waits while everyone pretends the hold-up is temporary. Custom lamination for rigid boxes has patience only up to a point.
Before production starts, a solid approval checklist should confirm the dieline, board thickness, surface finish, print method, and sample reference. If embossing, spot UV, or foil stamping appears in the design, that stack should be checked too. The wrap needs enough margin for folds and corners, and the finish should not fight the extra effects. Custom lamination for rigid boxes works best when the file is built for it from the start.
It also helps to consider how the box will be tested after production. For shipping-sensitive programs, ask whether the finished box has been reviewed against relevant transit expectations rather than judged by eye alone. The ISTA framework is a useful reference if the packaging has to survive drops, vibration, or repeated distribution handling. The finish itself is visual, but the box still has to move through a real supply chain.
Production also benefits from a clean handoff spec. Include dimensions, finish name, film type, target sheen, color tolerance expectations, and whether the box will be handled in retail or direct-to-consumer fulfillment. Custom lamination for rigid boxes is much easier to execute when the supplier is not guessing what “premium matte” means in your brand language.
Here is a practical internal check before you commit:
- Confirm the exact box dimensions and board caliper.
- Lock the finish choice and whether it is standard, soft-touch, or anti-scratch.
- Approve a physical sample if the artwork is dark, detailed, or high value.
- Verify the print stack if foil, embossing, debossing, or spot UV is included.
- Set the lead time with a buffer for shipping and final inspection.
Rushing this stage tends to cost more later. A poor sample approved too quickly becomes a shipment of boxes nobody wants to touch. Reprints, edge defects, and corner problems are more expensive than the extra days needed to get the finish right. That is the point of custom lamination for rigid boxes: the finish has to earn its place by reducing risk, not just by looking good in a mockup.
Common Mistakes That Make Lamination Look Cheap
The fastest way to make a premium box look ordinary is to pair the wrong finish with the artwork. That happens far more often than teams admit. A glossy film on a layout meant to feel quiet can turn the whole package into a reflection problem. A heavy texture on a minimal design can make the box feel ornamental in the wrong way. Custom lamination for rigid boxes needs to support the brand message, not start an argument with it.
Ignoring fingerprints and scuff behavior is another familiar mistake. Some finishes look excellent for a brief moment, then start showing every touch. If the box will be handled in stores, during packing, or by customers who inspect it closely, test the finish in real conditions. Matte and anti-scratch options usually hide marks better than high gloss. Soft-touch can look rich, but only if the surface coating is selected carefully. Custom lamination for rigid boxes should protect the package, not advertise fingerprints.
File preparation matters more than many designers expect. Rich blacks, tiny type, thin rules, and low-resolution images can become obvious once the finish goes on. A soft-touch surface may deepen contrast in one area and flatten detail in another. Gloss may make dust and print irregularities easier to see. If the artwork was built for a screen instead of print, lamination often exposes that fact with no mercy. That is why custom lamination for rigid boxes should be checked against a printed proof, not just a PDF.
Corner cracking and weak edge wrapping are also obvious tells. If the board score is too tight or the film is too stiff, corners can split or lift. If the adhesive is inconsistent, bubbles may appear near seams. If the wrap is trimmed poorly, the edges look unfinished even when the rest of the box is beautiful. Those tiny details separate strong retail packaging from packaging that only photographs well.
Treating every supplier as if their lamination equipment and quality control are identical is another mistake. They are not. Board stock varies. Adhesives vary. Finishing equipment varies. The same custom lamination for rigid boxes spec can produce a clean, premium result in one shop and a tired result in another. That is why samples matter more than sales language. A friendly email does not protect corners.
Skipping samples may be the biggest mistake of all. Screens cannot show sheen, tactile feel, fingerprint resistance, or how color shifts under different light. A physical sample tells you whether the finish helps the brand or merely makes the box more expensive. For a high-value product, the sample is not optional. It is the least costly insurance in the job.
For teams comparing different rigid box packaging options, the finish should be reviewed alongside the structure, not after the box is already approved. Custom lamination for rigid boxes can make a straightforward layout feel polished, but it cannot rescue weak artwork, poor board choices, or careless fold lines. That kind of rescue fantasy burns budgets fast.
One more practical note: boxes meant for repeated use, return programs, or gift reuse should be checked for finish wear after several openings. A finish that looks good once may scuff badly by the third or fourth handling. For product packaging that stays on a desk or shelf, that matters. People keep the box longer when it still looks clean.
Expert Tips and Next Steps Before You Place an Order
The smartest first move is to request a physical sample with the exact board, print style, and finish you plan to use. Not a generic chip. Not a nearby match. The real thing. Custom lamination for rigid boxes can shift dramatically depending on the paper wrap, the ink coverage, and whether the box uses foil, embossing, or spot UV. A sample should show all of that in one piece so you can judge it honestly.
Build a simple spec sheet before you ask for quotes. Include the box dimensions, finish type, surface expectations, color sensitivity, and whether the box needs to survive shipping abuse or mostly sit on a shelf. Add board thickness, magnetic closure, ribbon pull, or any die-cut details if the structure uses them. The fuller the spec, the easier it is for a supplier to quote custom lamination for rigid boxes without guessing.
Compare vendors on more than price. Lead time matters. Sample policy matters. Finish consistency matters. So does the way a supplier responds when a problem appears. A vendor that explains a color shift, a corner issue, or a lamination limit is usually more helpful than one that promises everything. In packaging, clarity beats optimism.
If the finish is new to your brand, or the box carries a high-value product, consider a small test run. You do not need to guess your way through a launch. A short run can reveal whether the finish shows fingerprints, whether the box resists shelf wear, and whether the tactile feel matches the positioning. Custom lamination for rigid boxes is easier to correct on 300 units than on 30,000. That is basic math, not drama.
Also check whether the supplier can support responsible material sourcing if that sits in your brief. FSC-certified board is a common request, and it helps when branded packaging needs to support both visual polish and a cleaner procurement story. If sustainability is customer-facing, say so early. It changes the material discussion quickly.
Here is the short version of what to do next:
- Review the current pain points in your box: scuffs, glare, fingerprints, or weak shelf presence.
- Pick two finish options instead of ten. Most projects do not need more.
- Request physical samples with the exact artwork and board type.
- Ask for quotes that split board, print, lamination, and assembly.
- Lock the spec before you place the order for custom lamination for rigid boxes.
If you are comparing packaging structures, the Custom Packaging Products page shows how finish decisions sit alongside board style, magnetic closures, and insert design. That context matters more than a lot of teams expect, because the finish does not live alone.
The bottom line is plain. Custom lamination for rigid boxes sits where appearance, cost, and durability meet. Choose it carelessly and the box looks ordinary, scuffs fast, or costs more than it should. Choose it well and the same structure can feel like true premium retail packaging. My practical recommendation is simple: narrow the finish choices, request a real sample, and sign off only after you have seen how the box behaves under normal handling, not just under nice lighting.
What is custom lamination for rigid boxes, and why does it matter?
It is a protective and decorative film applied to the printed wrap before the wrap is mounted onto the rigid board. Custom lamination for rigid boxes matters because it changes the feel, shine, scuff resistance, and overall perceived value of the box. The same design can look modern, quiet, flashy, or cheap depending on the finish.
Which lamination finish is best for rigid boxes with fingerprints?
Soft-touch and matte finishes usually hide fingerprints better than high-gloss films. Anti-scratch matte is often the smarter choice when boxes will be handled a lot or stacked during shipping. Still, test the finish on a real sample because inks, textures, and board stock can change how visible marks look.
How much does custom lamination for rigid boxes usually add to cost?
The price impact depends on film type, box size, quantity, and whether the finish is standard or specialty. Basic matte or gloss is usually the most budget-friendly, while soft-touch and textured films raise the unit cost. Ask for a quote that breaks out setup, material, and assembly so you can compare suppliers accurately.
What is the typical turnaround for laminated rigid boxes?
Standard runs are often faster than custom specialty finishes, but the exact timeline depends on sampling and approval. Artwork changes, finish sourcing, and quality checks can extend the schedule more than the lamination step itself. Build in time for proofs and physical samples if the box has tight color or feel requirements.
Can I combine lamination with foil, embossing, or spot UV?
Yes, but the order and material compatibility matter. Some finishes work better than others with foil, texture, and raised effects, especially on detailed artwork. Confirm the full stack-up with your supplier before production so the effects do not interfere with each other.

