Why Boutique Brands Use Logo Patches to Add Instant Value
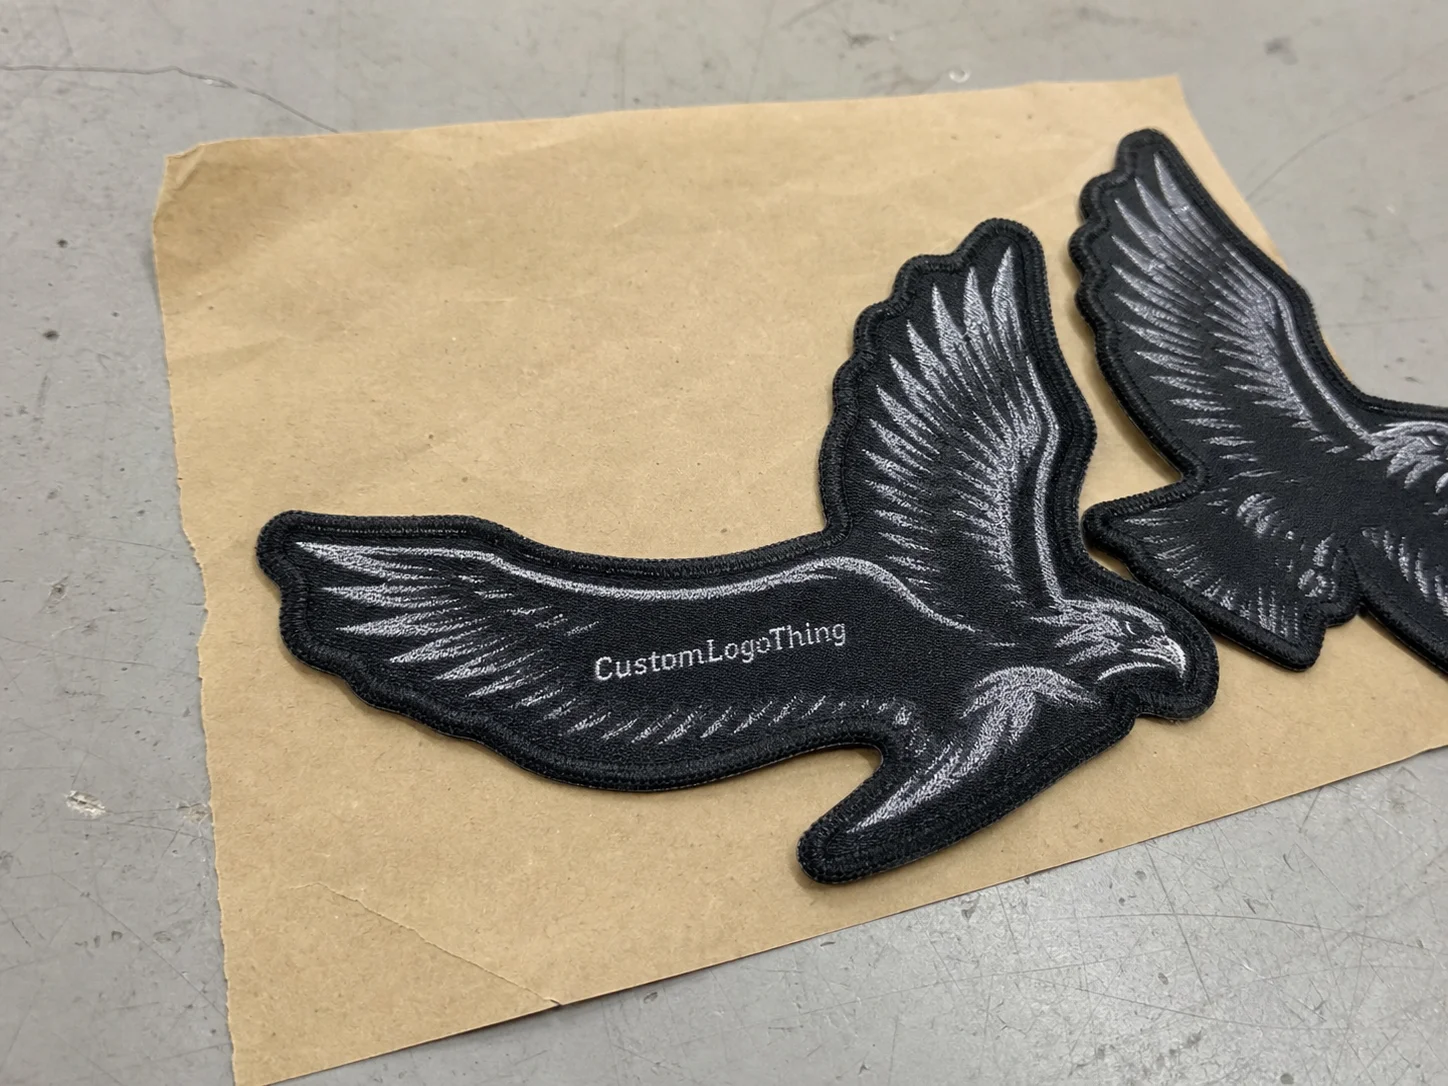
Custom Logo Patches for boutique brands do something a flat logo often cannot: they give a product texture, depth, and a tactile cue that makes the garment feel more deliberate the moment someone picks it up. A woven badge, stitched emblem, or debossed leather tab creates physical presence, and that presence matters when a brand is selling detail as part of the product itself.
For small collections, patches can do a lot of work without changing the garment pattern or adding a full print program. They are easy to place on denim jackets, caps, tote bags, overshirts, hoodies, knitwear, and accessory trims, which makes them useful for brands that need a repeatable mark across multiple SKUs. That repeatability helps a collection feel connected even when the silhouettes vary.
They also carry clear brand cues. Patches can suggest heritage, craft, durability, or exclusivity, depending on how they are built and where they are placed. Boutique buyers tend to care about those signals because the purchase is rarely about function alone; it is about presentation, identity, and whether the product feels considered from the first glance to the last stitch. The patch often sits alongside retail packaging, hangtags, and custom packaging products as part of the same visual system.
There is also a practical upside. A patch can sometimes raise perceived value more effectively than another print location, especially on small-batch apparel where the customer expects texture and finish. A chest print is visible, but a stitched badge on a cap or a leather tab at a jacket hem often feels more like a brand marker than decoration. That difference is subtle, but in premium apparel, subtle differences are what customers notice.
How Patch Construction and Attachment Actually Work
Patches are not one product with one outcome. They are a family of constructions, and the right choice depends on the garment, the artwork, and the way the final item will be worn and cared for. A boutique brand should start with the use case, then narrow down the visual style.
Common patch types and where they fit best
- Woven patches — Best for fine detail, small text, and crisp logo edges. The threads are woven tightly, so they hold detail better than traditional embroidery.
- Embroidered patches — Good for bold logos, pronounced texture, and a classic apparel look. The raised surface gives more tactile depth.
- Leather and faux leather patches — Common on denim, workwear-inspired items, and premium lifestyle pieces. They can be debossed, embossed, laser-marked, or printed depending on the finish.
- PVC patches — A durable option for outdoor apparel, bags, and products that need sharp color separation and a dimensional look.
- Chenille patches — Soft, high-contrast, and retro in feel; a strong fit for varsity styling and fashion-led statement pieces.
- Printed patches — Useful when the artwork includes gradients, photographic elements, or details that thread cannot reproduce cleanly.
The artwork file matters as much as the patch style. Vector artwork is preferred because it gives clean edges and scales without losing shape, while low-resolution raster files often create trouble when a logo has tiny details or thin strokes. Good patch art usually needs controlled color counts, clear outlines, and line thickness that can survive the chosen construction. If a logo includes a very small tagline or hairline symbol, those elements may need to be simplified before sampling.
Attachment changes the final result too. Sew-on is still the most durable choice and the safest default for long-term wear. Iron-on can work, but only if the fabric can take heat and the garment care instructions support it. Adhesive backings are useful for temporary placement or certain production workflows. Velcro makes sense when the patch needs to be removable. Heat transfer styles are used in some apparel programs, but they should be tested on the actual fabric rather than assumed to perform well.
“A patch should fit the garment’s job, not just the mood board. A sample that looks right on paper but fails on the final fabric is still the wrong choice.”
Production usually follows the same basic sequence: artwork review, digital proofing, sampling, manufacturing, finishing, and final inspection. That last step is where weak borders, inconsistent thread tension, color drift, and uneven cut lines show up before the order ships. For buyers comparing Custom Logo Patches for boutique brands, this is where quality differences become obvious.
Key Material, Size, and Finish Factors That Affect the Result
Material selection changes the whole impression. Woven patches usually work best when the logo needs clarity. Embroidery adds texture and a hand-finished feel. Leather communicates premium styling quickly, while PVC leans more technical and rugged. Chenille brings a fashion-forward, retro look that can suit varsity-style drops or statement pieces.
Size matters more than many buyers expect. A patch that looks sharp at 3.5 inches wide may become hard to read at 1.25 inches if the logo includes fine text, multiple symbols, or narrow lines. Caps, cuffs, sleeve tabs, chest panels, and accessory surfaces each create different limits. On smaller surfaces, a simpler mark usually performs better because it reads more cleanly from a normal viewing distance.
Edge finishing is another detail that quietly changes quality. Merrowed borders create a classic stitched edge and help resist fraying. Laser-cut edges are useful for irregular shapes and cleaner silhouettes. Stitched outlines can separate a patch from the garment visually, especially when the base fabric is close in color. The best choice depends on the shape, the base material, and the desired level of contrast.
Color matching can be straightforward or surprisingly difficult. If a brand works from a specific Pantone reference, that should be provided early. Thread sheen also affects appearance; glossy thread makes a logo stand out more, while matte thread can feel quieter and more refined. Debossed leather or faux leather is especially effective for subtle branding, but it relies on strong form and a simple mark to stay legible.
Backing should be chosen for the garment and the production workflow, not just because it is the default option. A patch on a heavyweight denim jacket can tolerate a different build than one used on a lightweight knit or a delicate woven top. On soft or stretchy fabrics, a lighter patch and sew-on attachment often make more sense than a heat-based option that can distort the garment.
| Patch Style | Best Use | Typical Strength | General Cost Tendency |
|---|---|---|---|
| Woven | Small logos, fine text, clean branding | High detail clarity | Moderate |
| Embroidered | Bold marks, texture, classic apparel | Strong tactile feel | Moderate |
| Leather/Faux Leather | Denim, workwear, premium basics | Strong brand presence | Moderate to higher |
| PVC | Outdoor gear, bags, durable use | Weather resistance | Higher |
| Chenille | Varsity, fashion pieces, statement branding | Soft texture and visual impact | Higher |
For brands balancing apparel trim, branded packaging, and retail presentation, patches should be treated as part of the wider packaging and product system. They are not only decorative. They are one of the first visible signs of whether the brand has taken care with the whole line, the same way a box finish or insert card can change how the product is perceived before it is worn.
Custom Logo Patches for Boutique Brands: Cost, Pricing, and MOQ
Pricing for custom logo patches for boutique brands usually comes down to five variables: material, size, color count, backing type, and whether the order includes sampling or setup charges. Simple artwork generally costs less to produce than designs packed with tiny details, because the manufacturing process is easier and the chance of rejection is lower.
Minimum order quantity is often where boutique buyers feel the most pressure. A brand testing a capsule release may want 100 to 300 patches, while a supplier may price far more efficiently at 500, 1,000, or more. The unit price usually drops as quantity rises, but the brand gives up flexibility. For a limited-edition drop, that tradeoff can make sense. For a permanent branding element, a larger run can be more efficient.
Here is a practical way to think about budgeting:
- Lower quantity usually means a higher unit price because setup and labor are spread across fewer pieces.
- Higher quantity lowers unit cost but increases cash tied up in inventory.
- Complex artwork may need more proofing time and sometimes a sample round.
- Special backing or finish can add cost, but it may also reduce labor during application.
For many boutique buyers, the smarter comparison is not manufacturing cost alone but perceived retail value. If a patch makes a hoodie or cap feel more premium, it may support a stronger selling price and a cleaner brand image. That is especially true when the patch is part of a broader presentation system that includes packaging, inserts, and consistent visual language across the collection.
Typical quotes for smaller boutique runs can vary widely, but simple woven or embroidered patches usually fall below more specialized builds such as multi-layer PVC or chenille. On a 500-piece order, a small change in size, color count, or backing can move the unit price more than buyers expect. It usually makes more sense to request two or three clear options than to force one overly detailed version that slows approval and drives up cost.
As a rough market expectation, simple woven or embroidered patches in modest quantities often start around a low single-digit unit cost range, while more complex constructions can move into the mid single digits or higher depending on size and finish. That range shifts quickly with MOQ, so the exact quote matters more than any generic estimate. The strongest budgets are built around a target look and a realistic production method, not around the cheapest possible line item.
Production Steps and Timeline: From Artwork to Delivery
The workflow is fairly direct, but small delays stack up fast. A typical job begins with artwork submission, then spec confirmation, proof review, sample approval, production, inspection, and shipment. When the file is complete, the order moves efficiently. When the artwork is incomplete, the schedule stretches before production even starts.
Lead time is slowed down more by missing details than most buyers expect. Common hold-ups include unclear sizing, missing Pantone references, back-and-forth on thread colors, and late approvals. If the brand is still deciding whether the patch should sit on a jacket chest or a sleeve tab, the production file is not ready to lock.
Boutique brands can speed up the process by sending a complete spec at the start:
- Vector artwork or a high-resolution logo file.
- Target patch size in inches or millimeters.
- Preferred attachment method.
- Garment type and fabric notes.
- Color references, ideally Pantone values.
- Estimated quantity and target ship date.
For simple woven or embroidered patches, turnaround often lands in the 12-15 business day range after proof approval, though that depends on the supplier queue and order size. Specialty constructions such as debossed leather, detailed PVC, or chenille can take longer because the sample stage matters more. That extra time is not wasted; it helps prevent a full run from going wrong.
If the patch will be part of a recurring brand system, the first order should be treated like a pilot. It is much cheaper to catch a misread logo height, a weak border, or a fabric compatibility issue on a sample than after 1,000 garments have been trimmed, packed, and labeled. The same logic applies to packaging programs: small decisions early save expensive corrections later.
For shipments that need validation, suppliers may reference abrasion, wash, or transit testing expectations. In apparel programs, it is wise to ask whether the patch construction has been tested for the intended use. For outer cartons, inserts, and other packaging components, standards such as ASTM or ISTA may be relevant depending on the shipping profile. If paper components are part of the broader program, FSC-certified material may be worth considering; see FSC for general certification information.
Common Mistakes Boutique Brands Make When Ordering Patches
One of the most common mistakes is choosing a patch style from a mockup and only later finding out it does not behave well on the real garment. A thick embroidered badge may look perfect on a jacket illustration, but if the fabric is stretchy, thin, or highly draped, the patch can bubble, twist, or sit awkwardly.
Another frequent issue is loading too much detail into a small patch. Fine text, tiny icons, and narrow lines are the first things to disappear. If the patch will be 1.5 inches wide, the logo should be designed for that scale from the beginning rather than reduced at the last minute and hoped for the best.
Backing mistakes can be costly as well. Some buyers choose iron-on because it sounds convenient, then discover the garment fabric or care instructions make that a poor fit. Others ignore how long it takes to attach each patch by hand. A lower unit price can become an expensive production choice if application labor is slow.
Screen-only approval is another trap. Colors on a monitor do not always match thread, leather, or PVC. A physical sample or material mockup is a better safeguard when the patch will anchor a signature collection. That is especially true for premium retail packaging programs where the patch, tag, insert card, and outer box all need to feel like they belong together.
A final mistake is not planning for washability and wear. A patch on a tote bag may face abrasion, sun exposure, and rough handling, while a patch on a knit sweater may need a softer construction and gentler attachment. Matching construction to real use is the difference between a nice sample and a lasting brand asset.
Expert Tips for Getting a Better Custom Patch Result
Start with one hero application, not five. A strong cap patch or jacket chest patch can define the visual language of a collection, and once that works, the system can expand into sleeves, bags, or trims. That keeps the project focused and makes it easier to judge what is actually performing.
Design for silhouette first. If the outline reads clearly at a glance, the patch has a better chance of working across different garment types. Once the shape is solid, add detail only where the material can support it. Woven patches are excellent when the logo needs precision; embroidery and chenille are better when the brand wants texture and dimension.
For any signature collection, a small production sample is worth pushing for before the full run is approved. That is especially true if the patch will repeat across seasonal drops. One well-made sample can reveal whether the border is too heavy, whether the thread sheen feels right, and whether the patch sits cleanly on the intended fabric.
Wear and wash testing should happen early. If the garment is for frequent laundering, ask how the patch handles repeated wash cycles. If it is outdoor apparel, check whether the materials hold up to moisture, sunlight, and abrasion. For high-traffic items, the safest route is usually a construction that is simple, durable, and easy to inspect.
Placement consistency matters more than many brands expect. When the patch sits in the same position across a hoodie, a cap, and a tote, the brand starts to feel intentional and recognizable. That kind of repeatable placement helps apparel look connected to the rest of the presentation system, including packaging and labels.
It also helps to keep the patch spec aligned with the rest of the product language. If the box, insert, hangtag, and garment trim all share the same tone, the line feels coherent without becoming repetitive. The patch should support that system, not fight it.
Next Steps: Build a Smarter Patch Spec Before You Request Quotes
Before requesting pricing, gather the basics: artwork, target size, preferred attachment method, garment type, and approximate quantity. That simple prep work reduces quoting confusion and usually leads to better comparisons. It also helps a supplier tell you whether the concept is realistic for the material you want.
Compare at least two or three material options if the patch will be a recurring element. A woven patch might be the cleanest choice for detail, while a leather or PVC version may feel more premium or durable depending on the product. The best option is rarely the fanciest one; it is the one that balances appearance, wear, and budget without creating avoidable production problems.
If the patch will anchor a permanent brand system, ask for a sample or pre-production proof. That is especially true when the patch will appear alongside branded packaging, custom printed boxes, and product inserts, because tone mismatches become more visible when the whole line is shown together.
Before placing a full order, review three things carefully: placement, hand feel, and washability. Those practical checks catch more issues than a polished mockup ever will. And if the patch is being used to build out custom logo patches for boutique brands, the real goal is a specification that is intentional, repeatable, and easy to produce well every time.
When a boutique label gets the patch spec right, the whole garment feels more deliberate. That is the real value of custom logo patches for boutique brands: they turn a small surface into a strong brand cue without forcing a costly overhaul of the product.
FAQ
What are the best custom logo patches for boutique brands on apparel?
Woven patches are usually the best choice when the logo includes fine detail or small text. Embroidered and chenille patches bring more texture and a fashion-forward feel, while leather, faux leather, and PVC options work well when the brand wants a stronger statement or a more durable specialty look.
How much do custom logo patches for boutique brands usually cost?
Pricing depends on size, material, color count, backing type, and order quantity. Smaller runs usually cost more per unit because setup and production overhead are spread across fewer pieces. Clean artwork and simpler constructions often help keep the total cost under control.
What is the usual turnaround for boutique custom patches?
Turnaround depends on patch style, complexity, sampling needs, and quantity. Orders move faster when the artwork is ready, the size is clear, and approvals happen quickly. Specialty finishes and more complex constructions can add time before production begins.
Which backing should I choose for boutique clothing labels and apparel patches?
Sew-on is the most durable choice for long-term apparel use. Iron-on can work for certain garments, but it needs to match the fabric and care requirements. Velcro or adhesive options are better for temporary, removable, or application-specific needs.
Can custom logo patches for boutique brands work on delicate fabrics?
Yes, but the patch size, weight, and attachment method need to be chosen carefully. Lighter constructions and sew-on placement often perform better on delicate or stretchy fabrics. Testing on a finished garment sample is the safest way to confirm compatibility before a full run.