custom mailing bags do a lot more than carry a product from warehouse to doorstep. They shape the first physical impression of the order, protect the contents from scuffs and moisture, and signal whether a brand pays attention to detail. For e-commerce labels, apparel sellers, subscription kits, and lightweight retail shipments, the mailer is part packaging, part presentation, and part logistics decision.
That last part is where many buyers underestimate the job. A mailer affects shipping cost, damage risk, warehouse handling, and the customer’s view of the package before the product is even touched. Get the size and material right, and you usually get fewer returns, cleaner packing, and less waste. Get them wrong, and the savings disappear in reorders, complaints, or damaged product.
The best results rarely come from choosing the fanciest option. They come from matching the bag to the item, the route, and the brand standard, then making sure the print and closure are engineered for actual use instead of a mockup on a screen.
What custom mailing bags are and why they beat plain poly mailers
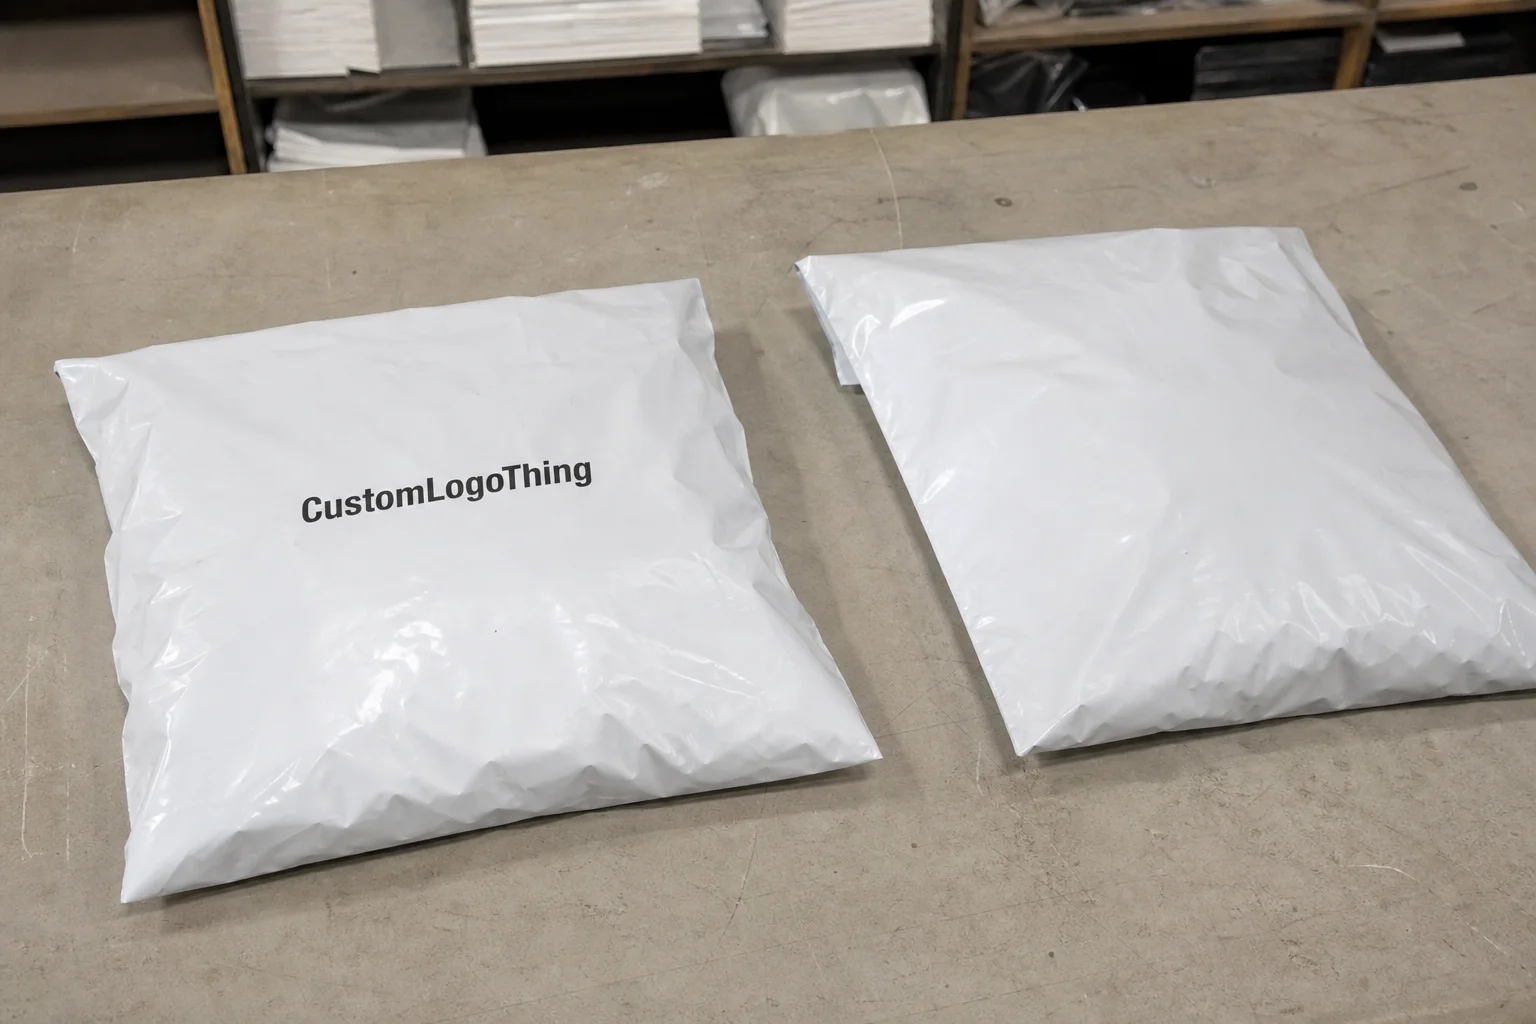
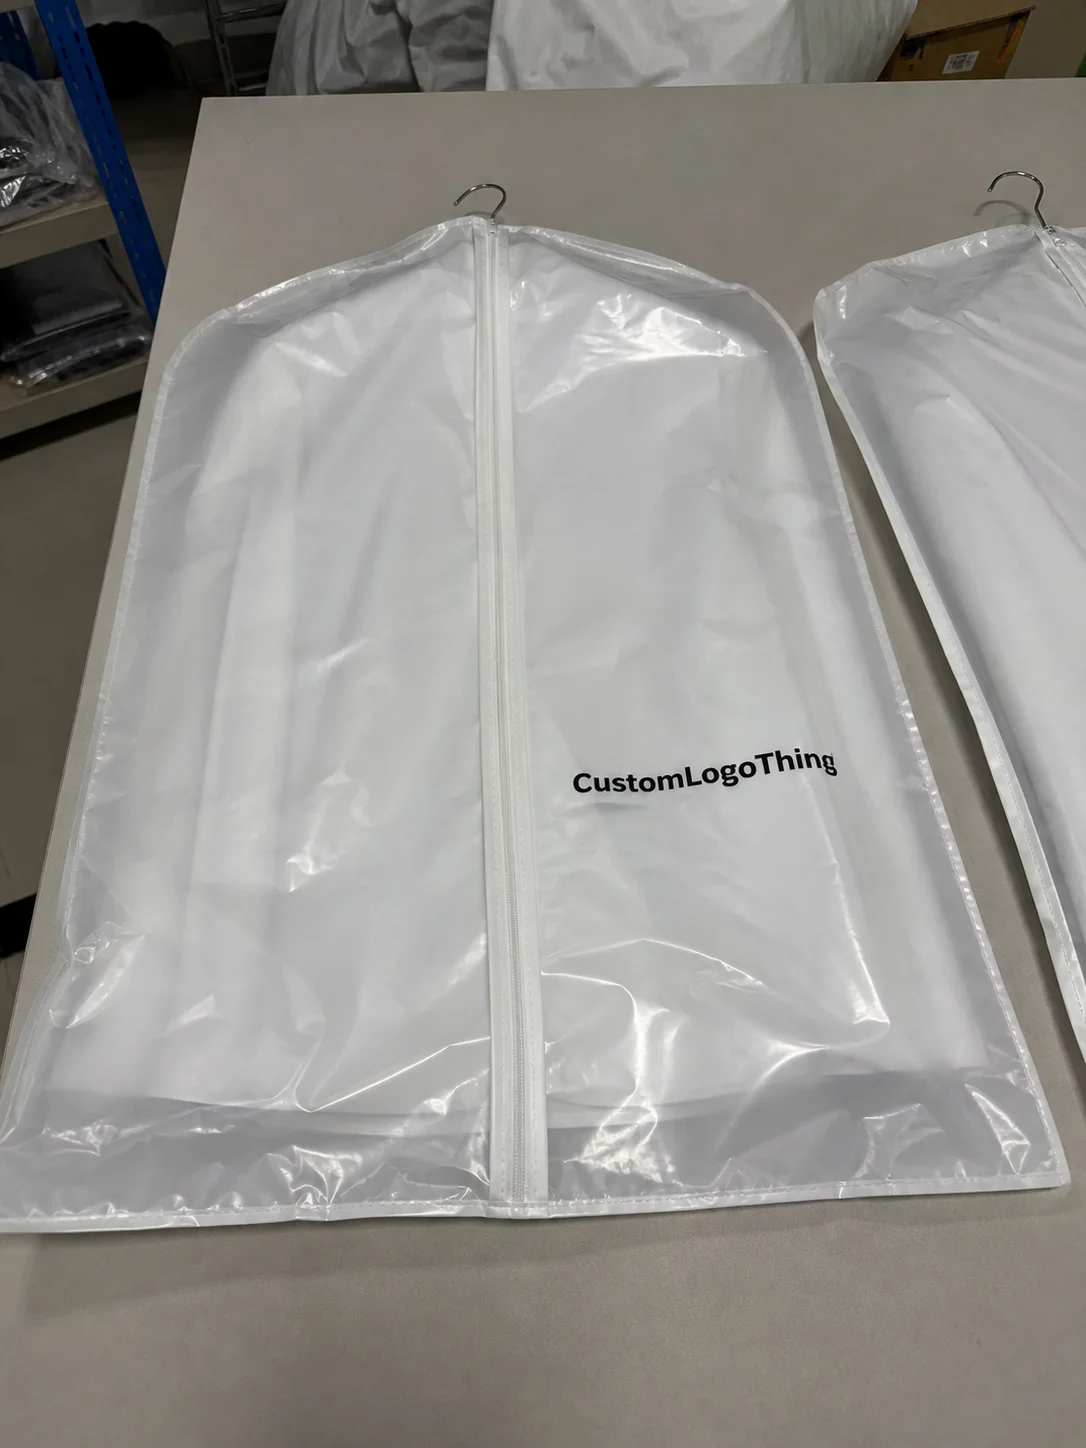
custom mailing bags are branded shipping bags used for products that do not need the rigid protection of a box. They are common for folded apparel, soft accessories, beauty sets, lightweight kits, and non-fragile retail goods. Most are made from polyethylene film, often LDPE or a co-extruded structure that improves opacity, stiffness, or puncture resistance depending on the build.
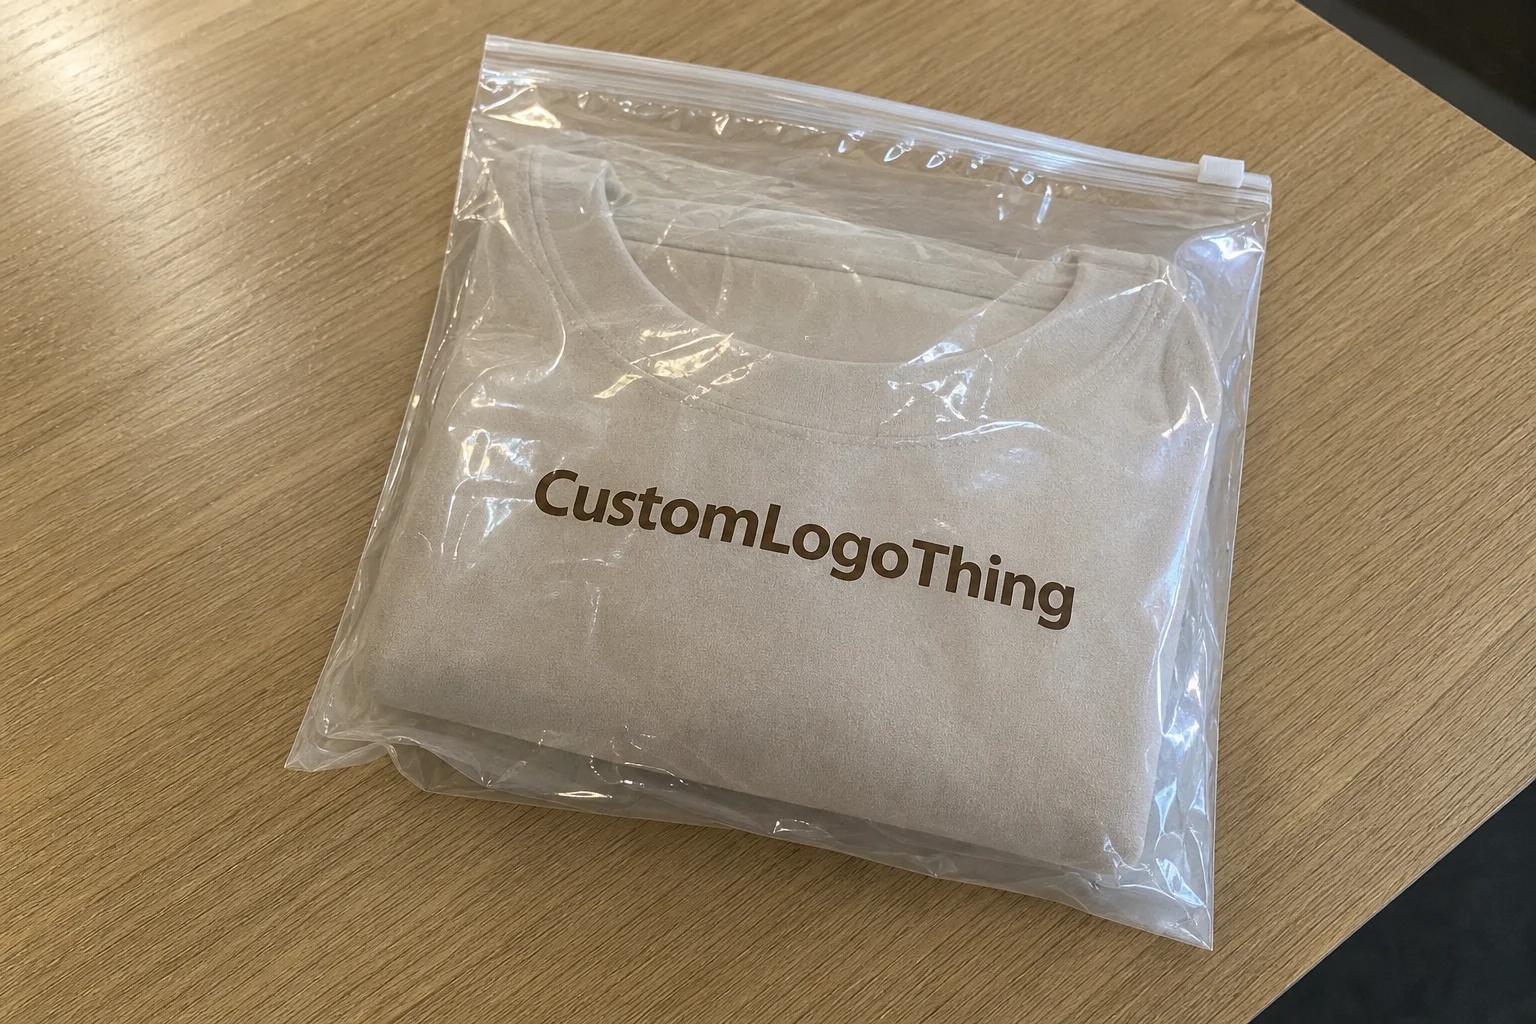
The practical difference between a plain stock mailer and a printed one is more noticeable than many new buyers expect. A stock bag simply ships the item. A printed bag does that and also reinforces package branding, which matters because the outer parcel is the first thing a customer sees. If the outside feels cheap, the whole order can feel less valuable before the box or bag is opened.
That does not mean every shipment needs a fully decorated outer layer. A simple logo, a repeating pattern, or a single-color brand wrap can be enough to make the package feel intentional. The point is consistency. In retail packaging, consistency often does more for perceived value than one dramatic design choice.
These bags work best when the product is light, flexible, and not likely to crush. They are not the right answer for every shipment. Use boxes when structure matters. Use padded mailers when the item needs cushioning. If the outer package needs to do both branding and heavier-duty shipping, other formats such as Custom Poly Mailers or custom printed boxes may be a better fit.
Common applications include:
- Apparel and folded garments
- Soft accessories such as scarves, hats, and socks
- Subscription inserts and light kits
- Beauty and wellness bundles
- Lightweight retail packaging for non-fragile products
For buyers comparing packaging formats, the real question is not “Which looks best?” It is “Which format protects the product, fits the ship method, and still presents the brand cleanly?” That answer changes with weight, fill volume, route length, and how much handling the parcel will take before delivery.
How the production process works from artwork to shipment
Ordering custom mailing bags is usually manageable once the core details are set early. The process typically runs through sizing, film selection, artwork setup, proofing, printing, sealing, and final packing. Miss one step and the order does not always fail, but it tends to become slower, more expensive, or both.
Everything starts with size. The bag must fit the product after it has been folded, kitted, or packed the way it will actually ship. Measuring the raw item on its own is a common mistake, especially with apparel or multi-piece bundles. A bag that is technically close but too tight around the seal can wrinkle the print or stress the closure. Too much extra space creates a loose, messy look and may increase dimensional weight in some shipping setups.
Material selection comes next. Buyers usually choose between standard LDPE, co-extruded film for better opacity or stiffness, and heavier blends when puncture resistance is a concern. Film choice matters more than many quote sheets suggest. A well-engineered film at a moderate thickness can outperform a thicker but weaker one, which is why judging bags by thickness alone is not enough.
Printing method also changes the buying experience. Flexographic printing is common for larger runs and straightforward artwork, because it offers repeatability and efficient unit pricing at scale. Gravure is used for higher-volume programs where ink consistency and very fine print control matter, although tooling costs are higher and make it harder to justify on small orders. Digital printing is useful for shorter runs, quicker proof cycles, and jobs that need faster setup, though the unit cost is usually higher.
Artwork setup is where many orders slow down. If the file is not built to the actual print area, the artwork may land too close to a seal, drift off center, or get clipped at the edge. Full-coverage graphics add another layer of complexity because more ink means more drying control, more attention to registration, and more opportunity for slight variation between runs. A simple logo is easier to keep consistent. A dense pattern or multi-color wrap needs more discipline from the production side.
Most buyers will review at least one proof before production begins. That proof might be a layout file, a digital mockup, or a physical sample if the job is more sensitive. Check size, logo placement, color targets, adhesive location, and any warning text or barcode areas. If the artwork uses more than one color, confirm whether those colors are spot inks or built as a process mix. Clear approvals save time later; vague approvals usually create expensive questions after the run is already underway.
“If the proof is wrong, production will not correct it later. The machinery prints exactly what was approved, not what was intended.”
For brands that care about consistency across product packaging, it helps to verify standards early. If your shipments must hold up to rougher transit, ask about testing expectations such as ISTA packaging protocols. If you are working toward recycled-content goals or broader responsible sourcing in the packaging mix, that affects material decisions elsewhere in the system as well. Industry references such as packaging.org and transit testing guidance at ISTA are useful starting points when comparing specifications.
Key specs that control durability, branding, and unit cost
Four specification groups do most of the work: thickness, material structure, closure style, and print coverage. Those choices affect not only durability, but also how the bag looks, how it feels in hand, and where the unit price lands.
Thickness is often listed in microns or gauge. Many mailers fall somewhere around 50 to 100 microns, depending on the product weight and how rough the shipping environment is. A heavier gauge can help, but it is not a universal fix. If the film structure itself is poor, simply adding material may only make the bag heavier and more expensive without improving performance in a meaningful way.
Size deserves just as much attention as thickness. An oversized bag creates slack, looks less polished, and can put extra stress on the seal if the contents shift around. An undersized bag is worse, because the product can buckle, wrinkle, or fight the adhesive strip. The right size usually leaves enough room for the folded item and any insert card or tissue wrap, while still keeping the package flat and controlled.
Finish changes both presentation and print behavior. Matte finishes often read as more premium and can reduce glare, which is helpful for darker graphics and clean logo work. Glossy finishes make colors pop more strongly and can give brighter contrast on simple designs. Opaque black, white, or custom-colored film also improves privacy, which is a real benefit for many apparel and beauty shipments.
The adhesive strip is easy to ignore until it causes trouble. A weak peel-and-seal closure can open during transit or feel flimsy to the customer. Too aggressive, and the bag becomes hard to close cleanly. Tear notches and side seals also affect the opening experience. None of these details is flashy, but they shape the way the package performs in the real world.
Below is a simple comparison of common mailer options and where they usually land on cost and appearance.
| Option | Typical use | Relative unit cost | Branding impact | Durability |
|---|---|---|---|---|
| Plain stock mailer | Low-value shipments, test orders | Lowest | Low | Basic |
| Printed standard mailer | Most e-commerce apparel and accessories | Medium | High | Good |
| Heavy-duty printed mailer | Heavier soft goods, stronger transit handling | Higher | High | Very good |
| Custom size and full-coverage print | Premium launches, exact dimensions | Highest | Very high | Depends on film spec |
Special finishes can improve the perceived value, but they should be chosen with purpose. Metallic inks, soft-touch coatings, and custom Pantone matching all add cost and may increase setup time. For some programs, that expense is justified because the outer package is part of the brand story. For others, the money is better spent on stronger film, better fit, or a more reliable adhesive.
If you are building a wider packaging system with other Custom Packaging Products, compare the added cost against what each upgrade actually does for the customer experience. Decorative spend is not the same as useful spend.
Custom mailing bags pricing: MOQ, unit cost, and what changes the quote
custom mailing bags pricing usually depends on minimum order quantity, dimensions, film structure, print colors, and freight. MOQ is simply the smallest volume a factory or supplier will produce for a custom run. Lower quantities almost always carry a higher unit price because setup cost is spread across fewer pieces. That is not unusual; it is how custom print economics work.
As a rough buying range, smaller custom runs may land around $0.25 to $0.60 per unit depending on size and print complexity, while larger runs can drop closer to $0.10 to $0.25 per unit. Larger formats, heavy ink coverage, and specialty finishes can push the price higher. Freight can move the landed cost enough to change the decision, especially if the bags are shipping long distance or internationally.
The main quote drivers are usually easy to identify once you know what to ask for:
- Size: larger bags use more film and usually cost more
- Thickness: heavier gauge means more material
- Print colors: each added color increases setup and run complexity
- Coverage area: full-bleed designs cost more than a small logo
- Special finishes: matte, gloss, metallic, or soft-touch add cost
- Quantity: higher volume lowers unit cost, but ties up more cash in inventory
Most buyers run into the same tradeoff: the cheapest bag is only cheap until it tears, prints unevenly, or looks off-brand. Once that happens, the “savings” often get eaten by reorders, complaints, or a downgrade in presentation. A better film structure can sometimes be thinner than a weaker bag and still perform better, which is why a quote should never be judged on thickness alone.
When comparing suppliers, ask for fully matched specifications. The bag dimensions, gauge, print coverage, adhesive type, finish, and pack count should be identical if you want a fair comparison. Otherwise you may be looking at two different products and calling it a pricing issue.
It also helps to ask how the bags are packed for shipment. Loose-packed, stacked, shrink-wrapped in set counts, and carton-packed formats all affect warehouse handling and storage efficiency. That matters more than many first-time buyers realize, especially if the bags are going into a retail packaging program or an order flow with limited storage space.
Turnaround and lead time: how long ordering actually takes
Lead time usually has four parts: artwork approval, sampling or proofing, production, and freight. Simple jobs can move fairly quickly once the proof is approved. More complex runs take longer because color matching, print setup, and finishing each add time and quality checks. Rush orders may be possible, but they usually cost more and leave less room for corrections.
Typical timeframes often look something like this:
- Artwork and proofing: 1 to 4 business days, depending on revisions
- Sampling: 3 to 10 business days if a physical sample is needed
- Production: about 7 to 20 business days for many standard runs
- Freight: a few days domestically, longer for ocean or consolidated overseas shipping
The biggest schedule risk is late artwork. After that come extra revisions, holiday congestion, and special finishes that need more careful handling. If a launch date is fixed, the ordering calendar should work backward from that date rather than forward from the day the quote is accepted. A bag approved too late can hold up the whole shipment, which is frustrating because packaging is usually invisible until it becomes the bottleneck.
Domestic production often gives shorter transit times and simpler communication. Overseas production may offer a lower unit cost at larger volumes, but it usually adds longer freight windows and more planning risk. The right choice depends on whether the priority is price, speed, or replenishment stability. For high-volume programs with steady demand, a longer lead time can be manageable. For launches and seasonal spikes, it can be a liability.
Step-by-step: how to order custom mailing bags without mistakes
Start with the product, not the mailer. Measure the item after it is folded, bagged, or kitted the way it will actually ship. Apparel, accessories, and bundle kits all pack differently, so the finished dimensions matter more than the item’s raw measurements. That one decision prevents the most common sizing mistakes.
Step 1: Define product weight, dimensions, and the shipping environment. A single folded T-shirt has very different needs from a thick hoodie, a swimwear bundle, or a mixed apparel set. If the package will go through rough handling, ask for stronger seals and better puncture resistance.
Step 2: Choose material and thickness based on budget, privacy, and protection. Opaque film is usually better for presentation and content privacy. Clear or semi-translucent options can work for internal packing, but they are usually less polished on arrival. If you want a premium look, compare actual samples rather than judging from screen images alone.
Step 3: Prepare artwork correctly. Vector files are usually easier to print cleanly, and they reduce the chance of fuzzy edges or mis-scaled logos. Confirm color targets, print area, and bleed requirements. If the design includes white ink on dark film or full-coverage artwork, verify that the supplier can reproduce it at your quantity and on your chosen material.
Step 4: Approve the proof carefully and request a sample if the product is valuable, irregular, or expensive to rework. A sample verifies fit, adhesive performance, print placement, and how the bag feels in hand. It also shows whether the result feels finished or merely printed, which is a practical difference in retail packaging.
Step 5: Confirm quantity, packing method, freight terms, and storage space before production begins. If cartons arrive faster than your warehouse can store them, you inherit a space problem. If you order too little, you risk stockouts. If you buy too much too early, cash flow gets tied up in inventory that may not turn fast enough.
A simple launch checklist keeps the order grounded:
- Final size checked against the actual packed product
- Material, thickness, and opacity confirmed
- Artwork approved with correct placement and bleed
- Sample reviewed if needed
- Quote reviewed line by line, not just by headline price
- Reorder timing planned before inventory gets tight
Common ordering mistakes and next-step checks before you buy
The most common mistake is choosing the wrong size. Too small and the product fights the seal. Too large and the package looks loose or unfinished. Right behind that comes overdesigning the print. A full-coverage bag can be effective, but if the extra ink and setup do not change how the product is perceived, the added cost is just decoration with a larger invoice.
Another frequent error is ignoring adhesive quality. A weak peel strip can open during transport or feel cheap in the hand. Buyers also assume all bags ship and store the same way, which is not true. Packing format, carton count, and moisture protection all affect warehouse handling and the condition of the bags when they arrive.
Inventory planning deserves more attention than it usually gets. If you sell seasonally or are preparing for a launch, build a cushion into the order. Running short creates emergency reorders, and emergency reorders always cost more. Ordering too much too early creates dead stock, which is not an elegant problem to solve later.
Before placing the order, ask for three things: exact material specs, proof images, and realistic lead times. If a supplier cannot give those clearly, the quote is not ready to compare. A strong quote should show size, film, print, and shipping details line by line. Anything less makes price comparison difficult and usually hides a difference somewhere in the spec.
For buyers building a broader packaging system, it helps to review how custom mailing bags fit with the rest of the shipment. Inserts, labels, boxes, and outer mailers should feel like one system rather than separate decisions made in isolation. If brand consistency matters, compare the mailer against your other branded packaging pieces and decide where the outer layer needs to carry the most visual weight.
Final check Before You Buy: confirm the specs, test a sample, compare quotes fairly, and map the reorder point before stock runs low. That process keeps the order practical, not speculative, and it helps you place custom mailing bags into a packaging workflow that holds up once volume starts moving.
FAQ
What are custom mailing bags used for?
They are used for shipping lightweight, non-fragile products such as apparel, accessories, and soft goods. They help protect items from dirt and moisture while giving the outer shipment a branded appearance.
How do I choose the right size for custom mailing bags?
Measure the product after folding or packaging it the way it will ship. Leave enough room for the item and any insert without creating extra empty space that makes the package look loose or wasteful.
What affects custom mailing bag pricing the most?
Size, material thickness, print colors, quantity, and special finishes are the biggest cost drivers. Lower MOQ usually means a higher unit cost, so the quote should be judged by total value rather than headline price alone.
How long does it take to produce custom mailing bags?
Most timelines include proofing, production, and freight, so the real schedule depends on approval speed and shipping method. Simple designs usually move faster than full-coverage, multi-color jobs with special finishes.
Can I get a sample before placing a full order?
Yes, and it is smart to request one if the product is important, oddly shaped, or expensive to rework. A sample helps verify size, print placement, adhesive strength, and overall feel before production begins.