Custom metal labels do one thing better than most branding elements: they make a product feel deliberate before anyone checks the stitching, lining, or packaging. That is why buyers keep using custom metal labels on denim, outerwear, bags, uniforms, and premium accessories. The hard part is not deciding whether metal looks good. The hard part is choosing a spec that survives handling, washing, shipping, and the occasional bad day on a warehouse floor.
Metal labels sit in the same brand system as Custom Printed Boxes, inserts, tags, and the rest of the package branding stack. If the badge feels solid, the product gets a lift. If it looks thin, scratches easily, or clashes with the rest of the finish set, it drags the whole presentation down. That usually comes from a vague brief, not a bad machine.
What custom metal labels are and where they make sense

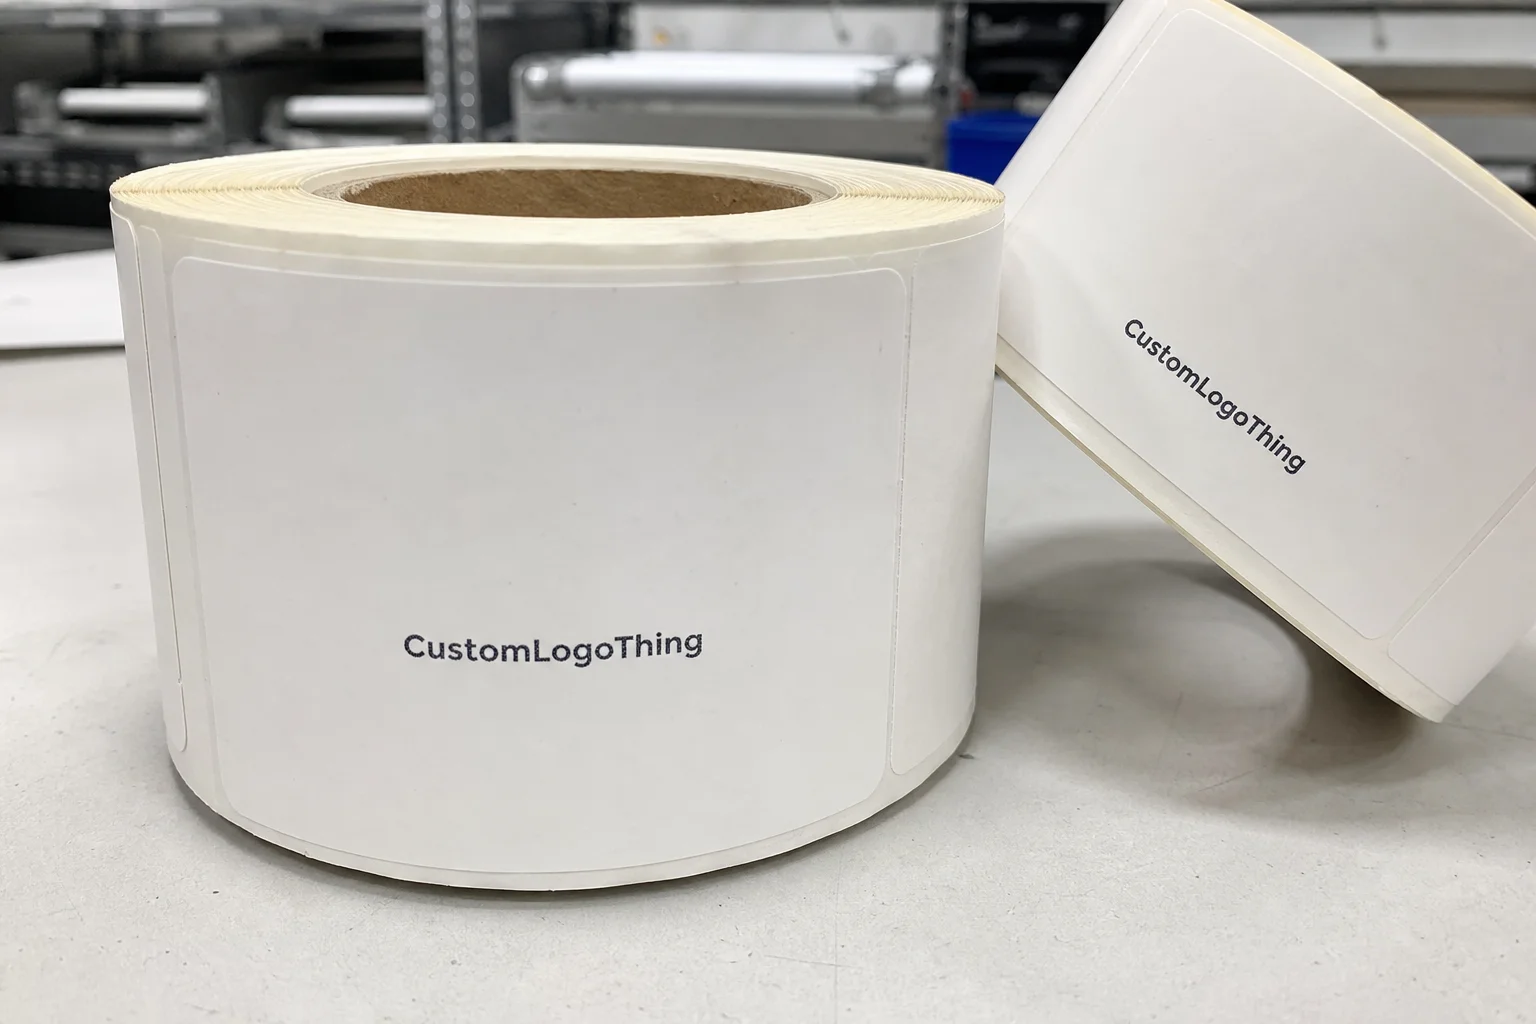
Custom metal labels are branded plaques, tags, badges, or nameplates made from metal and attached to apparel or soft goods. They can be flat or raised, polished or brushed, plated or painted, minimal or highly detailed. Their job is simple: identify the brand and add a durable visual cue that feels more permanent than ink or sticker stock.
They show up most often on jeans, jackets, leather goods, canvas totes, aprons, workwear, and structured accessories. On bags, they usually sit on a front panel, flap, or base area where the logo gets seen but does not take the worst of the abrasion. On uniforms, they can make a piece look more official, which matters in customer-facing service work where first impressions are part of the job.
There are places where metal is the right call, and places where it is just heavy decoration. Lightweight tees, stretch garments, and high-flex seams tend to punish rigid hardware. A badge on a knit top can warp the drape or irritate the wearer. If the product needs softness and movement, woven labels or leather patches are usually the better fit. If the item is structured and meant to last, custom metal labels can raise perceived value quickly.
That value is not theoretical. People notice the label before they notice stitch density. A clean finish can make the garment, the box, and the rest of the retail packaging feel more expensive. A sloppy finish does the reverse. The label becomes the first touchpoint, so it needs to hold up visually and physically.
For brands already thinking about the full presentation, the label should match the rest of the package branding. A matte black carton with silver foil usually pairs better with brushed nickel or gunmetal than with a bright chrome badge. Earthy, understated lines often look better with antique brass or matte finishes. Small decision. Big difference.
As a rough rule, metal labels make sense when the product has structure, repeat handling, and enough margin to justify the added cost. They are less useful when flexibility, softness, or very low unit price matters more than hard-wearing branding.
How the production process works from proof to shipment
The workflow is usually standard, but the details decide whether the run goes smoothly. A good supplier process looks like this: artwork review, material selection, tooling or mold setup, sample approval, finishing, production, and final QC before shipment. The machine time is rarely the bottleneck. The slow part is usually the back-and-forth on artwork, finish confirmation, and attachment method.
A simple rectangular label with one logo is quick. A three-dimensional emblem with raised text, cutouts, or a custom edge profile is not. Once the design depends on depth, relief, or a special plating sequence, the project behaves more like custom manufacturing than a quick print order. That is not a problem. It just needs to be treated like one.
Typical timing is around 5 to 10 business days for a sample or prototype, then 12 to 20 business days for production after approval. Those numbers move with seasonality, factory load, and how many times the artwork gets revised. Repeat orders are faster because the tooling already exists and the finish recipe is set. First runs take longer because somebody has to verify the real object, not just the render.
What matters at proof stage is not whether the mockup looks impressive. It is whether the label can actually be made at the requested size with the chosen finish. Tiny text, deep relief, and fine-line logos are where reality starts to trim the fantasy. If the lines are too thin, the edges blur. If the cutouts are too small, the part gets fragile. If the finish depends on three plating steps, the quote and timeline should reflect that.
If your supplier also handles Custom Labels & Tags and broader Custom Packaging Products, ask whether the metal label can be coordinated with the rest of the branded set. That matters more than people expect. Nobody wants cartons approved, inserts printed, and the badge still stuck in a sample loop.
A label that looks premium but bends on first wear is not premium. It is a shiny mistake with a good render.
For shipping and packout, ask how parts are counted, separated, and protected from scratches. Loose metal rubbing against metal is an easy way to ruin the finish before production starts. If the labels are going into retail-ready kits or outer cartons, standards from ISTA help keep the conversation tied to real transit stress, not wishful thinking. If the broader package uses paper-based inserts or sleeves, FSC certification may matter too.
Cost, MOQ, and pricing levers that change the quote
The quote for custom metal labels usually comes down to a few variables. Size, shape complexity, base material, thickness, finish type, attachment hardware, and packaging all affect cost. Quantity matters as well because setup gets spread across the run. A 500-piece order can cost far more per unit than a 5,000-piece order even if the design never changes.
Most factories treat 300 to 500 pieces as a practical floor for a custom run, though the real minimum depends on tooling and finish requirements. Lower quantities are possible, but the unit price climbs because setup is being paid across fewer labels. If a vendor offers a tiny MOQ and a price that looks suspiciously good, check whether the item is a stock part with limited customization rather than a true custom build.
In real buying terms, simple stamped aluminum labels at volume can sit in the low cents per piece. Heavier 3D zinc alloy parts with plating, enamel fill, and custom backing can move into a few dollars per unit at smaller quantities. That spread is normal. What is not normal is a quote that bundles tooling, samples, plating, and packing into one mystery number.
Here is the cleanest way to read a quote:
| Quote lever | What it changes | Typical impact |
|---|---|---|
| Size | Material usage, tooling, and visual presence | Larger labels usually cost more per unit |
| Shape complexity | Die cutting, mold work, and finishing time | Custom contours and cutouts increase cost |
| Material thickness | Weight, durability, and form stability | Thicker stock feels premium but adds price |
| Finish type | Plating, brushing, polishing, painting | Multi-step finishes raise cost quickly |
| Attachment style | Back hardware, sewing tabs, adhesives, rivets | More secure methods usually cost more |
| Packaging | Scratch protection and count control | Individual packing adds labor and material |
Multi-step decoration is where budgets start slipping. Enamel fill, embossing, debossing, dual plating, antique wiping, and color matching all add labor or yield loss. A buyer who wants a brushed brass base, black enamel fill, polished edges, and a custom backing is not asking for one feature. They are asking for several. The request is fine. The quote should reflect the work.
Ask for the numbers broken out. Tooling. Unit price. Sample fee. If one supplier looks cheaper only because the mold cost is hidden or deferred, the comparison is fake. Apples to apples matters here. So does knowing whether the quoted price includes any rework allowance for the first sample.
Send every supplier the same artwork, dimensions, finish target, attachment method, and quantity. If the labels need to coordinate with Custom Printed Boxes or a wider retail packaging program, say so. Finish and color are part of the job, not afterthoughts.
Material and finish choices that affect durability
Material choice should follow the product, not a mood board. Aluminum is light, easy to finish, and a decent fit for low-profile branding. Stainless steel is tougher and resists corrosion well, which helps in harsher environments. Brass has a warmer, more premium look and takes plating cleanly. Zinc alloy is useful for molded detail and raised graphics because it captures depth well, though it can feel bulky if the design overreaches.
Finish is what most people see first, and it affects wear too. Brushed finishes hide scuffs better than mirror polish. Matte and antique finishes feel calmer and less flashy. Polished chrome looks sharp on some products, but it shows fingerprints and scratches quickly. Painted color fills can make a logo pop, but too many colors push the label toward novelty instead of premium branding.
A practical breakdown:
- Aluminum: light, cost-effective, good for modern looks, but easier to dent than heavier metals.
- Stainless steel: durable and corrosion-resistant, better for hard use, though less forgiving on complex decorative shaping.
- Brass: rich visual warmth, strong premium cue, and good plating performance, but usually a higher-cost option.
- Zinc alloy: strong for molded detail and relief, useful when the logo needs depth, but it can feel heavy if the part is oversized.
For fashion apparel, brushed brass, antique silver, and matte black are common because they signal quality without shouting. For bags and accessories, polished or plated finishes can work if the hardware and zipper pulls already live in that same visual family. For uniforms and workwear, the key question is simpler: will the finish survive cleaning, abrasion, and repeated handling?
Climate and use matter more than buyers expect. Coastal humidity, sweat, cleaning chemicals, and repeated rubbing all attack finish quality. A label sitting on a backpack strap or jacket pocket wears differently than one on a display-only sample. A supplier can promise a lot. A real sample on the final substrate tells the truth. For abrasion and corrosion discussions, some teams reference ASTM B117 salt spray testing, then still run their own garment trials because no lab test replaces actual use.
One more practical point: edge quality matters as much as finish. A rough edge on a hard label can snag fabric, feel cheap in hand, and cut through coatings faster than expected. Deburring is not glamour work, but it saves a lot of embarrassment later.
Attachment methods for clothing and soft goods
Attachment is where a nice-looking label either becomes usable or becomes a headache. Rivets, screws, sewing tabs, adhesive backs, and custom fixation systems each solve a different problem. The right choice depends on the substrate, the amount of flex, the expected wash cycle, and whether the product needs to be repaired or replaced later.
Rivets are common on denim, canvas, and leather because they hold well and read as permanent. Sewing tabs work better when the label should sit flat and the product needs a softer edge. Screw backs are useful for structured items where the user may need to replace the badge or move it between pieces. Adhesive backs are fast, but they are the least trustworthy option for products that bend, wash, or get handled constantly.
For denim and heavy canvas, rivets and stitching are usually the safest bets. On leather, the attachment has to respect material thickness and any backing layer, or the hardware can telegraph through the face. On knitwear, a rigid metal label can create discomfort, snagging, or distortion, so many teams move to a lighter tag or place the metal detail on a stable trim area instead of the body of the garment.
For bags, the attachment can be hidden or exposed depending on the design. Exposed hardware creates a stronger brand cue, but hidden fastening keeps the exterior cleaner. On workwear, durability and wash resistance usually outrank ornament. If the label can snag a glove, catch on a tool pouch, or fail after repeated laundering, it is the wrong spec no matter how polished the mockup looked.
Testing on the final substrate matters more than guessing from a catalog sample. A metal badge on a stiff leather swatch can feel perfect in hand and then behave badly on a flexible jacket panel. The same label on a canvas tote may look fine but sit too heavy on a drapey garment. One round of physical sampling is cheaper than fixing 2,000 units later.
Attachment also changes the perceived quality of the entire piece. A solidly fixed label with clean spacing and no rotation feels intentional. A crooked badge or one that sits too proud looks like an afterthought. Small defect, loud message.
Common mistakes that make labels look cheap or fail early
The most common failure is trying to cram too much into a tiny surface. Small text, fine-line logos, multiple colors, and micro-engraving may look clever in a PDF and terrible in metal. The material has limits. If the logo only works under a magnifier, the spec is wrong.
Another easy mistake is under-specifying thickness. Buyers often want the label to feel premium, then choose a profile so thin it bends during handling. Once a metal label twists, scratches, or lifts at the corner, it stops looking premium very fast. Weak plating causes the same problem. A finish that looks strong on day one can wear through if the base metal is soft or the coating is too light.
Skipping a prototype is the cheapest expensive mistake in this category. One sample can reveal issues with edge sharpness, color contrast, attachment depth, and overall balance. That is the difference between approving a drawing and approving a real object that people will touch, flex, and inspect.
If the logo needs six colors to read, the label is probably doing too much.
Aesthetic mismatch is another common miss. A glossy chrome badge on a rugged work jacket can feel out of place. A heavy antique brass plate on a delicate fashion piece can look oversized. The label should support the brand story, not fight it. Good package branding works the same way. The hardware, print, box, and product should feel like one system.
Cost-driven compromises create problems too. The cheapest backing, the thinnest plating, or the lowest labor spec can save a little upfront and cost a lot in returns, replacements, or product photos that look inconsistent from one batch to the next. Consumers notice inconsistency faster than they notice savings.
QC should cover more than color. Check dimensional tolerance, edge finish, plating uniformity, logo alignment, attachment strength, and surface marks from packing. If the supplier does not inspect those things before shipment, the burden moves to your receiving team. That is not efficient. It is just delayed pain.
Next steps: how to spec, sample, and place the order
The cleanest ordering process is plain: gather the artwork, decide where the label sits, confirm the substrate, choose a finish, specify the attachment method, request a sample, then approve production. That sounds basic because it is basic. The hard part is being specific enough that the quote reflects reality instead of guesswork.
Before asking for pricing, write down the essentials:
- Artwork file: vector logo, not a screenshot.
- Final size: actual dimensions, not “around this big.”
- Placement: front panel, hem, pocket, flap, cuff, or strap.
- Fabric or substrate: denim, leather, canvas, knit, coated fabric, or webbing.
- Use case: fashion, workwear, retail packaging kit, or promotional item.
- Wash and wear expectations: laundry cycles, abrasion, sweat, outdoor exposure.
That last line matters more than most buyers think. A label for a jacket worn weekly needs a different spec than a label for a display-only item in a retail packaging launch. If the product is part of a broader branded packaging program, align the metal finish with the carton print, inserts, and other packaging elements. Consistency beats novelty. Every time.
Compare suppliers on the same questions: What is the tooling cost? What is the MOQ? What finish options are actually available? What is the sample timeline? What quality checks happen before shipment? How are parts packed to prevent scratching? If the answer is vague on any of those, the quote is not really a quote. It is a starting guess.
For teams managing multiple SKUs, the cleanest approach is to standardize a base label style and vary only what must change. That keeps costs under control and reduces approval churn. One strong family of custom metal labels can work across jackets, bags, and uniforms if the size and attachment are adapted properly. A pile of one-off specs will eat time and money for no good reason.
One sample should be enough to tell the story if it is tested honestly. Put it on the final product. Handle it. Flex it. Check the edge. See how it sits against the material. If it looks right, feels right, and survives real handling, the production run usually follows without drama. If it fails, you have not wasted a full batch. That alone is worth the extra step.
Used well, custom metal labels do more than carry a logo. They help define the product, support package branding, and make the item feel worth the price. Used badly, they become a shiny reminder that shortcuts are expensive. Choose the finish with the fabric, the use case, and the rest of the branded system in mind, and the label will earn its place.
FAQ
How much do custom metal labels cost per piece?
Unit cost depends mostly on size, finish complexity, quantity, and whether tooling is already in place. In real quotes, low quantities often land much higher per piece because setup gets spread across fewer labels. A simple run can stay in the low cents at scale, while a plated, embossed, multi-color badge can move into a few dollars per piece at smaller orders.
What is the typical MOQ for custom metal labels?
MOQ varies by factory and construction, but custom tooling usually pushes the minimum above a simple printed label order. Many buyers see practical minimums around 300 to 500 pieces, though some suppliers will go lower by limiting finish options or charging more per unit.
How long does the custom metal labels process usually take?
Prototype approval and tooling are usually the slowest parts, especially when artwork needs changes. Once the sample is approved, production is often faster than buyers expect. The calendar still stretches if revisions bounce back and forth or if shipping is handled late.
Which attachment works best for custom metal labels on clothing?
Rivets and sewing tabs are usually the most secure for denim, bags, and heavy apparel. Adhesive backs are faster to apply, but they are weaker for garments that bend, wash, or get pulled often. The best choice depends on the fabric and the wear pattern, not just the look.
Are custom metal labels better than woven or leather labels?
Metal is better when you want a premium, durable, high-visibility brand marker. Woven or leather can be better when flexibility, softness, or lower cost matters more than a hard badge effect. The right answer depends on the product, the hand feel, and the rest of the branding system.