Buyer Fit Snapshot
| Best fit | packaging buyers who need clearer specs, stronger internal paths, and repeatable quote decisions where brand print, material, artwork control, and repeat-order consistency matter. |
|---|---|
| Quote inputs | Share finished size, material target, print colors, finish, packing count, annual reorder estimate, and delivery region. |
| Proofing check | Approve dieline scale, logo placement, barcode or warning zones, color tolerance, and any recyclable or compostable wording before bulk production. |
| Main risk | Vague material claims, crowded artwork, or missing packing details can create delays even when the unit price looks attractive. |
Fast answer: Custom Printed Box Inserts: Design, Cost, and Fit should be specified like a repeatable production item. The safest quote includes material, print method, finish, artwork proof, carton packing, and reorder notes in one written spec.
What to confirm before approving the packaging proof
Check the product dimensions against the actual filled item, not only the sales mockup. Ask for tolerance on folds, seals, hang holes, label areas, and retail display edges. If the package carries a logo, QR code, warning copy, or legal claim, reserve that space before decorative graphics fill the panel.
How to compare quotes without losing quality
Compare board or film grade, print process, finish, sampling route, tooling charges, carton quantity, and freight assumptions side by side. A lower quote is only useful if the supplier can repeat the same color, closure quality, and packing count on the next order.
Why Custom Printed Box Inserts Matter More Than You Think
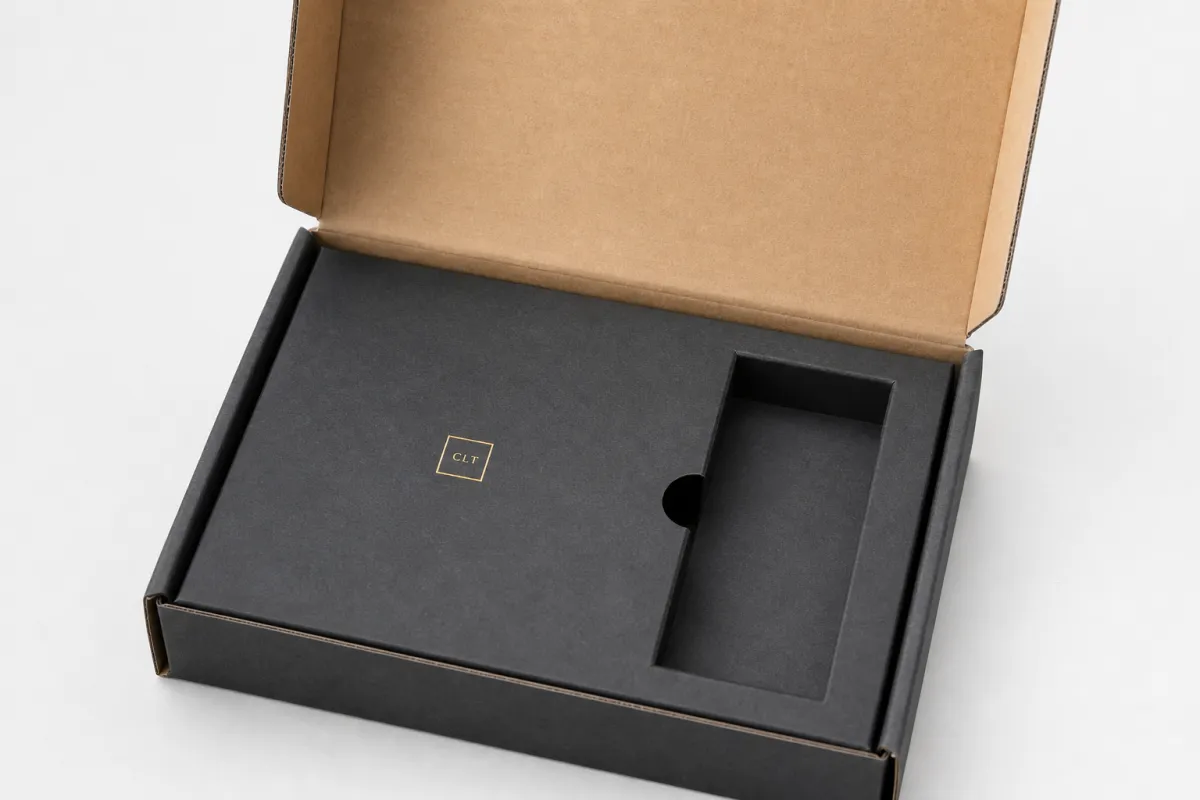
The outer carton gets the shipping label, but custom Printed box inserts often shape the first real impression a customer carries away. A package can look polished from the outside and still feel ordinary the moment the lid opens if the product shifts, rattles, or lands in a plain cavity with no sense of order. A lighter mailer can feel expensive with a printed interior tray that holds everything in place, while a heavy-looking box can feel underwhelming if the contents float around inside. I have seen brands put real budget into the exterior print and then treat the insert like filler, which is a bit like tailoring a suit and leaving the sleeves unfinished. In branded packaging, the insert is not just packing material. It is structure, presentation, and reassurance all working together.
From a packaging buyer's point of view, custom printed box inserts can solve two problems at once. They reduce movement, which lowers the chance of scuffed finishes, bent corners, or accessory packs arriving out of place. They also make the package easier to read. A clearly cut cavity for the main product, a smaller pocket for cables or samples, and a printed cue that shows where each piece belongs can reduce pack-out mistakes while making the kit feel intentional. That combination is why custom printed box inserts matter beyond decoration. They affect damage rates, labor speed, and the overall quality of the packaging experience.
Think about a cosmetics set, a compact electronics bundle, or a subscription box with three to five components. The outer box may look similar from one brand to the next, but the interior structure is where a brand proves it understands the customer. A well-built insert can guide the opening sequence so the hero item appears first, accessories stay nested, and the customer does not have to dig through tissue paper to find the missing piece. That is package branding doing practical work. It is also one of the clearest places where custom printed box inserts add value: they make the opening feel deliberate while helping fulfillment teams place products faster and with fewer errors.
A package can pass a drop test and still feel disappointing if the insert looks loose, generic, or visually disconnected from the brand.
Once brands treat custom printed box inserts as protection, branding, and operations in one piece, the conversation changes. The question stops being "Do we need an insert?" and becomes "What should the insert do for the product, the customer, and the packing line?" That is a better question because it points toward smarter packaging decisions and fewer compromises later.
What Custom Printed Box Inserts Are and How They Work
Custom printed box inserts are shaped interior components that hold products in place while adding printed branding, instructions, or visual structure. They can be simple die-cut paperboard carriers or more complex multi-cavity layouts that cradle a product, accessories, and printed messaging in one coordinated build. The insert is usually engineered around three things: the product footprint, the carton dimensions, and the unboxing sequence. If those three line up, the box opens cleanly, the item stays centered, and the user sees what the brand wants them to see first.
Several construction paths are common. Die-cut paperboard is often used for lighter items and premium retail packaging because it prints well and folds into crisp shapes. Corrugated inserts add more compression strength and are a practical choice when the product needs extra protection in transit. Molded pulp is a frequent option for sustainability-focused programs because it reduces plastic use while still providing good retention for irregular shapes. Foam still has a place for sensitive products, though many brands move away from it unless the protection requirement is unusually strict. For many programs, custom printed box inserts become a balancing act between print quality, protective performance, and end-of-life expectations.
The print layer matters too. Logos, color blocks, product names, QR codes, setup instructions, and small orientation marks can all live on the insert without crowding the outer carton. That helps when the box needs to carry more than one message. A well-placed printed arrow can show customers how to lift a product correctly. A simple numbered sequence can keep kitting staff from reversing components. Even a restrained line of text inside the lid can reinforce confidence. In practice, custom printed box inserts work best when the print supports the structure instead of fighting it.
There is a practical side as well. A well-designed insert slows product shift, reduces packing errors, and makes repeat orders easier to assemble. That matters most when a brand ships multiple SKUs with similar footprints. Without a fixed layout, operators spend seconds on every pack trying to identify the right cavity or orientation. Multiply that by hundreds or thousands of units, and the time loss becomes real labor cost. That is why custom printed box inserts often come into play after damage claims rise or packing speed starts limiting output.
For brands building a full packaging system, it helps to think of the insert and the outer carton as one structure. If you need broader packaging support, Custom Packaging Products can be a useful starting point for matching the insert with the box style, print method, and finish. The more those parts are planned together, the fewer surprises show up during production.
Key Factors That Shape Custom Printed Box Inserts
The product itself is the first input. Weight, fragility, shape complexity, surface sensitivity, and whether the item ships alone or in a set all influence custom printed box inserts. A glass bottle needs a different retention approach than a folded garment, and a polished metal accessory can scratch if the cavity fit is too tight. I would always start by asking how the product behaves under vibration, compression, and handling. If the answer is "it moves easily," the insert needs to control that movement without making pack-out awkward.
Geometry comes next. Clearance is not a guess. It should come from real dimensional data, expected manufacturing tolerances, and the level of retention the brand wants. A cavity that is too generous allows movement; one that is too tight can make packers fight the insert or mar the product finish. Lift tabs, finger notches, and layered structures can solve extraction problems, but they also add print and die-cut complexity. That is why custom printed box inserts work best when they are developed from exact measurements, not rough estimates from a sample on a desk.
Fulfillment conditions matter just as much. A manual line with low daily volume can handle a slightly more complex insert if the presentation payoff is strong. A semi-automated line or a high-volume kitting operation needs a layout that places quickly and consistently. If the insert takes ten extra seconds to load, the hidden labor cost can wipe out any savings from cheaper material. Packaging design becomes an operations question here. The smartest custom printed box inserts protect the product and fit the warehouse rhythm.
Branding choices also shape the spec. Full-color printing can create a strong interior reveal, while one-color branding or a quiet tone-on-tone mark can feel more premium if the product line is minimal and controlled. Some teams use bold graphics to guide the unboxing flow. Others keep the insert sparse so the product stays the focus. Both can work. What matters is consistency between product packaging, retail packaging, and the broader package branding system. If the insert looks louder than the carton and the website, the package can feel divided. Custom printed box inserts should reinforce the brand, not compete with it.
Sustainability and compliance belong in the brief from the start. If your audience expects recyclable materials, paperboard or molded pulp may fit better than mixed-material builds. If forest sourcing matters, ask for FSC documentation and chain-of-custody proof through FSC. If the product will travel through a distribution network with rough handling, discuss test plans aligned with ISTA methods at ISTA. Those standards do not promise a perfect outcome, but they make the discussion far more objective. In many programs, custom printed box inserts are where sustainability and performance either meet or collide.
Custom Printed Box Inserts Process and Timeline
The usual path starts with discovery. The supplier needs the product dimensions, total kit contents, carton size, print expectations, and target ship method. Structural design follows. For custom printed box inserts, the dieline is not a formality; it is the map. A few millimeters can change fit enough to alter retention, opening force, and the placement of printed elements. If the product has odd contours, handles, or accessories, a sample is worth much more than a verbal description.
Print setup and sampling come next. This is where teams often underestimate time. Artwork needs to align to the die-cut layout, colors may need adjustment, and the first prototype might show a cavity that feels too shallow or a fold that interferes with the hero item. A good prototype round can prevent an expensive production mistake. In real schedules, approval delays are often more disruptive than the actual cutting or printing stage. That is especially true for custom printed box inserts with multiple cavities or layered components.
Lead times vary, though there are realistic expectations. Simple paperboard inserts can sometimes move from approved artwork to production in about 10 to 15 business days. More complex structures, especially those that need new tooling or multiple proof rounds, may take 3 to 5 weeks. If molded pulp is involved, add time for tooling and drying behavior. If the insert uses specialty finishes, add time for material sourcing and press setup. The biggest schedule risk is rarely the cutter. It is the decision cycle. When internal approvals move slowly, custom printed box inserts can miss a launch date even if the shop is ready.
A good way to keep the schedule under control is to gather product data early, name the actual decision-makers, and lock artwork before the production slot is reserved. If the team waits to solve the layout after the quote is approved, the calendar starts slipping. Ask for both a prototype timeline and a production timeline. That makes the critical path visible. It also helps everyone understand where the schedule can flex and where it cannot. For custom printed box inserts, that clarity often matters as much as a lower unit price.
Custom Printed Box Inserts Cost and Pricing Factors
Cost starts with material choice. A simple die-cut paperboard insert usually comes in lower than a molded or multi-layer build, while foam and heavily engineered corrugated structures sit higher. Print coverage adds cost too. One-color branding is not the same as full bleed graphics, especially when both sides of the insert are printed. Size and complexity matter as well. A flat tray with one cavity is different from a nested insert with accessory pockets and lift tabs. For many buyers, custom printed box inserts get expensive when the design tries to do too many jobs at once.
MOQ changes the math. At 1,000 units, unit cost can feel high because setup is spread over a small run. At 5,000 or 10,000 units, the per-piece price often improves, but the brand takes on more upfront spend and more storage risk. That trade-off should be weighed against sales velocity. If the packaging changes every quarter, a large run may not make sense. If the insert fits a stable product line, larger quantities can be efficient. In that sense, custom printed box inserts are never just a materials quote. They are also a forecast decision.
There are charges that can hide in plain sight. Tooling or die-cut setup, prototype samples, freight, print plate prep, and artwork adjustment work can all add to the total. Some suppliers bundle these costs, and some separate them. Ask for transparency. A quote that looks lower can become more expensive once samples, revisions, and shipping are added. The real number is the landed cost, not the line item alone. That is especially true for custom printed box inserts that need a custom-fit insert and a specific brand finish.
| Insert Type | Typical Strengths | Print Feel | Common Unit Range at 5,000 Units | Best Use Case |
|---|---|---|---|---|
| Die-cut paperboard | Lightweight, crisp folds, good presentation | Strong for logos, patterns, and messaging | $0.18-$0.38 | Cosmetics, apparel accessories, kits |
| Corrugated insert | More cushioning and compression strength | Good for simple graphics and brand marks | $0.16-$0.32 | Electronics, shipping-heavy ecommerce |
| Molded pulp | Protection, sustainability story, custom shaping | Usually minimal print, premium if understated | $0.22-$0.45 | Eco-focused brands, irregular items |
| Foam | High retention, cushioning, precise cutouts | Limited branding value | $0.35-$1.20 | Sensitive components, high-risk transit |
The table helps, but it does not tell the whole story. A simpler insert can save money and still improve the package. A premium version can lift perceived value and reduce damage claims, but it only pays off if the customer sees and feels the difference. In practice, custom printed box inserts should be judged on total landed cost: insert price, labor savings, fewer replacements, lower returns, and faster pack-out. A package that costs more per unit can still be cheaper overall if it cuts rework.
One overlooked cost is visual clutter. Too much branding can require extra print passes, more color matching, and more design revisions. That can be a poor use of budget if the insert sits inside a box that already carries the main brand message. Sometimes the highest-value move is restraint. Clean lines, one strong logo, and a well-planned cavity can do more for perception than a busy panel full of claims. That is a lesson worth keeping in mind whenever custom printed box inserts are treated as the place to say everything.
Step-by-Step Guide to Specifying the Right Insert
Start with measurement, and measure the real pack-out, not the idealized one. Include the product, accessories, instructions, and any protective wraps that will actually ship together. A phone accessory kit, for example, may need space for a charger, cable tie, printed card, and a small warranty leaflet. If the main product is the only thing measured, the insert will be wrong the moment the fulfillment team starts using it. Strong custom printed box inserts begin with real objects on a table, not just a spec sheet.
Then decide the opening story. What should the customer see first? What should stay hidden? Where should the grip points live? A good insert guides the eye and the hand. It can place the hero item in the center, keep accessories aligned to one side, and use printed labels to reduce hesitation. If the package should feel premium, the reveal needs to be deliberate. If utility matters most, the layout should be obvious and fast. That choice shapes the entire packaging design.
Choose the material after the layout, not before. A rigid structure may be the right answer for a heavier item, while paperboard might be enough for light branded packaging with a refined look. Molded pulp can be a strong answer when the sustainability message matters and the item needs moderate protection. If you are unsure, ask for a sample in two materials and compare them against actual products. For many brands, custom printed box inserts become easier to specify once the team stops arguing in abstractions and starts handling prototypes.
Request a dieline and a prototype, then let the people who pack orders every day try it. Not marketing. Not only leadership. The people on the line see friction fast. They notice if a tab is hard to lift, if a cavity slows placement, or if the insert wants to spring out of the carton. Their feedback is often more useful than a polished presentation. This is also the point to ask whether the insert needs to serve multiple order types. Some custom printed box inserts can be adapted with small changes; others need separate versions for retail, ecommerce, or replacement-part shipments.
Finally, validate the design with testing. Drop tests, shake tests, and speed tests all tell different stories. ISTA-style testing helps reveal what happens during transit, while a pack-out speed test shows what happens at the fulfillment bench. A design that protects beautifully but slows production may still be the wrong business choice. The best custom printed box inserts support protection and throughput at the same time.
- Measure the product, accessories, and carton together.
- Prototype at least one version before committing to full production.
- Test pack-out speed with real staff and real units.
- Verify transit performance with drop and vibration checks.
- Approve artwork only after the dieline is locked.
Common Mistakes to Avoid With Custom Printed Box Inserts
The biggest mistake is designing around the box first and the product second. That almost always creates weak retention, wasted board, or a sloppy fit that looks better in a rendering than in the hand. I see this often in product packaging projects where the outer carton was chosen months before the insert entered the discussion. If the insert has to be forced into the carton, the system starts with a compromise. Strong custom printed box inserts should fit the product story, not rescue a poorly planned carton.
Over-branding causes trouble too. A dense wall of copy, icons, and color blocks can make the insert feel busy and cheap, even when the materials are decent. It can also add print cost without improving function. A cleaner layout often reads as more premium because it gives the product room to breathe. That is one reason minimalist custom packaging often feels more expensive than it is. The insert is part of that effect. With custom printed box inserts, more ink does not automatically mean more value.
Skipping prototype testing is a costly habit. CAD drawings are useful, but they do not account for humidity, slight product variation, or how the insert behaves after a long truck run. A cavity that looks exact on screen may be too stiff in real life. It may also be too loose or awkward for the operator. Test the actual insert with actual products before launch. For custom printed box inserts, the prototype is where expensive mistakes become visible while they are still cheap to fix.
Fulfillment coordination is another weak spot. If the packaging team designs an elegant interior but the warehouse team has to slow every order to place it correctly, labor cost can spiral. The pack-out method should be part of the brief. Manual lines, semi-automated lines, and high-volume kitting all have different tolerance for complexity. A well-built insert should reduce uncertainty, not introduce it. That is especially true when custom printed box inserts are used across more than one SKU.
Return flows and secondary packaging deserve attention too. If the product might be returned, repaired, or re-shipped, the insert may need to survive more than one trip. If replacement parts are common, the cavity design may need room for partial packs. A design that works only for the first shipment is not enough for many ecommerce brands. Custom printed box inserts should be judged across the full product lifecycle, not just the first unboxing.
Expert Tips and Next Steps for Custom Printed Box Inserts
Benchmarking is underrated. Before you approve a design, buy or study one or two competing unboxings and pay attention to how they use structure, empty space, and messaging. Notice where the eye lands first and how quickly the product is accessible. The strongest packaging often looks simple because the details are doing the work quietly. That is a useful lens for custom printed box inserts, especially when a team is tempted to add more print than the structure needs.
Gather real-world data before you place the order. Product dimensions are a start, but you also need monthly volume, target margin, fragility risk, and the preferred ship method. Ask whether the product will move through parcel networks, retail shelves, or both. Ask whether the insert needs to support seasonal bundles or a single core SKU. These questions sound basic, yet they shape the economics of custom printed box inserts more than most teams expect.
Get two timelines from the supplier: one for prototype development and one for full production. That tells you where the schedule can flex and where it cannot. It also helps internal teams stop assuming that sample approval and final production take the same amount of time. They usually do not. When the brief is unclear, the calendar stretches. When the brief is precise, custom printed box inserts move much faster because fewer decisions are left hanging.
A small pilot run is worth serious consideration, especially if the insert affects kitting speed, damage rates, or customer-facing presentation. A pilot lets the team check whether the insert truly improves the unboxing experience or just looks good in a meeting. It also shows whether the warehouse can live with the layout at scale. If the pilot works, scaling is much less risky. If it does not, the correction is still manageable. That is a better path than discovering the problem after thousands of units are printed.
My practical advice is simple: brief the vendor, review the dieline, approve the sample, and do not finalize custom printed box inserts until pack-out testing is complete. If you are building a new line or refreshing an old one, start with the right material, the right fit, and the right amount of print. That is how packaging stops acting like a cost center and starts working like a business tool. The right insert protects the product, speeds the line, and makes the brand feel more certain. That is the real job of custom printed box inserts.
Frequently Asked Questions
What are custom printed box inserts used for in packaging?
They hold products in place so items do not shift, rattle, or break during transit. They also improve presentation by organizing the opening experience and making the package feel intentional. In many operations, custom printed box inserts also speed up packing because the team follows a fixed layout instead of guessing where each item belongs.
How do I choose the right material for custom printed box inserts?
Match the material to product weight, fragility, and shipping distance. Paperboard and corrugated are common when structure and print quality matter, while molded pulp is a strong option for sustainability-led programs. If the item has unusual edges or a tight retention requirement, ask for a sample before committing to custom printed box inserts.
Do custom printed box inserts require a minimum order quantity?
Often yes, because setup, cutting, and print preparation create a baseline cost for each run. Larger quantities usually lower the per-piece price, but they also raise upfront spend and storage needs. Ask the supplier where the pricing breakpoints begin so you can compare MOQ against total budget for custom printed box inserts.
How long does it take to produce custom printed box inserts?
Timeline depends on design complexity, sample approval speed, material availability, and print method. Simple projects can move quickly once artwork and measurements are locked, while custom structures need more proofing and adjustment. Build in time for at least one prototype round so the fit issues are caught before full production of custom printed box inserts.
Are custom printed box inserts worth the cost for ecommerce brands?
They can be worth it when they reduce damage, returns, and packing labor while improving perceived value. The smartest way to judge them is to compare the insert price against savings from fewer replacements and a stronger unboxing experience. For premium, fragile, or multi-item kits, custom printed box inserts often pay back through both performance and presentation.

