A Custom Printed Mailer is usually one of the first things a customer touches after checkout, and that gives it more responsibility than people assume. It has to protect the product, survive transit, and still look like it belongs to the brand. If it fails on any of those three points, everyone notices. Usually not in a flattering way.
That is why buyers keep asking the same question in different forms: how much customization is enough, and where does extra spend actually pay off? The answer depends on the product, the route, and the packaging system around it. Apparel, subscription kits, soft goods, samples, and light accessories all have different needs, even if they end up in a similar bag.
The useful way to think about a Custom Printed Mailer is simple: it is not just a printed bag. It is a shipping surface, a brand surface, and a production decision. The right spec can speed up fulfillment and cut waste. The wrong one can turn into torn seams, fuzzy print, and a cheap-looking shipment that undercuts the product inside.
What a custom printed mailer really does for your packaging
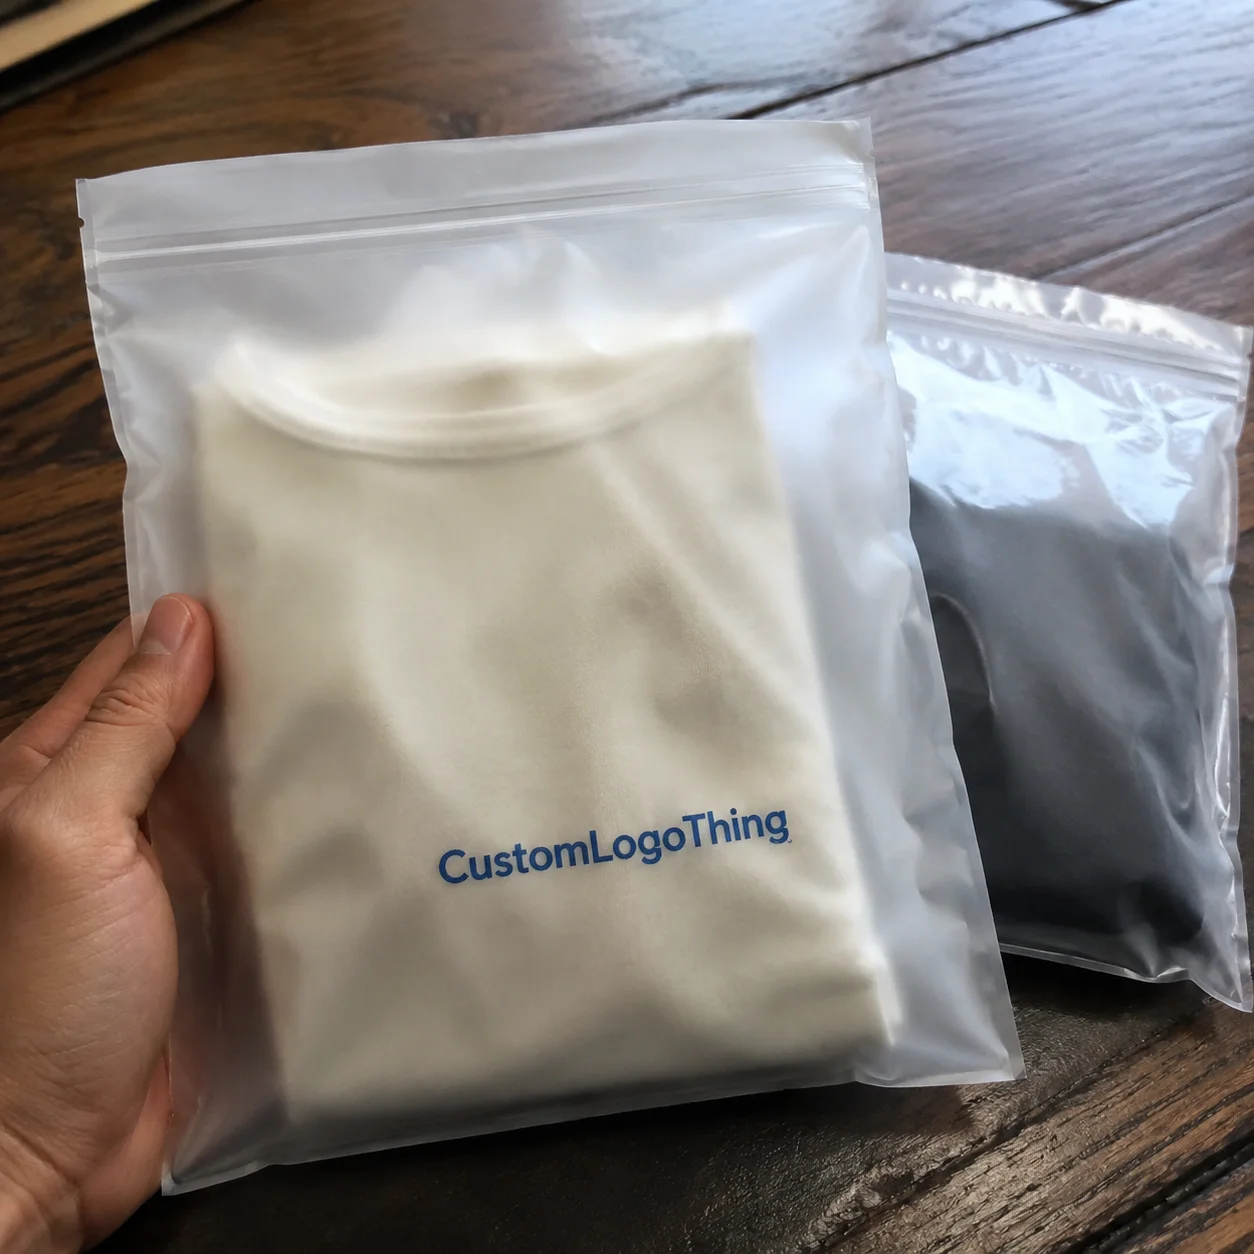
Most of the time, a Custom Printed Mailer means a flexible polyethylene shipping bag with branded print on the outside. The structure can be basic or fairly technical. Some are single-layer bags. Others use coextruded film, which lets converters combine layers for better strength, opacity, or print performance.
The bag does more work than a lot of buyers expect. It protects against scuffing, light moisture, dust, and casual tampering. It also changes the pack-out process. A good mailer is easy to load, seals cleanly, and does not force fulfillment staff to fight the material just to close the order. That matters more than people admit in spec meetings.
For e-commerce brands, the appeal is obvious. Mailers are lighter than cartons, use less material, and can be printed in a way that keeps the brand visible without overbuilding the package. They are common in apparel, swimwear, small accessories, promotional kits, and subscription shipments where a rigid box would be unnecessary overhead.
The tradeoffs are just as real. A mailer has limited structure, so overfilling it can stress the seal and distort the graphics. Thin film can reduce cost, but only if the product is soft and the shipping path is gentle. If the order is going through rough handling, it is better to choose a slightly heavier construction than to gamble on a cheap gauge and hope for the best.
At a minimum, buyers should look at these variables:
- Film gauge, which affects puncture resistance and overall feel
- Opacity, which affects privacy and product concealment
- Closure type, which affects speed and tamper resistance
- Print method, which affects color, detail, and order economics
- Bag size, which affects presentation and seal integrity
One reason a Custom Printed Mailer gets used so often is that it can support both branding and operations at once. A plain shipping bag just moves a product. A branded one can make the shipment feel deliberate without slowing down fulfillment. That is the sweet spot buyers are usually after.
“The bag has to survive the trip first. Branding comes second if the package tears on the way there.”
How the printing and converting process works
The process usually starts with artwork review. That means the converter checks dimensions, print placement, color targets, and any special requirements before production begins. Good suppliers do not jump straight to printing. They want to know where the seams are, where the adhesive sits, and whether the artwork will be cut off by a zipper line, tear notch, or fold.
After that, the film is selected and the print setup is prepared. The bag may be printed first and then converted into its final shape, or the structure may be formed during the production line depending on the method. Once printed, the film is slit, folded, sealed, and packed for shipment. It is not complicated in theory. In practice, every step can affect the final bag.
Flexographic printing is common for repeat orders and larger quantities. It runs efficiently and works well for straightforward logos, spot colors, and repeat graphics. Rotogravure is usually reserved for bigger volume runs where consistent, rich coverage matters and the setup cost makes sense. Digital printing is often the more practical route for shorter runs or jobs that need less upfront tooling, though the unit cost tends to be higher.
Flexible film is less forgiving than paperboard. Tiny text can fill in. Thin lines can disappear. Large dark blocks can show scuffing or slight variation if the substrate or press setup is not right. The best-looking artwork on film is usually clean, vector-based, and built with enough contrast to survive production. Fancy design is not a substitute for print discipline.
Finish also matters. A matte film can look softer and less reflective, while gloss can make colors pop. Corona treatment, surface coatings, and light lamination layers may be used to improve ink adhesion, rub resistance, or appearance. Those details are not decoration. They affect how the bag looks after it has been handled, stacked, and shipped.
Proofing saves money later
Proofing is where a lot of buyers either save themselves or create a problem they will be staring at for months. A digital proof can confirm layout, size, and general color direction. A physical sample or press check is better when the mailer has tight placement requirements or a picky brand color. If the print needs to sit close to the adhesive strip or edge seal, verify that before the run starts. Fixing it later is expensive. This is not a mystery.
It also helps to compare the structure to other packaging formats before locking in the order. The same artwork may behave differently on a pouch, carton, or film bag. A design that looks fine on a screen may need adjustments if it is moving to a different substrate, especially if you are also ordering Custom Packaging Products or other rigid formats like Custom Poly Mailers.
Material, size, and print choices that change performance
LDPE and coextruded polyethylene films are the most common material choices for a Custom Printed Mailer. LDPE has a soft, familiar feel and good flexibility. Coextruded structures combine multiple layers, which can improve puncture resistance, opacity, or print surface quality. That sounds technical because it is. The buyer version is simpler: better films usually cost a little more and behave better under stress.
Thickness is one of the biggest performance variables. A 2.5 mil mailer and a 4 mil mailer may look similar at a glance, but they will not hold up the same way. Thicker film usually resists tearing and corner pressure better, though it can also feel bulkier and cost more. Thinner film can be fine for soft, low-risk goods. It is a bad idea for anything with sharp edges, heavy inserts, or rough distribution conditions.
Size matters just as much. The goal is not merely to fit the product. The goal is to fit it cleanly. If the bag is oversized, the item can shift around inside, which makes the package look sloppy and can wrinkle the print. If the bag is too tight, the seal gets stressed and the material can stretch at the edges. Neither outcome is useful.
Good sizing starts with the actual packed footprint, not just the product dimensions on paper. Folded apparel, tissue, insert cards, and accessory bundles all change the space requirement. A little extra room is normal. A lot of extra room usually means the bag was guessed instead of measured.
Closure choice changes workflow and security. Common options include:
- Peel-and-seal strips for quick fulfillment
- Tamper-evident closures for added shipping security
- Dual adhesive strips for return or reseal use
- Tear notches for more consistent opening
Print coverage changes both appearance and cost. A one-color logo on a white mailer is usually the most efficient route and often looks cleaner than people expect. Full-coverage artwork creates stronger shelf presence and better privacy, but it increases ink usage and can add setup complexity. Inside print is useful if you want an added brand touch or a surprise message, but it should be used for a reason, not because the design team wanted to spend another afternoon being clever.
Opaque film is worth considering when privacy matters or the contents should not be visible. Hang holes, display slots, and other retail-specific features can also be added, but they only make sense if the package is being used in a channel that needs them. Otherwise, they are just extra cost with a nice label attached.
| Option | Typical use | Impact on cost | Performance note |
|---|---|---|---|
| 1-color logo on standard white film | Everyday shipping, basic branding | Lower | Best for simple, clean presentation |
| Full-coverage print with opaque film | Brand-forward e-commerce orders | Higher | Better privacy and stronger visual impact |
| Custom size with tamper-evident closure | Security-sensitive shipments | Moderate to higher | Helps reduce tampering and overpacking |
| Inside print with reseal strip | Premium unboxing or returns | Higher | Useful when customer experience matters |
If the shipment has to survive real distribution abuse, not just a friendly warehouse handoff, look at test methods too. ISTA methods are widely used for distribution testing, and they give buyers a better frame for comparing film choices than guesswork and optimism.
Custom printed mailer cost, MOQ, and quote factors
Pricing for a custom printed mailer depends on a handful of practical variables: film type, bag size, gauge, print colors, print coverage, closure style, and order quantity. There is no magic formula hiding behind the quote. More custom features and more ink coverage usually mean a higher unit price. That is the boring part, but it is also the part that matters.
Quantity is the biggest lever. A small run has to absorb the same setup work as a larger run, which is why the unit price can look stubborn at lower volumes. Plates, digital prep, machine changeover, and waste all get spread across fewer bags. That is why 5,000 pieces and 25,000 pieces can have very different economics even if the artwork barely changes.
MOQ depends on the printer, the print method, and the film structure. Standard sizes with simple artwork are easier to take on. Custom dimensions, special film blends, inside printing, and multiple print stations usually push the minimum order up because the line setup has to be worth the time. If someone gives you a suspiciously tiny MOQ on a very custom structure, ask how they are making it work. There is usually a catch somewhere.
For planning, buyers often see ranges like these, though actual pricing depends on the exact spec and the supplier's cost structure:
- Standard printed poly mailers: often around $0.10-$0.22 per unit at moderate quantities
- Heavier gauge or higher coverage designs: often around $0.18-$0.35 per unit
- Smaller runs with custom setup: can come in meaningfully higher because setup is spread across fewer pieces
That is only the starting point. Freight, sample charges, plate charges, carton configuration, and any kitting or special packing can change the landed cost more than buyers expect. A quote that looks good on paper can become ordinary the moment shipping gets added. A quote that looks a little high may be the better buy if it includes better packaging, fewer defects, and less rework.
It is also worth comparing cost against failure. A cheaper mailer that tears, opens early, or looks cheap at the door can cost more than a slightly better construction once returns, credits, and brand damage are counted. I would rather see a buyer spend a little more on the right film than save a fraction of a cent and ship problems.
If the packaging program extends beyond mailers, the same thinking applies to Custom Poly Mailers, pouches, and even custom printed boxes. Spend where the package is visible and where failure is expensive. That rule holds up pretty well.
Packaging and material guidance from organizations like EPA recycling resources can also help teams make cleaner material decisions, especially when sustainability targets are part of the brief. That does not solve everything, but it keeps the conversation grounded in actual material tradeoffs instead of marketing language.
Turnaround and production steps from artwork to delivery
A normal timeline starts with the brief and quote, then moves into artwork prep, proof approval, production scheduling, printing, drying or curing, inspection, packing, and shipment. Straightforward jobs with final artwork move faster. Jobs that need color matching, special film, or custom structure take more time. That is not a delay. That is the process doing its job.
Typical lead times often run 12-15 business days from proof approval for many standard projects, although that can move shorter or longer depending on quantity, print method, and factory load. Digital jobs may be faster for smaller runs. Gravure or multi-color work can take more coordination because the setup and color control are more involved.
Approvals are the usual bottleneck. Every change after proofing adds time. Moving a logo, changing a Pantone target, expanding coverage, or deciding the copy needs one more line of text can all reset part of the schedule. Flexible packaging is not a live preview. It still has to be produced, checked, and packed at line speed, which means last-minute indecision is expensive.
Rush orders are possible, but speed should never replace inspection. Drying, stacking, and seal checks still matter. If the supplier says they can turn it quickly, ask how they protect against smudging, crooked seals, registration drift, and blocking. If those answers are vague, the schedule is not the only risk.
After shipment, receiving discipline matters more than buyers like to admit. Check count, carton condition, print accuracy, and seal integrity as soon as the order lands. If the bags are palletized, make sure there is room to inspect them and that they are not sitting in a hot dock or damp corner while someone is looking for a forklift. That kind of neglect creates avoidable headaches.
Common mistakes that cause weak results or extra spend
The first mistake is choosing the wrong size. If the product rattles around, the package looks loose and the print can wrinkle. If the bag is too tight, the seal gets stressed and the contents may show through in a way that hurts privacy or presentation. Neither option helps the brand.
The second mistake is overcomplicated artwork. Thin type, tiny legal copy, metallic effects, and too many colors can look fine on a monitor and mediocre on film. Flexible film does not reward delicate design. Strong contrast, cleaner shapes, and a disciplined color count usually print better and age better once the bag has been handled a few times.
Ignoring shipping conditions is another common miss. Heat, abrasion, stacking pressure, and long transit paths can expose weak seal strength or a thin gauge fast. If the order is going through a rough distribution network, specify the bag for that reality. Do not spec it for a perfect delivery route that does not exist.
Skipping samples or proof review can get expensive. A small alignment issue or color shift can turn into a large visible problem across thousands of units. The issue is not just print quality. It is the cost of discovering a preventable mistake after the run is complete.
Buying only on unit price is the last classic trap. A lower-cost mailer that tears, leaks, or looks cheap at delivery often costs more once returns, replacements, and customer complaints are counted. Cheap packaging is only cheap if it actually works.
“The least expensive quote is not always the least expensive order. The real cost shows up in damage, rework, and the way the package feels in the customer's hands.”
Expert tips for a cleaner quote and better final result
Build the spec around the product first, then choose film gauge and print coverage based on how the order actually ships. That sounds obvious, but a lot of bad packaging decisions happen because someone started with a design mockup instead of the packed item. The product does not care what the mockup looked like.
Keep the design as clean as the brand allows. A strong logo, good contrast, and a limited color count often look better on a custom printed mailer than a crowded design trying to say five things at once. If the package has to feel premium, clarity usually beats noise.
If the color matters, ask for a sample or mockup before approving the full run. That is especially useful when the mailer has to match inserts, labels, or other packaging pieces in the same launch. Matching a packaging system is harder than matching a single bag, and it is much easier to fix on paper than after production.
Think in terms of lifecycle value. A slightly better mailer can reduce damage, speed up pack-out, improve customer perception, and lower the odds of complaints. Those are real operational gains. They do not show up neatly in the first quote line, but they do show up in the business.
Before requesting pricing, have these items ready:
- Final artwork files
- Target quantity
- Product dimensions and weight
- Closure preference
- Shipping destination
- Timeline expectations
That list makes the quote cleaner and usually shortens the back-and-forth. It also helps the supplier recommend the right construction, whether the order is a basic branded mailer or a more involved piece of packaging tied to a larger launch. If you are comparing mailers, boxes, and pouches at the same time, a clear spec sheet saves a lot of wasted motion.
A well-planned custom printed mailer should protect the product, support the brand, and fit the fulfillment process without creating unnecessary cost. Keep the size honest, the film appropriate, the print readable, and the quantity realistic. That combination usually gives you the result you actually wanted, not just the one that looked good in the mockup.
FAQ
What should I know before ordering a custom printed mailer for shipping?
Start with the product dimensions, weight, and shipping conditions so the mailer size and film gauge match the real use case. Confirm the print method, closure style, and minimum order quantity before artwork is approved. If color accuracy or presentation matters, ask for a proof or sample rather than trusting a screen rendering.
How does a custom printed mailer differ from a plain poly mailer?
A custom printed version adds logos, messaging, or graphics that turn basic shipping into brand presentation. It may also use more intentional sizing, opacity, and closure options to improve protection and customer experience. The structure is often similar, but the production setup is tailored to your brand instead of being generic stock.
What affects custom printed mailer pricing the most?
Quantity, film thickness, bag size, number of print colors, and coverage area are the biggest price drivers. Special closures, custom sizing, and freight can also change the total landed cost. Lower quantities usually carry a higher per-unit cost because setup fees are spread across fewer bags.
How long does it take to produce custom printed mailers?
Timeline depends on artwork approval, print method, order size, and the current production schedule. Simple projects with final artwork move faster than jobs that require color matching, special film, or finishing changes. Approval delays are one of the most common reasons a project takes longer than expected.
What artwork works best on a custom printed mailer?
Bold logos, high-contrast text, and clean shapes usually print best on flexible film. Tiny details, very thin lines, and overly complex gradients can lose clarity on the finished bag. Vector artwork and a simple color plan make proofing and production easier, which also lowers the chance of avoidable mistakes.
Is a thicker mailer always better?
No. Thicker film improves puncture resistance, but it also raises cost and can be unnecessary for soft, low-risk products. The right gauge depends on the product shape, packing method, and the amount of abuse the shipment will see. More material is not automatically better material.
Should I choose matte or gloss finish?
Matte usually looks softer and can hide minor scuffs better. Gloss tends to make colors look brighter and more saturated. The right choice depends on the brand style, print coverage, and how much handling the bag will see before it reaches the customer.