Custom printed t shirt bags do more than keep items together for the walk out the door. In retail, food service, and event settings, they are often the last branded object a customer handles, which makes bag spec a lot more important than it first looks.
The real question is not whether a logo can be printed. That part is easy. The better question is whether the bag carries the load, feels acceptable in hand, and still looks intentional after it has been twisted, stacked, and reused a few times. That is the difference between packaging that merely exists and packaging that actually supports package branding.
Why custom printed t shirt bags do more than carry product
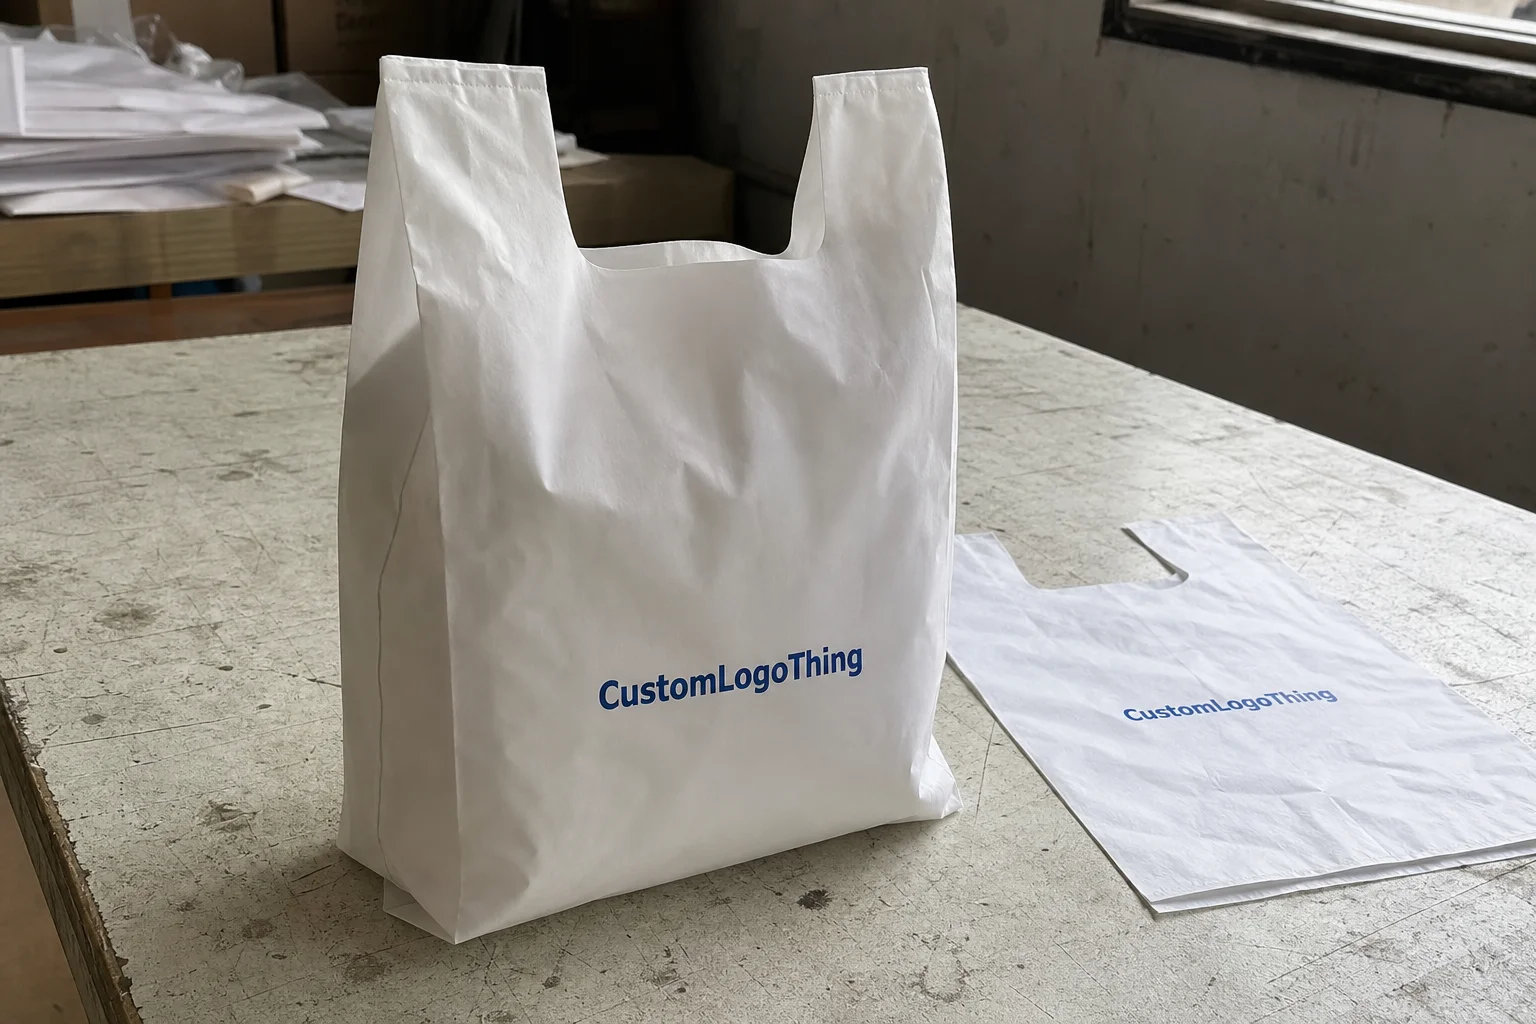
A bag leaves with the customer, not the cashier. That matters because the bag keeps working after the sale. A plain carryout bag disappears into the background. A well-made branded bag keeps exposing the logo in parking lots, offices, transit, and homes.
That is why custom printed t shirt bags show up everywhere from apparel stores and pharmacies to convenience retail, boutique counters, takeaway service, and trade show handouts. They move fast, they are easy to stack, and they give a business visible surface area without demanding a premium format.
There is also a simple cost-per-impression argument. A reusable bag can generate repeated views at a low unit cost if the print is readable and the film is strong enough to stay in service. The caveat is obvious: if the bag tears early, that marketing value collapses. A weak bag is just expensive litter.
They are not the right choice for every use case. Lightweight apparel may only need a compact carrier. A bottle, a boxed order, or a heavier food pickup may need stronger handles, thicker film, or a different structure entirely. The common mistake is ordering for the logo first and the load second. That usually ends in complaints, rework, or both.
In practice, a good bag spec balances four things:
- Load — what the bag must carry without stretching, splitting, or slipping.
- Size — how the contents sit inside, especially when gussets are involved.
- Handle style — comfort, grip, and whether the bag cuts into the hand under weight.
- Print surface — how much of the design stays visible after folding and filling.
If you are comparing against paper carriers or custom printed boxes, the tradeoff is usually cost, durability, and visibility. T-shirt-style plastic bags are not the fanciest option. They are often the practical one for high-throughput service where speed matters and the bag has to survive real handling.
“The cheapest bag on paper is not always the cheapest bag in use. If it fails at checkout, you pay for it twice.”
For buyers comparing packaging styles across categories, our Custom Packaging Products page is a useful place to review other printed formats as well.
Materials, thickness, and format choices that change performance
The base material does a lot of heavy lifting. Common options include high-density polyethylene (HDPE), low-density polyethylene (LDPE), recycled-content blends, and mixed formulations. HDPE is usually lighter, crisper, and lower in cost. LDPE tends to feel softer, stretch more, and handle puncture differently. Recycled-content film can support sustainability goals, but clarity, stiffness, and print behavior depend heavily on the blend.
Thickness is where performance becomes real. T-shirt bags are often specified in mil or microns, and that number affects tear resistance, stretch, and how the bag behaves under load. A thinner bag may save a fraction of a cent, but if it splits at the handle or drops a bottle, the savings disappear fast. That is not theory. It is the sort of mistake that creates customer problems and replacement costs.
The lightest option is not always the cheapest in practice. If a bag has to be overbuilt to survive use, or if weak specs create more rejects during quality checks, the low price is fake economy. Procurement teams usually get farther by comparing finished performance, not resin weight alone.
| Option | Typical strengths | Tradeoffs | Best fit |
|---|---|---|---|
| HDPE | Lower cost, crisp feel, good stiffness | Less stretch, can feel thinner in hand | Retail checkout, convenience stores, short carry distances |
| LDPE | Softer feel, more stretch, better puncture resistance | Usually higher cost than basic HDPE | Heavier contents, smoother hand feel, higher perceived quality |
| Recycled-content blend | Improved sustainability story, can support brand goals | Variation in clarity and print consistency | Brands prioritizing reduced virgin resin content |
| Opaque tinted film | Privacy, stronger color branding, hides contents | Less product visibility | Pharmacy, boutique, takeaway, branded retail packaging |
Format details matter just as much. Side gussets change internal volume. Bottom gussets help the bag stand and spread load. Die-cut handles can look clean but may be less comfortable when the contents get heavy. Loop handles usually improve carry comfort and can read as more premium, though they add cost and may change the print layout.
Transparency is another strategic choice. Clear film works when product visibility helps the sale, such as apparel, accessories, or promotional handouts. Opaque film makes more sense when privacy matters or when brand color needs to do more of the visual work than the logo itself. In some cases, a strong color block beats a busy design by a mile.
For buyers comparing retail packaging across categories, the same logic applies to custom printed boxes: structure, finish, and material are not decorative extras. They change how the brand is experienced and how well the package survives handling.
Artwork, color, and print setup that keeps logos readable
Print method affects appearance and consistency. On plastic bags, common approaches include flexographic printing and, in some applications, gravure or similar production methods. The right process depends on volume, artwork complexity, color count, and what the supplier’s equipment can actually hold without drifting. There is no prize for choosing the fanciest method if the design does not need it.
Simple logos and bold type usually reproduce best because they hold contrast and remain legible at checkout speed. Dense artwork can become a liability. Fine lines, tiny text, and delicate gradients may look clean on a screen and muddy on a narrow bag panel. If the print area is small, the design should be built for instant recognition. Three seconds is generous.
Color matching deserves more attention than it gets. Subtle gradients can shift, and ink registration on narrow packaging surfaces may not stay perfectly tight across every run. Strong contrast usually beats decorative complexity. Black on white. Dark on light. Brand color with enough surrounding space to breathe. Those combinations survive production realities better than “creative” designs that collapse once they hit the press.
Proofing should never be treated as a box-ticking exercise. Check logo placement, fold lines, barcode safety zones if relevant, legal copy, and any marks that must remain visible after the bag is flattened or loaded. A logo placed too low can disappear behind the gusset. Small text can end up inside a fold. A compliance line can vanish exactly when someone assumes it is safe.
There is a practical rule here: the more important the message, the simpler the artwork should be. That is not a design cop-out. It is a production truth. If the brand needs color fidelity beyond standard process printing, ask early about Pantone references, ink limitations, and whether the supplier can keep the target color consistent across the full run.
Good packaging design has to work in the real environment, not just in a presentation deck. For custom printed t shirt bags, that means checking the artwork against the folded bag, the filled bag, and the customer’s eye level. Those are three different views. Brands often approve only one and wonder why the result looks off in use.
Pricing, MOQ, and unit-cost drivers
Pricing for custom printed t shirt bags usually comes down to a handful of variables: resin cost, bag size, thickness, number of print colors, tooling or plate setup, freight, and volume. Material is only part of the story. Setup can matter a lot on smaller orders, while freight can swing landed cost more than buyers expect, especially on bulky, lightweight goods.
MOQ, or minimum order quantity, is the quantity floor a supplier sets for a production run. In plain English, the job has to be large enough to justify setup, materials, and press time. A higher MOQ usually lowers unit cost, but it also increases cash tied up in inventory and storage space. That tradeoff is real. A lower unit price does not help much if the bags sit untouched for a year.
For reference, a standard branded bag run can price very differently depending on size and print coverage. A simple one-color job at 5,000 pieces may sit in a very different range from a two-color, larger-size order with heavier film and special handling. Buyers should ask suppliers to quote the same specification across all bids. Otherwise the comparison is meaningless and usually inflated by hidden differences.
Here is a useful way to think about the cost stack:
- Base film — the raw material and thickness.
- Dimensions — width, gusset, and height.
- Print setup — number of colors, plates, and setup labor.
- Order volume — higher volume generally reduces unit cost.
- Freight and handling — often underestimated on low-margin items.
Bad specs create hidden costs. A bag that is too small can force a reprint. A weak handle can trigger customer complaints. A design that ignores fold lines can make the logo look crooked even if the print is technically correct. Those mistakes are expensive because they do not stay inside production; they spill into the customer experience.
It helps to separate unit cost from landed cost. Unit cost tells you what the bag costs at the factory. Landed cost includes freight, duties if applicable, and any warehousing or distribution expense. Those two numbers can diverge quickly on a lightweight product where shipping volume matters as much as the resin itself.
For realistic budgeting, buyers usually get better answers by asking for multiple quantity breaks and the same spec on each quote. That shows where the price actually drops and where it just looks attractive on paper. A quote that hides freight or swaps film thickness is not a clean quote. It is a distraction.
Production process and realistic lead times
The production sequence is straightforward, but each step can add time if the inputs are incomplete. First comes the brief: size, film, thickness, color count, handle style, and artwork. Then the supplier reviews the file, confirms print feasibility, and prepares the proof. After approval, tooling or press setup happens, followed by the print run, quality check, packing, and shipment.
Lead time depends on one simple fact in packaging: the less you change, the faster things move. A supplier that already stocks the base bag specification will usually move faster than one starting from scratch. Clean vector artwork is faster than a logo buried in a low-resolution image. One color is easier than four. Standard dimensions are easier than a custom size that needs extra confirmation.
Approvals are where projects stall. Legal text must be checked. Pantone references may need confirmation. Dimensions may need a second look if the bags are expected to hold boxed goods or heavier retail packaging. If any of that changes after the proof is generated, the schedule changes too. That is not just a supplier problem; it is a planning issue.
Typical production can often run around 12 to 15 business days after proof approval for straightforward jobs, though that depends on the supplier, order size, and current plant load. Rush service exists in some cases, but it still assumes complete artwork, locked Specs, and Faster approval on your side. Rush does not fix missing files or undecided stakeholders.
Here is a clean way to avoid timeline drift:
- Send vector art, not screenshots.
- Confirm size before proofing.
- Check color references up front.
- Keep internal approvers in the loop early.
- Separate production time from freight time.
For brands that need documentation or sustainability claims, ask whether the material or paper components are certified. If a product intersects with paper-based packaging, FSC guidance can matter. For transit testing on related packaging, standards from organizations like ISTA and sustainability resources from the EPA can help buyers ask better questions. Not every bag order needs a full testing program, but the standards vocabulary is useful when you want less guesswork.
Step-by-step selection checklist for the right bag spec
Start with use case. What is going into the bag? A folded tee is not the same as a boxed item, and a two-item takeout order behaves differently from a pharmacy pickup. If the load changes the shape of the bag, the spec should reflect that before artwork is approved.
Next, measure the contents. Width, gusset, and height should work together so the bag closes comfortably without looking stretched or baggy. A bag that is too small stresses the handle and the side seams. A bag that is too large looks wasteful and can undermine perceived quality. That balance is part engineering, part presentation.
Then choose the film, handle, and print style together. A thicker film may support a heavier load but also change the way the bag folds. A loop handle can improve comfort but may change cost and layout. A print style with more coverage can look stronger, but it may also be less forgiving if the bag is transparent or lightly tinted.
Request a proof or sample against the real contents if possible. Put the actual product inside the bag. Check the logo placement. Check the carry feel. Check whether the bag stands up to normal store handling, not just a perfect tabletop setup. That one test often exposes problems digital approvals miss.
A practical checklist keeps the order under control:
- Define the contents and load weight.
- Set the minimum acceptable bag size.
- Choose material and thickness.
- Pick handle style based on carry comfort.
- Prepare artwork with clear contrast.
- Confirm print colors and placement.
- Approve a sample against real use.
For brands managing multiple sites, consistency matters as much as cost. The same bag spec should travel across locations without drifting. That is how retail packaging stays recognizable, and it is why good package branding usually comes from disciplined repeat ordering rather than one lucky design.
Common ordering mistakes that create waste or delays
The most common mistake is approving artwork before confirming bag dimensions. That one error can leave logos too small, too crowded, or placed in a zone that folds out of sight. The design looked fine on a proof and failed in the hand. That happens more often than people admit.
Underestimating load needs is another frequent issue. Apparel bags can seem light until the order includes multiple folded items. Bottles and boxed goods are worse. Thin film and weak handles are the first things to fail when the contents shift, snag, or press against the seam. If the bag is meant for frequent reuse, that load target should be set higher from the start.
Late-stage surprises slow everything down. Missing artwork files. Unclear color references. Copy that has not been checked for compliance. Each one adds avoidable delay. The production team cannot print what it does not have, and a rushed correction after proofing almost always costs more than a careful check before proofing.
Reorder planning is another place where money disappears quietly. If you run out unexpectedly, emergency buys can push freight costs up and force you into a temporary spec that does not match your standard branded packaging. That creates inconsistency across locations, and customers notice that even if no one says it aloud.
Storage is part of the equation too. Bigger orders can reduce unit price, but they also require space and inventory discipline. If turnover is uneven, a moderate order with a slightly higher unit cost can be smarter than filling a warehouse with bags you will not use for months. Packaging buying is full of that kind of tradeoff.
For a clean comparison, ask every supplier for the same variables: film, thickness, dimensions, print count, quantity, and freight assumptions. Without that discipline, price shopping turns into apples-to-oranges noise. With it, custom printed t shirt bags become a controllable part of packaging spend instead of a recurring surprise.
What details do I need to quote custom printed t shirt bags accurately?
Provide bag size, film type, thickness, print colors, quantity, and whether you need stock or fully custom construction. Attach artwork in a usable vector format when possible, plus any Pantone references or placement notes. If you want apples-to-apples pricing, give every supplier the same spec sheet so setup and freight are easier to compare.
How many bags should I order if I want the best unit price?
Ask for price breaks at several quantities, not just one number, because the cheapest unit cost may overshoot your storage or cash-flow limits. Balance reorder frequency against holding cost; a slightly higher unit price can be smarter if you avoid excess inventory. For multi-location brands, separate pilot quantities from rollout quantities so you do not commit too early.
What print method works best for custom printed t shirt bags?
Simple logos and bold text usually reproduce best on plastic bags because they hold contrast and stay legible at speed. If your design uses fine detail or multiple colors, confirm the supplier’s print limitations before approving art. Choose the method based on durability, color count, and turnaround rather than assuming the most complex process is the right one.
How long does production usually take?
Lead time depends on proof approval, tooling, order size, and whether the base bag spec is already established. Clean artwork and a locked spec can shorten the schedule more than asking for a rush after approvals are already delayed. Build in shipping time separately so the production estimate does not get mistaken for arrival date.
What is the best way to avoid mistakes on a reorder?
Save the exact approved spec, artwork file, and color callouts so the second run matches the first one. Check whether your previous order had any substitutions, because those can change price and print consistency. Review old samples before reordering if the bag will be used in a different environment or with heavier contents.
For buyers trying to make a defensible decision, the process is simple: define the load, Choose the Right material, keep the artwork readable, and confirm the spec before you commit. Do that, and custom printed t shirt bags become a useful branding tool instead of a commodity expense. Done badly, they are just another line item. Done well, they carry the product and the brand at the same time.