A Custom Printed Zipper pouch does a lot with very little. It protects the product, carries branding, and keeps shipping weight low enough that the freight team does not start muttering under their breath. That is why flexible packaging keeps replacing heavier formats in food, beauty, supplements, pet care, and small consumer goods.
The pouch is usually the first thing customers touch. That matters. A package can be structurally fine and still underperform because it feels cheap, opens badly, or looks crowded on shelf. Good pouch packaging is not about slapping a logo on film and calling it done. It is about matching the structure, print method, and barrier level to the product inside.
Buyers tend to focus on the design first, which is understandable and slightly backwards. The better approach is to start with the product’s needs, then build the visual system around them. The result is packaging that holds up in transit, reads clearly in retail, and does not waste money on features that sound impressive but do nothing useful.
“Pretty packaging is nice. Packaging that protects the product and still sells it is better.”
What a Custom Printed Zipper Pouch Is, and Why It Sells
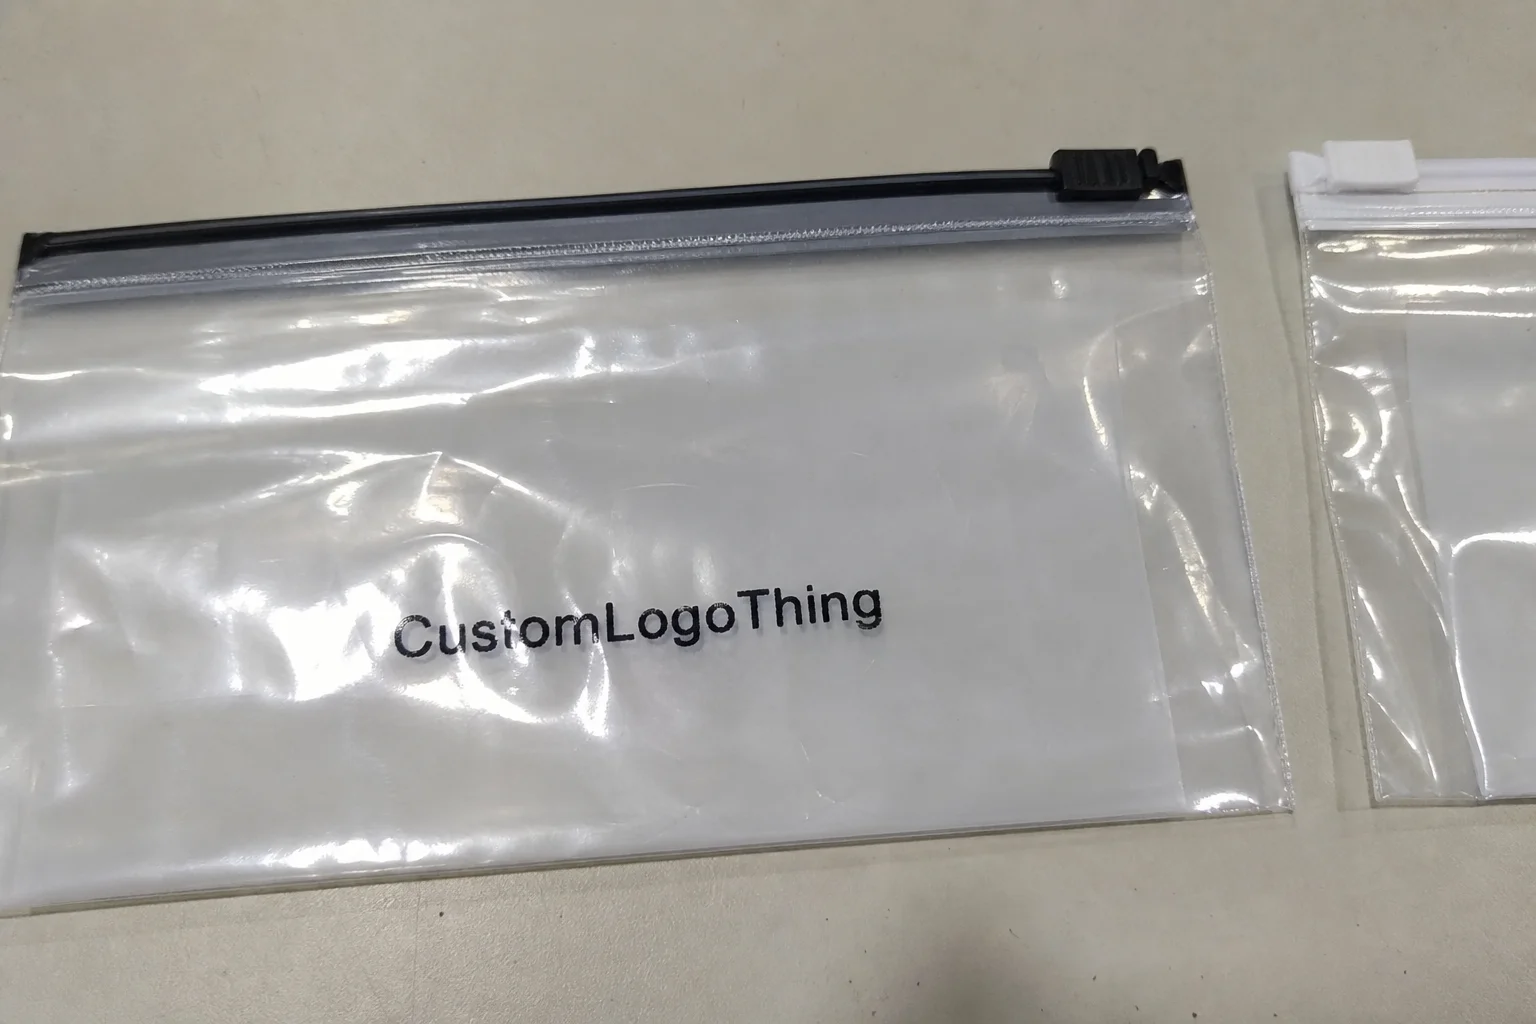
At its simplest, a custom printed zipper pouch is a flexible package with a reclosable zipper track, printed outer layers, and heat-sealed edges. Depending on the format, it may also include a bottom gusset, side gussets, a tear notch, a hang hole, or a clear window. Those small details change how the pouch functions on shelf and how customers use it after purchase.
The sales appeal comes from the combination of function and presentation. Compared with cartons, jars, or clamshells, pouches often use less material and ship more efficiently. They also allow for high-impact graphics without the bulk of rigid packaging. That makes them attractive for brands trying to look polished without inflating packaging cost or freight.
The format is especially useful for products that are opened and closed multiple times. Think snack foods, coffee, protein powder, bath salts, pet treats, wipes, and refill items. The zipper helps preserve freshness and improve convenience, which is one of the few packaging features customers actually notice again after the first opening.
There is a reason shelf presence matters so much here. A pouch can look premium with the right finish, or forgettable with the wrong one. Matte lamination softens reflections and can make a design feel more restrained. Gloss adds contrast and color punch. Soft-touch gives a velvet-like feel, though it also increases cost and can show scuffs if handled roughly. None of those choices is automatically best. The product category decides that.
One practical observation: the pouch has to earn its keep visually. If the design is cluttered, the package reads smaller and weaker than it should. If the artwork is too minimal, it can disappear next to louder competitors. The strongest packaging usually lands somewhere in the middle. Clear hierarchy. Enough contrast. No decorative nonsense pretending to be strategy.
How the Zipper Pouch Structure and Print Process Work
A finished pouch is built from layers. Most structures include a printable outer film, one or more functional layers beneath it, and a sealing layer that allows the package to close properly after filling. For more demanding products, multilayer laminates improve barrier performance and help the pouch resist moisture, oxygen, and odor transfer. That extra protection is not free, but it is often cheaper than product spoilage.
The basic construction is straightforward. The pouch has front and back panels, sealed edges, and a zipper track near the top. Stand-up pouches usually use a bottom gusset so the package can sit upright. Flat pouches are simpler and often better for samples, single-serve items, or mailer-style applications. Side-gusset pouches are common for coffee and other products that need a boxy profile and efficient stacking.
The print workflow usually starts with artwork and dieline review. After that, the supplier checks color setup, safe areas, and any issues around fold lines or seals. Then the film is printed, laminated if needed, slit, converted into pouch form, and inspected before packing. The process sounds clean on paper. It becomes less cheerful once a logo lands too close to a seal or the barcode sits where the fold eats half of it.
Print method matters as much as the structure. Digital printing is often used for shorter runs because setup is lighter and changes are easier. Flexographic and gravure printing usually make more sense for larger quantities, where the per-unit cost drops enough to justify the tooling. The catch is simple: those traditional methods want volume. If the order is small, the economics get ugly fast.
Artwork file quality is where a lot of projects go sideways. Thin fonts, low-contrast elements, and overly subtle gradients can fail once they are printed on flexible film and wrapped around a filled pouch. A design that looks crisp on a monitor can appear muddy on film, especially if the print is running on matte stock or includes white ink. That is not a production glitch. It is usually a design issue.
Key Specs That Affect Performance and Shelf Appeal
The best pouch spec is the one that fits the product and the supply chain. Fancy for the sake of fancy just makes the quote harder to swallow.
Size and fill volume are the first variables to settle. A pouch that is too large looks underfilled and wastes film. One that is too small can strain the seals, distort artwork, and make the zipper awkward to use. Buyers often underestimate how much visual credibility depends on fill. The package should look intentional, not like somebody guessed.
Film construction affects stiffness, print quality, sealability, and barrier. Common combinations include PE, PET/PE laminates, and more complex multilayer structures. PET tends to add stiffness and a better print surface. PE gives flexibility and sealing performance. If the product is dry and low-risk, a simpler structure may be enough. If freshness, aroma, or shelf life matter, the barrier layer deserves real attention.
Barrier requirements should be tied to the actual product, not just the category name. Roasted coffee, jerky, vitamins, powdered beverages, and scented goods all behave differently. Moisture barrier, oxygen barrier, and light resistance affect shelf life and product stability. A pouch that looks fine but lets in too much air is just expensive disappointment in film form.
Zipper style changes usability. Standard press-to-close zippers are common and economical. Child-resistant closures are used where compliance requires them. Tamper-evident features can matter for higher-risk products and food applications. If the zipper feels flimsy or misaligned, customers notice immediately. They may not know what went wrong technically, but they will absolutely know something is off.
Graphics and finish determine whether the package reads clearly from a distance. White ink becomes important on clear films and dark backgrounds. Typography needs enough size and contrast to survive bends, scuffs, and shelf clutter. Matte finishes reduce glare and feel more restrained. Gloss boosts color and visibility. Metallic effects and spot varnish can add impact, but they should support the design, not rescue it.
| Spec choice | Best for | Typical tradeoff |
|---|---|---|
| PE single-layer | Simple dry goods, low-cost programs | Lower barrier and less premium feel |
| PET/PE laminate | Retail packaging, moderate protection needs | Higher cost than a single-layer film |
| Matte finish | Premium branding, reduced glare | Can soften color intensity slightly |
| Gloss finish | Bright graphics and strong shelf pop | Reflections and fingerprints show more easily |
| Standard zipper | Most consumer products | Less specialized protection than custom closures |
| Barrier multilayer | Food, supplements, odor-sensitive items | Higher unit cost and more complex sourcing |
For sustainability-minded buyers, source reduction usually beats overbuilding. The EPA’s packaging guidance makes the same general point: reduce material where possible without compromising product protection. A lighter pouch with the right barrier is usually smarter than a heavier structure that solves nothing extra. See EPA packaging guidance.
Cost, Pricing, and MOQ: What Actually Drives the Quote
Pricing for a custom printed zipper pouch depends on quantity, pouch size, print coverage, material structure, zipper type, finish, and add-ons like windows, hang holes, or tear notches. There is no honest way around that. Suppliers need specifications before they can quote accurately, and small changes can move the price more than buyers expect.
MOQ, or minimum order quantity, comes from setup economics. The equipment needs time to get ready, colors need to be registered, and the production line has to be adjusted for the chosen film. That setup cost gets spread across the order. If the run is tiny, the unit price climbs. If the run is larger, the setup is diluted and the per-piece cost falls.
Short-run digital jobs are usually more expensive per unit but easier to launch. Traditional printed runs can be much cheaper at volume, but only after the order size justifies the setup. That is why buyers who want a “cheap” pouch without a quantity commitment usually get a quote that feels rude. It is not rude. It is arithmetic.
There are a few common cost triggers worth calling out:
- High ink coverage can increase production complexity and waste more film during setup.
- Special finishes such as soft-touch lamination, metallic effects, and spot varnish add cost.
- Barrier upgrades are often necessary, but they are not free.
- Nonstandard sizes may increase tooling or reduce production efficiency.
- Rush schedules can add charges if the timeline leaves no room for normal proofing and production.
For rough budgeting, short-run custom pouches usually sit noticeably higher per unit than larger-volume programs, sometimes by several cents or more depending on size and construction. High-volume orders can come in much lower, but the exact price depends on the film build and how much of the surface is being printed. A pouch with heavy coverage, a premium finish, and multilayer barrier will never price like a simple dry-goods bag. Nor should it.
Artwork revisions can also affect the quote. Every round of proof changes, color corrections, barcode fixes, and dieline adjustments adds time. That is one reason experienced buyers keep the design disciplined. Fewer surprises. Fewer delay fees. Fewer calls that start with “just one more small change,” which somehow never stays small.
If your packaging system includes cartons, inserts, or another retail component, it can help to compare options across the full lineup. A pouch may be the best fit, but in some cases a carton plus an inner pouch gives better shelf presence or better protection for a premium product. See Custom Packaging Products.
Production Steps and Timeline: From Artwork to Delivery
Most pouch projects follow the same sequence. The job only stays on schedule if approvals do.
- Request a quote with product details and target quantity.
- Confirm pouch format, dimensions, film structure, zipper style, and finish.
- Submit artwork, barcode files, and legal copy.
- Review the digital proof or sample.
- Approve the final specification.
- Print, convert, and finish the pouches.
- Inspect, pack, and ship.
Lead time depends on print method, complexity, and proof approval speed. Straightforward digital orders can move quickly once artwork is approved. Larger traditional print jobs, special laminations, and custom features take longer because each step adds production time. A practical planning window for standard jobs is often in the low-to-mid teens in business days after approval, while more complex projects can stretch beyond that.
The approval stage is where schedules usually slip. Color tweaks, copy changes, legal edits, and barcode corrections all add back-and-forth. If a launch date matters, final artwork needs to be ready before the order is placed. Hoping the proof will sort itself out is not a strategy. It is a delay with confidence issues.
Testing also matters if the pouch will move through e-commerce or palletized distribution. Compression, vibration, and abrasion can affect print finish and seal integrity. ISTA test methods are a useful reference point for buyers managing shipping-heavy programs. See ISTA.
Step-by-Step Guide to Ordering the Right Pouch
Ordering a pouch goes more smoothly if you treat it like a specification exercise. The visual part matters, but the structural choices decide whether the packaging works in the real world.
Step 1: Define the product. Start with fill weight, product texture, moisture sensitivity, shelf life, and how the item behaves once it is opened. A granola mix, protein powder, bath salt, and coffee all need different packaging logic. A pouch is not “one size fits most.” That is how you end up paying for the wrong thing.
Step 2: Pick the format. Stand-up pouch, flat pouch, side gusset, or custom shape? The answer depends on shelf display, filling method, and customer use. Stand-up pouches offer stronger retail presence. Flat pouches are often better for samples, single-serve items, or low-profile mailers. Side-gusset formats suit dense products and compact stacking.
Step 3: Match the film and zipper to the product. If the contents are moisture-sensitive or aroma-sensitive, the barrier spec comes first. If the pouch will be reopened many times, zipper quality matters more than buyers usually expect. Cheap closures save money only until customers start fighting the package.
Step 4: Prepare artwork correctly. Use the supplier’s dieline. Keep text away from seal zones and folds. Set bleed properly. Use the correct color mode and confirm barcode placement. Flexible packaging is unforgiving here. A clean screen file can still fail if it ignores how the pouch actually bends and seals.
Step 5: Review proof and sample options. A PDF proof confirms layout, but a physical sample tells you far more about texture, zipper feel, stiffness, and finish. If the product is positioned as premium, this step is not optional in any practical sense. It is cheap insurance against expensive regret.
It also helps to compare quotes on identical terms. If one supplier quoted matte laminate and another quoted gloss film, the pricing is not comparable. Same size, same construction, same quantity, same print coverage. Otherwise the numbers are just decorations.
Common Mistakes and Expert Tips Before You Approve
The most common mistake is choosing a pouch that looks right but does not protect the product long enough. That happens a lot with food, supplements, fragrance-sensitive goods, and anything that degrades with moisture or oxygen exposure. Nice graphics do not fix weak barrier performance.
Another frequent issue is overdesign. Too much text, tiny compliance copy, and low-contrast type make the package harder to read. The problem gets worse once the pouch is filled, bent, handled, and stacked. Flexible packaging has a way of punishing designs that rely on perfect flatness. Unfortunately, products are not stored in design software.
Usability is easy to underestimate too. If the zipper is hard to find, hard to close, or inconsistent across the run, customers feel it right away. Reclosability is one of the main reasons people choose pouch packaging. If that part fails, the package loses a major advantage.
Expert tip: ask for a physical sample whenever possible. Film texture, seal strength, and finish are difficult to judge from a screen.
Expert tip: check the pouch in two conditions: shelf display and shipping. A structure that looks elegant in retail might scuff in transit. A tough mailer-style pouch might read too plain for a premium shelf program. The right answer depends on where the package spends its life.
Expert tip: build in one round of internal review before proof approval. The fastest way to miss an error is to assume someone else already checked it. Barcode placement, claims, and legal copy deserve a second pass because production does not care about good intentions.
For buyers focused on material sourcing, FSC certification may matter if paper components or paper-based inserts are part of the system. The FSC resource center is a sensible reference: FSC.
The best purchasing decisions are usually unglamorous. Check the spec. Review the sample. Confirm the proof. Avoid assumptions about how the pouch will behave once it is filled, stacked, shipped, and opened by real people with real impatience.
Next Steps for Specifying Your Custom Printed Pouch
Before requesting quotes, build a one-page spec sheet. Include product weight, target dimensions, material preference, zipper style, finish, barrier needs, and expected quantity. That single document cuts down on guesswork and makes supplier quotes easier to compare.
Then gather the files that matter: artwork, barcode, claims, dieline, and any brand rules around color or finish. If the packaging program also includes boxes, inserts, or other printed components, keep the visual language aligned so the line feels intentional rather than pieced together in a hurry.
Once quotes arrive, compare them with caution. Price alone does not tell the full story. A lower quote may use thinner film, a different zipper, a simpler finish, or less barrier than you actually need. That can be fine if the product allows it. It can also turn into a return problem later, which is a much more expensive form of learning.
Ask for a sample, proof, or material recommendation before approval. If the product is moisture-sensitive, aroma-sensitive, or positioned as premium, that extra step is worth the time. A good custom printed zipper pouch should do three things at once: protect the product, support the brand, and move cleanly through production without surprises.
FAQs
What sizes work best for a custom printed zipper pouch?
Choose the size based on fill weight, product shape, and whether the pouch needs headspace for sealing and reopening. A proper fit reduces wasted material, improves shelf presentation, and helps the zipper close more cleanly.
How much does a custom printed zipper pouch cost per unit?
Unit cost depends on quantity, pouch dimensions, material structure, print method, and added features like windows or matte finish. Higher quantities usually reduce cost per pouch, while short runs and premium specifications increase it.
What is the typical lead time for custom printed zipper pouch orders?
Lead time varies by print method, quantity, proof approval speed, and whether the pouch needs special materials or finishes. Fast approvals and standard specs usually shorten the schedule.
Can a custom printed zipper pouch be made for food or supplements?
Yes, but the pouch structure should match the product’s barrier needs, shelf life, and any safety or regulatory requirements. Moisture, oxygen, and light protection matter a lot for sensitive contents.
What file type should I use for pouch artwork?
Vector files are usually best for logos and text, while print-ready files should follow the supplier’s dieline and color requirements. Always confirm bleed, safe area, and resolution before production begins.


