Custom Stickers Canada: What Buyers Actually Need to Know
A small brand can spend six weeks perfecting a product, then lose shelf impact because the sticker looks cheap, curls at the edge, or lands two days after launch. Annoying? Yes. Common? Painfully. If you are buying custom stickers canada wide for product packaging, retail packaging, events, mailers, or giveaways, the sticker is not a cute afterthought. It is often the first thing a customer touches.
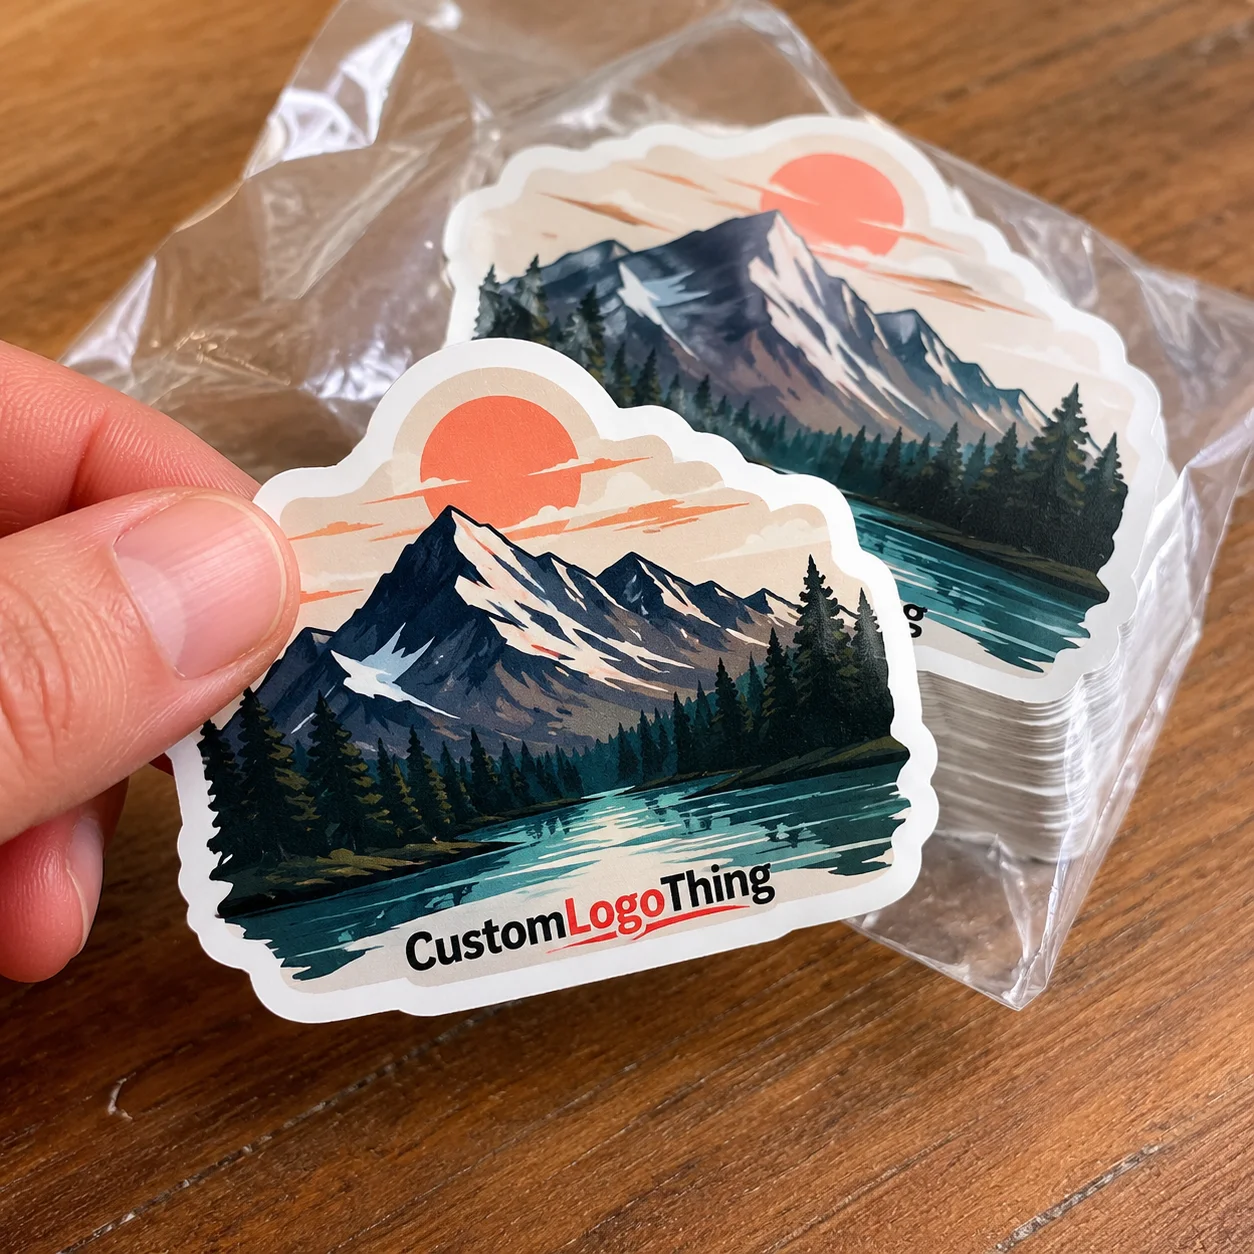
Custom stickers are made-to-order adhesive pieces printed with your logo, artwork, ingredients, barcode, warning text, promotion, QR code, or brand message. They can be used as product labels, decals, packaging seals, inserts, shipping stickers, or campaign handouts. The format changes. The job does not: stick cleanly, look sharp, survive the intended use, and avoid making your packaging look like it was assembled during a power outage.
Here is the plain-language split. Stickers are the broad category. Labels usually carry product, compliance, pricing, batch, or barcode information. Decals are often more durable or decorative, especially for windows, laptops, equipment, vehicles, or outdoor exposure. Seals are used to close boxes, tissue, bags, mailers, or sleeves and can support a tamper-aware presentation, though they are not certified tamper-evident security unless specified.
Canadian orders have a few extra practical wrinkles. Shipping from one province to another can add two to seven business days depending on the lane. Rural, northern, or event-location delivery can take longer. Bilingual packaging may matter for national retail. GST, HST, and PST expectations should be clear on quotes. Cross-border buying can look cheap until customs delays, brokerage fees, exchange rates, and missed launch dates show up. Very glamorous. Very preventable.
This guide is for buyers, not design theory collectors. You will see how material, adhesive, finish, size, quantity, artwork setup, pricing, and timelines affect the final sticker order. If you also need hang tags, carton labels, or coordinated package branding, Custom Logo Things offers Custom Labels & Tags that can sit beside your sticker program instead of fighting it visually.
How Custom Sticker Production Works From Artwork to Finished Roll
The production flow looks simple. You submit artwork and specifications. The supplier checks the file. A proof is created. You approve it. Printing starts. Stickers are cut, finished, packed, and shipped.
Simple does not mean casual. Most expensive sticker mistakes happen before ink hits material.
A proper proof should confirm size, shape, bleed, cut line, colour expectations, spelling, barcode position, QR code readability, and roll direction if the labels are machine-applied. Proofing is boring. It is also the step that catches the 5,000-piece typo before it becomes a 5,000-piece monument to regret.
Most sticker orders use one of three production methods:
- Digital printing: Good for short runs, multiple designs, fast setup, variable artwork, and quantities from roughly 50 to 2,500 pieces.
- Flexographic printing: Better for larger roll-label runs, repeat orders, tighter colour consistency, and quantities often starting around 5,000 to 10,000 pieces.
- Screen printing: Useful for bold spot colours, specialty inks, rugged decals, and certain outdoor or industrial applications.
Digital printing is usually the most forgiving entry point for small brands because there is less setup and less commitment. It works well for seasonal designs, short product runs, and early-stage packaging tests. Flexographic printing starts making sense when the design is stable, the quantity is high, and repeatability matters more than low-volume flexibility.
Format matters too. Roll stickers are ideal for product labeling, label dispensers, and hand application at scale. Sheet stickers work for office use, inserts, short batches, or mixed designs. Individually cut stickers are better for giveaways, merch, retail counters, trade shows, welcome kits, and creator drops.
Die-cut and kiss-cut are not the same thing. Die-cut stickers are cut through the sticker and backing so the whole piece follows the outside shape. Kiss-cut stickers are cut through the face material but not the backing, which makes them easier to peel. Kiss-cut is often smarter for tiny shapes, intricate logos, and event giveaways because people can actually remove the sticker without fingernail surgery.
Roll direction deserves more attention than it gets. If labels are going through an applicator, the leading edge, unwind direction, core size, and gap between labels can affect whether the roll works at all. A beautiful label on the wrong roll orientation is still wrong. Machines are rude that way.
A good printer can help clean up margins, check bleed, and flag obvious issues. They cannot turn a 300-pixel logo pulled from a social profile into premium product packaging. Garbage file in, sad sticker out. That is not snobbery. That is print physics.
Materials, Adhesives, and Finishes That Match the Job
Material choice should start with use, not vibes. Paper stickers are cost-effective for dry indoor packaging, bakery boxes, retail bags, stationery, and short-life promotional use. They can look beautiful, especially on textured or uncoated stocks, but they are not built for ice buckets, shower shelves, oily jars, or outdoor windows.
BOPP, often called polypropylene, is a strong choice for moisture-prone product packaging. Clear BOPP can create a no-label look on glass or plastic. White BOPP is common for cosmetics, food jars, bath products, supplements, and bottles. It handles condensation better than paper and usually keeps print cleaner during handling.
Vinyl is the rugged option. It suits outdoor decals, laptops, equipment labels, bumper-style stickers, hard cases, and long-wear promotional pieces. Depending on laminate and adhesive, vinyl stickers can hold up for months or years outdoors. If your stickers need to survive Canadian winter exposure, delivery trucks, storefront windows, or gear, vinyl deserves a serious look.
Kraft paper gives a handmade, natural, farmer’s-market feel. It works nicely for soaps, candles, coffee, tea, apothecary-style goods, and small-batch food packaging. The tradeoff is colour. White ink may be needed if you want bright colours on kraft, and fine details can look softer than they would on a white film.
| Material | Best Use | Typical Strength | Watch For |
|---|---|---|---|
| Paper | Dry indoor labels, boxes, inserts | Lower cost, good print quality | Moisture, oils, abrasion |
| BOPP / Polypropylene | Jars, bottles, cosmetics, food packaging | Moisture resistance, clean finish | Needs the right adhesive for cold or curved surfaces |
| Vinyl | Outdoor decals, laptops, equipment | Durability and weather resistance | Higher unit cost than paper |
| Kraft Paper | Natural retail packaging, handmade goods | Warm texture and earthy look | Muted colours and limited moisture resistance |
Adhesive is where many buyers get burned. Permanent adhesive is standard for product labels and packaging seals. Removable adhesive works for temporary promotions, pricing labels, and some retail displays. Freezer-grade adhesive is designed for cold-chain products, frozen food, and refrigerated surfaces. High-tack adhesive helps on textured cartons, recycled mailers, rough plastics, and difficult substrates.
Surface energy matters. Smooth glass is usually cooperative. Some plastics are not. Recycled cardboard can be dusty or fibrous. Kraft mailers may have texture that fights low-tack adhesives. A label applied to a cold, damp bottle behaves differently from the same label applied to a clean room-temperature jar.
Finish changes both appearance and performance. Gloss makes colour pop and can feel energetic. Matte looks softer and more premium, especially for skincare, candles, tea, and boutique retail packaging. Soft-touch lamination feels upscale but can scuff if the wrong film is used. Holographic and metallic effects grab attention, but they can overwhelm simple packaging design if used on every surface. Laminate adds scratch and moisture protection, especially on vinyl and BOPP.
Practical rule: do not choose a sticker material because it looks cool in a product photo. Choose it because it survives the surface, storage conditions, shipping route, and customer handling.
Compliance also matters. If the sticker is used on food, cosmetics, children’s products, cannabis, supplements, or regulated retail goods, confirm material suitability and required label information before printing. Standards and expectations vary by product category. For broader packaging performance testing, the International Safe Transit Association publishes useful testing frameworks for packaged-product distribution. For responsible paper sourcing, FSC certification may be relevant if your retail buyers care about documented fibre sourcing.
Pricing, MOQ, and Unit Cost Drivers for Sticker Orders
Sticker pricing depends on quantity, size, material, finish, shape, number of colours, format, artwork condition, proofing time, and shipping location. That sounds like a lot because it is. Anyone giving one flat price for every sticker without asking questions is either guessing or selling something very limited.
Small runs cost more per unit because setup time is spread across fewer pieces. A 100-piece order may cost $0.65 to $2.50 per sticker depending on size and material. A 1,000-piece order of a standard paper or BOPP label may land around $0.12 to $0.45 per piece. A 5,000-piece roll label can drop below that, especially if the size is modest and the finish is standard. Specialty vinyl, foil, clear stock, laminate, or complex die-cuts can push costs higher.
Minimum order quantity also varies. Digital sticker orders can sometimes start at 25, 50, or 100 pieces. Custom roll labels may start around 250 or 500 pieces. Flexographic runs, specialty adhesives, metallic effects, embossing, and custom tooling may require 1,000, 5,000, or more. MOQ is not a moral judgment. It is the point where setup, material waste, press time, and finishing make financial sense.
Here are the common cost tradeoffs. Paper is usually cheaper than vinyl or BOPP. Standard circles, squares, rectangles, and ovals are usually cheaper than intricate die-cut shapes. Matte and gloss finishes usually cost less than soft-touch, holographic, metallic, foil, or heavy protective laminates. Rolls can be more efficient for repeat product packaging, while individually cut stickers cost more to finish and pack.
Colour expectations can affect cost too. Standard CMYK printing works for many jobs, but brand-critical colours may need Pantone references or closer press control. That can add setup time and cost. Metallic stock, white ink underprinting on clear or kraft materials, and layered effects also change the estimate. Fancy finishes are not automatically bad. Unplanned fancy finishes are where budgets go to wheeze.
A higher unit cost is worth paying when failure costs more than the upgrade. Waterproof labels for bath products, freezer-grade stickers for frozen food, premium finishes for luxury packaging, and durable vinyl for outdoor decals are not indulgences. They are insurance against peeling, staining, smearing, and looking amateur in front of paying customers.
Ask for price breaks at several quantities: 250, 500, 1,000, and 2,500 pieces is a useful spread for many small brands. One extra price tier can make the math obvious instead of mystical printer fog. If 500 stickers cost $220 and 1,000 cost $285, the better decision is not hard unless your design is changing next week.
Process and Timeline: From Quote Request to Delivery
A clean buying process saves days. Gather specs first, Request a Quote, submit artwork, review the digital proof, approve production, wait for printing and finishing, then allow transit time. The clock usually starts at proof approval, not quote request, not first email, and not the moment you emotionally decided the order was urgent.
Simple digital sticker orders can move quickly, often in the range of three to seven business days after proof approval, plus shipping. More complex work can take longer. Specialty materials, foil, custom dies, large quantities, roll direction requirements, laminate, multiple versions, or proof revisions can push production to 10 to 20 business days or more. This depends on supplier capacity and material availability, so confirm the current timeline before you promise a launch date.
Proof approval is the line in the sand. If you delay approval by two days, production usually shifts by two days or more. If you request changes after approval, the printer may need to restart proofing or charge revision fees. Printers are many things. Time machines are not one of them.
For faster quoting on custom stickers canada orders, send the useful facts up front:
- Final sticker size, such as 2 x 2 inches or 3 x 4 inches
- Shape, including standard shape or custom die-cut
- Quantity and number of artwork versions
- Material preference, or at least indoor, outdoor, wet, cold, or dry use
- Finish, such as matte, gloss, soft-touch, clear, metallic, or laminate
- Roll, sheet, or individually cut format
- Application surface, such as glass, plastic, kraft mailer, jar, pouch, or box
- Delivery city, required date, and whether the order is event-critical
Shipping inside Canada is not one uniform experience. Toronto to Montreal is different from Vancouver to Halifax, and both are different from rural Alberta, northern Ontario, Yukon, Nunavut, or a last-minute trade show delivery. Add a buffer. For launches, retail drops, subscription box packing, holiday campaigns, and trade shows, three to five extra business days can save rush fees, reprint panic, and blood pressure.
Weather can also interfere. Winter storms, holiday freight backlogs, and remote delivery routes do not care about your launch calendar. If the order is tied to a paid event or retail appointment, treat the required date as the date stickers must be in hand, checked, and usable. Not “scheduled to arrive.” That phrase has betrayed many people.
If stickers are part of a larger packaging system with tissue, sleeves, cartons, or Custom Packaging Products, coordinate timing across every component. A beautiful sticker arriving early does not help if the Custom Printed Boxes are still in transit. Production planning is boring until it saves the launch.
Common Ordering Mistakes That Make Stickers Look Cheap
Cheap-looking stickers usually come from preventable decisions. The first cluster is artwork. Low-resolution logos, missing bleed, wrong colour mode, tiny text, weak contrast, and no cut line for custom shapes can all wreck the result. A label that looks readable at 400% on your screen may be useless at 1.25 inches wide on a lip balm tube.
Bleed is the extra artwork that extends beyond the cut edge, often 0.0625 to 0.125 inches depending on the supplier. Safe margin keeps text and important graphics away from the cut line. A dieline tells the printer where to cut. These are not decorative file features. They are how your sticker avoids white slivers, chopped text, and weird edges.
Sizing is another classic trap. Buyers choose a size based on a screen mockup instead of the actual jar, box, pouch, envelope, or bag. Printed stickers are physical objects. Screens lie. For curved containers, even a 0.25-inch difference can change how the label sits, wrinkles, or overlaps. Test paper mockups on the real container before ordering 2,000 labels.
Material mismatch is brutal. Paper stickers on cold bottles wrinkle and fail. Removable adhesive on permanent packaging can lift. Indoor stock used outdoors fades, cracks, or peels. A kraft label on an oily candle jar can stain. A glossy finish over tiny ingredients can glare under retail lights. Matte can mute bright colours. Specialty effects can make clean package branding look noisy if every design element screams at once.
Another quiet problem is application. Labels applied by hand need enough backing area to peel easily and enough tolerance for human placement. Labels applied by machine need roll direction, core size, gap, liner type, and unwind details confirmed. If staff are applying stickers to hundreds of jars, a hard-to-peel shape is not charming. It is payroll wearing a costume.
Quantity mistakes go both ways. Ordering too few creates constant reorders, inconsistent batches, and higher average cost. Ordering too many before testing can leave you stuck with obsolete ingredients, old addresses, changed compliance text, or a logo you secretly hate after three weeks. For new product packaging, a pilot run of 100 to 500 pieces is often smarter than jumping straight to 5,000.
Samples are not a luxury. They are a cheap reality check. Apply the sticker to the real surface, store it the way customers will, rub it, chill it, ship it, stack it, and photograph it under the lighting you use for ecommerce. Guessing is cheaper for about five minutes. Then the replacement order starts.
Next Steps Before You Request a Sticker Quote
Before asking for a quote, build a simple spec sheet. It does not need to be fancy. It needs to answer the questions a printer will ask anyway. Confirm the sticker purpose, surface, size, quantity, material preference, finish, shape, application method, storage conditions, and deadline. If you do not know the material, describe the use. A decent supplier should translate that into options.
Measure the actual package with a ruler, not vibes. For curved containers, wrap a paper strip around the jar or bottle and mark where it lands. If the sticker sits near a taper, shoulder, seam, or groove, test that too. Labels hate pretending curved surfaces are flat. They will punish optimism.
Prepare artwork in vector format when possible. AI, EPS, and press-ready PDF files are usually best for logos, clean type, and custom shapes. Outline fonts, embed images, include bleed, maintain safe margins, and provide a clear cut line for die-cut artwork. Raster images should be high resolution at final print size, commonly 300 dpi for standard label printing. A website PNG is usually not enough.
Ask the supplier for the right material instead of pretending to know every adhesive chemistry on earth. Tell them if the sticker goes on glass, plastic, cardboard, a kraft mailer, a cold jar, an oily bottle, a textured pouch, a window, or outdoor equipment. Tell them if it will be refrigerated, frozen, shipped in winter, handled wet, or applied by machine. Better input gets better recommendations.
Run a basic quality check when the order arrives. Confirm count, size, colour, spelling, cut accuracy, finish, roll direction, and adhesion on the actual surface. Check the first few pieces from different parts of the roll or stack, not only the one sitting on top looking innocent. If something is wrong, document it quickly with photos, order details, and the approved proof.
Get the commercial details in writing before approving production. That includes price breaks, lead time after proof approval, proofing terms, revision fees, shipping cost, tax, reorder process, roll direction, overrun or underrun policy, and whether colour matching is approximate or controlled by a specific reference. Pantone matching, ASTM-related performance expectations, FSC paper claims, and ISTA-style shipping tests all need clear scope if they matter to your product.
For custom stickers in Canada, the smartest buyers compare specs, not just sticker prices. The cheapest option is only cheap until it fails on the package, delays the launch, or makes good product packaging look like a rushed school project. Decide what the sticker has to survive, give the printer enough information, approve the proof carefully, and leave time for shipping. Not glamorous. Effective.
FAQ
How much do custom stickers in Canada usually cost?
Pricing depends on size, quantity, material, finish, shape, artwork setup, and shipping location. Small digital runs may cost roughly $0.65 to $2.50 per sticker, while larger paper or BOPP orders may fall closer to $0.12 to $0.45 per piece. Ask for quantity breaks at 250, 500, 1,000, and 2,500 pieces before deciding, because the next tier may cost only slightly more overall.
What is the best material for custom product stickers in Canada?
Paper works for dry indoor packaging where cost matters most. BOPP or polypropylene is better for jars, bottles, cosmetics, refrigerated items, and moisture-prone product packaging. Vinyl is usually better for outdoor decals, equipment labels, laptop stickers, and long-wear promotional pieces. The surface, storage conditions, and handling matter more than the material name alone.
How long does it take to print custom stickers Canada wide?
Timeline depends on proof approval, order size, material availability, finishing, and shipping distance. Simple digital sticker orders are usually faster than specialty rolls, foil, custom die-cuts, or large-volume jobs. Build in extra time for launches, retail deadlines, holidays, rural delivery, winter weather, and trade show events.
Should I order custom stickers on rolls, sheets, or individually cut?
Choose rolls for product labeling, hand application at scale, and label dispensers. Choose sheets for inserts, small batches, office use, or mixed designs. Choose individually cut stickers for giveaways, merch, events, retail counters, and brand promo packs. If labels will run through a machine, confirm roll direction before production.
What artwork file is best for custom sticker printing?
Vector files such as AI, EPS, or press-ready PDF are usually best for logos, typography, and clean cut lines. Raster images should be high resolution at final print size, not pulled from a website or social profile. Include bleed, safe margins, outlined fonts, embedded images, and a clear dieline for custom shapes.


