Custom Stickers for Wine Bottles Buyers Can Order Fast
What Custom Stickers for Wine Bottles Need to Do on the Shelf
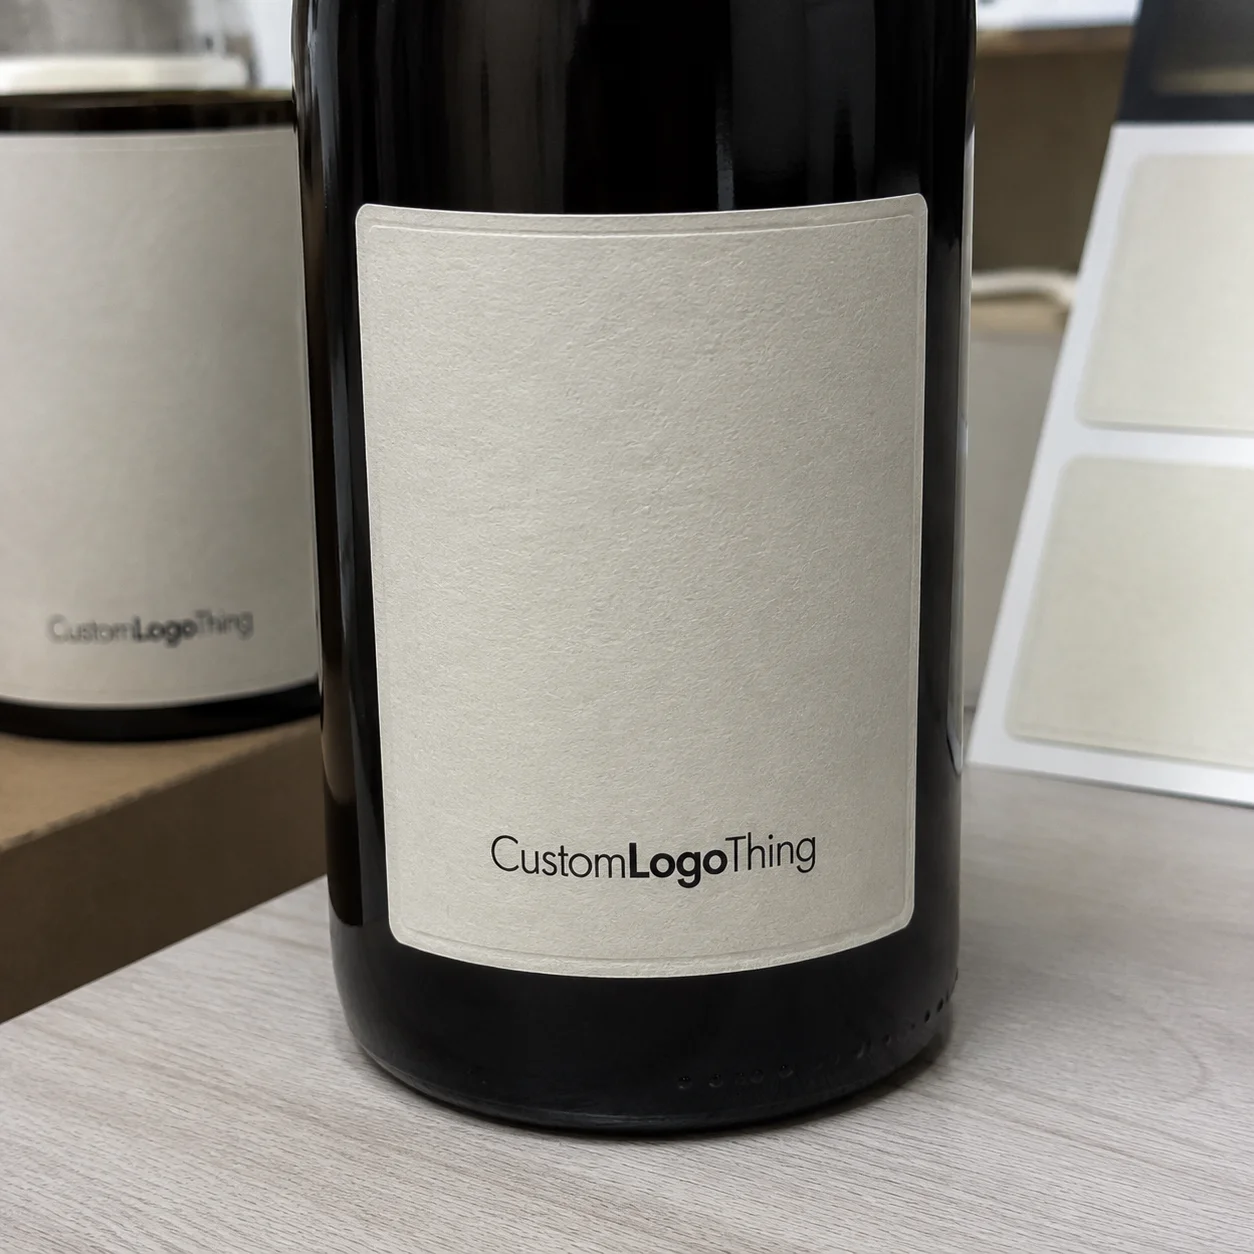
Two bottles can hold wine of similar quality, sit at the same price point, and target the same buyer. The one with cleaner label alignment, richer finish, and readable details usually feels more credible before anyone pulls the cork. Custom stickers for wine bottles do more than decorate glass. They carry brand identity, compliance copy, varietal cues, batch information, gift presentation, and the first promise the package makes.
A wine bottle sticker may be a full front label, a small back label, a shoulder accent, a neck seal, a tamper-style strip, or a promotional sticker added to an existing bottle. For a private dinner or wedding, it may only need to look sharp for one evening. For retail, it has a harder job: handling, shelf lighting, cold storage, transit vibration, and a customer’s hand after the glass starts to sweat.
Glass is not a friendly surface. It is curved, sometimes tapered, often cold, and occasionally damp. A label that looks perfect as a flat PDF can wrinkle at the edge, bubble near the shoulder, or skew badly if the panel is too wide for the bottle diameter. Standard 750 ml wine bottles often have a front label panel around 3.5 to 4.5 inches tall, but bordeaux, burgundy, champagne, and specialty bottles vary enough that measuring is not optional.
Small wineries, event planners, private-label brands, corporate gifting teams, wedding suppliers, and beverage startups tend to share the same pressure: the label needs to look polished, arrive on time, and avoid headaches during application. The right build balances material, adhesive, print method, finish, shape, compliance space, quantity, and schedule. Pretty artwork helps. Proper construction keeps it on the bottle.
Practical rule: choose the sticker around the bottle and use conditions first, then refine the artwork. A beautiful label on the wrong stock can fail faster than a plain label built for the job.
How Wine Bottle Stickers Are Built: Materials, Adhesives, and Finishes
The face stock is the visible material your customer touches. Paper remains common for classic estate-style wine labels because it takes ink warmly and can feel premium, especially in textured, laid, or uncoated finishes. BOPP film, a biaxially oriented polypropylene, is a better choice for moisture resistance and chilled bottles. Clear film creates the popular no-label look. Metallic stock adds premium cues. Textured paper works well for craft releases, wedding bottles, and gift sets where hand feel matters.
Adhesive choice is less glamorous. It is often the part that decides whether the label stays flat. Permanent adhesive is typical for retail and gift bottles. Removable adhesive can make sense for short-run events or reusable glass, although it may not resist chilling as well. For bottles going into refrigeration, damp storage, or ice buckets, ask about wet-strength paper, freezer-grade adhesive, or film constructions designed for condensation.
Printing method shapes both cost and flexibility. Digital printing suits short runs, seasonal labels, personalized batches, and multiple varietals because plates are not required. Flexographic printing can be more efficient for larger repeat orders, especially when the same size and material run often. Foil stamping, embossing, debossing, and spot UV can raise perceived value, but they add setup steps and usually extend the schedule.
Finishes change how the bottle feels in the hand. Matte lamination reduces glare and gives the design a softer shelf presence. Gloss varnish sharpens color and adds shine. Soft-touch coating feels velvety, though it can show fingerprints on dark artwork. Spot UV highlights a logo, crest, or varietal name. Foil stamping looks strong on black, cream, deep green, and textured stocks, but small foil details under about 0.5 mm can fill in if the artwork is too delicate.
Clear labels need extra scrutiny. Without white ink under the graphics, colors become translucent. Pale gold on clear film can nearly disappear on dark green glass; red artwork can look muddy on amber glass. A white ink layer behind key areas keeps color more predictable, especially for logos, barcodes, fine type, and compliance copy.
Compatibility checks should cover bottle diameter, taper, punt shape, label panel height, storage temperature, and whether the bottle will sit in an ice bucket or ship inside custom printed boxes. If the label belongs to a larger branded packaging program, coordinate the finish with cartons, inserts, hang tags, and other Custom Packaging Products so the presentation feels intentional rather than assembled from unrelated parts.
Key Specs to Decide Before You Request Artwork or Samples
Start with size. Measure the usable front panel height, then wrap a flexible tape around the bottle to understand width. A label that reaches too far around the curve may lift at the edges or wrinkle during hand application. For many 750 ml bottles, a front label width between 3 and 4 inches is easier to apply than a broad wrap, but the bottle style should decide the final dieline.
Shape affects both appearance and mechanics. Rectangles are efficient and easy to align. Ovals and arches feel traditional and visually soften the shoulders. Circles suit seals and promotional stickers. Die-cut silhouettes can look distinctive, but sharp points and narrow bridges may lift or tear during application. Wraparound bands create strong shelf presence, yet they demand careful alignment and usually need a flexible paper or film stock.
Copy planning deserves early attention. A retail wine label may need brand name, wine type, region, alcohol content, volume, sulfite statement, barcode, lot code, tasting notes, producer or distributor details, and required government language. Requirements vary by market, so buyers should confirm compliance with a qualified regulatory advisor before printing retail labels. Private event stickers have more freedom, but misspelled names and dates still cause expensive reprints.
Artwork files should be built for production, not just for screen viewing. Send vector logos where possible, images at 300 dpi at final size, CMYK color values, about 0.125 inch of bleed, safe margins around legal copy, outlined fonts, and a dieline for custom shapes. Barcodes need quiet zones and enough contrast to scan after varnish or lamination.
The application method is also a specification. Hand-applied labels can tolerate small variations if the shape is simple and the size is manageable. Machine-applied roll labels need exact details: unwind direction, core size, outside roll diameter, gap between labels, liner type, and roll quantity. A common core size is 3 inches, but application equipment varies. Confirm the machine requirements before ordering rolls.
Samples are not wasted time. A blank label test can show whether the sticker conforms to the bottle, whether the adhesive grabs too aggressively, and whether edges lift after chilling. For clear film, textured stock, foil labels, or a bottle with heavy taper, testing a swatch on the actual glass can save a full production run.
Pricing, MOQ, and Unit Cost Factors for Wine Label Stickers
Pricing is usually shaped by quantity, finished size, material, adhesive, number of versions, finishing, die-cut complexity, proofing, packing format, and delivery location. Sheets are useful for small hand-applied runs. Rolls work better for machine application or organized kitting. Individually cut pieces can fit gifting projects, though they usually cost more to pack and count.
Unit cost drops as quantity rises because setup time, press calibration, die setup, finishing, inspection, and packing are spread across more stickers. The material cost per label may not change dramatically, but the fixed work gets divided over a larger run. For a simple digitally printed wine label around 3.5 by 4.5 inches, rough production pricing may land around $0.18 to $0.45 per label at mid-size quantities, depending on stock, finish, and print coverage. Small event batches can be higher, especially under 250 pieces.
Minimum order quantities depend on the construction. Digital short runs can support event labels, samples, tasting room batches, and seasonal releases with lower MOQs. Foil stamping, embossing, custom dies, and flexographic production may need higher minimums because tooling and press setup take more time. If one winery needs six varietals, keeping the same size and material can reduce cost even when the artwork changes.
| Sticker Option | Typical Use | Practical Cost Impact | Buyer Watchout |
|---|---|---|---|
| Paper with matte varnish | Classic retail or tasting room labels | Usually economical for dry handling | Standard paper may scuff or wrinkle with condensation |
| BOPP film with laminate | Chilled bottles, events, gift boxes | Moderate increase for better moisture resistance | Needs the right adhesive for cold glass |
| Clear film with white ink | No-label look on clean glass | Higher than basic paper due to white ink setup | Artwork can disappear without opaque backing |
| Foil or embossed label | Reserve, luxury, or corporate gifts | Higher setup and finishing cost | Fine details need enough line weight |
For accurate quotes, prepare the finished size, shape, quantity, material preference, chilled or dry use, finish, number of designs, roll or sheet format, application method, and delivery location. If the sticker is part of broader package branding, share photos of cartons, closures, bags, or Custom Labels & Tags so colors and finishes can be aligned.
Compare quotes by specification, not only by bottom-line price. A cheaper sticker with the wrong adhesive can cost more through relabeling, returns, damaged retail packaging, or a bottle that looks tired before it reaches the table.
Process and Timeline: From Bottle Measurements to Finished Rolls
A clean ordering process starts with the bottle. Measure it, choose front and back label placement, define whether the bottle will be stored dry or chilled, prepare the artwork, Request a Quote, review material recommendations, approve a proof, then move into production, inspection, packing, and shipping. For straightforward custom stickers for wine bottles, production can often run in about 7 to 12 business days after proof approval. Specialty finishes, physical sampling, or custom tooling can push that to 15 to 25 business days or more.
Lead time depends on artwork readiness, proof revisions, material availability, finishing complexity, custom die requirements, quantity, and shipping method. Buyer-controlled delays are usually familiar: late copy changes, missing barcode files, low-resolution logos, unclear compliance text, and no final decision on label size.
Prepress is where the file gets checked before it becomes a production problem. A prepress operator will review bleed, resolution, color mode, dieline accuracy, barcode quality, safe margins, and white ink layers for clear labels. Tiny legal copy needs contrast and breathing room. A 5-point font may pass on a bright monitor but become difficult to read on textured stock under warm restaurant lighting.
Proofs come in different levels. A digital PDF proof confirms layout, copy, dieline, color callouts, and version names. A physical sample or press proof may be useful for high-value launches, color-sensitive brands, unusual bottle shapes, or clear labels where opacity matters. Not every order needs a press proof, and a physical proof does not always match full production perfectly, but it gives a more honest look at material behavior.
Production is fairly direct once approvals are final. Material is loaded, printed, dried or UV-cured, laminated or varnished if needed, die-cut, matrix-stripped, rewound or sheeted, inspected, counted, packed, and labeled for shipping. Roll labels should be packed to protect edges from dents. A crushed roll can cause application issues even if the print quality is sound.
Build buffer time for wine releases, weddings, corporate gifting, distributor deadlines, and bottling appointments. If labels must arrive before filling or kitting begins, do not treat the ship date as the safe date. Give yourself a few days for receiving, inspection, and a quick application check.
Common Mistakes That Make Bottle Stickers Look Cheap or Fail Early
The most common mistake is choosing by appearance alone. Moisture exposure, bottle curvature, glass texture, storage temperature, and ice bucket use all matter. A textured paper label may look beautiful on a dry shelf but wrinkle if the bottle sits in melting ice for an hour. A film label may survive moisture better, but it still needs an adhesive matched to the surface and temperature.
Oversizing the front label is another quiet troublemaker. Artwork can look balanced on a flat screen, then fight the bottle during application. Wide labels on small-diameter bottles can bubble, skew, or lift along the edges. If the bottle has a heavy taper, even a straight rectangle can look crooked unless the dieline and placement are adjusted.
Weak contrast and tiny typography hurt credibility fast. Back labels often carry tasting notes, legal copy, barcodes, importer details, and lot information. Those details must remain readable under retail shelf lighting, at a dinner table, and after a little handling. For barcodes, follow scanner-friendly sizing and contrast practices rather than squeezing them into the last empty corner.
File problems create preventable delays. Missing bleed, raster logos pulled from websites, flattened low-resolution artwork, RGB color builds, unoutlined fonts, and missing dielines can all stall proofing. For custom shapes, the dieline should be a separate spot-color path, clearly labeled, not a guess buried inside the artwork.
Clear labels disappoint buyers who forget white ink. Colors may become transparent, black glass may swallow fine details, and pale artwork can nearly disappear once the bottle is chilled. If the goal is a crisp no-label look, plan the white ink layer with the same care as the visible artwork.
Application mistakes matter too. Labels should be applied to clean, dry glass at the recommended temperature, often around normal room conditions unless the adhesive data sheet says otherwise. Dust, damp glass, rushed placement, and uneven pressure can create bubbles or edge lift. For larger hand-applied runs, a simple jig or guide can improve alignment far more than relying on eyesight bottle after bottle.
Ordering too close to the event or bottling date removes every safety net. No time for proof corrections. No time for shipping delays. No time for a quick test on the actual bottle. That is how a manageable packaging design task turns into a relabeling scramble.
Build a Print-Ready Sticker Brief Before You Order
A strong brief makes quoting faster and proofing cleaner. Gather a bottle photo, bottle dimensions, label placement, finished sticker size, quantity, number of designs, preferred material, finish, chilled or dry use, application method, and delivery deadline. Add the delivery location too, because shipping speed can change the best production plan.
Measure the label panel with a flexible tape, then print a paper mockup at actual size and tape it to the bottle. Look at it straight on, from a slight angle, and under the lighting where the bottle will be presented. This simple step catches labels that are too tall, too wide, too low, or visually crowded before a dieline is approved.
Choose one primary performance priority. Premium shelf presence may point toward textured stock, foil, embossing, or spot UV. Moisture resistance may point toward BOPP film and laminate. Fast event turnaround may favor digital printing on a stocked material. Low unit cost may call for a standard rectangle, shared size across versions, and no specialty finishing. Easy hand application may mean a smaller shape with forgiving alignment.
Gather final copy early: varietal, vintage, alcohol by volume, volume statement, barcode, lot code, gifting message, event details, and any compliance language. If sustainability claims are part of the design, verify them carefully. For paper-based materials, buyers sometimes ask about responsible sourcing and chain-of-custody programs such as FSC. For shipping performance, especially gift kits and bottle packs, test methods from groups such as ISTA can help frame transit expectations.
Request samples if the label uses clear film, textured paper, foil, unusual shapes, cold storage, or a bottle with heavy taper. A material swatch will not answer every production question, but it can reveal whether the look, feel, and adhesion match the use case before money is tied up in a full run.
Once size, material, finish, quantity, and timeline are clear, custom stickers for wine bottles become much easier to quote, proof, print, and apply cleanly. That clarity is what keeps the bottle looking intentional from the packing table to the shelf, gift box, tasting room, or dinner table.
FAQ
What material is best for custom wine bottle labels that will be chilled?
BOPP film or another moisture-resistant synthetic label stock is usually safer than standard paper for bottles that will sit in refrigeration, condensation, or ice buckets. Use a compatible permanent adhesive and consider a matte or gloss laminate to protect ink from scuffing and moisture. If a paper look is important, ask about wet-strength paper, then test it on the actual bottle before ordering a full run.
Can custom stickers for wine bottles be applied by hand?
Yes, many short-run wine bottle stickers are hand-applied, especially for weddings, tasting rooms, corporate gifts, and seasonal batches. Hand application works best with a manageable label size, clean dry glass, a simple shape, and a small alignment guide or jig. For large runs, roll labels made to machine specifications can improve speed and consistency.
How do I choose the right size for wine bottle stickers?
Measure the flat-looking label panel height and wrap a flexible tape around the bottle to understand the usable width. Avoid making the sticker so wide that it reaches too far around the curve, because edges may lift or wrinkles may form. Print a paper mockup at actual size and tape it to the bottle before approving the dieline.
How long does it take to print custom wine bottle stickers?
Timing depends on artwork readiness, proof approval, material availability, finishing, quantity, and shipping distance. Simple digitally printed labels can often move faster than labels with foil, embossing, custom dies, or multiple proof rounds. The biggest buyer-controlled delay is usually incomplete artwork or last-minute copy changes.
What should I send to get an accurate quote for wine bottle stickers?
Send the finished size, shape, quantity, number of designs, bottle type, storage conditions, preferred material, finish, and whether labels are needed on rolls or sheets. Include artwork files if available, plus any barcode, compliance copy, or personalization details. Share the deadline and delivery location so production and shipping options can be matched to the project.


