Custom Stickers Seattle Buyers Use Beyond Simple Branding
A small sticker can carry more operational weight than its size suggests. The custom stickers Seattle businesses order may label products, seal tissue, mark service dates, promote events, support QR campaigns, identify equipment, or turn a plain shipping box into something that feels deliberate.
That same printed piece might be rubbed by fingers, chilled in a refrigerator, splashed with rain, stacked in transit, peeled from a release liner by a rushed employee, or applied to a curved bottle five minutes before a retail drop. A brochure only has to sit there and be read. A sticker has to survive contact.
People use stickers, decals, labels, and packaging seals as if they mean the same thing. They overlap, but the distinction matters during quoting. A sticker is the broad casual term. A label usually carries information: ingredients, barcodes, batch codes, warnings, sizes, or compliance copy. A decal is often decorative, longer-lasting, or outdoor-capable. A packaging seal does a physical job first; it closes a box, pouch, sleeve, or tissue wrap while adding brand presence.
Seattle conditions add another layer. Moisture, refrigerated displays, damp delivery routes, outdoor events, coffee shop handling, and high-touch retail packaging all influence material choice. A paper label that looks perfect on a dry candle box can soften on a cold beverage bottle. A glossy vinyl decal may look sharp on a laptop but feel too slick for kraft packaging built around a natural, low-sheen look.
Practical rule: the best sticker is not automatically the thickest, glossiest, or cheapest option. It is the one matched to the surface, handling environment, expected lifespan, and application method.
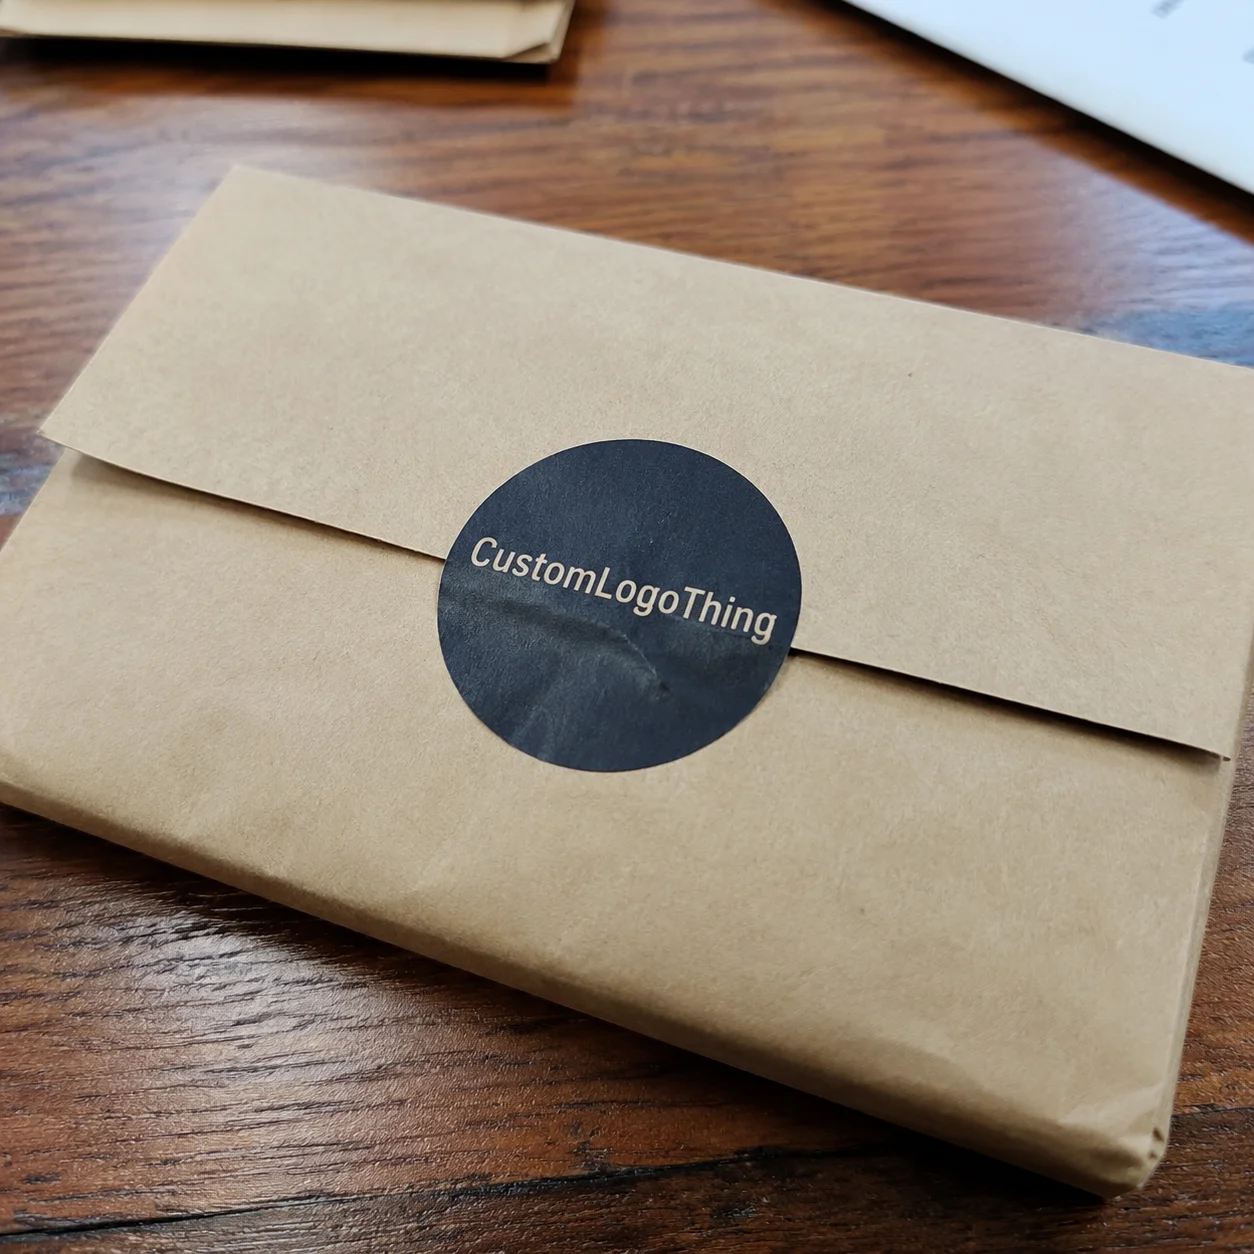
For branded packaging, Custom Printed Boxes, and retail sets, custom stickers Seattle buyers should treat the sticker as part of the packaging system rather than an afterthought. It has to look right, stick right, and fail quietly never.
How Sticker Materials, Adhesives, and Finishes Work
Sticker performance starts with the face stock, the printable top material. White vinyl is common for durable decals because it handles moisture, flexes better than paper, and pairs well with gloss or matte laminate. Clear vinyl works for window decals, transparent pouches, and a “printed-on” effect, but colors can disappear on dark surfaces unless white ink is printed behind them.
Paper label stock is economical and often right for dry indoor uses: bakery boxes, tissue seals, thank-you stickers, retail bags, short-life product packaging. BOPP film, short for biaxially oriented polypropylene, is widely used for food, beverage, cosmetic, and personal care labeling because it resists moisture better than paper while staying thin and flexible. Textured stocks can add a craft feel. They are less forgiving with tiny type, heavy abrasion, and wet handling.
The adhesive does as much work as the printed face. Permanent adhesive suits long-term branding, product identification, and packaging labels meant to stay put. Removable adhesive fits temporary promotions, window notices, event signage, and applications where residue would create a customer-service problem. Freezer-grade adhesive is designed for cold storage and refrigerated products, though application temperature still matters. A freezer label applied to a damp, icy surface may still lift.
Some surfaces are simply harder to bond to. Textured kraft board reduces contact area. Powder-coated metal can be inconsistent. Certain plastics have low surface energy and resist adhesion. Curved containers create edge lift when the sticker is too stiff or applied under tension. For those jobs, a small test run can save a full production failure.
Finishes change appearance and durability. Gloss lamination increases shine and makes colors feel brighter. Matte lamination reduces glare and often suits retail packaging with a calmer visual style. Soft-touch film feels velvety, but dark artwork may show fingerprints and oils. UV coating can improve scuff resistance on some jobs. Uncoated paper feels natural but offers limited protection against moisture, wiping, and repeated handling.
The stack matters: material, ink, adhesive, lamination, and cut shape work together. A waterproof film still needs a suitable finish if it will be scraped or wiped every day. A precise die-cut still needs enough bleed and safe margin so the blade does not shave the design. A strong adhesive still needs a clean, dry surface and firm application pressure.
- Kiss-cut sheets: easy to peel, useful for office use, inserts, low-volume packaging, and small batches.
- Individually die-cut stickers: strong for giveaways, merch tables, events, and retail packs where each piece needs to feel finished.
- Roll labels: efficient for repeated hand application, label dispensers, and some packaging lines.
- Transfer decals: useful for lettering, window graphics, and designs with separate elements that need accurate placement.
If the sticker supports a larger branded set, the team at Custom Logo Things can align it with Custom Labels & Tags so the adhesive, color, finish, and package format feel consistent across the full presentation.
Cost and Pricing Factors That Change the Unit Cost
Sticker pricing is shaped by size, material, quantity, number of artwork versions, cut complexity, finish, adhesive, and supply format. A 2-inch circle on standard white film is easier to produce than a 4-inch contour-cut mountain shape with narrow points, matte laminate, and three versions packed separately.
Quantity changes unit cost because setup, prepress, proofing, print layout, waste, and machine time spread across more pieces. A short run may be the right move for testing a new product or seasonal package. Production runs usually price better when buyers consolidate designs and plan reorders before stock runs low. Not always, but often enough to matter.
As a planning range, simple paper or film stickers in moderate quantities may land around $0.08 to $0.35 per piece, depending on size and finish. Smaller specialty runs, individually die-cut pieces, clear decals with white ink, or outdoor laminated decals can run higher, sometimes $0.45 to $1.50 or more per piece at low quantities. Large roll-label orders can push unit costs lower, but only once setup, material minimums, and application needs make sense.
| Sticker Type | Best Use | Typical Cost Influence | Practical Buyer Note |
|---|---|---|---|
| Paper label stock | Dry packaging, tissue seals, bakery boxes | Lower material cost | Not ideal for refrigeration, rain, or heavy handling |
| White vinyl decal | Outdoor branding, laptops, equipment, windows | Moderate to higher material cost | Add lamination for better scuff and UV resistance |
| Clear film sticker | Glass, clear pouches, window graphics | Higher if white ink is needed | Dark surfaces usually require white underprinting |
| Roll label | Repeated packaging application | Efficient at volume | Confirm roll direction, core size, and outside diameter |
| Individually die-cut decal | Giveaways, events, retail merch | Higher finishing and handling cost | Great presentation, slower packing than rolls or sheets |
A small sticker with a difficult contour cut can cost more than a larger rectangle. The finishing path is slower, waste may increase, and narrow cut details require careful setup. Sharp interior corners, thin bridges, and delicate points also raise the chance of tearing during peeling or packing.
Multiple artwork versions affect price as well. Each version may need separate proofing, press layout, inventory control, and packing. Ten neighborhood-specific designs are manageable, but they should be disclosed early so the quote reflects the real job rather than a single-design assumption.
For a cleaner quote, provide final size, quantity, application surface, indoor or outdoor use, expected lifespan, finish preference, and moisture exposure. Add whether the sticker must tolerate refrigeration, oil, sunlight, abrasion, repeated wiping, or customer removal. Minimums vary by process. Lower minimums are useful for pilots, while larger custom stickers Seattle production runs usually price better when formats and versions are grouped logically.
Process, Timeline, and Production Steps from Art to Delivery
A good sticker order follows a fairly predictable path: inquiry, spec review, artwork check, quote, proof, approval, printing, finishing, cutting, quality inspection, packing, and shipping or local delivery coordination. Skipping steps rarely saves much time. It usually pushes the risk to the end, where mistakes cost more.
Artwork review catches problems before ink hits material. A production team checks vector paths, bleed, safe margins, color mode, image resolution, small type, barcode readability, QR code scanability, and cut-line placement. For clear materials, they also check white ink layers. White ink can sit behind the full design, behind selected elements, or behind color only. Each choice changes the final look.
Proof approval should not be treated as a quick “looks good.” The proof confirms layout, size, cut line, color intent, spelling, orientation, and sometimes roll direction. Approval gives the shop permission to commit material, press time, finishing labor, and packing. If a product name is misspelled on the approved proof, the press will reproduce that mistake with impressive accuracy.
Simple standard stickers can move quickly when artwork is print-ready and material is in stock. Specialty adhesives, outdoor-grade laminates, layered white ink, complex contour cuts, roll formats, and multi-version collation need more planning. A straightforward sheet or die-cut order may be possible in several business days after proof approval. More involved runs can take one to three weeks or longer depending on volume, finishing, material availability, and the production calendar.
Industry standards give useful context for packaged goods. For products moving through parcel or freight networks, ISTA test methods are often used to evaluate distribution hazards. For paper-based materials and responsible sourcing, FSC certification may be relevant. Stickers are small, but they live inside larger packaging and logistics decisions.
Build in time for one proof revision. Add a buffer before events, retail resets, product launches, farmers market drops, holiday kits, and seasonal promotions. The buffer is one of the cheapest quality-control tools available. It gives everyone room to fix a file, adjust a finish, change a size, or catch a roll-direction issue before boxes need to leave the building.
Step-by-Step Guide to Ordering the Right Sticker Specs
Ordering custom stickers Seattle buyers can trust starts with a plain question: what job must this sticker perform? If it seals a box, adhesive and peel strength matter. If it decorates a bottle, moisture resistance and curve performance matter. If it promotes an event, handout format and visual punch matter. If it sits outdoors on equipment, UV exposure, rain, abrasion, and temperature swings matter.
- Define the job. Decide whether the sticker is sealing, labeling, decorating, identifying, warning, promoting, or carrying a QR code. A service reminder label has different requirements than a merch table decal.
- Identify the surface. Common surfaces include glass, corrugated cardboard, kraft paper, rigid plastic, flexible pouches, metal, painted surfaces, textured cartons, and curved containers. Send a photo if the surface is unusual.
- Choose the format. Rolls are efficient for repeated hand application or labeling equipment. Sheets are good for storage, office use, and low-volume distribution. Individual die-cuts feel more polished for giveaways and retail packs.
- Select material around conditions first. Choose paper, vinyl, BOPP, clear film, or specialty stock based on moisture, temperature, surface energy, and handling. Then choose gloss, matte, soft-touch, UV coating, or uncoated finish around brand appearance.
- Prepare artwork correctly. Add bleed, keep live text away from the trim edge, use high-resolution images, outline fonts when needed, and place cut lines on a separate layer. For many small stickers, 1/16 inch bleed is a practical minimum, though the printer’s template should control the final file.
- Review the proof at real size. Check spelling, final dimensions, cut path, orientation, color expectations, and scannable codes. A design that looks balanced at 300% zoom may feel cramped at two inches wide.
- Save the approved spec. Keep the size, material, adhesive, finish, roll direction, packing format, and artwork version in one record so reorders stay consistent.
For brands coordinating stickers with boxes, inserts, bags, and other Custom Packaging Products, saved specs prevent drift. Package branding looks more intentional when the matte finish on a label does not fight the soft-touch carton, and the white point of a sticker does not look oddly blue against the rest of the retail packaging.
Quality control is partly visual and partly physical. Check that the cut follows the intended path, corners release cleanly, borders look even within normal cutting tolerance, and stacked pieces are not welded together by heavy ink or coating. For roll labels, confirm unwind direction before production if labels feed into a dispenser or applicator. A beautiful roll wound the wrong way can slow a packing line immediately.
Common Mistakes That Make Stickers Fail Early
The most common failure is using paper in a place where paper was never meant to live. Paper stickers are fine for dry, short-term, indoor use. They are risky for wet bottles, refrigerated foods, outdoor windows, high-touch counters, and delivery packaging that may sit in drizzle. If the sticker only needs to last one afternoon, paper may be smart. If it needs to look clean for months, film is usually safer.
Surface assumptions cause the next wave of trouble. Some plastics resist adhesion. Textured cartons reduce contact area. Powder-coated metal can be unpredictable. Curved containers create lift at the edges, especially when the sticker is too stiff or applied under tension. A permanent adhesive on smooth glass behaves differently than the same adhesive on rough kraft board.
Artwork mistakes are just as expensive. No bleed can leave a white hairline at the edge. Thin borders close to the cut path can look uneven after normal cutting tolerance. Low-resolution logos print soft. Tiny reversed-out text may fill in, especially on textured or uncoated stock. QR codes that scan on a monitor may fail after being reduced to a 0.6-inch square and printed with low contrast.
Color expectations need discipline. Backlit screen color is not printed ink. Matte film, clear stock, kraft paper, and textured materials all change how color is perceived. A bright orange on screen may look calmer on uncoated paper. A brand gray may shift depending on the white point of the material. For critical color, request a physical sample or discuss tolerance before production.
Clear stickers deserve extra planning. Transparent film placed on a dark bottle can make colored ink look muted or nearly invisible unless white ink is printed underneath. The white layer can sit under the entire design or only under specific shapes. Both approaches can work, but they create different results and different production requirements.
Application conditions matter too. Stickers applied to dusty, oily, damp, or cold surfaces may fail even if the sticker itself is well made. Many pressure-sensitive adhesives need firm pressure and dwell time to build bond strength. If a team will apply labels in a busy shop, event booth, or warehouse, a short instruction sheet can prevent a surprising number of failures.
The correction mindset is simple: share the surface, environment, and expected lifespan before quoting. Most early failures are preventable when those three details are clear from the start.
Next Steps Before You Approve a Sticker Order
Before requesting a quote, confirm the practical details: size, quantity, number of designs, application surface, indoor or outdoor use, moisture exposure, expected lifespan, finish, format, packing preference, and deadline. That list may feel basic. It gives the printer enough information to recommend a spec instead of guessing.
Testing is wise for unusual applications. Order samples or run a small pilot if the sticker will sit on curved containers, outdoor equipment, refrigerated packaging, rough kraft surfaces, powder-coated metal, or hard-to-stick plastics. Apply the sample the same way your team will apply the production order. Then rub it, chill it, wipe it, bend it, or leave it outside if that reflects real use.
Send useful files and context with the quote request. A vector logo in AI, EPS, or print-ready PDF format is ideal. Include desired dimensions, quantity, number of versions, delivery location, photos of the application surface, and any packaging or retail requirements. If the sticker must match existing product packaging, send a photo or sample of the box, pouch, bottle, or label family.
- Confirm final size at actual scale, not only on screen.
- Check spelling, punctuation, ingredients, warnings, and promotional dates.
- Scan QR codes and barcodes from a printed proof when possible.
- Review cut shape, margin, border thickness, and corner radius.
- Confirm roll direction, sheet layout, or individual packing if application speed matters.
Approve proofs slowly. A rushed approval can turn a small file issue into a full production problem. If the final sticker will be used on a bottle, box, bag, window, or display, hold a ruler against the real item and make sure the size feels right. Two inches can feel generous on a laptop and cramped on a shipping carton.
For custom stickers Seattle teams plan to use on packaging, storefronts, events, or product launches, the smartest move is to match the sticker specs to the real surface and handling conditions before locking the order.
FAQ
What materials are best for custom stickers in Seattle weather?
For outdoor or moisture-prone use, vinyl or BOPP film with a protective laminate is usually more reliable than paper. For short-term indoor packaging, paper or standard film labels may be enough if the surface stays dry and clean. If stickers face rain, refrigeration, sunlight, or frequent handling, ask for material, adhesive, and finish recommendations as a combined spec.
How much do custom decals in Seattle usually cost?
Cost depends on size, quantity, material, finish, adhesive, cut shape, and whether the stickers are supplied on rolls, sheets, or individually cut. Simple moderate-quantity stickers may fall around $0.08 to $0.35 each, while low-quantity specialty decals can be higher. A useful quote request includes final dimensions, order quantity, application surface, finish preference, and expected use conditions.
What is the typical turnaround for Seattle custom sticker orders?
Turnaround depends on proof approval speed, material availability, quantity, cut complexity, and finishing requirements. Simple standard stickers usually move faster than specialty adhesives, clear decals with white ink, outdoor laminates, or multi-version orders. Build in time for artwork review, proof revisions, production, quality checks, packing, and shipping.
Should I order roll stickers, sheet stickers, or die-cut stickers?
Roll stickers are best for efficient labeling, packaging lines, and repeated hand application. Sheet stickers work well for small batches, office use, inserts, and easy storage. Individually die-cut stickers are strongest for giveaways, merch tables, retail packs, and promotional handouts because each piece feels finished on its own.
What artwork files work best for custom sticker printing?
Vector files such as AI, EPS, or print-ready PDF are best for logos, type, and clean cut lines. Raster images should be high resolution at final print size, with bleed added beyond the trim edge. For contour cuts, provide or approve a clear cut path, and for clear stickers, confirm whether white ink is needed behind the artwork.


