With Custom Swing Tag printing, the tag is doing more work than most buyers expect. It is the first printed object a shopper often touches, and that small rectangle has to communicate quality, price confidence, and brand character before the product is even lifted off the rail.
A well-made swing tag is not just a hanging label. It can carry size, barcode, care notes, fiber content, origin information, and short brand copy for apparel, accessories, gifts, and specialty products. In retail packaging, that makes the tag part of the product presentation rather than an afterthought tucked onto the side.
The best tags are rarely the flashiest. They are the ones that feel appropriate to the product: readable, sturdy, and cut with enough restraint that the design looks deliberate. A tag that is too thin, too crowded, or too glossy for the item beside it can quietly drag down the whole presentation. That is the part buyers notice later, usually after the stock arrives.
What Custom Swing Tags Do at Shelf Level
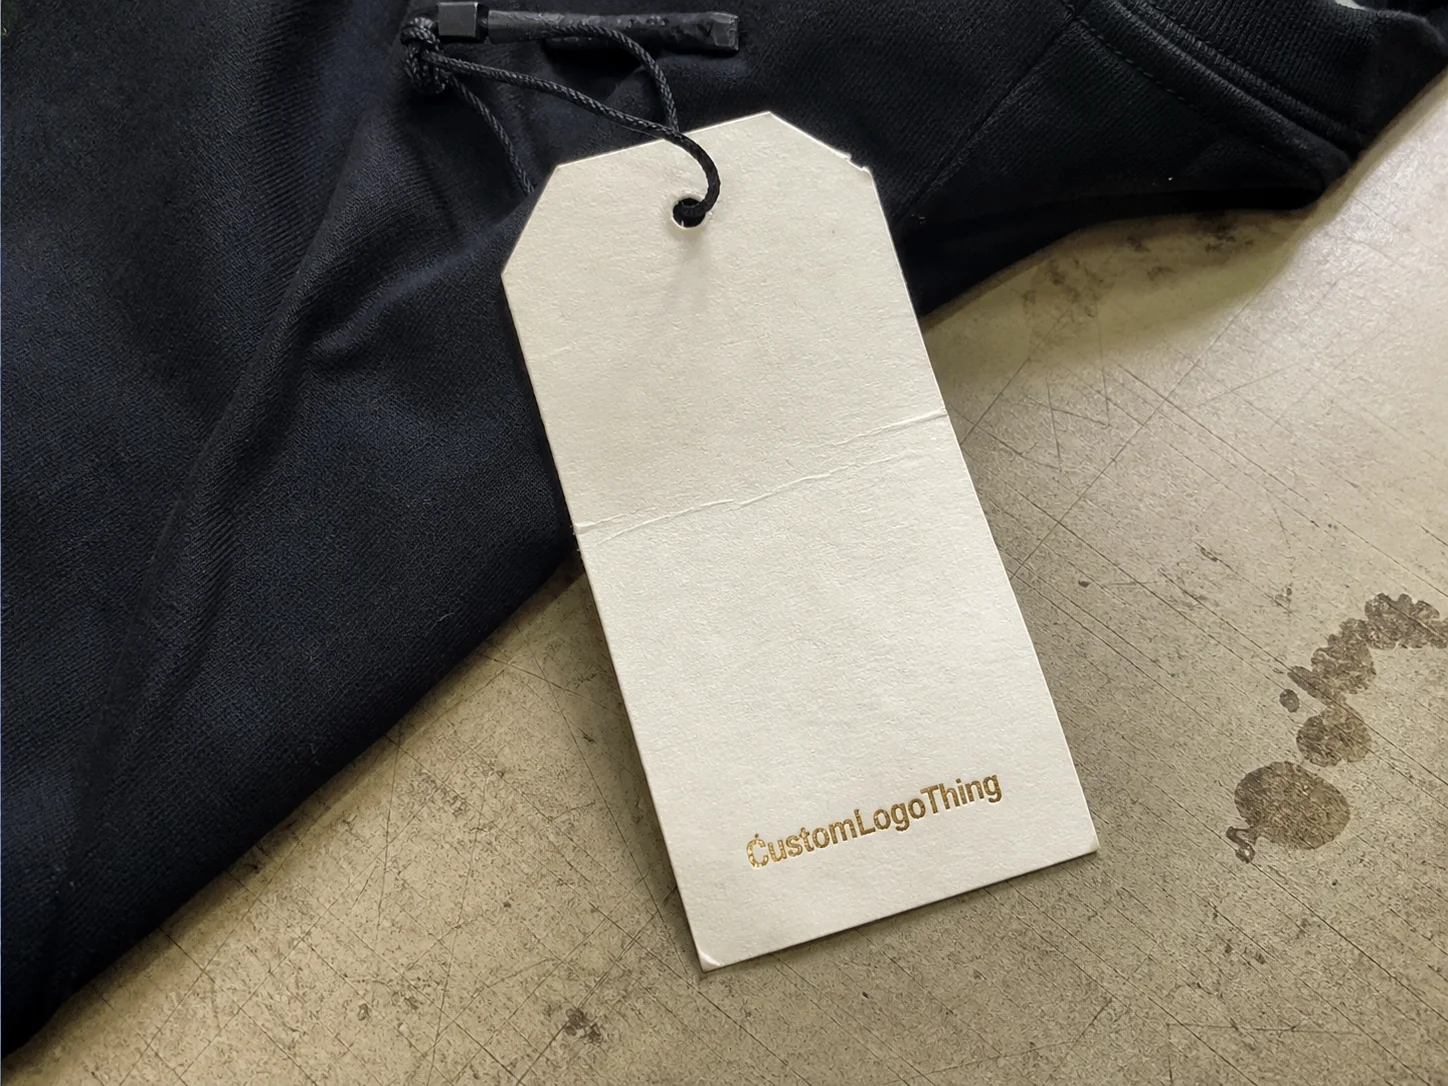
Think of a folded shirt on a rack, a candle on a shelf, or a pair of earrings in a small box. Before anyone reads the tag, they are already judging the brand by paper weight, print clarity, edge quality, and whether the piece feels like it belongs with the item. That first impression matters because package branding begins long before the outer carton or shopping bag comes into play.
A swing tag usually has four jobs:
- Branding through logo, color, typography, and message
- Merchandising with price, SKU, barcode, and variant information
- Product communication such as materials, size, country of origin, or care instructions
- Presentation by making the item feel complete and shelf-ready
That is why custom swing tag printing sits alongside Custom Labels & Tags and other Custom Packaging Products as part of the wider packaging system. A tag does not need a lot of ink coverage to be effective, but it does need clean hierarchy. In practice, a simple black-and-white design on a good stock often outperforms a more elaborate layout if the typography is clearer and the tag feels better in hand.
For apparel and accessories, the tag often acts like a miniature sales rep. It reinforces the price point, signals quality, and gives the shopper one more reason to trust the brand. If the tag looks flimsy or the print is muddy, the product can feel cheaper than it really is.
Good tag design is not about adding more elements. It is about choosing the few elements that matter, then printing them cleanly on a stock that supports the product.
How Custom Swing Tag Printing Moves from File to Finished Piece
The workflow is straightforward, but the details decide whether the job runs smoothly or gets stuck in proof revisions. Most orders begin with artwork setup, then proofing, printing, finishing, cutting, and packing. Clean files move quickly. Missing bleed, low-resolution logos, or a dieline that does not match the intended trim can slow the job before the press is even booked.
For many buyers, the first question is digital or offset. Digital printing is usually the better fit for shorter runs, variable data, or quick artwork changes. It requires less setup and is easier to adjust if the design is still evolving. Offset printing usually makes more sense for larger quantities because the unit cost improves as volume rises, and color consistency can be excellent once the run is dialed in.
After the print stage, sheets are converted into finished tags. Depending on the specification, that can involve:
- Die cutting to a custom outline
- Corner rounding for a softer look and less edge wear
- Hole punching for string, elastic loops, or fasteners
- Scoring for folded or tent-style pieces
- Foil stamping, embossing, or spot UV where the design really benefits from texture or contrast
Attachment choice is not a minor detail. Cotton string feels natural and suits lifestyle or artisan brands. Elastic loops are faster on assembly lines. Plastic barb fasteners are common for high-volume retail use. Threader-style attachments can give a cleaner look for premium items, though they may slow application slightly. If the vendor can supply tags and attachments together, the finished pack usually arrives ready for application instead of requiring extra sorting at receiving.
File preparation affects the result more than many buyers think. Printers usually prefer vector artwork in AI, EPS, or print-ready PDF format, with correct bleed, trim, and safe zones. Images should generally be 300 dpi at final size. Color mode should match the printer’s workflow, and any brand colors that must stay consistent should be defined clearly rather than guessed from screen appearance. If the order is part of a larger packaging rollout, keeping logo treatments and color references aligned across tags, boxes, and labels prevents avoidable mismatch.
For buyers who want to understand packaging performance beyond the print layer, sources such as the Packaging Machinery Manufacturers Institute and the International Safe Transit Association are useful references for distribution handling and transit stress, especially if finished tags are packed with other retail packaging components and shipped in bulk.
Material, Finish, and Size Choices That Change the Outcome
Material changes the feel of a tag more than almost any other variable. Coated cardstock gives sharper image reproduction and cleaner color blocks. Uncoated kraft produces a more natural, handmade impression. Textured boards add depth, while heavier premium stock usually feels more substantial the moment it is picked up. For premium apparel or accessories, a 400gsm board with a clean edge often reads better than a thinner sheet dressed up with extra effects.
Finish has a similar effect. Matte looks restrained and contemporary. Gloss gives stronger contrast, especially on vibrant artwork or photography. Soft-touch lamination adds a velvety surface that can feel expensive, but it costs more and may not suit every brand. Foil, embossing, and spot UV are best used to support a layout that is already working. If the design is crowded, those finishes tend to amplify the clutter rather than fix it.
Size is a practical decision, not just a design one. A small tag around 50 x 90 mm can look minimal and tidy, which suits jewelry, socks, or compact accessories. Larger formats around 70 x 140 mm or 80 x 150 mm create room for storytelling, barcodes, multi-language copy, and care instructions. The right size is the one that keeps the type readable without making the whole piece feel oversized for the product.
Readability is where many jobs win or fail. Strong contrast, sensible type size, and enough white space make a larger difference than a complicated graphic idea. The front should usually carry the brand and the one message a shopper needs immediately. The back can handle practical details. Once the back turns into a legal dumping ground, the tag starts to feel like paperwork instead of packaging.
There is also a sustainability angle that needs practical handling rather than marketing language. Recycled board, kraft papers, FSC-style sourcing, and lighter constructions can all be sensible choices when the product does not need heavy protection. Overbuilding a tag wastes material and cost. Underbuilding it can make the item feel cheap. The goal is to choose a stock that performs well, matches the brand promise, and does not add unnecessary weight.
For sourcing context, the FSC site is helpful if you need to understand certification language or the kind of paper claims that can be made responsibly.
| Stock / Finish | Typical Brand Feel | Best For | Relative Cost |
|---|---|---|---|
| Uncoated kraft | Natural, handmade, earthy | Artisan goods, eco-focused brands | Low to moderate |
| Coated cardstock | Clean, crisp, versatile | Apparel, general retail, multi-use formats | Low to moderate |
| Textured premium board | Refined, tactile, elevated | Luxury items, gifting, premium accessories | Moderate to high |
| Soft-touch laminated board | Quiet luxury, smooth, premium | High-end retail presentation | High |
Custom Swing Tag Printing Cost, MOQ, and What Drives the Quote
Pricing is usually driven by a small set of variables: quantity, stock thickness, color count, finishing complexity, die-cut shape, and whether attachments are included. A plain two-color tag on standard cardstock will almost always cost less than a soft-touch, foil-stamped tag with rounded corners and a custom hole position. That sounds obvious, but quote comparisons often hide those differences unless the buyer asks for a line-by-line breakdown.
Lower quantities usually carry a higher unit price because setup costs are spread across fewer pieces. A short run may fall somewhere around $0.40 to $0.80 per unit depending on specification, while larger runs can drop much lower once the press setup is absorbed across thousands of tags. Those figures vary by region and finish, but the pricing pattern is consistent: more setup, smaller run, higher unit cost.
MOQ deserves a direct question early in the conversation. Digital printing usually supports smaller minimums because setup is lighter. Offset printing becomes more economical as volume increases. If the brand is testing a new collection, lower quantities reduce waste and keep inventory risk down. If the artwork is already approved and the line is stable, a larger run often makes better financial sense.
Special finishes can add value, but only if they solve a real presentation problem. Foil stamping adds shine and perceived value. Embossing gives physical depth. Perforations can create tear-off sections or useful information panels. Variable data helps with serialization, SKU changes, or barcode-heavy retail workflows. Each extra step adds time and cost, so it should earn its place.
When requesting a quote, ask for a clear breakdown of printing, finishing, attachment parts, packing, and freight. If one quote is much cheaper than the others, the difference usually sits in the spec: thinner board, simpler finishing, fewer proof rounds, or no attachment included. That does not automatically make it a bad quote, but it does mean the comparison is not complete.
| Job Type | Typical MOQ | Common Use Case | Indicative Turnaround After Proof |
|---|---|---|---|
| Digital printed tags | 100-500 pcs | Launches, test runs, fast changes | Often 5-10 business days |
| Offset printed tags | 1,000+ pcs | Established product lines, repeat orders | Often 10-15 business days |
| Special finish tags | Usually higher | Premium retail and brand statements | Often 12-18 business days |
Timeline, Quality Checks, and Production Constraints
The timeline usually starts with artwork review, then proof approval, then print production, finishing, assembly, quality checks, and final packing. If the specification is standard and the files are clean, the job can move quickly. If it includes a custom die, foil, embossing, or late artwork changes, the schedule stretches. That is not a warning sign; it is just how print production works.
One of the most common bottlenecks is incomplete file information. A dieline that does not match the intended cut shape can slow the job immediately. So can low-resolution logos, improper color builds, or changes made after proofing has already started. The fastest orders are usually the ones where the buyer sends a complete brief and answers proof questions promptly.
There are also production limits worth acknowledging. Fine text can fill in on heavy textures. Foil can shift if the design is too intricate. Very small holes may tear on heavier board if the placement is poor. Not every effect works on every stock, and a good supplier should say so before production rather than after a problem appears.
Quality control matters at several points. A proper check usually looks at trim accuracy, color consistency, hole placement, surface defects, and whether the finished stack matches the approved proof. For jobs with barcodes or variable data, scan testing should happen before packing. If the order includes attachments, the count and pack format should also be verified. A tag that looks perfect but arrives with the wrong fasteners is still a problem for the buyer.
Planning buffer time helps. Seasonal collections, trade shows, and photo shoots all tend to make shipping windows tighter than they look on paper. Even if the print run itself is efficient, freight can still create delay. A tag that arrives three days late can hold up a full fulfillment batch if the packaging line is waiting on it before products can be boxed or labeled.
Shipping method matters too. Ground shipping is economical, but time-sensitive rollouts may need expedited service. If the order is going to multiple locations or a fulfillment center, carton counts, delivery addresses, and pack format should be checked carefully. A few minutes spent on logistics often saves hours later.
Mistakes That Make Tags Look Cheap or Print Poorly
Overcrowding is the first problem. A tag filled with too much text starts to look like a compliance sheet, and the shopper loses the visual cue that tells them what matters first. The more content that is forced into a small space, the less elegant the piece becomes.
Color mismatch is another frequent issue. A design that looks rich on a laptop can print flatter on kraft stock or shift slightly on coated paper. If proof review is rushed, the final result may surprise everyone. This becomes even more obvious on fine logos, thin type, and brand colors that rely on precise contrast.
Paper weight matters more than many buyers expect. Too light, and the tag curls, bends, or tears near the hole. Too heavy, and it may feel stiff or overbuilt for the product. A tag on delicate garments should not feel like a rigid board hanging off the side. The stock should match the product, not fight it.
Hole placement and string length are small details with outsized impact. If the hole sits too close to the edge, the tag can tear. If the string is too long, the tag twists and hides the copy. If it is too short, it sits awkwardly and can interfere with packaging or display. Those issues are easy to miss in design files and hard to forgive once the product is on the shelf.
Another common miss is forgetting operational copy. Barcodes, SKU space, sizing, country of origin, and legal text all need room if the product requires them. If they are not planned from the start, the artwork often has to be reworked after approval. That costs time and can force a less elegant layout.
Practical Tips for Stronger Brand Impact and Smarter Ordering
One useful approach is to design a master layout that can be adapted across sizes, colorways, or product families. That keeps the brand consistent while still allowing for changes in materials or copy. It also makes reorders easier, which matters once a product line starts to grow and the packaging system becomes more layered.
Keep one clear focal message on the front. Put the practical information on the back. That structure works because the shopper gets the brand promise first and the product details second. The tag does not need to tell the whole story at once; it only needs to guide attention.
Choose finishes because they fit the product, not because they are available. If the brand story is natural and understated, kraft and simple black print may say more than foil ever could. If the item sits in premium retail packaging, a soft-touch finish or spot UV may be a better match. Good packaging follows the price point and audience, not the printer’s full menu.
If you are testing a new stock, finish, or supplier, order samples or proof copies before committing to a full run. Even a small sample can show whether the surface holds fingerprints, whether the color density is right, and whether the board feels appropriate beside the product. Store lighting and product photography can change the appearance of a tag, so check it in the real environment, not just on a desktop.
Keep the broader packaging system in view too. Tags should coordinate with boxes, inserts, wraps, and labels without repeating the same message over and over. A well-planned tag can echo the typeface or color palette used on Custom Packaging Products, which makes the whole presentation feel assembled with intent rather than patched together.
Planning Your Next Hang Tag Order
Before asking for pricing, build a simple spec sheet. Include size, stock, finish, print colors, attachment type, quantity, and required delivery date. Add barcode files, compliance text, and any brand references that help the printer understand the look you want. The more complete the brief, the smoother the quote process.
Then decide what the tag has to do first. Does it need to sell the brand, communicate product details, or support retail operations? That one decision should shape the layout. If storytelling matters most, keep the copy concise and visual. If compliance matters most, build in room for the required text and make sure it is still readable at arm’s length.
Review the proof carefully. Check spelling, trimming, color, barcode placement, and readability. If something feels tight or unclear on proof, it will not improve after production. Most printing mistakes begin as proofing oversights, not press failures.
After approval, confirm packing format and delivery timing. Ask how the tags will be boxed, whether strings or attachments are bundled separately, and how the shipment will be labeled. That way the tags arrive ready to use, which keeps fulfillment moving and avoids avoidable delays.
For brands that want practical, polished custom Swing Tag Printing, the strongest results come from clear specifications, honest material choices, and a layout that respects both the product and the shelf. Done properly, the tag feels like a natural extension of the item rather than a loose extra, and that is exactly what strong branded packaging should do.
What file format is best for custom swing tag printing?
Vector formats like AI, PDF, or EPS are usually best because they keep edges sharp and text scalable. Include bleed, trim, and safe zones so the printer can finish the tag cleanly without cutting off important content.
How many custom swing tags should I order at once?
The right quantity depends on SKU count, sales velocity, and whether the design is likely to change soon. Larger runs usually lower unit cost, but smaller runs reduce waste when you are testing a new product line or artwork.
What affects the turnaround time for custom swing tag printing?
Turnaround depends on print method, finishing complexity, quantity, and how quickly artwork is approved. Special finishes, custom dies, and late file changes can add days to the schedule.
Can custom swing tags be made from recycled or eco-friendly materials?
Yes, many tags can use recycled board, kraft stock, or responsibly sourced paper options. The best eco choice depends on the balance between appearance, durability, and the product environment.
What should I include on a swing tag besides branding?
Useful additions include size, price, barcode, product code, care instructions, material details, and a short brand message. Keep the layout clear so the tag still looks premium and is easy to scan at a glance.