Custom Vehicle Stickers Buyers Can Order with Confidence
A parked service van can generate more local impressions in one afternoon than a small paid ad campaign, yet custom vehicle stickers are often treated like the last line item on a print quote. That is backwards. If a truck sits outside a jobsite for four hours, passes through school pickup traffic, and parks overnight near a busy road, the graphic is doing quiet media work the whole time.
The catch is that a vehicle graphic is not just “a sticker.” It has to survive sun, rain, road grit, pressure washing, door handles, fuel doors, curved panels, and the occasional employee who applies it five degrees crooked. Good ordering decisions start before the artwork file leaves your desktop.
What Custom Vehicle Stickers Really Do for Moving Brands
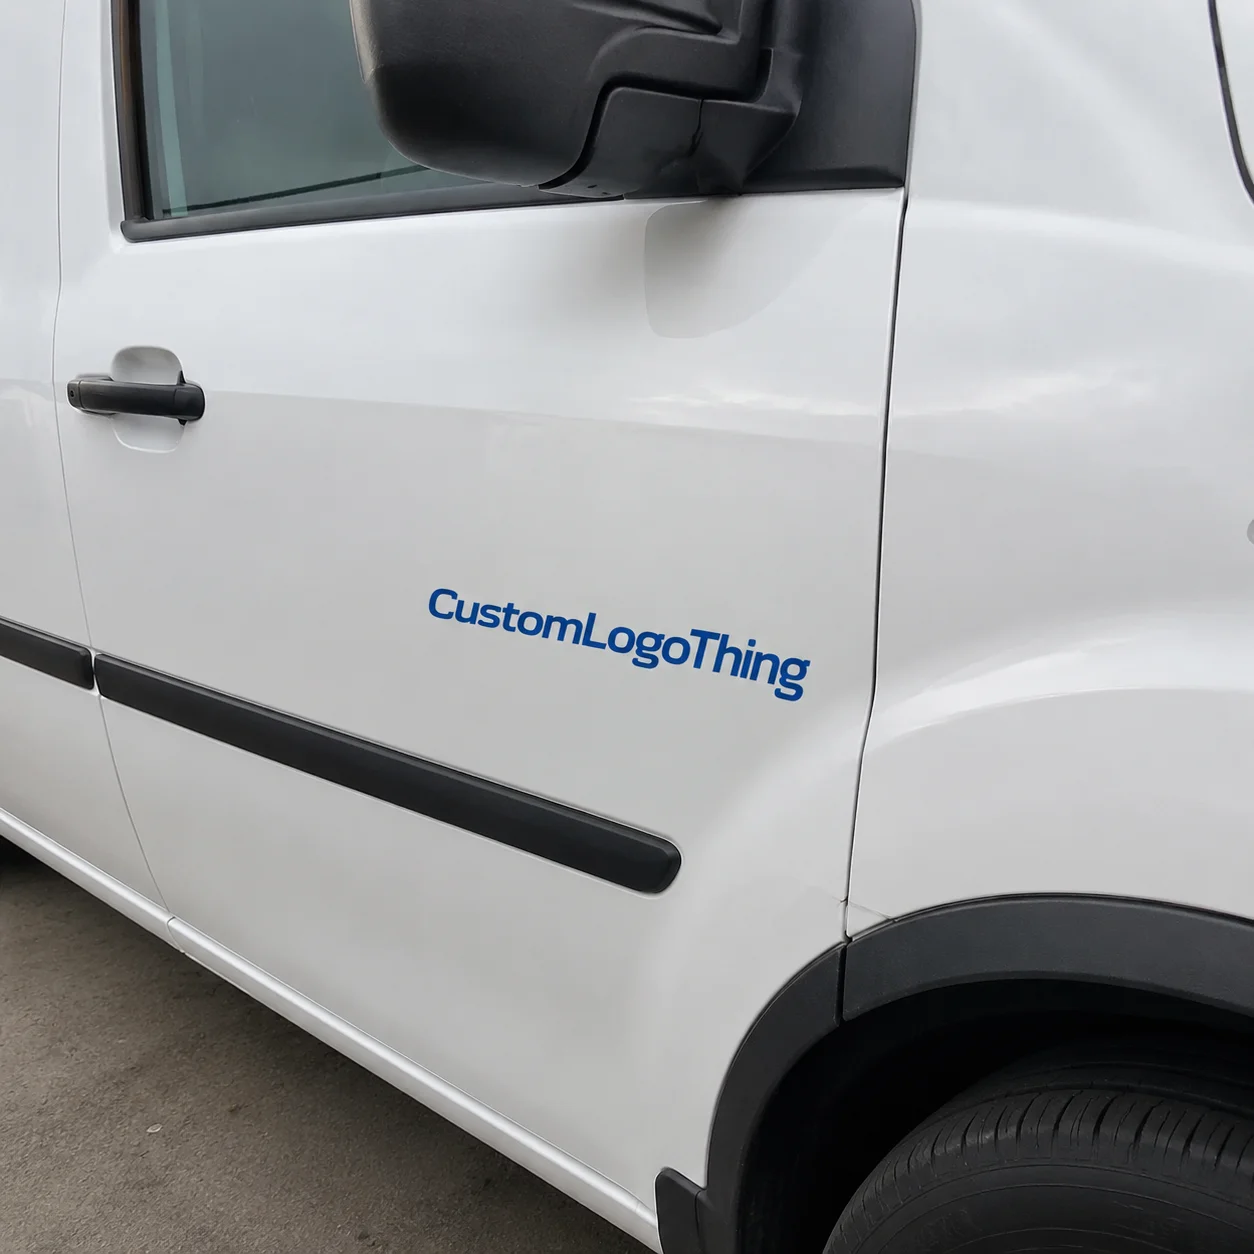
Custom vehicle stickers are adhesive graphics made for cars, vans, trucks, trailers, equipment, service fleets, and temporary promotions. They can be as small as a 4-inch logo decal on a rear window or as large as a 48-inch door panel with a phone number, QR code, service list, and brand mark. Some buyers use them for fleet identification. Others need short-run campaign graphics for a weekend event, dealership promo, food delivery route, or nonprofit fundraiser.
The vocabulary gets messy fast. Stickers usually means printed adhesive graphics, often contour cut. Decals often means the same thing, although some suppliers reserve the word for transfer lettering or heavier outdoor vinyl. Magnets attach without adhesive and can be removed daily, but they need flat steel panels and careful cleaning. Vinyl lettering is cut from solid-color vinyl rather than printed as a full-color image. Partial wraps cover a portion of the vehicle with larger shaped panels. Full wraps cover most painted surfaces and require more design, material, and installation skill.
From a packaging buyer’s point of view, the closest comparison is the difference between a stock label and a structural branded packaging program. One is a mark. The other is a system. Vehicle graphics sit in that same territory: part print production, part packaging design logic, part outdoor advertising.
Use cases are broad. Contractor vans need trust at curbside. Mobile pet groomers need instant recognition in residential neighborhoods. Courier trucks need fleet consistency across routes. Real estate agents want visibility without committing to a full wrap. Food delivery cars need short, readable messages. Dealerships may need low-tack promotional graphics that come off cleanly after a sale.
Practical rule: if the vehicle will be seen at 25 to 50 feet while moving, the design has to work faster than a brochure, faster than product packaging, and faster than most retail packaging on a shelf.
How Vehicle Sticker Materials, Adhesives, and Finishes Work
Most vehicle graphics use outdoor-rated vinyl because it bends, resists moisture, and holds printed color better than paper label stock or general-purpose adhesive film. Paper labels may be fine for shipping cartons or indoor product packaging, but they are the wrong tool for vehicle panels. Rain alone can expose that mistake within days.
The first material split is usually calendared vinyl versus cast vinyl. Calendared vinyl is made by rolling PVC into a sheet. It is usually more budget-friendly and performs well on flat or lightly curved surfaces such as van doors, trailer sides, rear panels, and simple equipment labels. A common thickness range is about 3 to 4 mil before laminate. It is a sensible choice for short to medium campaigns, especially when the graphic is not stretched around complex curves.
Cast vinyl is thinner, more conformable, and more stable over time because it is formed differently. It often lands around 2 mil before laminate and is better for curves, rivets, channels, bumpers, and longer-term fleet branding. If the design crosses deep body lines or wraps around an edge, cast film is usually the safer bet. Not always the cheapest. Often the smarter one.
Adhesive choice matters just as much. Permanent adhesive suits long-running fleet identification and service vehicles. Removable adhesive fits seasonal campaigns, leased vehicles, and promotions where clean removal matters. Low-tack options can help for dealership graphics, event vehicles, or short displays, although low tack is not magic. Heat, paint condition, surface contamination, and dwell time still affect removal.
Finishes change both appearance and durability. Gloss makes colors pop and often matches modern vehicle paint. Matte reduces glare and can look more controlled, especially for black, white, gray, or muted brand palettes. Clear laminate adds abrasion resistance against road grit, wash brushes, hand contact, and UV exposure. For graphics near handles, sliding doors, bumpers, ladders, or cargo areas, laminate is usually worth the extra spend.
For reflective graphics, ask whether the material references ASTM D4956, the common specification family for retroreflective sheeting. Not every reflective decal needs highway-sign performance, but the question tells you whether the supplier understands the material class being quoted. For packaged shipments of finished graphics, especially rolled kits going to multiple installers, ISTA test thinking is useful: the print is only successful if it arrives undamaged, uncreased, and clearly labeled for installation.
Surface prep is the unglamorous part buyers underestimate. Wax, dust, oil, silicone dressings, ceramic coatings, and old adhesive residue can shorten sticker life even when the vinyl itself is excellent. A clean panel, moderate temperature, and dry surface are production specs, not installer preferences.
Key Specs to Decide Before You Ask for a Quote
A supplier cannot quote accurately from “we need stickers for our vans.” They need the vehicle type, placement area, finished size, quantity, material preference, finish, color expectations, installation method, and expected lifespan. Add whether the sticker goes on paint, glass, plastic trim, metal equipment, or a trailer surface. Each surface behaves differently.
Measurements should come from the actual vehicle panel, not memory, a web photo, or a manufacturer rendering. A Ford Transit, Ram ProMaster, box truck, refrigerated trailer, and compact delivery car all give you different design boundaries. Handles, hinges, fuel doors, sliding tracks, rubber trim, windows, lights, badges, and curved sections can steal usable space. A “24 x 18 inch” door graphic may sound safe until it collides with a sculpted panel line.
Ask for photos taken straight-on with a measuring tape visible. One photo from 10 feet away and one close-up of the panel edge can prevent a surprising number of errors. For multi-vehicle fleets, confirm whether every unit has the same body style. Mixed fleets are common, and a single master layout may need two or three size variations.
Artwork is the next filter. Vector logos in AI, EPS, PDF, or SVG format are preferred because they scale cleanly. High-resolution raster images can work, but they should be sized close to final print dimensions, often 150 to 300 pixels per inch at output size depending on viewing distance. Screenshots, compressed social media files, and tiny JPEG logos usually create jagged edges or muddy color.
Give the printer Pantone references if brand color is sensitive, but understand the limit. Vehicle graphics are commonly printed in CMYK or CMYK-plus systems, then viewed under changing daylight. A blue that looks perfect indoors can shift on a glossy white van under noon sun. Color-critical programs should use a printed sample or press proof, especially for fleet rollouts.
Visibility rules are harsh. Large lettering should be readable from across a parking lot. Phone numbers need contrast. QR codes need enough size and quiet space; many fail because they are treated like packaging decoration instead of a scannable tool. For moving vehicles, one contact method often beats five tiny ones.
Here is the investigative question to ask any supplier making a durability claim: “What does that lifespan assume?” Garage parking, desert sun, freeze-thaw cycles, coastal salt, automatic car washes, and road chemicals change performance. A five-year outdoor estimate in mild conditions is not the same as five years on a snow-route service truck.
Cost and Pricing Factors That Change the Final Unit Cost
Pricing is not just square inches of vinyl. It usually reflects material grade, print method, ink coverage, lamination, contour cutting, setup, proofing, packaging, waste allowance, and sometimes installation support. Two orders can both say “100 vehicle decals” and land at very different totals.
| Graphic Type | Typical Use | Common Size Range | Indicative Price Range | Cost Drivers |
|---|---|---|---|---|
| Small logo decals | Rear windows, toolboxes, hard hats, small equipment | 3 to 8 inches wide | $1.50-$5.00 each in moderate quantities | Contour cut, laminate, quantity, color coverage |
| Medium door stickers | Contractor vans, delivery cars, service trucks | 12 to 30 inches wide | $12-$45 each, depending on finish and volume | Vinyl grade, lamination, proofing, left/right versions |
| Rear-window graphics | Promotions, contact info, brand visibility | 18 to 48 inches wide | $25-$120 each | Perforated film, visibility needs, laminate, installation |
| Fleet panel kits | Multi-vehicle brand consistency | Multiple panels per vehicle | $150-$600+ per vehicle kit | Panel count, cast vinyl, numbering, packing by vehicle |
These ranges are directional, not a promise. A 5,000-piece run of small decals might fall below $1 each with efficient production, while a one-off reflective door set may cost several times more because setup and finishing labor are concentrated into a tiny run. The quantity curve is real: larger runs spread file prep, proofing, and press setup over more pieces.
Buyers often miss the expensive details. Contour cutting adds machine time. White ink on clear film can add a production pass. Reflective vinyl costs more than standard white vinyl. Specialty laminates, metallic films, rush production, split shipping, and individualized vehicle numbering all change the final cost. So does packaging. If every kit must be bagged by vehicle number with left-side and right-side labels, that is labor.
Ask for a quote that separates material, print, finishing, installation if applicable, shipping, and reprint policy. A low print line can become a higher total once rush charges, freight, and installation fixes appear. The same logic applies to Custom Labels & Tags: the unit price matters, but so do finishing, packing, and failure risk.
For sustainability-minded teams, ask how scrap vinyl, release liner, and packaging are handled. Vehicle graphics are not as easy to recycle as paperboard, but responsible packing choices still matter. For broader packaging waste guidance, the EPA Sustainable Materials Management program is a useful reference point.
Process and Timeline from Artwork Upload to Installation
The standard production path is predictable: Request a Quote, submit artwork and vehicle details, receive a digital proof, approve or revise, print, laminate, cut, quality check, pack, ship, and install. The surprise is where delays happen. It is rarely the printer simply “being slow.” More often, the proofing stage stalls because measurements are missing, files are weak, or approvals sit in someone’s inbox.
Simple repeat decals can move quickly, sometimes within 3 to 5 business days after proof approval if material is in stock and the schedule is open. More complex orders often need 7 to 15 business days. Fleet sets, reflective materials, custom die lines, color matching, multi-location shipments, or individually packed kits require more planning. Add transit time. Add receiving time. Add installation scheduling.
Ask four timeline questions before paying: What is the production lead time after proof approval? What shipping method is included? Do weekends count? Does rush service cut into any quality-control step? That last question matters. Rushing ink cure, laminate timing, or packing can create problems that do not show up until the installer is already holding the squeegee.
Installation should be scheduled after delivery is confirmed, not before. A vehicle should be clean, dry, and at a moderate temperature. Many vinyl films apply best around 50°F to 90°F, though each product has its own data sheet. Cold panels can reduce tack. Hot panels can make adhesive grab too aggressively. Freshly washed vehicles should be fully dry around trim, handles, and seams.
Shipping deserves more respect than it gets. Flat decals need protection from bending. Large graphics may ship rolled around a core. Fleet kits should be labeled by vehicle, side, and panel location. If your company already buys Custom Packaging Products, treat vehicle graphics with the same receiving discipline as custom printed boxes or retail packaging: inspect before use, verify count, and keep proofs with the order record.
Step-by-Step Ordering Guide for First-Time Buyers
Step One: Define the Business Goal
Start with the job the graphic must do. Brand awareness, contact capture, safety labeling, temporary promotion, fleet identification, event sponsorship, and regulatory marking all lead to different sizes and layouts. A plumbing van may need a phone number at 4-inch letter height. A nonprofit parade vehicle may need sponsor logos. A warehouse forklift decal may need durability more than beauty.
Step Two: Photograph and Measure the Panels
Take straight-on photos of the target panels with a measuring tape or ruler visible. Include the full vehicle side and close-ups of handles, trim, fuel doors, windows, and curves. Write down the maximum usable width and height, not just the panel’s total size. If the design must avoid a sliding door track, say so clearly.
Step Three: Send the Cleanest Artwork Files
Send vector logos, brand colors, font names, and layout inspiration. Label must-have content versus optional content. For example, the logo, service category, phone number, and website may be mandatory; social icons and a tagline may be negotiable. This keeps the designer from squeezing eight messages into space that can only hold three.
Step Four: Review the Proof Like an Inspector
Proof review is not a quick glance. Check spelling, phone numbers, website URLs, QR code function, trim lines, color notes, orientation, and which side of the vehicle each graphic fits. Look for mirrored layouts. Confirm whether the driver side and passenger side need separate files. One wrong arrow, handle conflict, or reversed door placement can turn a tidy order into an expensive reprint.
Step Five: Approve Only After the Full Order Is Clear
Before approval, confirm quantity, material, finish, shipping address, installation plan, and reorder needs. Store the final proof. For fleet consistency, that proof becomes a control document, much like a package branding standard or dieline for product packaging. Six months later, nobody wants to rebuild a van graphic from a blurry photo.
Common Mistakes, Expert Tips, and Final Checks Before Ordering
The most expensive mistake is ordering graphics before confirming vehicle dimensions. A beautiful design fails if it collides with trim, curves, windows, sliding doors, or fuel caps. The second mistake is quieter: making the layout too polite. Thin type, low contrast, and tiny service lists may look refined on a laptop screen but disappear on a moving vehicle.
Overloaded layouts are common. Buyers want services, icons, slogans, license numbers, certifications, social handles, payment logos, QR codes, and a smiling mascot. The vehicle gives viewers seconds. Sometimes less. Prioritize the logo, category, geography if useful, and one contact method. If the phone number matters most, make it large. If the website matters most, make it simple enough to remember.
- Choose high-contrast colors: black on white, white on dark blue, or bold brand colors usually beat subtle tone-on-tone combinations.
- Test readability: print the proof on paper, tape it to a wall, and view it from across a parking lot or warehouse aisle.
- Protect high-touch areas: request laminate near handles, rear doors, loading zones, and equipment panels.
- Order a spare set: one extra left and right graphic can save time after a dent repair, employee change, or installation error.
- Plan removal early: ask whether the adhesive is permanent or removable, and how paint age may affect clean removal.
Paint condition is the uncomfortable variable. Vehicle stickers are generally safe on clean, factory-cured paint in good condition. Old, oxidized, repainted, chipped, or poorly cured paint carries more risk. If the vehicle has bodywork history, disclose it. A removable film may reduce risk, but no supplier can honestly guarantee every paint surface will release perfectly after long exposure.
Most sticker failures begin as ordering failures. The buyer does not ask about surface, lifespan, laminate, proof scale, or installation temperature. The supplier quotes the fastest version. Everyone is happy until the first car wash or the first hot week.
Before ordering, measure the vehicle, choose placement zones, gather vector artwork, define quantity and lifespan, request a proof, and test the design for real-world readability. Custom vehicle stickers can turn ordinary routes into steady brand exposure, but only after the graphic is sized, specified, printed, packed, and installed like a serious brand asset.
FAQ
How long do custom vehicle decals usually last outdoors?
Outdoor lifespan depends on vinyl grade, laminate, sun exposure, road salt, washing habits, and whether the vehicle is parked indoors or outside. Budget vinyl may suit a short campaign, while premium laminated vinyl is better for multi-season fleet branding. Ask the supplier what conditions their durability estimate assumes instead of treating the number as a guarantee.
Are custom car stickers safe for vehicle paint?
They are generally safe on clean, factory-cured paint in good condition when the correct adhesive is used and removal is done carefully. Old, oxidized, repainted, chipped, or poorly cured paint carries more risk during removal. Buyers should disclose paint concerns and ask whether removable vinyl is a better fit.
What artwork files are best for ordering vehicle graphics?
Vector files such as AI, EPS, PDF, or SVG are best for logos and lettering because they scale cleanly. Photos or textured images should be high-resolution and sized close to the final print dimensions. Screenshots, compressed social media images, and tiny JPEG logos often create blurry or jagged results.
How much do vehicle stickers cost for a small business?
Cost varies by size, quantity, vinyl type, lamination, cut shape, color needs, proofing, shipping, and installation support. Small logo decals may be inexpensive in bulk, while large door panels, reflective graphics, and fleet kits cost more because they require more material and finishing. A useful quote should show material, finishing, production, shipping, and any setup or rush charges.
Can custom vehicle stickers be removed and reused?
Most adhesive vehicle stickers are designed for one-time application and should not be reused after removal. Removable vinyl can come off more cleanly than permanent vinyl, but removal does not mean repositionable or reusable. If reuse matters, buyers should consider magnetic signs or static cling options where appropriate.


