What a Custom Woven Clothing Label Actually Does
A tiny tag can make a $28 shirt feel finished, or make a $180 jacket look suspiciously cheap. A custom woven clothing label is not decoration tossed in at the end. It carries brand identity, size, care, origin, and product trust in a piece of textile often smaller than a business card.
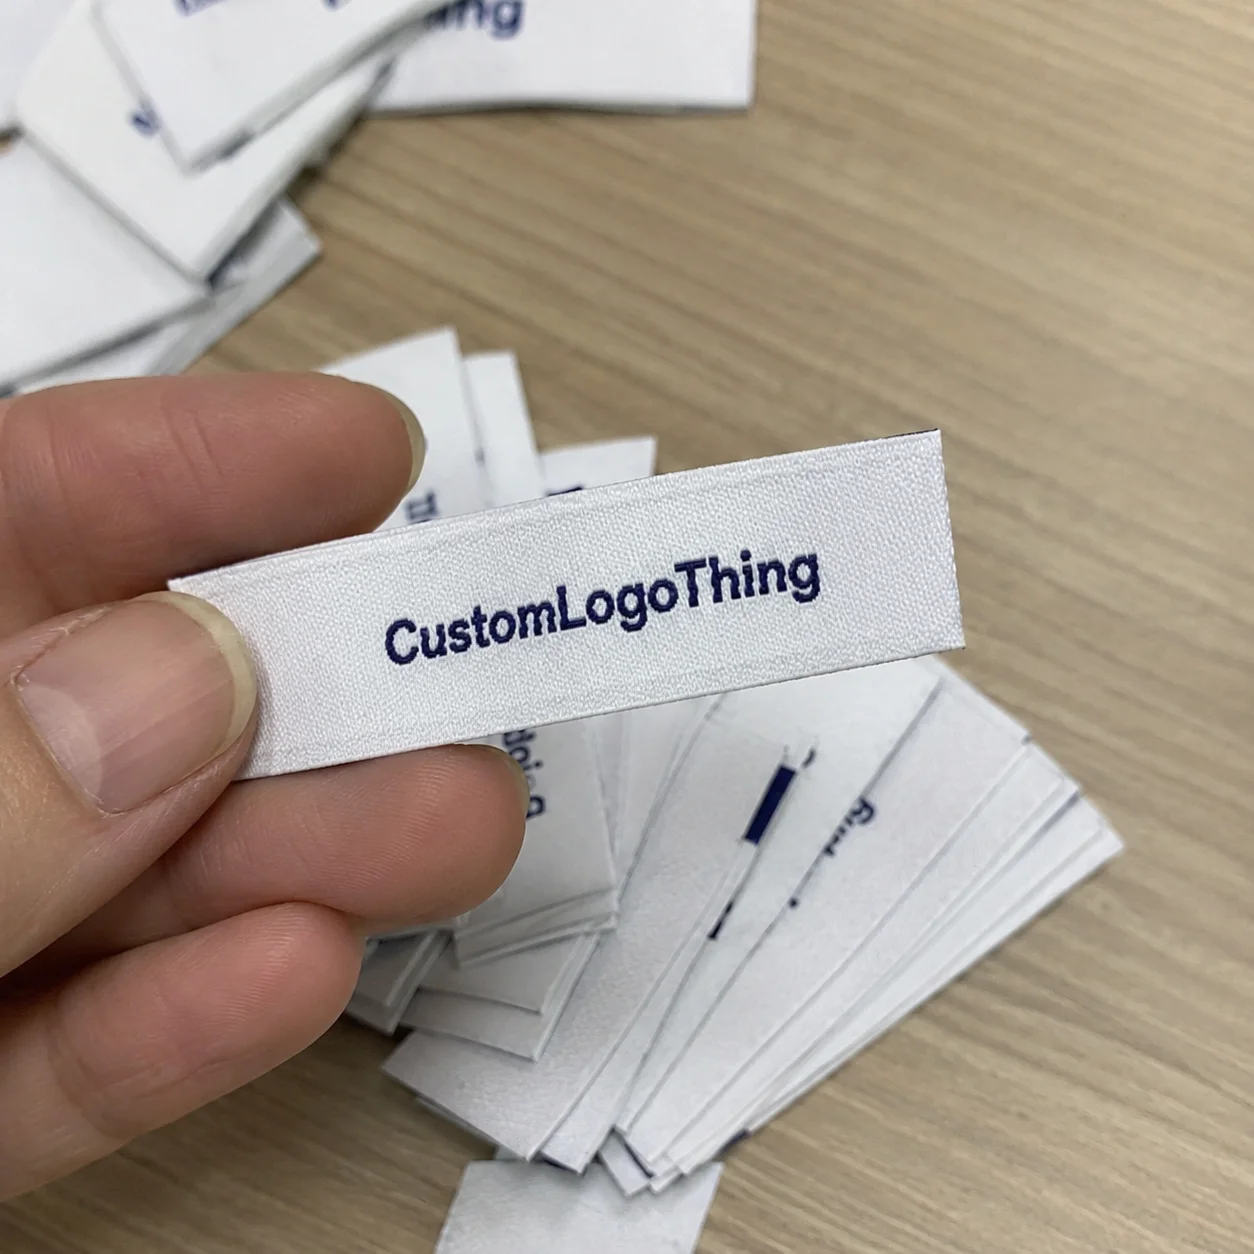
Woven labels are made by interlacing colored threads to form the logo, text, border, and background. That is different from printing ink onto ribbon or fabric. The result usually feels more permanent, especially after washing, rubbing, steaming, folding, retail handling, and all the casual abuse garments take before someone even buys them.
The jobs are practical: brand neck labels, hem tags, size tabs, care and content labels, origin labels, and decorative patches. One label can handle more than one function, but there is a limit. Cramming a logo, size, fiber content, laundry symbols, country of origin, website, slogan, and tiny icon into one rectangle creates a messy little billboard. Nobody needs that.
Apparel brands use woven labels because they make garments feel intentional. Merch sellers use them to move beyond blank-stock vibes. Private-label manufacturers use them for consistency across production runs. Fashion startups, workwear brands, kidswear companies, and boutique makers use them when the garment needs to look like a real product, not a hobby project with a tag slapped on.
From a packaging buyer’s point of view, labels sit beside product packaging, retail packaging, hang tags, mailers, and Custom Printed Boxes as part of the buyer’s first impression. If the box feels premium but the neck label feels like sandpaper, the brand story collapses fast. The right label balances hand feel, artwork detail, fold type, durability, order quantity, budget, and lead time before production starts.
How Woven Labels Are Made From Thread, Not Ink
The process is not mystical. The supplier converts your artwork into a weaving file, selects thread colors, sets loom parameters, weaves the label as tape or panels, then cuts, folds, seals, and packs the finished pieces. Every step affects the final look. Tiny type, fold direction, thread density, and cutting method all matter more than most first-time buyers expect.
A woven label usually wins for premium branding, long-term wash durability, and texture. A printed label usually wins for tiny care text, QR codes, gradients, complex illustrations, or exact ink-level color control. If your label needs a small block of legal care copy, print may be smarter. If your neck label needs to carry a luxury logo for 50 washes, woven is usually the better choice.
Common weave types include damask, satin, and taffeta. Damask is the all-around workhorse: finer detail, smoother hand feel, and better readability at small sizes. Satin has a shinier surface and can look dressier, though it can feel too glossy for rugged, athletic, or minimalist garments. Taffeta is simpler, more economical, and useful for size tabs or straightforward labels that do not need a soft luxury finish.
Thread has thickness. Annoying, but true. Ultra-thin lines, tiny serif text, photo-style logos, fades, and detailed icons do not translate perfectly. A woven label rewards clean artwork with bold shapes, enough spacing, and realistic contrast. Overdesigned logos get humbled quickly once they meet actual thread.
Finishing options decide how the label sews and feels. Straight cut labels are flat and often sewn on all sides. Center fold labels tuck into neck seams. End fold labels have folded left and right edges for a clean top-stitched finish. Loop fold labels work well for hems and side seams. Manhattan fold gives a more structured neck label presentation. Heat-cut and ultrasonic-cut edges help reduce fraying; merrowed edges create the raised border used on many patches.
Key Specs That Decide Comfort, Durability, and Brand Feel
Start with size. A neck label often lands around 30–60 mm wide, depending on the logo shape and garment category. A small size tab might be 10–20 mm wide. A hem tag may sit around 20–35 mm wide. Decorative patches can run much larger, especially for outerwear, bags, uniforms, and streetwear.
The correct size depends on three things: what must be readable, where it will sit, and how it will be sewn. A wide horizontal logo may need a 50 mm neck label. A compact monogram may work at 25 mm. If you force too much content into a small format, the weave fills in and the label starts looking cheap. The loom is not a miracle worker. Shocking, I know.
Fold choice should follow the garment construction. Center fold works well in a neck seam because the raw edge is captured during sewing. End fold works for flat brand labels sewn onto an inside back neck, sleeve, waistband, or bag panel. Loop fold is common for side seams, bottom hems, and small external tags. Straight cut is better for patches or labels sewn on all four sides.
Thread density affects detail and feel. Higher-density damask labels capture cleaner small text and usually feel smoother against skin, but they cost more. Lower-density labels can be fine for simple two-color logos, merch drops, or outside hem tags. Do not pay for luxury density if the label is a basic size tab. Do not cheap out on density if the logo has tight letter spacing and the label sits at the neck.
Softness matters most where skin contact happens. Neck labels, kidswear labels, underwear labels, and activewear labels need a softer finish than a jacket patch or outside hem tag. A beautiful label that annoys the wearer is not premium. It is just expensive irritation. The fastest customer modification is scissors at the back neck.
Color planning needs restraint. Most woven labels use 2–6 thread colors, depending on supplier, weave type, and design. Pantone references help, but they are targets, not magic spells. Dyed thread, monitor color, fabric texture, and lighting all behave differently. If brand color is critical, ask for a thread card, sample photo, or physical sample before bulk approval.
Attachment planning should happen before garment production, not after cartons of labels arrive. Labels may be sewn into seams, top-stitched flat, applied as patches, or added during final garment assembly. If you are also coordinating hang tags, branded packaging, or Custom Packaging Products, keep the same color references and brand rules across the full presentation. Package branding and garment branding should look related, not like distant cousins who met once.
| Label Spec | Best Use | Typical Tradeoff |
|---|---|---|
| Damask weave | Neck labels, premium garments, detailed logos | Better detail and softer feel, usually higher cost |
| Taffeta weave | Size tabs, simple brand labels, budget merch | Lower cost, less refined texture |
| Center fold | Labels sewn into neck seams | Clean install, but fold direction must be correct |
| End fold | Flat labels top-stitched to garments | Finished edges, slightly more planning needed |
| Merrowed edge | Patches for jackets, caps, bags, uniforms | Strong border and bold look, bulkier edge |
Cost, MOQ, and Quote Factors for Woven Labels
Woven label pricing depends on size, weave type, thread count, color count, fold style, backing, edge finish, order quantity, packaging, and shipping. There is no universal price because, shocking revelation, factories do not price a tiny hem tag like a large jacket patch.
For practical planning, small woven labels often become cost-effective around 500–1,000 pieces. Larger or more complex labels may need 2,000–5,000 pieces to bring the unit cost down. Very small runs are possible with some suppliers, but they usually carry setup fees, higher per-piece pricing, or fewer finish options.
A simple two-color damask neck label at 1,000 pieces might land roughly in the $0.12–$0.35 per piece range before freight, depending on size and finish. A larger woven patch with merrowed edge and backing may run closer to $0.60–$1.80 per piece at moderate quantities. These are planning ranges, not universal quotes. Freight, duties, rush timing, and packaging can move the number.
MOQ is a cash-flow decision as much as a production decision. A lower MOQ helps new brands test a capsule drop, validate sizing, or avoid shelves full of unused labels. A higher MOQ usually improves unit cost, but it ties up money and storage space. If the label works across multiple garment styles, ordering more often makes sense. If the design is seasonal, trend-heavy, or likely to change, stay conservative.
Good quote requests include label dimensions, fold type, quantity, artwork file, number of thread colors, weave quality, backing or adhesive needs, sewing allowance, delivery address, and target in-hand date. Better input gets a better quote. Vague input gets vague pricing, then everyone acts surprised later. Cute little industry tradition.
Hidden costs are where budgets get bruised. Artwork cleanup, sample fees, rush charges, freight upgrades, import duties, rework from bad files, and repacking fees can all show up. If labels must arrive sorted by size, style, colorway, or production batch, mention that early. Sorting 20,000 tiny tags after packing is nobody’s idea of efficiency.
Compare quotes by total landed cost and spec accuracy, not just unit price. A label that is two cents cheaper but too stiff for a neck seam is not a bargain. It is future customer complaints with a discount sticker. For broader product presentation, pair label decisions with related Custom Labels & Tags so the garment, hang tag, and packaging design speak the same language.
Production Steps, Timeline, and Lead Time Expectations
A normal order moves through a predictable sequence: submit artwork and specs, receive a quote, approve a digital proof, produce a physical sample if needed, approve the sample, run bulk production, inspect labels, pack, and ship. Skip steps only when the label is simple, low-risk, and already proven from a previous order.
Quoting may take 1–2 business days when specs are complete. Digital proofing may take another 1–3 business days. Sampling often takes 5–10 business days. Bulk production commonly takes 7–20 business days depending on complexity, quantity, loom schedule, finishing, and factory load. Shipping can add a few days by express or several weeks by slower freight.
What slows production? Unclear artwork, missing dimensions, changing fold type after proofing, adding thread colors late, requesting rush production during peak season, or discovering that the logo has details too small to weave cleanly. A custom woven clothing label is small, but it still needs decisions. Delayed decisions create delayed tags.
Order labels before garment production is locked, especially if they must be sewn into a seam. Labels arriving late can hold up the whole garment run. Tiny tag, giant bottleneck. If a factory is waiting on labels before finishing 5,000 hoodies, that is not a label problem anymore. That is a production scheduling problem with a very small villain.
Physical samples are worth it for new designs, skin-contact labels, luxury lines, children’s clothing, and any artwork with small text or tight color requirements. For children’s products, compliance and safety expectations can be stricter depending on the market, product type, and retailer requirements. For shipping and handling durability around broader product launches, packaging teams often reference standards from groups such as ISTA. Labels are textile components, not shipping cartons, but the same lesson applies: test before scale.
Approval responsibility sits with the buyer once the proof or sample is signed off. Check spelling, size, fold, color, placement, front and back orientation, and sewing allowance. Proofreading care labels and brand names is not glamorous. Neither is reprinting 10,000 tags because someone missed one letter.
Practical rule: approve a woven label only after viewing it at actual size. A design that looks crisp at 300% zoom can turn into decorative lint at 25 mm wide.
Step-by-Step Guide to Ordering the Right Label
Step 1: Decide the label purpose first. A brand neck label, size tab, care label, hem tag, and decorative patch all need different specs. Do not start by choosing the prettiest fold from a sample card. Start by deciding what the label must do.
Step 2: Measure the garment placement area. Check seam width, available height, wearer comfort, and visibility. A back-neck seam may allow 40 mm of width but only 18 mm of comfortable height. A side seam tag may look best at 12 x 25 mm. Guessing dimensions from a mockup is how labels become either microscopic or obnoxiously large.
Step 3: Simplify the artwork for weaving. Vector artwork is best. AI, EPS, or clean PDF files usually make production easier. Outline fonts, thicken thin strokes, remove tiny details, and limit colors where possible. If you only have a PNG or JPG, the supplier may need to clean or redraw the art before accurate weaving.
Step 4: Choose weave type, fold, and edge finish. Match construction to the garment. Use a soft damask center fold for neck seams, an end fold for flat logo labels, a loop fold for side seams, and merrowed edges for patches. If the label touches skin, prioritize comfort. If it sits outside on a jacket, prioritize durability and edge structure.
Step 5: Request a proof with actual dimensions and color notes. Confirm spelling, spacing, fold direction, sewing allowance, color references, and front/back orientation. If the label has size variants, check each size. A perfect medium label does not help if the small and extra-large tabs use the wrong font or fold.
Step 6: Order a sample when risk is high. If the label touches skin, uses small text, supports a premium line, or carries strict brand color requirements, get a physical sample. Skipping the sample to save lunch money is a bold strategy. Usually not a good one.
Step 7: Check the sample against the garment. Do not judge it alone on a desk under flattering office light. Pin it or sew it into the actual placement area. Check comfort, scale, color, fold, and readability. A custom woven clothing label should be approved in context, not just admired in someone’s palm.
Common Mistakes That Make Woven Labels Look Cheap
Mistake 1: using artwork that is too detailed for thread. Gradients, hairline strokes, tiny script, and complex icons often blur or fill in once woven. Clean shapes, strong contrast, and realistic spacing usually look better than complicated artwork forced into a small label.
Mistake 2: choosing the wrong fold. A label may look fine flat but fail when sewn into a seam because the fold direction or sewing allowance was not planned. Ask for the proof to show fold lines and finished dimensions, not just the flat artwork.
Mistake 3: ignoring comfort. Stiff labels at the back neck are one of the fastest ways to make customers reach for scissors. Once they cut the tag out, your branding is sitting in the trash. For neck labels, ask about soft damask, edge finish, and whether any scratchy heat-cut edges will be exposed.
Mistake 4: treating thread colors like digital colors. Monitor color, Pantone color, and dyed thread color are related, not identical. Pantone is a useful reference, but thread has sheen, texture, and dye-lot variation. If color matters, review a thread card or sample before signing off.
Mistake 5: ordering too few labels. Reorders often cost more per unit and may not match perfectly if thread lots change. Order a buffer of 5–10% for normal production waste, replacements, size changes, and small reworks. For labels used across multiple garment styles, a larger buffer can save money.
Mistake 6: forgetting compliance needs. Fiber content, country of origin, care instructions, and sizing may require separate labels depending on market and garment type. Brand labels are fun. Compliance labels keep retailers and regulators from getting cranky. For broader sustainability and materials claims on packaging, buyers can review guidance from sources such as the EPA, especially if environmental language appears on product packaging or hang tags.
Mistake 7: approving without checking scale. A custom woven clothing label that looks clean on screen may be unreadable at actual size. Print the proof at 100%, cut it out, and hold it against the garment. Low-tech? Yes. Useful? Also yes.
Next Steps Before You Approve Bulk Production
Before placing a bulk order, confirm the basics in writing: label use, placement, finished dimensions, flat dimensions if folded, fold type, weave type, thread colors, quantity, delivery deadline, and whether labels need sorting or special packing. If the labels are part of a larger launch with boxes, hang tags, mailers, or retail displays, align the specs with the rest of the package branding early.
Prepare files properly. Vector artwork such as AI, EPS, or PDF is best, with fonts outlined and Pantone references included if available. If only PNG or JPG files exist, expect cleanup before production. That cleanup may be minor, or it may involve rebuilding the logo so it can actually weave cleanly. Better now than after 3,000 blurry tags arrive.
Order a physical sample for first-time designs, premium garments, children’s clothing, neck labels, and anything with tiny text. Test the sample against the actual garment fabric. Dark fabric, ribbed collars, fleece backing, denim, and satin linings all affect how a label looks and feels once attached.
Review the sample like a buyer, not like someone trying to get the task off their desk. Check logo clarity, thread color, softness, fold accuracy, edge finish, stitch allowance, finished size, and how it looks after being pinned or sewn in place. If the label feels rough, looks crowded, or fights the garment construction, fix it before bulk production.
For a faster quote, send the supplier the label size, quantity, artwork, fold type, garment placement, target delivery date, shipping location, and any comfort or durability requirements. If the label is part of a broader branded packaging program, share the color references used on hang tags, inserts, or Custom Printed Boxes so the full presentation stays consistent.
Before approving a custom woven clothing label, test the label on the garment, confirm every production spec in writing, and order enough quantity to avoid an expensive panic reorder. Small tags cause big problems when they are wrong. Funny how that works.
FAQ
What is the best fabric type for a custom woven clothing label?
Damask is usually the best all-around choice because it captures finer detail and feels smoother against skin. Satin works when you want a shinier, more decorative finish, though it may not suit casual, rugged, or minimalist garments. Taffeta is more economical and works for simple designs, size tabs, or labels that do not need a luxury feel.
How much does a woven clothing label cost per piece?
Unit cost depends on size, quantity, weave type, fold, color count, backing, and shipping. As a planning range, simple woven labels may fall around $0.12–$0.35 per piece at moderate quantities, while larger patches can cost much more. Higher quantities usually reduce per-piece cost because setup is spread across more labels.
What is the minimum order quantity for custom woven labels?
Many woven label orders become practical around 500–1,000 pieces, though some suppliers offer lower MOQs with higher unit costs. Low MOQs help with testing a new brand, capsule collection, or limited merch run. Larger MOQs make more sense when the same label will be used across multiple garment styles or repeat production runs.
How long does custom woven label production take?
A typical order may take 1–2 business days for quoting, 1–3 business days for proofing, about 5–10 business days for sampling, and 7–20 business days for bulk production. Rush timing depends on artwork quality, label complexity, quantity, factory capacity, and shipping method. Start early if the label must be sewn into garments before final assembly.
Can small text and detailed logos work on woven clothing labels?
Small text can work if the label is large enough and the weave density is high enough. Very thin lines, gradients, tiny script, and complex icons often lose clarity when converted to thread. Simplifying the artwork and ordering a physical sample is the safest move before bulk production.