Custom Zipper Pouch Pricing Guide for Brand Buyers
A custom zipper pouch is often the right move when a product needs repeat access, better shelf presence, or a cleaner reclose after opening. If you are comparing it with a simple heat-seal bag or with Custom Packaging Products such as custom printed boxes, the real question is not just price. It is how the pouch will protect the product, support package branding, and hold up in retail packaging or a warehouse.
From a packaging buyer’s point of view, the pouch is doing several jobs at once. It has to protect contents, make the brand look intentional, and feel easy to use in the hand. That combination is why a zipper format can beat a basic bag even when the starting unit cost is a little higher. For many product packaging programs, the extra structure pays for itself in fewer complaints, better shelf presentation, and less spoilage or spill risk.
The format itself is simple enough: a pouch body, a zipper track, seal zones, and sometimes extras like a hang hole, tear notch, clear window, or euro slot. The details are where the trouble starts. Material structure, closure quality, seal width, and artwork placement all affect how the pack performs once it is filled. A quote should never be treated as a single number detached from the build.
The sections below focus on the decisions that shape cost and function: material choice, barrier needs, artwork, MOQ, production timing, and the small spec choices that separate a decent pouch from one that feels well engineered.
Why a Custom Zipper Pouch Can Outperform Basic Bags
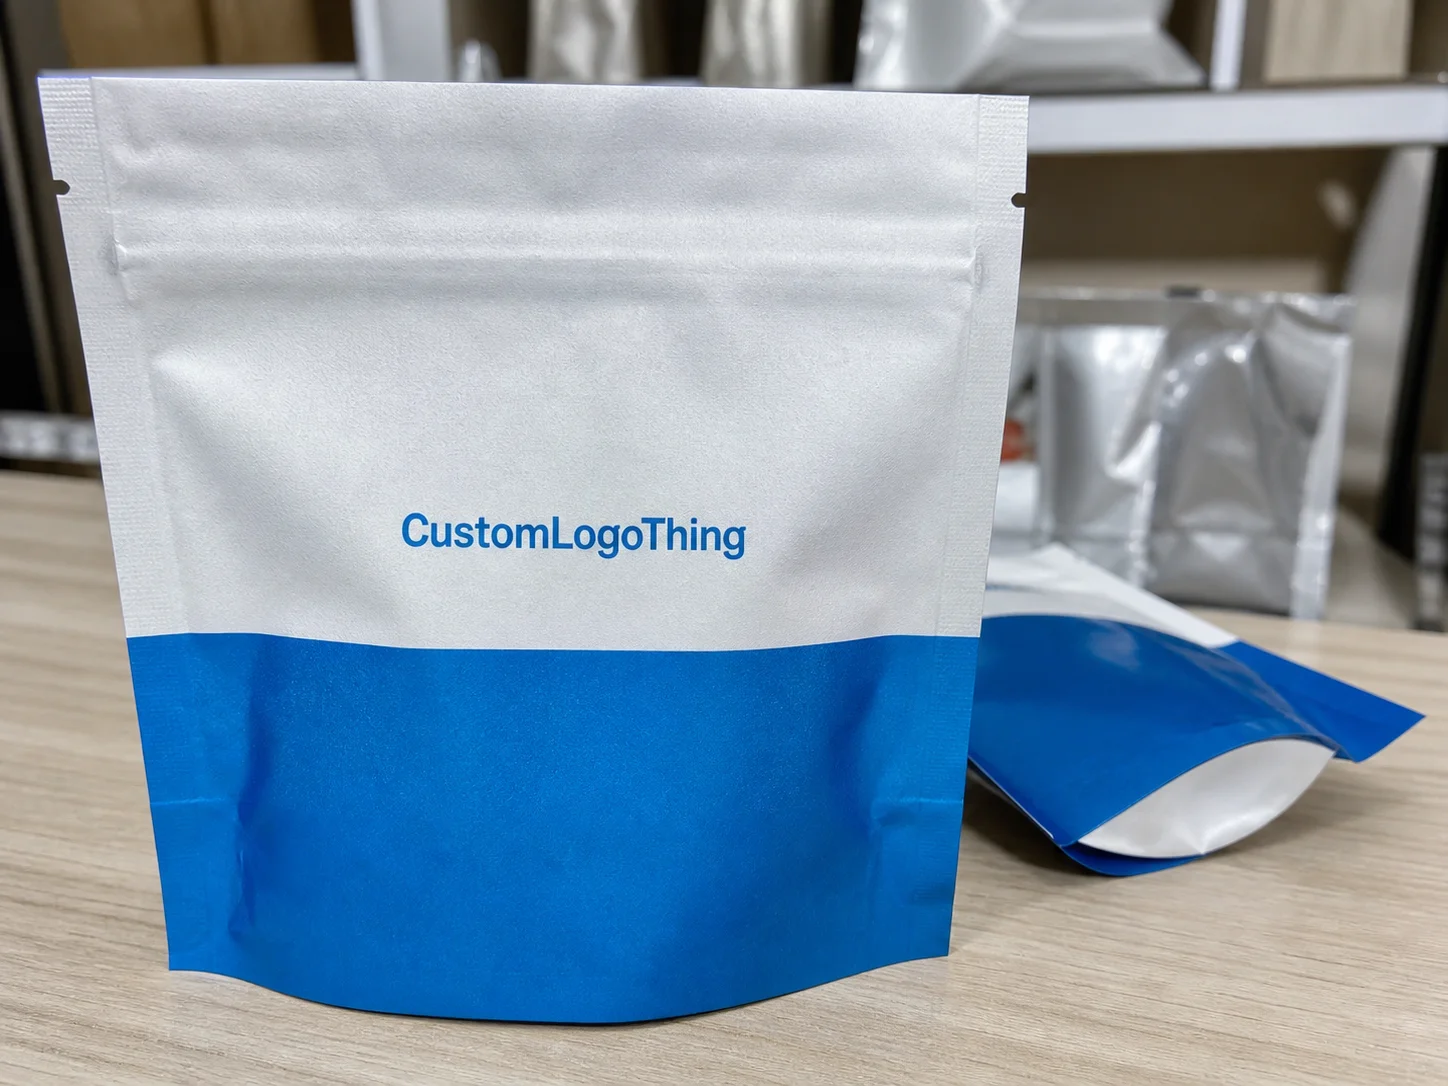
Some products need more than a flat bag. Granola, pet treats, protein powder, coffee, frozen snacks, bath salts, and many supplements all benefit from repeated access and a closure customers can trust. A zipper pouch gives the end user a way to open, use, and reseal the package without reaching for another clip or container. That sounds small. It changes how people store the product and how long they keep using it.
The core job of the pouch is to protect the contents, support merchandising, and make storage easier without making the pack fussy. A good pouch should stand up in a display, survive handling in transit, and still feel tidy after the first opening. If the product is part of a broader branded packaging system, the pouch also has to carry the visual story cleanly, which is why artwork density, finish, and clarity matter more than many teams expect.
In plain language, a custom zipper pouch is a flexible package with a recloseable zipper integrated into the body. The pouch may be a stand-up format with a bottom gusset, a flat pouch, or a three-side seal style. Depending on the product, you might also add a tear notch for easy opening, a hang hole for retail display, or a clear window that shows the contents without giving up all branding space.
Why brands switch from a simple bag to a zipper pouch:
- Repeated access without losing the seal completely after first use.
- Better shelf presentation than a loose, floppy bag.
- Improved convenience for storage in kitchens, gyms, or travel kits.
- More room for strong package branding and compliance copy.
- Better fit for products that need moisture, odor, or oxygen control.
If the product has a short use cycle and does not need recloseability, a simpler bag can still make sense. For many consumer lines, though, especially retail packaging with multiple uses, the zipper format is easier to justify. The buyer is not just paying for a closure. They are paying for usability, perceived quality, and a package that feels more deliberate on shelf.
For products sold by weight, the pouch shape also affects how the fill settles. A compact bag can make a lightweight item look underfilled. An oversized pouch can make the same product appear sloppy. Neither is ideal. The right format helps the product look finished without adding fake bulk just to fill space.
How the Construction and Closure Actually Work
A zipper pouch is usually built from several functional parts working together. The outer print layer carries the graphics. The inner sealant layer helps create the package seams. Between them, the structure may include barrier films, metalized layers, or clear films selected for moisture, oxygen, light, or odor resistance. The zipper itself is welded into the structure during conversion, then the pouch is sealed in the remaining areas and later filled through the open top or through a form-fill-seal line depending on the production method.
The closure quality matters more than buyers sometimes realize. If the zipper engages cleanly and consistently, the consumer gets a better sense of confidence. If it feels flimsy, stiff, or uneven, the whole package can seem less trustworthy even when the print looks premium. Recloseability is one of those details customers notice right away, even if they do not have the vocabulary for it.
Common material paths include PET/PE for straightforward uses, matte laminated films for a softer tactile look, and higher-barrier structures such as PET/VMPET/PE or PET/AL/PE when product protection matters more. Clear PET/PE can work well for visibility, while opaque laminated structures help if the brand wants stronger visual control or better light blocking. A window can split the difference, letting the product show through without giving up the full design field.
Seal zones deserve attention too. Most pouches need enough seal width to handle fill pressure and shipping stress, and a coarse or bulky product may need more land area than a fine powder. A typical seal width often lands around 6 to 10 mm, but the correct number depends on the build, the fill weight, and the filling method. Too narrow, and you invite weak seals. Too wide, and you waste material while shrinking the usable print area.
Buyers often ask whether a zipper pouch is “food safe.” The better question is whether the material set, inks, and conversion method match the product and the market. For food use, the supplier should be able to state the applicable material compliance basis and the intended contact layer. If the product is sensitive to oxygen or aroma loss, barrier performance should be specified in practical terms rather than vague claims. If the buyer cannot get a straight answer, that is usually a sign to keep looking.
For reference points on packaging performance and testing language, suppliers often align with standards from ISTA for transit testing and with ASTM-style seal checks such as seal strength or leak testing where needed. For paper-based components or inserts, FSC sourcing may matter if your brand has a verified material policy. Not every program needs that level of documentation, but Buyers Should Know what is available before they lock a spec.
A pouch that looks premium but opens badly is not a design win. It is a packaging problem that will show up in customer reviews, returns, and repurchase behavior.
Custom Zipper Pouch Cost, MOQ, and Quote Factors
Pricing is driven by a handful of practical inputs, not by one single bag cost. Material structure, pouch size, print coverage, number of colors, zipper style, finish, and special features all matter. A simple clear pouch with a standard zipper will usually sit at the lower end of the range, while a high-barrier stand-up pouch with soft-touch lamination, a window, or a hang hole will cost more because the converting process is more involved and the material bill is higher.
For a standard custom zipper pouch run of 5,000 pieces, a realistic unit range might look like this:
| Build Type | Typical MOQ | Approx. Unit Cost | Best Fit |
|---|---|---|---|
| Clear PET/PE pouch with standard zipper | 3,000-5,000 | $0.18-$0.32 | Short shelf life, visibility, low-complexity retail packaging |
| Printed matte laminated pouch with zipper | 5,000-10,000 | $0.24-$0.48 | Branded packaging with stronger shelf impact |
| High-barrier stand-up pouch with zipper | 10,000+ | $0.35-$0.85 | Moisture, oxygen, odor, or light-sensitive products |
| Special finish pouch with window, soft-touch, or custom feature | 10,000+ | $0.40-$0.95 | Premium product packaging and stronger package branding |
Those ranges are only a starting point. Total project cost also includes artwork setup, plates or cylinders depending on the print method, tooling if the shape is unusual, freight, and sample charges. Some buyers focus only on the unit number and are surprised when the landed cost comes in higher because the quote did not include the complete production picture.
The more accurate the spec sheet, the more accurate the quote. A supplier can usually price faster and better when they have the product dimensions, fill weight, target launch volume, artwork status, closure preference, and any barrier target up front. That is especially true for products that need shelf life protection or unusual pouch dimensions. If the product is still in development, it is better to quote a few structure options side by side than to force one build too early.
Typical cost drivers, in order of impact:
- Material structure and barrier level.
- Pouch size and gusset design.
- Print coverage and finish.
- Zipper style and any special closure features.
- MOQ, freight method, and sampling needs.
The MOQ question is often less about a hard rule and more about how much setup the job requires. A simple pouch may be feasible at a smaller run, while a complex barrier pack with premium finishes usually needs a larger commitment to keep the economics sensible. If your launch volume is uncertain, ask for a stepped quote so you can see how pricing changes at 3,000, 5,000, and 10,000 pieces.
For private-label brands, it also helps to ask whether pricing changes if you commit to repeat runs. Some suppliers hold setup costs steady for reorders, while others re-figure the economics every time. That small detail can change the real cost more than a few cents on the first order.
Production Steps and Lead Time From Spec to Shipment
Good production starts with a clean intake. The supplier should review the product type, fill method, storage conditions, and visual goals before the artwork is finalized. After that comes structure selection, dieline confirmation, artwork prep, proofing, sampling if needed, printing, lamination, slitting, pouch conversion, and final inspection. That sequence sounds neat on paper. In real production, the lead time can stretch at several points.
Artwork revisions are one common delay. So are sample approvals when the buyer wants to compare zipper feel, finish, or opacity. Material sourcing can also extend a schedule if the chosen film, zipper profile, or barrier layer is not on hand. If the pouch has special features, the supplier may need extra time for setup or tooling. A realistic lead time for a straightforward program is often 12 to 15 business days from proof approval, but that can move depending on the build and the current factory schedule.
Prepress checks matter more than many teams expect. A barcode placed too close to a seam, text that crosses a fold line, or a logo that sits inside the zipper zone can turn into an expensive error. Good prepress work catches those issues before ink ever hits film. This is also where compliance copy, lot coding space, and any required panel instructions should be confirmed. A little discipline here saves a lot of waste later.
For shipments that will face parcel or pallet movement, it is sensible to ask whether the total pack-out has been considered against an ISTA test profile. Not every order needs formal lab work, but the question tells you whether the supplier is thinking about the journey the pack will take, not just how it looks on press.
Buyers can keep the schedule moving with a few simple habits:
- Approve the dieline early and do not wait for final artwork to confirm dimensions.
- Send the fill weight and product density as soon as possible.
- Confirm barcode placement, compliance text, and carton pack counts before production starts.
- Review samples with the actual product, not just empty pouches.
One caveat: sample timing and production timing are not the same thing. A digital proof can be quick. A physical sample can take longer, especially if the build needs special film or zipper components. Buyers sometimes build launch calendars on the proof schedule and then act surprised when the sample is the slower step. Packaging does not care about optimism.
How to Choose the Right Specs for Your Product
The right spec starts with product behavior, not with the flashiest finish. Powder, snack, granola, pet treat, supplement, and non-food items all behave differently inside a pouch. A dusty or fine product may need a better seal strategy, while a brittle snack may need more headspace to avoid crush damage. Moisture sensitivity, odor transfer, and oxygen exposure should all be part of the first conversation.
Finish is a branding choice, but it also affects handling. Matte gives a softer, more restrained look. Gloss tends to read brighter and can help color pop. A soft-touch lamination feels premium in the hand, but it can scuff more readily depending on transport and shelf handling. Transparent film shows the product and can reduce the need for a full window, while opaque film gives the design team more control over the surface.
Size and fill behavior are easy to underestimate. If the pouch is too small, the fill can deform the seals or make the zipper sit awkwardly. If it is too large, the product may shift around and look underfilled. Gusset style matters too. A bottom gusset can help the pouch stand better, while a flat pouch may suit a lighter item or a simpler distribution model. Zipper placement needs enough room above the fill line so the closure stays usable after opening.
Useful options to evaluate before you quote:
- Reseal strength for frequent opening.
- Easy-open tear notch for first-use convenience.
- Child-resistant features where regulation or product risk requires it.
- Hang hole for peg display.
- Clear window for visibility without giving up all branding space.
A strong spec is not always the most premium spec. The best build is the one that fits the product, the shelf, and the customer’s routine. If the packaging is part of a broader launch that includes labels, cartons, or inserts, the pouch should sit comfortably inside the full packaging design system rather than fight it. That is how you get a coherent brand presentation instead of disconnected pieces.
If you are comparing pouches with cartons or other formats, keep the product journey in view. Custom printed boxes can be excellent for secondary packaging, while a zipper pouch often makes more sense for direct product contact, especially where convenience and resealability are important. Good product packaging is usually the result of matching format to use case, not chasing the most elaborate option.
There is also a practical limit to what a pouch can do. Very heavy products, awkward shapes, or items with sharp edges may need thicker films, stronger seals, or a different format entirely. If the product can puncture the film in transit, no amount of glossy print will save it. The structure has to earn its keep first.
Common Custom Zipper Pouch Mistakes to Avoid
The first mistake is overspecifying barrier. A buyer may assume more layers are always better, but an unnecessary high-barrier structure can add cost without delivering meaningful value if the product is dry, fast-moving, or not sensitive to oxygen. Barrier should be matched to product need, not chosen as a default premium upgrade.
The second mistake is approving artwork before the dieline is truly locked. Zipper location, seal margins, tear notches, and safe text zones all affect where the design can live. If the art is built on guesswork, the finished pouch can end up with crowding, clipped copy, or critical information too close to a seam.
Another problem is underestimating fill behavior. Heavy contents can bulge the body, distort the zipper line, or stress the bottom seal. Fine powders can migrate into areas that should stay clean. If the product behaves unexpectedly in the pouch, the package may look cheap even if the print is strong. That is a packaging issue, not just a fill issue.
Closure strength also matters. Too weak, and the pouch feels unreliable. Too strong, and the customer may struggle to open or reclose it cleanly. The best zipper choice depends on how many times the pouch will be opened, whether children will handle it, and whether the product is meant to stay fresh over several uses.
Skipping sample review is the last common miss. A digital proof can tell you dimensions and copy layout, but it cannot tell you how the zipper feels in the hand, how the finish reflects light, or whether the seal integrity seems right after filling. A sample stage is cheap insurance compared with discovering an issue after a full run is already in transit.
One more trap: forgetting the shipping environment. A pouch that survives a careful hand test may still fail if it is packed tightly in cartons, shipped through humid conditions, or stacked under weight. Transit stress changes things. So does temperature. If the product is going into summer storage, cold chain, or export lanes, that needs to be part of the spec conversation early.
The most expensive pouch is not always the one with the highest unit cost. It is the one that looks fine on paper and causes rework once the product is already committed.
Expert Tips for Better Results and Smoother Ordering
Start with product requirements first, then build the pouch around them. That order matters. Too many teams start with appearance, then try to force the structure to fit the product later. It usually works better the other way around: define shelf life, fill behavior, storage conditions, and branding needs first, then choose the pouch system that supports them.
Requesting a sample set is one of the smartest moves a buyer can make. A side-by-side comparison of matte and gloss films, or of different zipper profiles, often reveals a clearer preference than mockups ever will. Touch, stiffness, and opening feel are real product attributes. They change the user experience and the perceived value of the pack.
Share expected order volume, market type, and launch timing early. A supplier can recommend a more efficient build if they know whether the line is going into club retail, specialty retail, direct-to-consumer, or food service. The right advice is different for each channel. Even within branded packaging, a pouch for shelf display is not the same as a pouch for shipping kits or subscription boxes.
A practical ordering checklist:
- Final dimensions and fill weight.
- Closure type and reseal expectation.
- Print method and finish.
- Barrier target and storage conditions.
- Compliance copy, barcode, and carton requirements.
It also helps to think beyond the production line. A slightly better spec can reduce leakage, product loss, customer complaints, and repacking labor downstream. That is a real business cost, not a design theory. If your team also buys labels, cartons, or mailers, compare the pouch against the rest of the packaging system so the decision is consistent across the full launch. You can start that conversation through Custom Packaging Products if you want to evaluate formats together.
For brands that care about sourcing discipline, ask for documentation on paper or board components where FSC chain-of-custody matters, and ask how any shipping test claims were verified. That kind of question filters for suppliers who think in terms of process control rather than just sales language. It also helps separate a real packaging partner from a quote-only vendor.
A good buyer also asks what the supplier cannot do well. Some shops handle straightforward printed pouches beautifully but struggle with special finishes, unusual gussets, or tighter tolerances. That is not a moral failing. It is a production reality. Better to know that before the order is placed.
Next Steps for Specifying Your Pouch
The cleanest way to move forward is to build a short discovery sheet before you ask for quotes. List the product type, fill weight, dimensions, shelf-life needs, closure preference, and branding requirements. Add a note on your target market and launch schedule. That one page can save several rounds of back-and-forth and usually leads to a more accurate quote the first time.
Next, compare two or three structure options side by side. It is often useful to see what changes when you move from clear PET/PE to a matte laminated build, or from a basic zipper to a higher-barrier structure. The differences in cost, appearance, and protection become much easier to judge when they are shown together rather than discussed abstractly.
If the product has unusual weight, texture, or storage demands, ask for a sample or prototype before committing to the full run. That is especially true for powders, sticky snacks, odor-sensitive goods, and items that need longer shelf stability. The sample stage is where you confirm the pouch actually works with the product, not just with the spec sheet.
Before approving production, review the artwork against the dieline one more time. Check the zipper location, safe text zones, barcode placement, and any compliance copy. If those details are stable and the spec is clear, the project is in good shape. That is how you get a custom zipper pouch that fits the product, the timeline, and the budget instead of forcing one of those three to give way at the last minute.
A well-specified custom zipper pouch is not just a container. It is part of the customer experience, the shelf story, and the protection strategy for the product inside. When those pieces are aligned, the pack earns its place in the line.
What materials are commonly used for a custom zipper pouch?
Common constructions include PET/PE, laminated films, and barrier structures chosen for moisture, oxygen, light, or odor protection. The right material depends on product sensitivity, the shelf-life target, and whether the pouch should look matte, glossy, or clear.
How do I know what MOQ to expect for a custom zipper pouch?
MOQ depends on pouch size, material structure, print complexity, and whether special components are required. Simpler builds usually allow lower minimums than highly customized barrier pouches with premium finishes or specialty closures.
What affects custom zipper pouch pricing the most?
Material choice, print coverage, pouch size, zipper style, finish, and add-ons such as hang holes or windows are major price drivers. Setup costs, freight, and sample requirements can also change the total project budget.
How long does custom zipper pouch production usually take?
Lead time typically depends on artwork approval, material availability, sampling, and the complexity of the pouch structure. Projects move faster when specs are finalized early and proofing feedback is returned quickly.
What should I send when requesting a quote for a custom zipper pouch?
Provide product type, fill weight, target dimensions, quantity, desired finish, barrier needs, and any special features. Including artwork status and launch timing helps the supplier return a more accurate quote and timeline.


