Buyer Fit Snapshot
| Best fit | Packaging Finish Options projects where brand print, material claims, artwork control, MOQ, and repeat-order consistency need to be specified before quoting. |
|---|---|
| Quote inputs | Share finished size, material target, print colors, finish, packing count, annual reorder estimate, ship-to region, and any compliance wording. |
| Proofing check | Approve dieline scale, logo placement, barcode or warning zones, color tolerance, closure strength, and carton packing before bulk production. |
| Main risk | Vague material claims, crowded artwork, missing packing details, or unclear freight terms can make a low unit price expensive after revisions. |
Fast answer: Packaging Finish Options: Quote Scope, Sample Proof, MOQ, and Lead Time should be specified like a repeatable production item. The safest quote records material, print method, finish, artwork proof, packing count, and reorder notes in one written spec.
Production checks before approval
Compare the actual filled-product size with the drawing, then confirm tolerance on folds, seals, hang holes, label areas, and retail display edges. Reserve space for logos, QR codes, warning copy, and material claims before decorative graphics fill the panel.
Quote comparison points
Review material grade, print process, finish, sampling route, tooling charges, carton quantity, and freight assumptions side by side. A quote is only useful when the supplier can repeat the same color, closure quality, and packing count on the next order.
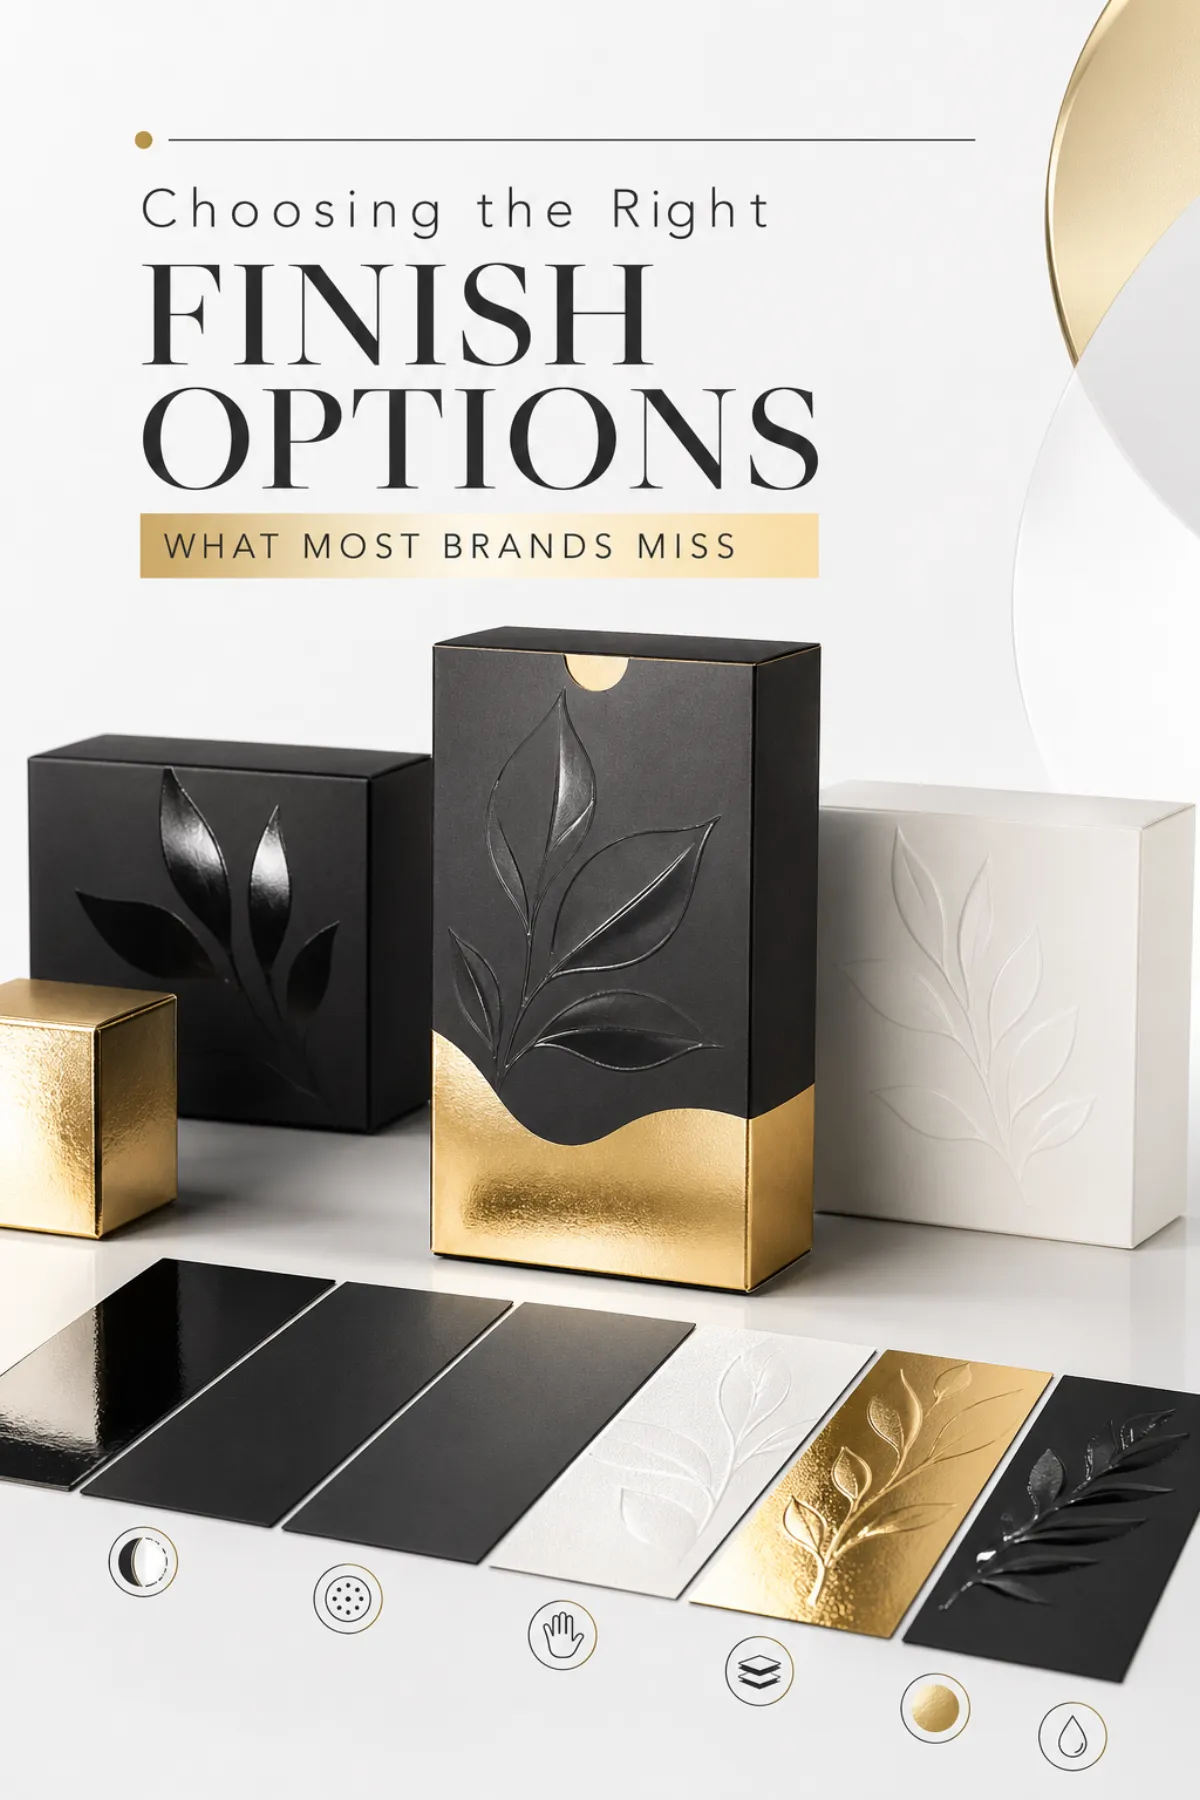
How to choose packaging finish options: what most brands miss
How to choose packaging finish options looks like a design decision at first glance, but it rarely stays there. The first time I watched it go sideways, it became a manufacturing problem and a revenue problem in the same afternoon. I was on a folding carton line in Shenzhen, standing under fluorescent lights while a cosmetics box rolled off the press looking immaculate from three feet away. Up close, the story changed. The soft-touch film held fingerprints like wet paint, the edges picked up scuffs in packing, and a 4,000-unit run was suddenly staring at a reprint estimate of $1,180 before freight. That is the part nobody puts on the mood board, and honestly, that part is usually the part that decides whether the order works or not.
Packaging finish options are the treatments added after printing to change feel, glare, durability, and shelf presence. Think matte varnish, gloss coating, soft-touch lamination, foil stamping, embossing, debossing, and spot UV. They influence how a box looks under 3,000K retail lighting, how it behaves in the hand, and whether it survives the rough edge of shipping, stacking, and repeated handling. A carton that looks expensive in a render can still fail in a warehouse if the finish and substrate are mismatched. That is why how to choose packaging finish options starts with material behavior, not inspiration boards that make everything look better than it will in real life.
Perception moves fast. A finish change can pull a $2 item upward in the buyer’s mind until it reads like a $12 product, and the reverse happens just as quickly. I have seen a $0.20 per unit upgrade on a rigid gift box lift conversion in a retail test, then watched a $0.28 foil treatment make a premium line look oddly cheap because the gold shifted green under LED store lighting at 4,000K. I still remember the buyer staring at the sample like it had personally betrayed her. Surface treatments do not merely decorate packaging. They steer value judgment in seconds.
The framework I use is simple: product first, then handling conditions, then budget, then brand voice. Put those in the wrong order and the sample pile starts lying to you. Put them in the right order and how to choose packaging finish options becomes a practical decision instead of a guessing contest dressed up as taste. That sounds dry until you are the one paying for a rerun because the finish looked gorgeous and performed like a stubborn piece of plastic in a thunderstorm. On a 6,000-unit order, that kind of mistake can burn $900 to $2,400 before a replacement sheet even clears the pressroom.
How packaging finish options work in production
Finish selection only makes sense if the production sequence is clear. In a normal packaging job, the artwork is printed, the finish is applied, the surface is cured or dried, and then the sheet moves into die-cutting, creasing, gluing, and assembly. Rigid boxes follow a slightly different path: the wrap can be finished before it is mounted to greyboard. Custom Printed Boxes may receive coating on press or through a separate finishing line. That order matters because how to choose packaging finish options depends on what the board, ink, and glue can tolerate without cracking, warping, or losing registration. In Guangdong and Dongguan, factories often run this sequence on separate machines, which adds one to three handoffs before carton conversion.
The main categories split into two camps. Film-based finishes use a plastic layer, usually BOPP or PET, for stronger scuff resistance and a more controlled tactile feel. Liquid coatings such as aqueous, matte varnish, and UV varnish are applied like a fluid and then cured. Film usually performs better in transit. Liquid coatings often cost less and can fit recycling streams more cleanly, especially on paperboard structures. If your brand wants a paper-first footprint, that detail changes both the spec and the invoice. It also changes how the package behaves after three days in a humid warehouse in Guangzhou or a damp container moving through Ningbo, which is the kind of detail that gets ignored right up until it becomes a complaint.
Different substrates react in different ways. On coated paperboard, spot UV reads crisp because the surface is smooth and the contrast stays clean. On kraft, the same effect can look softer or patchier because texture absorbs some of the sharpness. on Rigid Boxes, foil stamping and embossing can create a deep, tactile impression, but the registration needs to stay tight within roughly 0.3 mm or the detail starts looking careless. Labels bring their own problems. A small cosmetic label at 50 mm wide can curl at the adhesive edge if the coating is too heavy. Substrate comes first for a reason, and if someone tells you otherwise, they are probably trying to sell you a finish instead of a solution. A 350gsm C1S artboard behaves differently from a 400gsm SBS sheet, especially at the crease line.
Factories cannot rescue a bad spec after the fact. Heavy ink coverage can make some finishes craze at the folds. Foil too close to a score line can crack on a 90-degree bend. On a 350gsm C1S board, emboss depth beyond about 1.2 mm can distort the reverse side. Minimum order quantities matter too. One supplier may quote 2,000 units for aqueous coating and 5,000 for hot foil because the setup and machine changeover cost more. That is the unglamorous side of how to choose packaging finish options, and it decides whether the concept is printable or just expensive in a very creative way. A factory in Suzhou may quote differently from one in Xiamen simply because the foil plate and die-making are outsourced across town.
Time enters the equation as early as the proof stage. A simple matte varnish may add 1 to 2 business days. Soft-touch lamination can add 2 to 4 days if film inventory is tight. Foil stamping, embossing, and custom die work can add 5 to 10 business days, sometimes more if a second proof round appears. I tell clients to leave a 7-day buffer minimum for shelf launches and 10 to 14 days for export orders that need transit testing. Finish choice has a calendar attached to it whether anyone wants one or not. If a supplier in Shenzhen says a foil-and-emboss job is “fast,” ask whether they mean 8 business days or 15, because that difference can decide a launch.
How to choose packaging finish options by product, budget, and audience
Cosmetics need a finish that stays clean in the hand and still feels premium after the third touch. I watched one skincare client debate how to choose packaging finish options for a 30 ml serum carton, and the winning choice was not the loudest. It was a soft-touch laminate with a small foil logo and no full-panel gloss. The box felt expensive, but it also survived 18 handlings across a launch table. That mattered more than a flashy render ever could. I remember thinking, rather bluntly, that the box had more stamina than some marketing campaigns I have seen. For a $38 serum sold through boutiques in Singapore and Los Angeles, that durability mattered more than a mirror shine.
Food packaging has a different rulebook. If the pack might be wiped down, chilled, or exposed to condensation, durability has to outrank drama. A light gloss coating or a food-safe aqueous finish usually beats a delicate tactile effect. Supplements sit between those poles. They need clarity, trust, and enough shelf contrast to stand out without screaming. Matte laminate with a high-contrast logo and a restrained spot UV detail on the brand mark often fits best. Electronics usually need abrasion resistance and sharp graphics rather than softness. One nick on a headphone box can make the whole item feel discounted. Retail is ruthless like that, which is rude but true. A mailer shipped from Jakarta to Melbourne will punish the wrong coating in under 72 hours.
Audience matters as much as product category. A value-driven buyer tends to read finish as added cost. A premium buyer reads finish as care. That is why how to choose packaging finish options for a mass-market vitamin brand is not the same as the choice for a boutique candle line. If the buyer expects utility, a clean matte or gloss finish with one strong graphic cue usually works. If the buyer expects tactility, add one premium element and stop there. I have seen brands stack foil, embossing, and soft-touch on a $14 accessory box, then wonder why the result looked overeager. It looked like the packaging was trying too hard to impress the in-laws, and the panel in Milan noticed.
Budget tradeoffs become clearer once you think in terms of visible value per dollar. A $0.06 matte aqueous coating can lift presentation enough to justify a stronger sell-through without wrecking margin. A $0.18 soft-touch film can be worth it on a $40 product. A $0.42 foil and emboss combination on a 1,000-unit run can hurt unless the box is carrying the entire brand story. The real question is where the money shows and where it disappears quietly. Honestly, that is the only budget question that matters in the room. A branded tray box in Toronto may justify a pricier finish; a shipper in Ho Chi Minh City may not.
Sustainability belongs in the same conversation. Laminated packaging is not automatically irresponsible, and plain kraft is not automatically virtuous. The real test is structure, local recycling capability, and the claims printed on the side panel. If FSC-certified paper matters to your positioning, verify the spec and the supplier’s paperwork. The FSC site is a useful starting point for sourcing language and chain-of-custody basics: FSC certification resources. For distribution and drop-test questions, ISTA guidance is worth reading: ISTA. Not glamorous, just useful, which is a phrase I say a lot when no one is happy about the spreadsheet but everyone eventually needs it. A 350gsm FSC C1S carton with aqueous coating can sometimes be easier to justify than a fully laminated rigid box, depending on the recycling rules in Chicago or Berlin.
Here is a decision matrix I use with clients trying to figure out how to choose packaging finish options without losing half a day to a swatch debate. These numbers are directional, not fixed list prices, because volume, substrate, and region move the quote more than people expect:
- Product type: cosmetics, food, supplements, electronics, apparel.
- Brand position: value, mid-market, premium, luxury.
- Quantity: 500, 2,000, 5,000, or 20,000 units.
- Handling: shipping abrasion, humidity, retail touchpoints, stacking.
- Compliance: food-safe claims, recyclability claims, FSC paperwork, transit standards.
Use that grid before falling for a reference image. I have watched a buyer spend 45 minutes on a rose-gold foil swatch, then reject it after a simple rub test showed the edges would wear through in less than two weeks. Real handling beats beautiful theory every time. That sounds harsh, but I would rather disappoint a mood board than a launch date. In a 2,500-unit run out of Dongguan, that five-minute rub test can save a $1,400 reprint.
How do you choose packaging finish options step by step?
Step 1: define the job the package has to do. Not the mood. The job. Is it protecting a candle in a corrugated mailer, standing out on a retail shelf, or creating a premium unboxing moment for custom printed boxes? I ask clients to write one sentence that includes a number, such as “This carton needs to survive a 3-foot drop, look good under 4,000K store lighting, and sell a $28 serum.” That sentence makes how to choose packaging finish options far less vague because it forces priorities into the open. If the carton is headed to a pharmacy chain in Seoul, add the aisle distance too, because shelf visibility changes everything.
Step 2: request samples on the actual substrate, not a generic promo sheet. A matte coating on kraft paper can look warm and organic; the same coating on C1S artboard can feel sharper and more modern. A supplier once sent me a spot UV sample on 250gsm white board, then tried to use that approval for a 420gsm black rigid wrap. I stared at that email for a full minute because it was so confidently wrong. The result was too glossy, too busy, and nowhere near the intended effect. Finish decisions only hold up when the sample reflects the real board, real inks, and real thickness. If the production board is 350gsm C1S artboard, approve nothing on a 300gsm substitute.
Step 3: test under ugly conditions. Fingerprints. Condensation. Scuffing. Shipping friction. Harsh lighting. Put the sample in a mailer, shake it for 90 seconds, and inspect the corners. Hold it under LED strips and fluorescent tubes. If the packaging is meant for retail, test it in a store aisle instead of a desk lamp. I once saw a midnight-black box pass every studio check and fail the second it landed under a 6-foot shelf light. It turned gray in five minutes. That sort of detail decides how to choose packaging finish options in the real world, which is frustrating, but there it is. A sample that survives a Guangzhou warehouse at 32 degrees Celsius deserves more trust than a perfect render.
Step 4: compare lead times and tooling before sign-off. A simple aqueous coating might fit inside a 10-business-day window. A custom emboss die plus foil plate can require two extra approvals and another week. If the supplier has to source specialty film, freight and customs time enter the schedule too. A launch date without buffer is not a plan. It is a hope with a logo on it. If your factory is in Ningbo and the die shop is in Shanghai, add 2 to 3 business days for handoff before you promise retail-ready cartons.
Step 5: lock the spec sheet. Write down the finish name, coverage, exact location, acceptable variation, and any notes about color shift or folding. For example: “Soft-touch lamination, full wrap, matte black printed base, foil only on logo mark, maximum edge wear acceptable at 3% on hidden spine.” That kind of detail prevents arguments later. I have seen a $9,000 order stall because the buyer expected foil across 70% of the panel and the factory understood 30%. One line of copy would have saved three days of back-and-forth, and probably a few gray hairs. Add the die line version, too, because a 0.5 mm shift can matter on a premium closure flap.
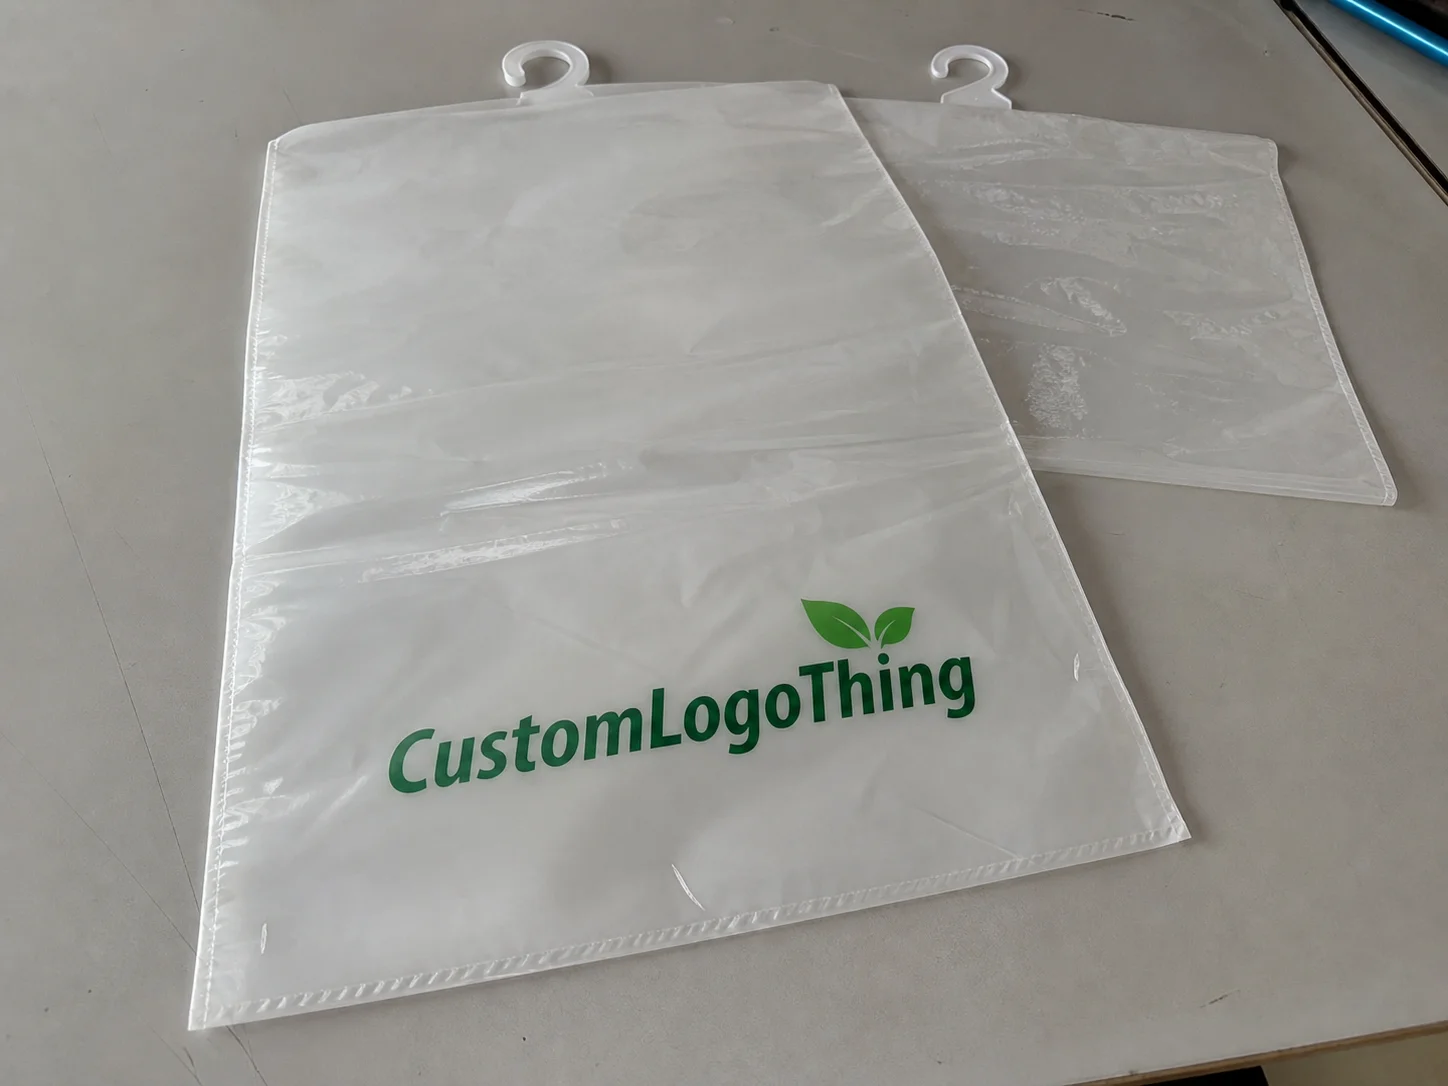
If you need a broader product range while you build those specs, our Custom Packaging Products page is a practical place to compare structures, from folding cartons to rigid gift boxes. Pair that with physical samples and the answer to how to choose packaging finish options gets much less murky. A 5,000-unit custom printed box order in Shenzhen can look very different from a 1,000-unit luxury set assembled in Suzhou.
One more point: repeated opening matters. A finish that looks dramatic on day one can look tired after 20 touches. Subscription boxes expose that problem quickly. Customers rarely complain about the coating itself. They just stop posting photos, and the social proof fades without ceremony. That is a quiet kind of failure, which is somehow more annoying than a loud one. A finish that still looks clean after 12 weeks in a customer’s kitchen has done its job.
Packaging finish pricing: what affects the real cost
Pricing is where the render meets the invoice. The biggest cost drivers are material type, number of finishing passes, setup labor, tooling, and quantity. A 1,000-unit run on rigid packaging can make a basic foil look expensive because the plate fee gets spread over a small order. On 10,000 units, the same finish becomes much easier to justify. Order size is part of how to choose packaging finish options, not a side note tucked into procurement after everyone has already fallen in love with the concept. In practical terms, a factory in Guangzhou may quote a 1,000-unit foil box at $0.34 per unit and the same design at 10,000 units near $0.18.
Premium effects usually cost more because the factory has to do more. Hot foil stamping needs a plate. Embossing needs a die. Debossing needs pressure control. Spot UV needs registration accuracy and careful curing. Soft-touch lamination often costs more than matte aqueous because the film itself is pricier and the handling is fussier. When a buyer asks why a $0.12 coating quote became a $0.38 premium quote, the answer usually sits in the number of passes. One pass is cheap. Three passes are not. That math is boring, but it is real. A foil plus emboss stack often adds 2 to 4 days in a factory near Dongguan because the line has to reset between operations.
There are moments when the higher upfront spend is the cheaper choice overall. A finish that prevents scuffing can save a 3% return rate. A finish that improves shelf conversion by even one point can pay for itself across a 20,000-unit season. I have seen a beverage client spend an extra $1,600 on finish upgrades and earn it back in the first distribution cycle because the cartons arrived without corner wear. The goal is not to minimize every line item. The goal is to spend where the customer can feel the difference, which sounds obvious until someone tries to shave pennies off the exact part that makes the product look trustworthy. In a Chicago warehouse, a $0.04 upgrade per carton can cost less than replacing 600 dented sleeves.
Small runs make costs feel sharper. A $0.45 unit price for a fancy finish may be perfectly normal at 500 pieces, while the same treatment drops to $0.17 at 5,000 pieces. That is why I tell people to request quotes at 500, 1,000, 3,000, and 5,000 units. The break point reveals itself quickly. A factory that only gives one number is usually hiding setup, plate, or “miscellaneous” charges. I have never trusted miscellaneous charges, and I do not plan to start. Ask for a breakdown in writing, because a 12,000-sheet project can hide $300 in tooling and $180 in test waste if nobody is watching.
| Finish option | Typical use | Relative cost impact | Practical note |
|---|---|---|---|
| Matte aqueous coating | Folding cartons, mailers, retail packaging | Low, often about $0.02-$0.06 per unit at 5,000 pieces | Good balance of protection and price |
| Gloss coating | Bright shelf products, labels, coated board | Low to moderate, often about $0.03-$0.07 per unit | Stronger shine, easier wipe-down |
| Soft-touch lamination | Cosmetics, premium product packaging, rigid boxes | Moderate to high, often about $0.08-$0.20 per unit | Tactile, but can show fingerprints on dark colors |
| Foil stamping | Logos, seals, accents | Moderate to high, often about $0.10-$0.30 per unit plus plate costs | Needs precise registration |
| Embossing or debossing | Luxury branding, rigid gift boxes | Moderate to high, often about $0.08-$0.25 per unit plus tooling | Best with sturdy board |
| Spot UV | Contrast on logos, premium custom printed boxes | Moderate, often about $0.06-$0.18 per unit | Works best with strong registration and smooth board |
Those numbers are not universal, and any supplier pretending they are has probably not stood beside a line during changeover. They still help with planning. If you are comparing three quotes for branded packaging, ask each factory to separate base print, finish pass, tooling, and packaging. I have seen quotes that looked $800 apart until I discovered one supplier had tucked 2,000 sheets of waste into the setup line. Apples-to-apples comparison matters far more than people admit out loud. A quote from Xiamen that includes overseas freight will never match a FOB Shenzhen line item unless you ask the right questions.
Shipping damage is another hidden finish cost. If a coating reduces damage by 2%, that matters. If a laminate lets you stack 20 units per carton without corner wear, that matters too. A finish is not just decoration; it is also insurance against rework, returns, and embarrassed unboxings. I know that sounds dramatic, but if you have ever opened a box of crushed corners on a Monday morning, you know exactly what I mean. In one Toronto trial, a $0.03 stronger coating saved 140 units from being reworked after transit.
Common mistakes when choosing packaging finish options
The biggest mistake is choosing from inspiration images instead of the actual supply chain. A box spotted on a luxury shelf in Milan may have been printed on 450gsm SBS, foil stamped with a custom die, and packed in climate-controlled cartons. Your 300gsm recycled board and cross-country freight lane are a different animal. I have had clients arrive with one image and no substrate spec, then act surprised that how to choose packaging finish options feels difficult. The picture is not the product. The picture is not even close, if we are being honest. A board from Suzhou with aqueous coating will not behave like a boutique pack from Paris.
Ignoring fingerprints, glare, and scuffing causes plenty of damage too. Dark surfaces show oils. High-gloss finishes bounce overhead lighting. Deep matte can make tiny rub marks easy to notice after transit. I once visited a cosmetics fulfillment center where 600 boxes had to be reboxed because the black soft-touch surface looked blotchy after 48 hours in polybags. The print was fine. The finish was the failure. That mistake cost the brand about $2,700 in labor and materials, which is a memorable lesson for anyone learning how to choose packaging finish options. I still grimace when I think about it. The cartons had come through a 14-day ocean leg from Shenzhen looking perfect, then failed in the warehouse because of handling.
Another error is piling on special effects until the package loses its nerve. Three finishes on one panel can make the design feel busy, cheap, or unsure of itself. A restrained foil logo on a matte base often looks stronger than full-panel gloss, spot UV, and embossing all competing for attention. More effects do not equal more luxury. Often they just create noise. I have seen a beautiful box ruined by enthusiasm, which is a strange sentence but an accurate one. On a 90 mm-wide side panel, one foil accent and one emboss line is often enough.
Skipping pre-production samples is expensive for the same reason. A finish can crack on folds, misregister on edges, or shift in color under curing heat. If a supplier refuses to produce a sample on the real stock, that is a warning light. I usually ask for one physical sample with the final inks, the actual finish, and the exact crease pattern. Waiting for a sample round is annoying. Reprinting 5,000 units is worse. Much worse. The kind of worse that makes people suddenly care very deeply about the details they skipped earlier. A 7-business-day sample delay is cheap compared with a 21-day reprint cycle.
“The first sample told us everything. Under store lights, the foil looked silver, not champagne. We saved a full reprint because we checked before production.”
That quote came from a premium tea client. The lesson was direct. Finish choice affects cost and schedule, so treat it like a production decision rather than a decoration pass. The answer to how to choose packaging finish options gets much clearer once the mockup stops being mistaken for the final truth. Their cartons were printed in Dongguan and sold through tea shops in Vancouver, which made the lighting test even more important.
Expert tips and next steps for packaging finish options
My first recommendation is plain and effective: build a shortlist with three finish directions. Call them safe, premium, and bold. Compare all three against the same dieline, the same substrate, and the same quantity. Packaging design choices stay grounded when the variables stay fixed. A matte aqueous version might be the safe path, a soft-touch with spot UV might be the premium one, and a foil-heavy concept might be the bold one. Seeing them priced side by side makes how to choose packaging finish options much easier to read. On a 2,000-unit quote, that comparison can reveal a $0.11 gap that would otherwise stay hidden.
Order physical samples before approving anything for production. Digital mockups help with color direction, but they do not tell you how a finish feels at 2 p.m. under fluorescent retail lights or whether it smudges after one thumbprint. I remember a client who approved a render of a deep blue rigid box with embossed initials. On the shelf, the emboss looked elegant. In hand, the soft-touch layer made the box feel almost rubbery, and the brand hated it. One real sample would have saved two weeks and a surprising amount of grumbling. The replacement sample from Guangzhou arrived in 9 business days and changed the whole decision.
Ask your supplier to recommend combinations based on the actual substrate, freight method, and sales channel. A factory that spends most of its time on e-commerce mailers will have different instincts than a shop focused on luxury gift sets. Good suppliers know which board and coating survive 200-mile truck routes, humid ports, and crowded retail displays. The best ones do more than agree. They explain why a 350gsm board with gloss laminate may outperform a 400gsm matte wrap for your use case. That is actual expertise, not just polite nodding. If your orders move through Los Angeles, Rotterdam, or Dubai, mention the climate and transit time at the first call.
Use a tight workflow: gather 5 references, request 3 quotes, approve 2 physical samples, lock the spec sheet, and keep a 7 to 10 day buffer for final tweaks. If the supplier cannot give you lead time, minimum order quantity, and setup fees in writing, keep moving. A clean process costs less than a rushed one. I have seen a buyer save $900 by slowing down for one week and avoiding a duplicate plate order. Not glamorous. Very effective. Also a little boring, which is probably why it works. A clear approval path from Shenzhen to your local warehouse can prevent one changed finish from becoming a 3-week delay.
If you need a starting point for comparing structures and decoration levels, our Custom Packaging Products catalog can help you match the box style to the finish instead of making the finish do all the heavy lifting. That matters for retail packaging, subscription mailers, and premium custom printed boxes alike. A 350gsm folding carton, a rigid set-up box, and a corrugated mailer each deserve different finish logic, and each will price differently in one of the larger manufacturing hubs in Guangdong or Jiangsu.
Take this sentence into your next supplier call: the best answer to how to choose packaging finish options is the one that fits the product, survives the supply chain, and still feels deliberate in the customer’s hand. Start with one real sample this week, not ten mood boards. That is how to choose packaging finish options without paying for the wrong coating, the wrong film, or the wrong shiny idea. If the sample passes a 90-second shake test, a 3-foot drop, and a 24-hour shelf check, you are closer than most brands ever get.
FAQ
How do I choose packaging finish options for a premium product?
Start with the tactile moment you want the customer to remember in the first five seconds, then choose finishes that support it, such as soft-touch, foil, embossing, or a restrained spot UV accent. Match the finish to the product price, whether that is a $28 serum or a $60 candle, so the box feels premium without looking overworked. For premium goods, how to choose packaging finish options usually comes down to one or two details landing cleanly rather than piling on every special effect available. A 350gsm C1S board with one foil logo often beats a crowded six-effect stack.
Which packaging finish options are best for small budgets?
Matte or gloss coating is usually the most cost-effective path, especially on 1,000 to 5,000 units. If the budget is tight, choose one focal effect instead of layering several. A single logo foil or a clean matte coating often does more than three competing finishes. Ask for quotes at multiple quantities, because per-unit cost changes quickly from 500 pieces to 5,000 pieces. That price curve is a major part of how to choose packaging finish options without blowing the margin. In Guangzhou, a matte aqueous carton might land near $0.05 per unit at scale while a foil accent can double that.
How long do packaging finish options add to production?
Simple coatings may add only 1 to 2 business days, while foil, embossing, and custom laminations can add 5 to 10 business days depending on tooling and approvals. The sample round is often the bigger schedule risk, not the finish itself. If the finish needs precise registration or special dies, build in at least a 7-day buffer. That is the safer way to handle how to choose packaging finish options for a launch with a fixed ship date. A factory in Dongguan may need 12 to 15 business days from proof approval for a mixed foil-and-emboss job.
Are all packaging finish options recyclable?
No, and anyone saying otherwise is selling a slogan. Some laminated or heavily decorated structures are harder to recycle than plain paperboard, especially when film and substrate are difficult to separate. Ask your supplier which finishes fit your sustainability goals and what local recycling rules actually allow. If recyclability matters, simple coatings or FSC-supported paper structures are usually easier to defend. Sustainability checks belong in how to choose packaging finish options, not after the order is already placed. In markets like the UK and Germany, that distinction affects both compliance and customer trust.
What should I ask a supplier before approving a finish?
Ask for physical samples on the exact material you plan to use, not a substitute board. Request lead time, MOQ, setup fees, and any plate or tooling charges in writing. Then ask how the finish behaves under shipping, handling, and retail lighting. If the supplier cannot answer those questions clearly, keep looking. Solid procurement discipline is a big part of how to choose packaging finish options without surprises. I would rather review a sample from Shenzhen or Suzhou for 20 minutes than approve a guess that costs $1,500 to fix later.
Final takeaway: pick the finish that survives real handling, reads correctly under the actual light your customer will see, and fits the budget without begging for attention. If you do only one thing, approve one physical sample on the final substrate before you greenlight production. That one step saves more money than most brands expect, and it keeps the packaging honest.