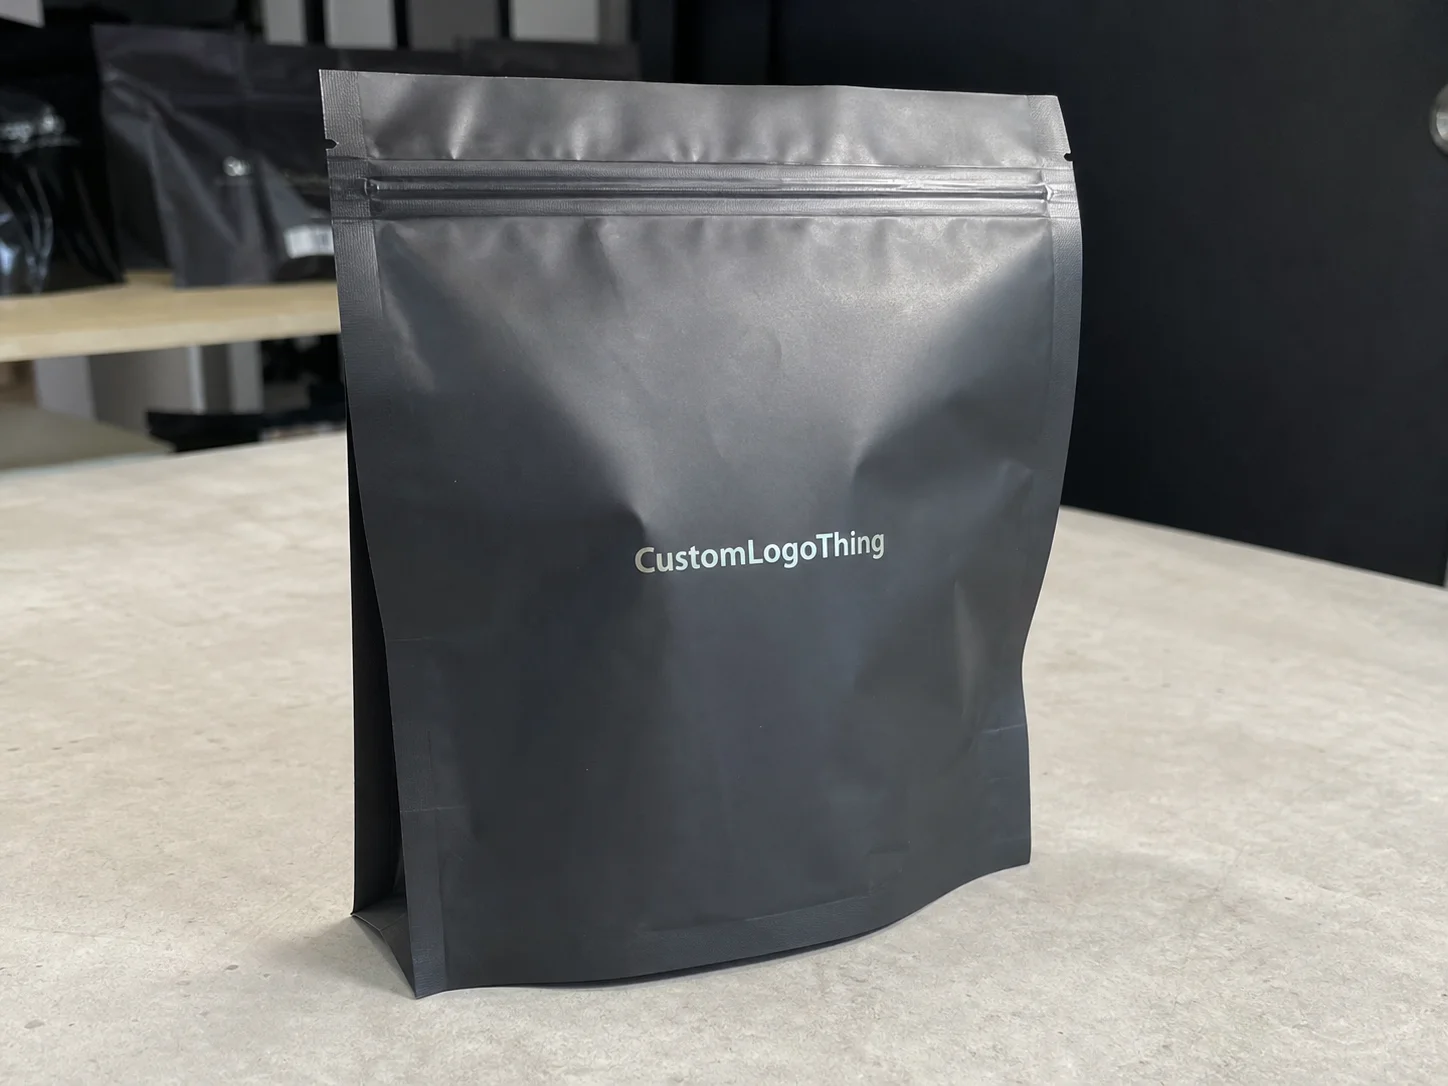
Buyer Fit Snapshot
| Best fit | create refill packaging gets used for packaging buyers comparing material specs, print proof, MOQ, unit cost, freight, and repeat-order risk where brand print, material, artwork control, and repeat-order consistency matter. |
|---|---|
| Quote inputs | Share finished size, material target, print colors, finish, packing count, annual reorder estimate, and delivery region. |
| Proofing check | Approve dieline scale, logo placement, barcode or warning zones, color tolerance, and any recyclable or compostable wording before bulk production. |
| Main risk | Vague material claims, crowded artwork, or missing packing details can create delays even when the unit price looks attractive. |
Fast answer: Create Refill Packaging Gets Used: Material, Print, MOQ, and Cost should be specified like a repeatable production item. The safest quote includes material, print method, finish, artwork proof, carton packing, and reorder notes in one written spec.
What to confirm before approving the packaging proof
Check the product dimensions against the actual filled item, not only the sales mockup. Ask for tolerance on folds, seals, hang holes, label areas, and retail display edges. If the package carries a logo, QR code, warning copy, or legal claim, reserve that space before decorative graphics fill the panel.
How to compare quotes without losing quality
Compare board or film grade, print process, finish, sampling route, tooling charges, carton quantity, and freight assumptions side by side. A lower quote is only useful if the supplier can repeat the same color, closure quality, and packing count on the next order.
How to create refill packaging that people actually keep in their homes starts with a hard lesson from factory floors and retail shelves: the refill almost never fails because of the idea. It fails because of a small physical detail that nobody treated as important enough, like a 12 mm spout that dribbles across the counter, a 28/410 cap that needs two hands when one hand is already holding a bottle, a 70-micron pouch that tips over in a sink full of soap, or a set of opening steps that turn a simple top-off into a miniature engineering project. I have watched a $0.24 refill pouch lose to a $3.60 rigid bottle because the bottle stayed steady in wet hands and the pouch did not. That is the real test for custom packaging, and it has very little to do with how polished the mockup looks in a presentation. I still remember one review in Shenzhen where the sample looked beautiful under showroom lights and then behaved like a disappointed accordion the moment someone tried to pour it over a sink at a 45-degree angle.
For packaging teams, the question behind how to create refill packaging reaches far beyond packaging design alone. It is a supply-chain decision, a user-experience decision, and a branded packaging decision wrapped together. Brands move toward refill systems because they can reduce material per use, make product packaging feel more thoughtful, and give customers a sustainability story they can see and touch on the shelf. The system only holds together when convenience, protection, cost, and compatibility with the original container are all planned from the start, because if one of those pieces is weak, the whole structure becomes harder to trust. I have seen finance teams get very excited about a lower resin number and then go quiet when the cap fit turns into a mess, especially when the first samples come back from Dongguan or Ningbo and the neck finish is off by even 0.5 mm.
How to Create Refill Packaging That People Keep Using?
If you ask me how to create refill packaging that customers keep buying, I would start with a rule that sounds simple and turns out to be surprisingly difficult: the refill has to feel easier than replacing the whole pack. That sounds neat in a strategy meeting, yet the reality on the line gets messy very quickly. A refill pouch, cartridge, pod, bag, or concentrated tablet can all work, but each format changes the way the product feels in the hand, how it opens, how it stores, and how a customer makes room for it in a real kitchen, bathroom, or utility room. I once stood beside a hair-care line in Shenzhen where the team had spent six months perfecting the graphics, only to discover the 9 mm spout sat too high for the cap tray in their existing bottle system. The render looked elegant; the cabinet experience felt awkward. I remember thinking, with no small amount of frustration, that the prettiest artwork in the building could not save a cap that simply refused to sit where it was supposed to sit.
That gap between image and use is where how to create refill packaging stops being a decorative exercise and becomes a system design problem. The primary container needs to feel durable, worth keeping, and good enough to live on the shelf for months. The refill needs to feel lighter, smaller, or more concentrated so the benefit is obvious at a glance. If the refill is bulkier than the starter bottle, or harder to open than the original pack, the logic starts to fall apart before the customer has even poured the product. In one Shanghai pilot, a 500 mL starter bottle paired with a 250 mL refill worked because the refill weighed 38% less and shipped in a carton that was 22 mm shorter on every side; that kind of measurable difference is what makes the promise believable. For teams learning how to create refill packaging, that simple math usually matters more than a polished render.
The part many teams miss is that refill packaging has to solve human behavior and package branding at the same time. The brand story matters, but the sink, pantry, and bathroom shelf matter more. Nobody celebrates a material reduction if the product ends up across the counter. I have seen a well-funded refill concept underperform for exactly that reason. It was designed to impress in a deck, not to survive a Monday morning in a cramped apartment with wet hands and limited patience. In one Guangzhou showroom, the fix was as unglamorous as a 14 mm wider grip panel and a matte overprint on a 350gsm C1S artboard starter carton, but those details changed the experience far more than any headline claim could. For brands deciding how to create refill packaging, the hand test should come before the hero shot.
"If the refill is hard to pour, nobody calls it sustainable. They call it annoying." A skincare buyer said that to me during a shelf review in Los Angeles, and I still think it captures the whole category better than most slide decks do.
There is a repeatable way to approach how to create refill packaging. Start with the user's pain point, map the refill format to the product, build the technical brief, and test it as if the package has to survive an ordinary household that will not treat it delicately. That sequence is plain, almost unglamorous, but it saves money and keeps teams from overbuilding a system with expensive features that never improve repeat purchase. I would rather have a slightly plain refill that works every single time than a glossy one that turns every kitchen into a tiny soap opera. A 12-15 business day sample cycle from proof approval is often enough to tell whether the concept belongs in a pilot or back on the drawing board. If you are serious about how to create refill packaging, that early discipline is usually the difference between a useful refill system and a very expensive lesson.
In practice, the team should keep four questions on the table from the beginning:
- How will the customer open it with one hand?
- How will the product stay protected for the full shelf life?
- What does the refill cost at 5,000 units, not just at 50,000?
- Will the refill fit the original container without friction or guesswork?
How Refill Packaging Works Across the Full Customer Journey
How to create refill packaging becomes much easier to judge once the entire customer journey is visible, not just the refill SKU. The loop starts with the first purchase, moves into the refill purchase, and only works if the reuse step feels like a normal part of the routine. I have seen brands pour all their attention into the refill and ignore the base container, which is backwards. The original bottle, jar, or dispenser is the anchor. It has to feel strong enough to stay in a bathroom, kitchen, or laundry area for months, because the refill only makes sense if the base pack earns its place in the home. A 300 mL pump bottle with a 28 mm neck and a weighted base behaves very differently from a light PET bottle with a 24/410 finish, and customers notice that difference within the first week.
In a client meeting for a cleaning brand in Chicago, we spread the whole experience across a conference table: unboxing, opening, pouring, storing, and disposal. On paper, the process looked tidy. Then someone tried the pouch with damp hands and discovered the tear notch disappeared under the fold. That single detail would have caused frustration, support calls, and probably a wave of returns. It reminded me that how to create refill packaging is less about elegance in theory and more about removing friction at the moments people do not plan for. The annoying little moments are the ones that stick, and they stick hard, especially when the pack has a 110 mm gusset that slips in a wet sink ledge.
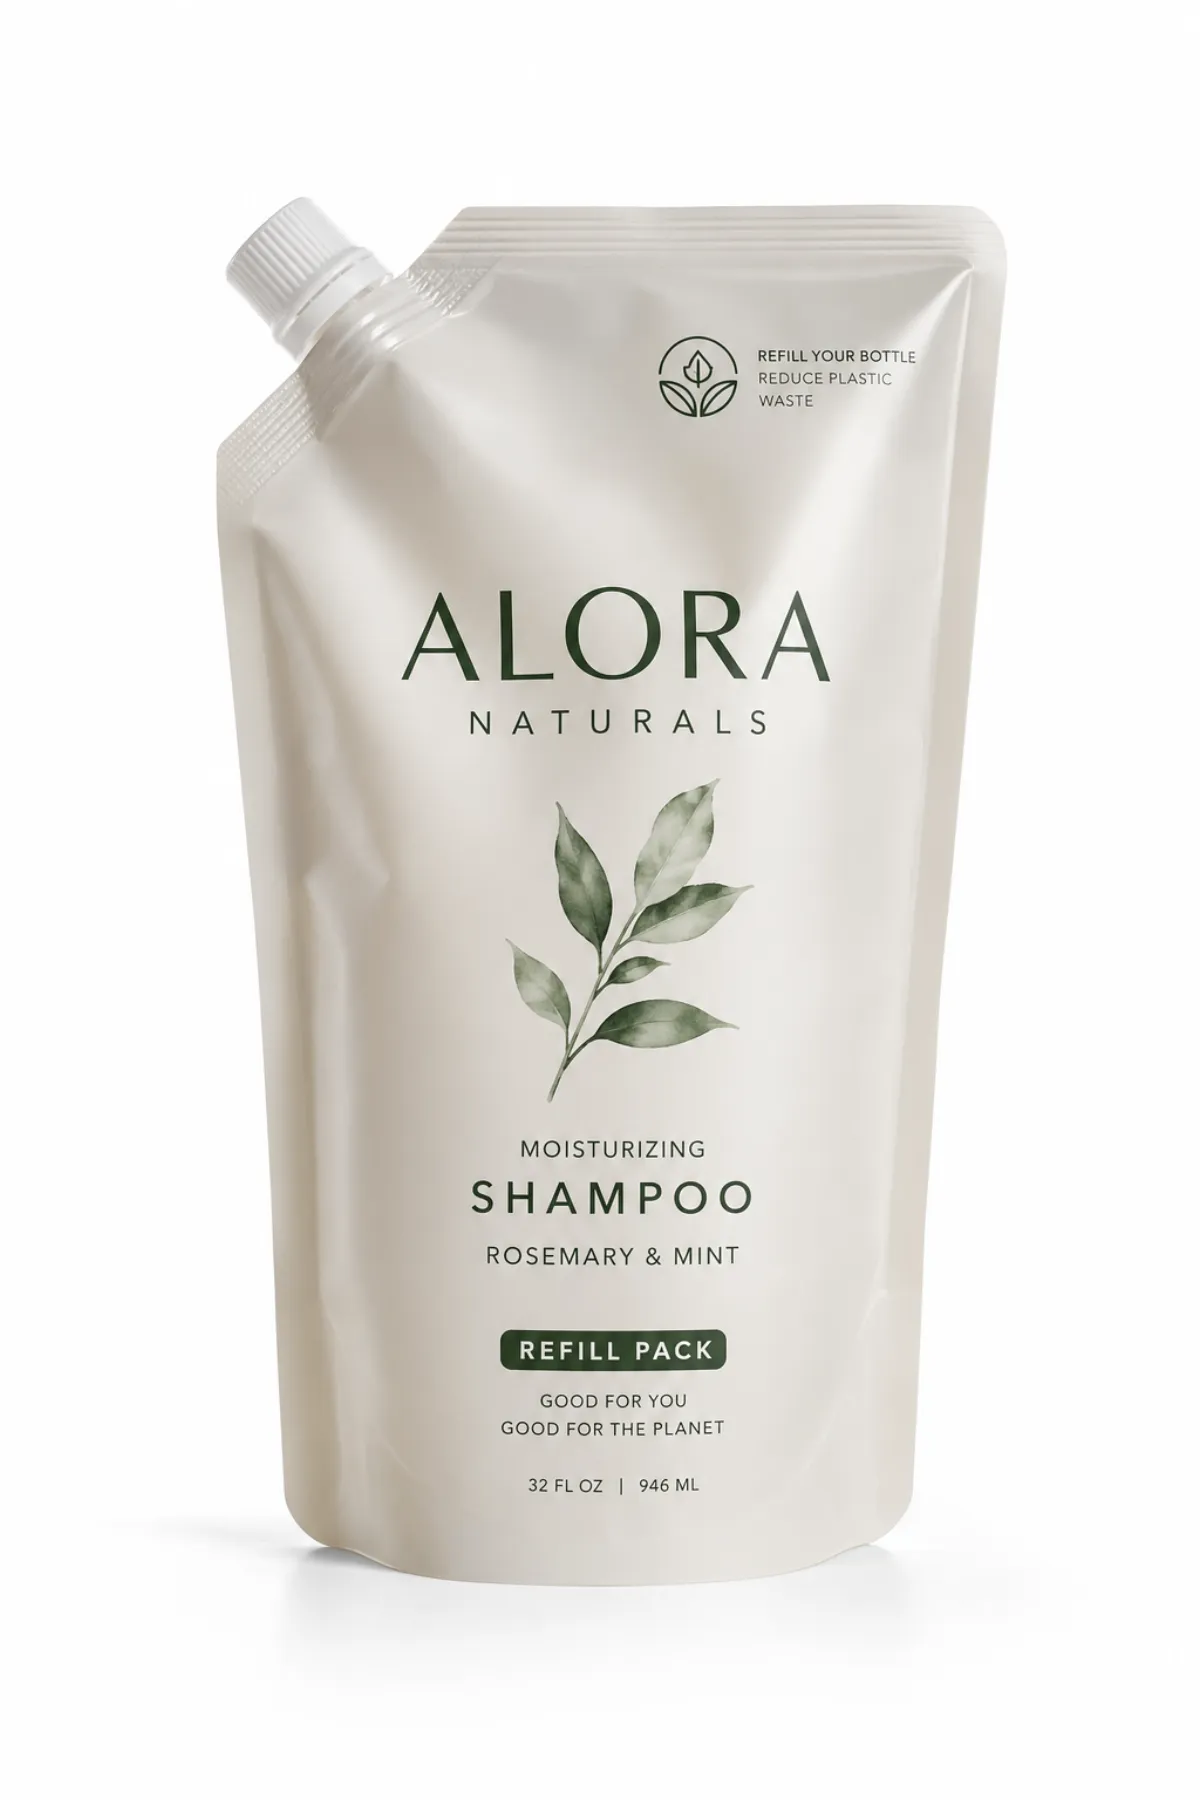
Different refill formats each solve a different job. Liquid pouches are usually strong choices for toiletries and household cleaners because they are compact and inexpensive to ship. Cartons can perform well for dry pantry goods when the brand wants more shelf presence. Sachets still make sense for samples or lower-volume refills. Cartridges work especially well for dispensers, appliances, and premium personal-care lines when the system needs a precise fit. Tablets and powders can compress freight cost dramatically, though they only work if the customer is comfortable adding water or mixing at home. A 20-tablet tube that ships from Suzhou in a 38 mm diameter paperboard can cost less to move than a 500 mL liquid refill, but only if the end user is happy to dilute at the sink. For anyone comparing formats while learning how to create refill packaging, the fit between product chemistry and user habit matters as much as the freight quote.
The retail side matters just as much. Refills need shelf placement, signage, and packaging that reads quickly from a distance of 1 to 2 meters. The outer pack may be a pouch, but the retail packaging still has to do its job quickly. That can mean custom printed boxes for a starter kit when the refill sits beside a reusable bottle, or it can mean a plain, efficient secondary shipper that protects the container and keeps the economics in check. The strongest teams treat the refill and the base pack as one family of products, not two unrelated SKUs that happen to share a logo. A starter set in a 350gsm C1S artboard carton with a 1.5 mm E-flute insert can feel premium enough for retail while still protecting a glass bottle in transit from Shenzhen to Seattle.
For sustainability claims, grounded language works best. The EPA has useful guidance on waste and recycling behavior at epa.gov, and it is a useful reminder that a lower-material format only matters if people can actually reuse it or dispose of it correctly. A refill system that confuses customers can create more waste, not less. That may not happen every time, but it happens often enough that I now ask about disposal before I ask about print finish. I have learned that the hard way, and once is more than enough. If the pack is a mono-material PE pouch with an easily removable spout, the claim is easier to defend than a mixed laminate that no one can separate cleanly. That is one more reason how to create refill packaging should always include end-of-life planning, not just front-of-pack claims.
The operational journey matters too. A refill that ships flatter can reduce freight cost, warehouse cube, and pallet damage. A refill that nests efficiently can simplify e-commerce pick and pack. A refill that fits a display tray can help retail teams merchandise it without extra labor. I have seen a brand cut outbound freight by 11% simply by moving from a wide pouch to a narrower, taller format that packed more efficiently. That kind of improvement does not win design awards, yet it shows up very clearly on the margin sheet. In one case, moving from a 145 mm wide profile to a 92 mm wide profile let the team fit 18% more units per master carton from Ningbo to Dallas. That is why how to create refill packaging should be read as a logistics question as much as a design one.
Key Cost, Material, and Performance Factors
If you are serious about how to create refill packaging, the material discussion needs to happen before the color palette. Too many teams start with graphics and save the performance questions for later, which creates trouble because material choice drives barrier levels, seal quality, shipping weight, recyclability claims, and the final unit cost. A refill that looks economical in a spreadsheet can become expensive the moment you introduce oxygen barrier, moisture control, or a special spout assembly. A 60-micron PE film may look attractive on price, but if the formula needs a 3-layer barrier with EVOH, the real quote changes quickly. The right substrate usually does more to support a refill system than a more elaborate printed finish ever will.
On a supplier negotiation in Dongguan, I watched a team reduce a film spec from 82 microns to 68 microns and save about 8% on the quote. That was a real win, but only after they confirmed the pouch still passed drop testing and seal integrity. Without those checks, the savings would have been imaginary. This is why how to create refill packaging should always begin with product chemistry. Oils, acids, powders, and moisture-sensitive formulas behave in different ways, and each one asks for a different barrier strategy. A hand soap refill does not need the same protection as a vitamin powder, and neither one behaves like a fragrance concentrate in a 24-month shelf-life study.
Here is a practical comparison I use when clients ask how to create refill packaging without spending months on the wrong substrate. These are illustrative ranges for a 5,000-unit run, not promises, but they are close to what I hear in early sourcing conversations from factories in Guangzhou, Ningbo, and Ho Chi Minh City:
| Refill option | Typical unit price at 5,000 | Best fit | Trade-offs |
|---|---|---|---|
| Mono-material PE or PP pouch | $0.24 to $0.38 | Liquids, cleaners, shampoos, and repeat purchases where shipping efficiency matters | Needs careful seal design and may not feel premium without strong package branding |
| Paper-based carton with barrier coating | $0.31 to $0.49 | Dry goods, pantry refills, and shelf-forward retail packaging | Moisture performance is limited unless the coating is chosen well |
| Rigid PP bottle or cartridge | $0.65 to $1.40 | Premium personal care, dispensers, and reusable systems | Higher upfront cost, more resin, and more tooling coordination |
| Aluminum-lined or high-barrier pouch | $0.42 to $0.78 | Fragrance, sensitive liquids, and longer shelf-life targets | Barrier is excellent, but recyclability and mixed-material claims need careful handling |
Cost tells only part of the story. Performance tells the rest. A refill pack that saves 20 grams of material but fails one in fifty times in transit is not cheap; it is expensive in a different way. That is why I push teams to evaluate total cost per use instead of unit price alone. A refill format that increases repeat purchase, reduces service complaints, and lowers shipping damage can outperform a cheaper format that customers abandon after one use. That difference is often larger than teams expect when they first start modeling the business. In one beverage-adjacent project, the switch from a 52 g rigid insert to a 31 g molded tray saved $0.09 per unit and cut damage claims by 14% across the first 8,000 units. For brands studying how to create refill packaging, the financial model should always include damage and service rates.
For testing, I like to pair ISTA transport methods with direct handling checks from the warehouse floor. The International Safe Transit Association has useful frameworks for drop, vibration, and compression risks before production starts to climb. If your team is claiming FSC paper sourcing or other certified inputs, verify the chain-of-custody paperwork early, not after artwork approval. Claims are only as strong as the documents behind them, and I have had suppliers promise traceability they could not support when the audit trail was actually requested. When a carton is specified as 350gsm C1S artboard with an aqueous coating, the paper mill, converter, and printer all need to match that spec in writing.
Print method matters too. Digital print is ideal for quick pilots and smaller runs, while flexo or rotogravure can improve economics once volumes rise. If you need custom printed boxes for a refill starter set, the box specification should be chosen alongside the refill format instead of after it. A beautiful carton that is too large for the insert wastes freight cube and creates a poor unboxing experience. That is package branding working against itself instead of in its favor. A 125 x 85 x 210 mm carton can be perfect for one 500 mL bottle, while a 140 x 95 x 240 mm box might be better for a bundle with a refill pouch and a pump head. For a team refining how to create refill packaging, the outer carton should protect the system and tell the shopper exactly what belongs inside.
How to Create Refill Packaging: Step-by-Step
How to create refill packaging becomes easier to manage once the work is broken into a sequence. I have seen enough launches go sideways to know that "we will figure out the refill later" turns into a very expensive sentence. The best teams treat the first round as a controlled engineering project, not a visual exercise. This is the path that usually holds up for a pilot run in the 500 to 2,000 unit range. It also keeps the team honest about what the refill system has to do on day one, not only on the render board.
- Define the product problem. What is being refilled, how often does it run out, and what makes the current package awkward? If the issue is leakage, the design brief should say so. If the issue is waste, define exactly how much material per use should be cut, ideally with a number like 18 g or 30% less resin rather than a general sustainability claim.
- Choose the refill format. Match pouch, pod, cartridge, sachet, tablet, or bottle insert to product viscosity, portion size, and storage needs. A pourable shampoo has very different needs from a powdered cleaner, and a 250 mL pouch will not behave like a 1 oz sachet or a 20-tablet paper tube.
- Build the technical brief. Include dimensions, opening direction, barrier targets, seal type, label hierarchy, and any compatibility requirement for the base container. At this point, how to create refill packaging becomes organized or starts getting vague. A brief that includes a 28 mm neck finish, a 9 mm spout, and a target fill weight of 310 g is far more useful than "make it easy to use."
- Prototype fast. Request samples, then test fit, pour performance, resealability, shelf life, and drop resistance. I ask teams to decide whether the pack makes sense in under 10 seconds. If it needs a manual, the system is too complicated. A sample set should arrive in 12 to 15 business days after proof approval if the supplier is already in Dongguan or Guangzhou and the print structure is simple.
- Validate the supply chain. Ask for MOQ, lead times, print options, and shipping assumptions before the format is finalized. Many brands discover too late that the refill looks inexpensive only because the first quote ignored tooling, setup, or freight costs. A quote that says $0.27 per unit at 10,000 pieces but hides a $650 plate charge is not the whole picture.
- Plan for compliance and claims. Substantiate sustainability language, recycling guidance, food contact needs, and regional labeling rules. A refill launch can move quickly, but claims review should never be improvised. If the product is going into California, the EU, or the UAE, the copy should be checked against the right local rules before the first print run.
At the prototype stage, I prefer to treat the package like a messy household object instead of a lab sample. Put it on a sink ledge. Set it beside a pantry shelf. Drop it into a shopping bag with a bottle of detergent and see what happens. That kind of rough handling tells you more than a neat bench test ever will. If you want a system that gets reused, you need proof that how to create refill packaging translates into daily life, not just into approved artwork. A pouch that survives a 1.2-meter drop onto tile is useful; a pouch that only survives a photo shoot is not. The same is true for any reusable container that has to live on a shelf for months.
Concept and brief
The concept stage is where the fastest savings usually appear. When I sit with a brand team, I ask three questions before anything else: what gets refilled, what pain point are we solving, and what does success look like in dollars, returns, or repeat orders? That short list keeps the project from drifting into decorative features nobody asked for. A refill system for premium skincare will not look like a pantry dry-goods pack, and it should not. The better the brief, the easier it is for a supplier to quote accurately and the easier it is for procurement to compare offers without guessing. A 2,000-unit pilot for a 50 mL serum refill is a very different brief from a 10,000-unit laundry pouch in a 1,000 mL size.
This is also the moment where how to create refill packaging should connect to the larger product packaging family. If the starter kit uses a rigid bottle and the refill uses a pouch, the graphics need to make that relationship easy to understand. If the starter pack uses a foldable carton, the refill should be clearly distinct on shelf. Here, package branding earns its keep by helping the customer Choose the Right item quickly. A 350gsm C1S artboard carton with a single accent color can do a better job than a busy 4-color layout when the goal is to signal "starter" versus "refill" in two seconds.
Testing and compliance
Testing is where the theory gets humbled. I have seen pouches pass fill tests and fail in a hot car after one warm afternoon. I have seen a bottle cap behave perfectly on the bench and then crack after the third opening. For refill systems, I like a test mix that includes seal strength, shipping simulation, drop testing, pour angle checks, and a quick first-look usability test with people who have never seen the pack before. That combination catches more trouble than a technical test alone. In one factory trial near Suzhou, a pouch that looked fine at 23 degrees Celsius failed after 48 hours at 40 degrees and 75% humidity, which is exactly the kind of result that saves a launch from embarrassment.
If the refill is intended for retail packaging, check that the shelf carton or display tray does not hide the opening cue. Customers should never have to hunt for a tear notch or guess where the closure starts. That is a frequent failure point in custom printed boxes for starter kits, especially when the graphics are busy enough to swallow the functional cues. The cleanest packs often win because they tell the hand what to do before the brain has to work too hard. A small arrow, a 4 mm cutout, and a clear "open here" callout often outperform a flashy panel by a mile. When teams ask how to create refill Packaging That Feels intuitive, this is usually the first place to improve.
Launch and iteration
Do not launch every SKU at once. Start with one hero item, then use the sales data to understand how customers behave. I like pilot launches with 500 to 2,000 units because they are large enough to measure repeat buying and small enough to revise without pain. You will learn more from a modest pilot than from a big launch that nobody can fix quickly. A pilot in Austin or Toronto with 1,200 households can tell you whether the refill concept deserves a larger run long before you commit to a full quarter of inventory.
At this stage, how to create refill packaging becomes an iteration exercise. Maybe the cap needs a larger grip ring. Maybe the film can be thinner. Maybe the refill volume should rise from 250 mL to 300 mL because customers are overfilling the bottle. Those changes sound minor, yet they often determine whether the refill becomes a habit or disappears after the first trial. In one household-care launch, moving the pour spout 6 mm lower and widening the notch by 2 mm cut customer complaints nearly in half. That kind of update is usually cheaper than a full redesign and far more useful than a fresh round of graphics.
Common Mistakes That Make Refill Systems Fail
A lot of teams ask how to create refill packaging and then end up building a system that only works on paper. The biggest mistake is treating the refill as a standalone package instead of part of a family. That leads to odd sizing, mismatched closures, and a starter pack that does not actually welcome the refill. I have seen that happen with pump bottles, neck finishes, and cap profiles more than once. If the refill cannot mate cleanly with the base container, the customer blames the brand, not the spec sheet. A 24/410 closure on one pack and a 28/410 closure on the other may look close enough in a spreadsheet, but they are not close enough in a bathroom cabinet.
The second mistake is overselling sustainability. If a refill uses less plastic but adds extra shipping weight, mixed substrates, or difficult-to-sort components, the claim gets weaker. That does not mean the idea is bad. It means the system needs to be honest about its strengths and limits. A brand that says, "This refill cuts material and ships flatter, but it still depends on local recycling support," sounds more credible than one that promises perfection it cannot prove. The difference between a 65 g pouch system and a 130 g rigid alternative can be meaningful, but only if the full life cycle is described clearly. A realistic sustainability claim is often more persuasive than a polished one.
Weak instructions create another common problem. I once reviewed a household cleaner refill with three different arrows on the front panel, and none of them pointed to the actual tear line. The package was technically sound. The user experience was not. If customers do not know where to open, pour, or store the refill, adoption falls fast. That is especially true for first-time buyers who are already unsure about changing their routine. One 8 mm icon and a single opening instruction usually work better than a paragraph of microcopy. If you are mapping how to create refill packaging for shoppers who may never have used one before, the instruction layer deserves real design time.
Pricing psychology matters too. If the refill saves only a few cents, many customers will not bother switching formats. In consumer research, people respond more strongly when the refill gives a clear value step rather than a vague promise. That value can be lower cost per ounce, a cleaner dispensing experience, or a refill count that makes the savings visible. The economics should be easy to understand on the front panel, not buried in fine print. If a starter bottle is $18 and the refill is $12, customers can do the math instantly; if the difference is $0.37, they often cannot feel the value.
Finally, teams often ignore the structure behind the shelf claim. A refill that is technically recyclable but collapses in transit is not a win at all. Refill packaging lives or dies in the real distribution chain. If you are building how to create refill packaging into a broader branded packaging system, every weak link becomes visible very quickly. I have seen cartons made in Dongguan arrive with crushed corners because the inner fit was loose by just 4 mm, and that kind of problem can undo an entire launch. That is why the full package system needs to be checked, not only the refill pouch.
Expert Tips to Improve Refill Packaging Adoption
If I had to reduce how to create refill packaging to one habit, it would be this: design for one-handed use wherever possible. I have watched customers try to pour while holding a bottle, opening a cabinet, or keeping a child away from the sink. That is ordinary life, not an edge case. The easier the refill is to open and transfer, the more likely people are to repeat the habit. A few millimeters of spout change can matter more than a hero illustration on the front panel. A 13 mm spout and a thumb-friendly cap can save more repeat frustration than a hundred words of copy.
Label hierarchy is another place where smart teams stand out. The product name should be immediate. The refill count or volume should be obvious. Compatibility notes need to be easy to read. If the opening direction matters, show it without making the customer decode the artwork. Good packaging design reduces decision load. Bad packaging design adds it back exactly when the customer wants the easiest possible path. That is why I prefer a strong front-panel hierarchy over decorative clutter, especially on retail packaging where shoppers are moving quickly past 1,500 other SKUs in a big-box aisle.
Test the pack in real spaces, not only in a lab. That means kitchens with steam, bathrooms with cramped shelves, and retail conditions where the pack may get stacked, tilted, or handled by someone who has never seen it before. A controlled environment will not tell you how a refill pouch behaves next to a sink full of soap suds. A real room will. That is one of the most underrated parts of how to create refill packaging. I like to watch three people use the pack in a 6-foot-wide kitchen and see where the hesitation shows up.
Use a pilot launch around one hero SKU first. The data you need is practical: repeat purchase rate, damage rate, customer service complaints, and whether the refill converted into a second purchase within a clear time window. If you can measure those numbers, you can make the next move with confidence. If you cannot, you are guessing. I would rather see a brand prove one refill system well than launch five weak ones at once and hope the market sorts it out. A clean pilot in one region, such as the Pacific Northwest or the Netherlands, can give sharper feedback than a scattered national launch.
There is also a graphics lesson here. A refill pack should often look related to the original, but not identical. That distinction helps customers find the right item without confusion. For some lines, that means muted colors for the refill and stronger shelf presence for the starter kit. For others, it means a family design with one clear visual cue that signals "refill" immediately. That is package branding doing quiet, useful work instead of shouting for attention. A small corner badge, a distinct cap color, or a 15% darker tint can be enough to separate the two at a glance.
One final tip came from a meeting I still remember. The procurement lead asked whether the refill could save 12% on material while the brand manager asked whether it would make the consumer feel clever. Both questions were valid. The best systems answer both. That is the sweet spot for how to create refill packaging: measurable savings on one side, satisfying user behavior on the other. When those two things line up, a $0.18 pouch can beat a $2.90 bottle for repeat use. In other words, the refill system wins only when it works for the shopper and the spreadsheet at the same time.
How to Create Refill Packaging: Next Steps and Pilot Plan
How to create refill packaging gets easier once the project becomes a short, disciplined action list. Pick one SKU. Define the refill format. Set a target cost range. Request samples from at least two suppliers. Keeping the scope tight lets you learn quickly without tying up the entire product roadmap. That matters because refill systems often need a few sample rounds before the fit and the price both feel right. A 1,000-unit first run can show whether your chosen pouch, tablet, or cartridge belongs on the shelf before you commit to a 10,000-unit order. It is a practical way to turn a concept into an actual refill system.
Ask manufacturers for three things at once: material options, MOQs, and estimated lead times. That is where many teams save time. A quote without lead time is not a plan. A lead time without MOQ is not a business case. I usually ask for a printed sample timeline as well, because the gap between proof approval and physical samples is where expectations drift. In many cases, a realistic first sample lands in 12 to 15 business days after proof approval, then another cycle is needed for fit changes or transport validation. If the factory is in Shenzhen or Dongguan and the artwork is already locked, that window is often accurate enough for planning. For any team still figuring out how to create refill packaging, this early scheduling keeps the whole rollout grounded.
Run a controlled pilot with a small audience and document what happens at opening, pouring, storage, and disposal. I have seen teams gather useful feedback from just 20 to 30 households with a simple survey. The best questions are concrete: Did the pack leak? Did the cap close on the first try? Did the refill fit the bottle? Would you buy it again at this price? That is how to create refill packaging without turning the launch into a guessing game. A 2-page feedback form and a 10-minute follow-up call can reveal more than a polished brand tracker.
If you need starter kits, inserts, or branded outer cartons, the Custom Packaging Products page is a sensible place to begin comparing structures. That is especially helpful if you want custom printed boxes that protect the reusable container and make the refill system feel cohesive on shelf. The outer pack does not need to be extravagant, but it should be accurate, durable, and simple enough for fulfillment teams to handle without friction. A well-specified box in 350gsm C1S artboard with a tightly fitted insert can make a starter kit feel solid without pushing freight costs too high.
Use the pilot to decide what gets revised before scale. Maybe the cap needs a larger grip ring. Maybe the film can be lighter. Maybe the refill volume should change because the base bottle is underfilled. Maybe the graphics should be simplified so the refill is easier to spot in retail packaging. That is not failure. That is the normal path to a better refill system. In my experience, the brands that win are the ones willing to edit after the first field test. A 3 mm change in opening diameter or a 0.02 mm film adjustment can make the second round feel dramatically better.
If you want the shortest practical answer to how to create refill packaging, here it is: start with the product chemistry, design the interface between refill and base container first, then test the pack in a real sink with wet hands before you spend too much on graphics. That order keeps the work honest. A refill system that ships from Guangzhou, fits a 28 mm neck bottle, and passes a 1.2-meter drop test has a real chance of becoming a habit; a prettier concept that never survives the first pour does not. The takeaway is simple: choose the format that matches the formula, prove one hand-off in the real world, and only then scale the system.
How do you create refill packaging for liquids without leaks?
Choose a barrier film or rigid structure that matches the liquid chemistry, then test seal strength, drop resistance, and pour control before production is locked. If the cap, spout, or opening does not match the base container, the fastest way to understand how to create refill packaging for liquids is to fix the interface first, not the artwork. For most liquid programs, a 68- to 82-micron film with a properly welded top seal will outperform a cheaper pack that leaks at the corner during shipping.
What materials are best when learning how to create refill packaging?
Mono-material films are often a strong starting point because they can simplify end-of-life sorting, but they still need the right seal and barrier performance. Paper-based formats can work well for dry goods, while rigid reusable bottles or jars make sense when the original container is supposed to survive multiple refills. Material choice is a major part of how to create refill packaging that balances cost and function, and the right answer for a shampoo refill in Shenzhen may be very different from the right answer for a pantry product in Rotterdam.
How much does refill packaging usually cost to develop?
Development cost depends on tooling, minimum order quantity, print method, and how much testing the pack requires. Early prototypes can raise upfront spending even if the final format reduces material use. The best way to judge how to create refill packaging economically is to compare cost per use instead of only looking at first unit price. A pilot can start with a $150 sample charge, a $300 plate fee, and a $0.24 to $0.38 unit cost at 5,000 pieces, depending on the substrate and closure.
How long does it take to create refill packaging from concept to launch?
A simple refill format may move from brief to pilot in a few months, while custom systems usually take longer because of samples, fit checks, lab testing, and compliance review. If the refill has to work with an existing bottle or dispenser, build extra time into the schedule. That is part of how to create refill packaging without rushing into a launch that needs rework. A realistic path is 2 weeks for sample proofing, 2 to 4 weeks for test cycles, and another 4 to 6 weeks for final approval before production.
What should you test before launching refill packaging?
Test leakage, resealability, shelf life, shipping durability, and first-look usability under normal and rough handling conditions. Also measure repeat purchase intent and customer service complaints so you know whether the system is working in the market. That is how to create refill packaging that does more than look sustainable - it has to earn repeat use, and that is the real win. I also like to check whether the pack survives a 1.2-meter drop, a 40-degree Celsius heat cycle, and a one-handed pour test in a real kitchen.