Buyer Fit Snapshot
| Best fit | Label Poly Mailers projects where brand print, material claims, artwork control, MOQ, and repeat-order consistency need to be specified before quoting. |
|---|---|
| Quote inputs | Share finished size, material target, print colors, finish, packing count, annual reorder estimate, ship-to region, and any compliance wording. |
| Proofing check | Approve dieline scale, logo placement, barcode or warning zones, color tolerance, closure strength, and carton packing before bulk production. |
| Main risk | Vague material claims, crowded artwork, missing packing details, or unclear freight terms can make a low unit price expensive after revisions. |
Fast answer: Label Poly Mailers: Material, Adhesive, Artwork, and MOQ should be specified like a repeatable production item. The safest quote records material, print method, finish, artwork proof, packing count, and reorder notes in one written spec.
Production checks before approval
Compare the actual filled-product size with the drawing, then confirm tolerance on folds, seals, hang holes, label areas, and retail display edges. Reserve space for logos, QR codes, warning copy, and material claims before decorative graphics fill the panel.
Quote comparison points
Review material grade, print process, finish, sampling route, tooling charges, carton quantity, and freight assumptions side by side. A quote is only useful when the supplier can repeat the same color, closure quality, and packing count on the next order.
On a packing floor in our Shenzhen facility, I watched one pallet of parcels move through a scan check without a single read error, then watched the next pallet stumble three times because a label had curled just enough to catch a seam on a 10x13 matte mailer. That kind of thing stays with you, because the difference between a clean shipment and a messy one can be less than a millimeter of misplacement. The real lesson behind how to label poly mailers is that the printer matters, yes, but the surface, the adhesive, the placement, and the pressure used during application usually decide whether a package glides through the carrier network or turns into an exception somebody has to fix before lunch.
I have seen small e-commerce brands spend more on reprints, mis-sorts, and customer service time than they ever spent on the mailers themselves, especially on runs of 2,000 to 5,000 parcels where every error gets counted twice. I have also seen a 12,000-unit apparel run move with almost boring consistency because the team used the same 4x6 label, the same placement template, and the same pressing method on every pack. Honestly, I love that boring kind of consistency. It is the kind that keeps a warehouse calm and a finance team from making that tight-lipped face nobody wants to see. That contrast is why how to label poly mailers deserves real attention. The right setup depends on volume, budget, label stock, and whether the mailer uses a matte film, a glossy film, or a textured finish that fights adhesion in ways that are hard to appreciate until the first batch goes sideways.
What follows is a practical system for how to label Poly Mailers Without wasting motion or money. I will walk through where labels hold best, what the actual cost looks like, how the failure points show up in a warehouse, and how to build a workflow that holds steady whether you ship 30 orders a day or 3,000. I will also tell you where people usually fool themselves, because I have made the same mistake in a Dongguan packing room while testing labels on a Friday afternoon with a half-empty roll and too much confidence.
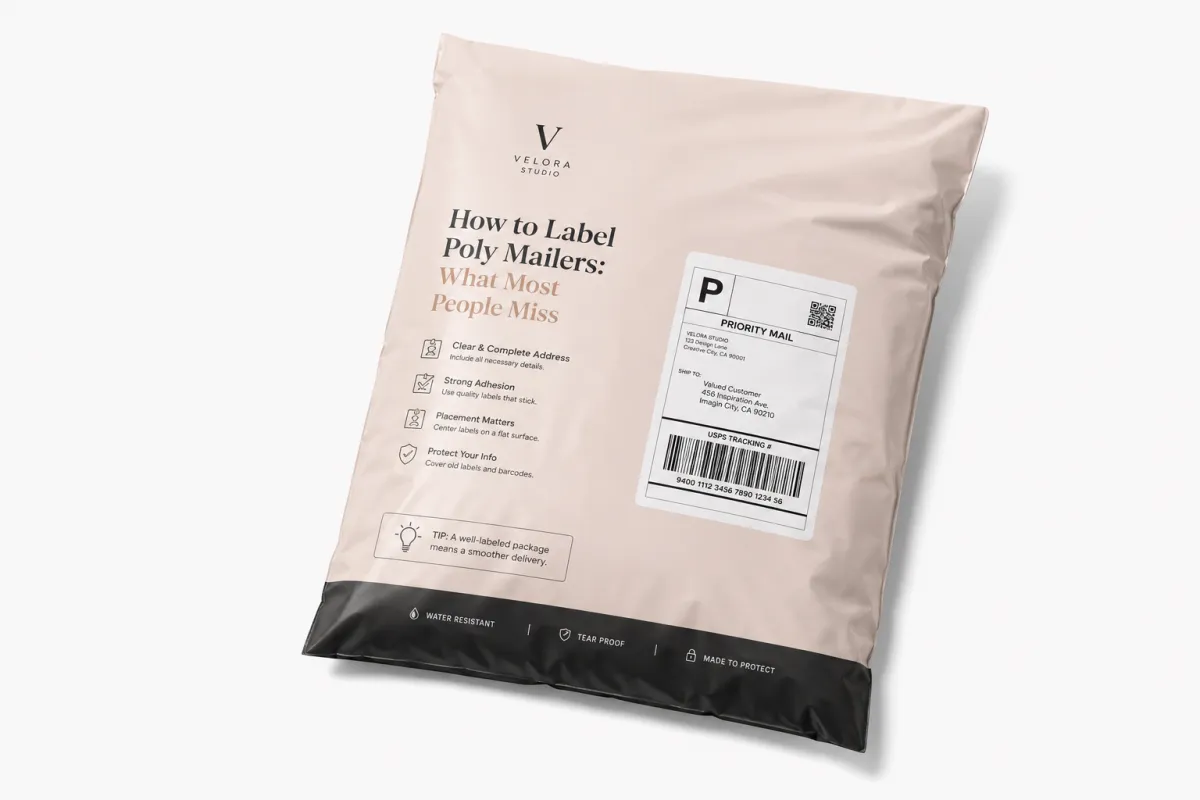
How to Label Poly Mailers: What Most People Miss
Most people assume how to label poly mailers is a printer problem. It usually is not. The failures begin earlier, with the bag surface itself. Poly mailers flex, wrinkle, rebound, and sometimes carry a faint film of dust from storage, and a label that looked perfect on the workbench can start lifting after the first bend or the first pass through a conveyor curve. A clean print file does not guarantee a clean shipment. I learned that the hard way on a rush order years ago, standing in front of a table full of “perfect” labels that looked less perfect once the mailers were actually stuffed, sealed, and handled by humans moving faster than they should have been. A 500-piece rush can expose more problems than a 50,000-piece run if the warehouse is humid and the labels are the wrong adhesive grade.
When a brand asks me how to label poly mailers, I start by asking three questions: Is the mailer matte or glossy? Is the label going on a flat panel or across a fold? Is the adhesive designed for plastic film, not just paperboard? Those details sound small in a sample room, yet they decide whether a 38-micron BOPP label holds for 72 hours or peels off during a 2-day regional route. I have seen a standard paper label on a slick, low-surface-energy bag fail quickly in a warehouse at 78 to 82 degrees Fahrenheit, especially if the packer touched the adhesive zone with oily hands or if the bag sat open near a dock door in Ningbo. I have seen that exact combination ruin a whole morning. It is like watching a row of dominoes made of invoices and barcode slips.
Labeling poly mailers also means more than shipping labels. Return addresses, barcodes, customs stickers, and branded seals all need to survive handling, sorting, weather, and the occasional hard drop into a tote from 36 inches up. If you use Custom Labels & Tags, you can standardize size, finish, and adhesive so the label looks intentional instead of improvised. For some teams, I also recommend pairing labels with Custom Poly Mailers in Shenzhen or Foshan so the shipping face and brand face work together instead of fighting for attention like two people trying to speak over a loading dock fan set to high speed.
“The label was not failing in the printer. It was failing on the seam.” — fulfillment manager at a direct-to-consumer apparel brand in Dongguan
That line came from a client meeting after we traced a 4.3% reprint rate to one habit: staff were centering the label by eye and letting it cross a gusset fold on 10x14 mailers. Once we changed the placement, the failure rate dropped almost immediately. That is the part many teams miss. How to label poly mailers is not about fancy artwork or expensive equipment first. It is about repeatable contact between adhesive and surface, done the same way every time, whether the line runs 300 parcels a shift or 3,000. I have a deep respect for that kind of unglamorous discipline because it usually saves the most money.
For a small shop, one bad label can trigger a return, a customer service ticket, or a delayed scan that costs more than the mailer and label combined, especially if the carrier charges a $0.35 exception fee or the brand absorbs a second shipment. For a larger team, the problem multiplies because one mistake can repeat 500 times in the same batch. Before buying more rolls or a larger printer, build a process that answers the basics of how to label poly mailers with a flat surface, a strong adhesive, and a scan-friendly layout. That is the part that actually pays rent.
How to Label Poly Mailers So Labels Stick Best
If you want to understand how to label poly mailers so the label actually stays put, think like a sorter, not like a designer. A package gets turned, squeezed, stacked, and dropped into bins. It does not sit politely in one position. The best label zone is usually the flattest panel on the front of the mailer, away from side seams, closures, and the gusset area that flexes the most during handling. That sounds obvious in hindsight, which is probably why people keep missing it. A 4x6 label centered on a 12x15 bag can perform beautifully, while the same label shifted 8 mm into a fold can fail within the first hour on a conveyor in Shanghai.
I usually tell teams to reserve a rectangle in the middle of the mailer and keep at least 10 to 15 mm away from folds and edges. That small buffer matters more than it looks. On one cosmetics project using 3.0-mil glossy bags, labels looked perfect in the packing room but began peeling at the top corner after two hours in a warm truck. The fix was not a better printer. The fix was moving the label 18 mm inward and switching to a stronger permanent acrylic adhesive rated for plastic film. The whole thing felt a little ridiculous, honestly, because the “problem” was so tiny you could barely point to it on paper. But tiny mistakes make very expensive habits.
Dark text on white usually scans better than colored labels or low-contrast designs, especially under warehouse lighting around 4,000K to 5,000K. If you print barcodes, keep them flat, crisp, and sized correctly for the scanner you actually use, whether that is a Honeywell handheld at the packing bench or a Zebra fixed mount on the outbound line. A faint or wrinkled barcode can slow down sorting even if a person can read the address by eye. That is why how to label poly mailers for shipping is really a readability question first. Pretty is nice; scannable is what gets the parcel through the door.
Matte versus glossy mailers
Matte films usually behave better than glossy ones because they offer slightly more bite for adhesive. Glossy mailers can still work, but they need a label stock with stronger tack and a more careful application. If the bag feels slick in your hand, assume the adhesive will have to work harder. I have seen low-cost labels pop off glossy mailers during a rain-soaked last-mile handoff in Guangzhou when the same label held fine on matte bags in a climate-controlled stockroom. That sort of inconsistency is maddening, because it makes people blame the carrier first, and the carrier almost always gets blamed first.
Moisture, dust, and heat
Humidity weakens weak adhesives, dust blocks contact, and heat softens some label stocks. That is not theory; it is what I watched happen during a summer audit at a warehouse in Suzhou that ran open doors all day and hit 86 degrees by 3 p.m. The team thought how to label poly mailers was already solved because the label stock was “premium.” It was premium paper, not premium for plastic film. Different problem, different failure mode. I have learned to be suspicious of the word premium unless someone can tell me exactly what, in the material stack, is actually improved, such as a 90gsm face stock, a rubber-based adhesive, or a liner that feeds cleanly through a thermal printer set at 6 ips.
For operations that need packaging standards beyond a single SKU, the broader mix in Custom Packaging Products can help you match mailer finish, label finish, and the unboxing experience without forcing one component to carry all the burden. That kind of planning saves all the awkward compromises later, the ones nobody notices until the returns start coming back with peeled corners and sad little barcode tails hanging off the edge of a parcel from a Tuesday batch.
Key Factors That Affect Cost and Label Performance
The cheapest label is rarely the cheapest system. I have seen plain shipping labels cost only a few cents each in bulk, then watched reprints, return handling, and customer complaints erase the savings in a hurry, especially on 1,000-order batches where just 2% failure means 20 extra touches. If you are trying to master how to label poly mailers at scale, total cost matters more than sticker price. I know that sounds like a line from a spreadsheet, but I mean it very literally.
Here is the rough pricing pattern I see most often. A standard paper shipping label in a bulk run of 5,000 pieces may land around $0.03 to $0.06 per label. A synthetic label for more moisture resistance can move into the $0.05 to $0.11 range. Custom Printed Poly Mailers can add $0.06 to $0.18 per bag depending on size, color count, and minimum order quantity. A label pouch may seem simple, but once you count the pouch itself and the extra hand movement, the real cost rises quickly. The hidden tax is labor. Labor is sneaky like that, especially when a packer spends 12 extra seconds per parcel reaching for a pouch, smoothing wrinkles, and doing a second scan.
Those numbers are directional, not universal. Supplier location, print coverage, adhesive chemistry, and order volume can shift them quite a bit, so I always tell teams to test with real samples before they lock a budget. On one supplier negotiation, a rep tried to save us $0.008 per label by moving to thinner face stock. On paper, that looked clever. On the packing line, it was not. The label started to wrinkle during application, and the team lost more time correcting misfeeds than the supplier saved in material. That is the hidden math behind how to label poly mailers: pennies can disappear into labor very quickly. I remember the warehouse lead looking at the jammed roll and just saying, very calmly, “Great, we saved less than a coffee in Shenzhen and bought ourselves a headache.” He was right.
| Option | Typical Cost | Best For | Watch-Outs |
|---|---|---|---|
| Paper shipping labels | $0.03-$0.06 each at 5,000 units | Low-volume ecommerce, standard indoor shipping | Can peel on slick or dusty poly mailers |
| Synthetic labels | $0.05-$0.11 each | Moisture, cold rooms, rough handling | Higher unit price, but often lower failure rate |
| Label pouches | $0.06-$0.15 plus labor | Reusable docs, multi-insert shipments | Extra handling time, bulkier finish |
| Pre-printed poly mailers | $0.06-$0.18 added to the bag | Brand-heavy orders, high repeat volume | Longer lead time, less flexibility for variable data |
| Thermal printing setup | Printer investment plus low per-label cost | Fast-growing teams, daily fulfillment | Needs correct settings, ribbon or direct-thermal choice |
That table is where the real decision lives. If you ship 40 parcels a day, a desktop thermal printer may be enough. If you ship 1,500 parcels a day, the labor cost of hand-applied labels starts to matter more than the label stock itself. How to label poly mailers economically is not about finding the absolute lowest unit price. It is about finding the lowest total cost per successful shipment. Successful is the key word there. A cheap label that fails is just a more annoying expense.
There is also a quality standard angle. If you are building a shipping process for retail partners or Amazon-style receiving rules, use transit testing language that resembles ISTA packaging test protocols. For sustainable paper components, look for certifications through FSC-certified sources. Those references do not solve adhesion by themselves, but they help you ask sharper questions of suppliers and compare claims that otherwise sound interchangeable. I have found that the better the supplier, the less defensive they get when you ask about test methods instead of just “quality.”
I think many businesses spend too much time comparing label prices and too little time comparing failure rates. A label that costs $0.02 more but cuts reprints by 80% is usually the smarter buy. That matters even more if the customer service team is already dealing with late-delivery claims or chargebacks from reshipments. Nobody wants to explain, again, why a parcel was fine until the label gave up in transit.
Step-by-Step Process and Timeline for Labeling Poly Mailers
There is a simple sequence for how to label poly mailers well: choose the format, test the placement, apply the label, press it down, and scan-check before the parcel leaves the table. It sounds basic because it is basic. The challenge is making the sequence repeatable enough that a tired packer can follow it on a busy day without drifting into shortcuts. And shortcuts are always tempting at 4:30 p.m. on a Friday, right when a pallet of orders decides to arrive like it owns the place and wants 800 labels done before dinner.
- Pick one label size, usually 4x6 inches for shipping, unless your carrier or internal process requires something else.
- Match the adhesive to the mailer finish, especially if the bag is glossy or has a soft-touch coating.
- Print a test batch of 10 to 20 labels and apply them to the exact mailer stock you ship every day.
- Check that the barcode scans cleanly from at least two angles.
- Set a placement template so every label lands in the same zone.
- Press with a hand roller or firm palm pressure to push out trapped air.
- Run a final visual check before sealing the outbound carton or manifest.
For a stable manual workflow, I have seen teams label a poly mailer in 35 to 50 seconds once they had a good setup and the rolls were staged within arm’s reach. In a messy setup, the same package can take twice that long because of reprints, misalignment, and peel retries. That is why how to label poly mailers should be treated like a process improvement project, not just a supplies purchase. Time leaks are sneaky. They never show up as one huge failure; they show up as a hundred tiny delays nobody remembers by the end of the day, except the person who has to stay 20 minutes late to finish the last carton.
Set-up time matters too. If you are rolling out a new system, plan one afternoon for printer calibration, one small test batch, and a short review with the packing lead. A new label stock can look fine in the office and fail in the warehouse because of temperature, static, or the amount of dust in the room. I once watched a team spend two hours debugging a “printer issue” that turned out to be a bag batch with slightly more powder on the surface than expected. The adhesive was fine. The contact was not. That was one of those moments where everyone stares at the box like the box personally insulted them.
A realistic rollout timeline
If you are moving from handwritten addresses to printed labels, a practical rollout can look like this: one day to source samples, one day to test on your actual mailer, two to three days to adjust settings and placement, and then a controlled first production run. If you are switching to Custom Printed Mailers, proof approval to first production often takes 12 to 15 business days, depending on artwork revisions and order size. That timeline is one reason how to label poly mailers and how to package them should be planned together instead of as separate jobs. Separate plans create separate problems, and separate problems like to show up on the same day.
For growing brands, the goal is to remove uncertainty. The fewer decisions packers make per parcel, the fewer ways the process can drift. That is also why I like standard kits from Custom Packaging Products paired with a single approved label format. Less choice on the table usually means more consistency in the box. I know that sounds almost too simple, but packing lines reward simple more often than clever, especially on 7 a.m. shifts in warehouses outside Hangzhou where the first hour sets the tone for the whole day.
One more practical point: if your team packs near a humid dock door, place a fan or dehumidifier nearby and keep rolls sealed until use. Small environmental tweaks often do more for how to label poly mailers than a more expensive printer ever will. I have seen a $300 environmental fix outperform a $1,500 equipment upgrade, which is the sort of thing nobody enjoys admitting after they already bought the expensive option and installed it in a perfectly wrong spot.
Common Mistakes When You Label Poly Mailers
The biggest mistake I see is the label crossing a seam, fold, or gusset. It looks harmless at the table. It turns into peeling, curling, and unreadable barcodes later on a parcel that has already made it through a 9 p.m. pickup. If you remember only one rule for how to label poly mailers, make it this: keep the adhesive on the flattest possible surface. I wish I had a more dramatic rule to offer, but that one boring rule prevents a lot of pain.
Another common failure is surface contamination. Dust from storage, hand oils from repetitive packing, and static from plastic film all reduce bond strength. On one order for a candle brand, the first 200 packages were fine because the labels were applied right after the bags came out of the sealed carton. The next 600 failed more often because the bags sat open near a fan and gathered dust over a 40-minute packing block. Same label, same printer, different result. That is the part people underestimate. Packaging is sensitive in ways that feel unfair until you account for them.
Size errors cause their own headaches. A barcode that is too small, a return address that runs too close to the edge, or a label that wraps around a curve will invite scan delays. The fix is not always a bigger label, but often a simpler one. How to label poly mailers well often means removing unnecessary graphic clutter so the shipping data has room to breathe. Design teams do not always love hearing that, but shipping systems are not impressed by decoration, especially if the route includes a regional sort center that reads 200 parcels a minute.
- Do not place labels across seams or pleats.
- Do not apply labels with visible dust, moisture, or lotion residue on your hands.
- Do not use tiny fonts on a label that must carry both brand graphics and shipping data.
- Do not assume a glossy bag behaves like a carton or a paper envelope.
- Do not skip the test scan after a printer or label stock change.
Design mistakes can be sneaky. A label may look premium because it uses a metallic accent or a dark background, yet the barcode becomes harder to scan under warehouse lights. I have seen teams trade performance for style and then spend a week blaming the carrier. That usually sends the conversation in the wrong direction. The real question is how to label poly mailers so the package can be read by people, scanners, and rough handling systems without drama. If a label needs an apology, it is already too fancy.
There is also a materials mistake that keeps repeating in supplier calls: confusing “works on paper” with “works on plastic.” Those are different surfaces. A label adhesive that bonds beautifully to corrugated board may still fail on low-surface-energy film. If a supplier cannot explain the adhesive chemistry in plain language, I get cautious. In a factory setting, chemistry matters just as much as print resolution, and I would rather hear a slightly nerdy explanation about a 20-pound tack test than a glossy promise that falls apart in the rain on a Monday truck route.
How Do You Label Poly Mailers So Labels Stay Put?
The shortest answer is: use the flattest panel, a permanent adhesive made for plastic film, and firm pressure immediately after application. If you want the longer answer, how to label poly mailers so labels stay put starts with testing the exact mailer stock you ship, not a sample that only looks similar. I have seen a label hold on one batch of bags and fail on the next because the supplier adjusted the film finish by a hair and did not think it was worth mentioning. It was worth mentioning.
For everyday shipping, the safest setup is a 4x6 barcode label placed squarely within the center third of the bag, with no contact on the seam, fold, or closure strip. Apply the label once, press from the center outward, and avoid lifting and reapplying if you can. Every peel-and-restick cycle reduces adhesion a little more, and on a poly surface, a little more is usually enough to matter. If your team is applying labels by hand, train them to watch the corners first, because corners are where the failure starts.
I also like a simple quality check at the table. Scan the label once, rub the corner nearest the seam, then scan again after a light flex of the mailer. If the code still reads, you are probably in good shape. If it does not, you have caught a problem before it became a carrier issue. That kind of check is inexpensive, and it turns how to label poly mailers from a hope into a standard.
For teams shipping in humid climates or through mixed transit lanes, synthetic labels often justify their higher cost. I have seen them outperform paper stock on both glossy mailers and lightly textured bags, especially when the parcels spend a few hours in a warm van before linehaul pickup. The extra durability can pay for itself fast if it prevents even a small percentage of reprints. That is the quiet truth of how to label poly mailers well: the right label material is often the cheapest one over time, even when the invoice says otherwise.
Expert Tips to Label Poly Mailers Faster and Cleaner
If your packing bench starts feeling chaotic, speed usually improves after you remove motion, not after you ask people to move faster. The cleanest way to label poly mailers is to stage the mailers, keep the labels within one hand’s reach, and place the printer so the first touch point and the final scan point sit in the same line of sight. That is the sort of detail that sounds fussy until you watch a shift shave several minutes off every hundred orders simply because nobody has to twist, reach, or hunt for the roll.
I also recommend batching labels by destination or carrier only if the routing logic stays simple. Too many small batches can create more sorting than they solve. The same goes for label design. Keep the shipping layout consistent, use one barcode hierarchy, and reserve branding for the outer mailer or insert if possible. How to label poly mailers fast is almost always a question of reducing exceptions. Fewer exceptions mean fewer pauses, and fewer pauses mean fewer mistakes when the line gets busy and somebody starts talking over the sound of the heat sealer.
Pressure matters more than most teams think. A firm pass with a hand roller across the full label width helps the adhesive wet out against the film. If you do not use a roller, train packers to smooth from the center toward the corners with the side of the hand, not the fingertips. Fingertips leave smaller contact patches, and smaller contact patches leave more room for lifting later. That small hand motion is one of the simplest ways to improve how to label Poly Mailers Without changing a single part in the supply chain.
Printer settings deserve a check too. Direct thermal labels can darken differently depending on print speed, heat, and liner quality. If the barcode edge looks fuzzy or the text looks washed out, do not assume the file is wrong. Test the heat setting, then test the label stock, then compare the output on the actual bag. I have seen teams chase a software issue for hours when the real fix was two clicks on the printer menu and a different roll from the storage shelf.
Finally, keep the work area dry, clean, and predictable. A fan aimed at the wrong angle can curl a lightweight label stock. A box cutter left on the table can scratch a glossy mailer. Even a change in room humidity can alter how to label poly mailers from one shift to the next. Good fulfillment work feels calm because the environment is calm enough for the process to stay honest.
Next Steps: Build a Repeatable Poly Mailer Labeling Workflow
The best workflow is the one your team can actually repeat on a busy Tuesday. Start by standardizing the mailer size, the label size, and the adhesive type, then document the label placement with a photo at the packing bench. If you are still testing how to label poly mailers, create one approved sample package and keep it beside the printer so everyone can compare new work against the same reference. That single sample can prevent a surprising amount of drift.
Once the basics are stable, write a short packing standard that covers storage, application, scan checks, and what to do when a label peels during a shift. Keep it plain. Packer-friendly instructions beat polished paperwork every time. I have seen teams spend a week perfecting a training deck and then discover that the real problem was a box of labels stored near a humid wall. The best process in the room is the one that notices practical details first.
If you are ready to upgrade packaging as a system, coordinate Custom Labels & Tags, Custom Poly Mailers, and the surrounding Custom Packaging Products line so the surface, adhesive, and print finish all work together. That coordination matters because how to label poly mailers is easier when the materials were chosen together instead of pieced together after a problem appears. You get fewer surprises, fewer reprints, and a line that feels like it knows where it is going.
For bigger teams, a quarterly review helps catch the small changes that accumulate over time: a new supplier lot, a different humidity pattern, a fresh printer, or a slightly revised barcode format. Those tiny shifts can change how to label poly mailers more than a full redesign ever does. The teams that stay ahead are usually the ones that keep watching for small changes before they grow teeth.
FAQ
What is the best label size for poly mailers?
For most shipping setups, 4x6 inches is the most practical size because it leaves enough room for a barcode, address, and routing details without crowding the front panel. If your mailer is very small or your carrier has a specific format, test that layout on the exact bag you use. The best label size for how to label poly mailers is the one that scans cleanly and sits flat on the bag.
Can you put shipping labels directly on poly mailers?
Yes, as long as the label adhesive is rated for plastic film and the label sits on a flat, clean section of the mailer. A shipping label can hold well on matte and many glossy poly bags, but the surface preparation and placement matter just as much as the stock itself. If the mailer is dusty, wrinkled, or heavily textured, test first before running a full batch.
Do thermal printers work well for poly mailers?
They do, especially for teams shipping at a steady pace. A thermal printer is usually the most efficient option for shipping labels, barcode labels, and recurring fulfillment work because it keeps output consistent and fast. Pair it with the right label stock, and it becomes a strong answer to how to label poly mailers at scale.
How do I stop labels from peeling off glossy poly mailers?
Use a stronger permanent adhesive, keep the label away from seams and folds, and press it firmly across the full surface after application. Glossy mailers often need more careful handling than matte bags because the film offers less bite. A test run on the actual bag stock will usually show whether the label setup is strong enough before you commit to a larger order.
Should I use label pouches on poly mailers?
Only if you need to protect inserts, documents, or multi-piece paperwork. For standard shipping, label pouches add cost and extra handling time, which can slow down the line. In most fulfillment settings, a well-chosen adhesive shipping label is a cleaner and faster answer.
Takeaway: If you need a reliable way to label poly mailers, test 10 to 20 labels on the exact bag you ship, place them on the flattest panel, press them down firmly, and scan them after a light flex. If the label peels, wrinkles, or blurs, change the adhesive or the mailer finish before you order more stock. That one small test will tell you more than a supplier deck ever will.


