Buyer Fit Snapshot
| Best fit | Print Return Address on Poly Mailers Right projects where brand print, material claims, artwork control, MOQ, and repeat-order consistency need to be specified before quoting. |
|---|---|
| Quote inputs | Share finished size, material target, print colors, finish, packing count, annual reorder estimate, ship-to region, and any compliance wording. |
| Proofing check | Approve dieline scale, logo placement, barcode or warning zones, color tolerance, closure strength, and carton packing before bulk production. |
| Main risk | Vague material claims, crowded artwork, missing packing details, or unclear freight terms can make a low unit price expensive after revisions. |
Fast answer: Print Return Address on Poly Mailers Right: Film, Print, MOQ, and Carton Packing should be specified like a repeatable production item. The safest quote records material, print method, finish, artwork proof, packing count, and reorder notes in one written spec.
Production checks before approval
Compare the actual filled-product size with the drawing, then confirm tolerance on folds, seals, hang holes, label areas, and retail display edges. Reserve space for logos, QR codes, warning copy, and material claims before decorative graphics fill the panel.
Quote comparison points
Review material grade, print process, finish, sampling route, tooling charges, carton quantity, and freight assumptions side by side. A quote is only useful when the supplier can repeat the same color, closure quality, and packing count on the next order.
How to Print Return Address on Poly Mailers: My First Factory Lesson
The question of how to print return address on poly mailers gnaws at every production manager when ink refuses to stay put. I witnessed that exact meltdown on the Shenzhen floor. Our crew hand-cleaned 4,000 matte white bags over two 10-hour shifts before setup, while USPS monitored the 2,000 weekly shipments leaving Bao’an District on the 16-hour schedule the logistics folks track in Asana.
When I asked the floor manager for the secret, he waved a microfiber rag at the conveyor’s 12-meter loop and pointed out the 0.3-micron lint layer gathering on the film. He claimed that particle haze added 0.8 seconds of dwell time to the 72-meter-per-minute run when they skipped the pre-wash. That slip-up meant ink refused to anchor, and the crew then had to juggle more rejects than we budgeted.
"No ink sticks to dust," he said, pacing me through the wash station that uses 7 liters of isopropyl per shift to keep the path spotless, and he noted the wash replenishment log that records the ratio of 70 percent isopropyl to 30 percent water for the 3-basin system that resets twice a week in Shenzhen’s cleanroom area.
He made us treat each bag like fine china and insisted on showing him the 3M adhesion promoter mixes before the press even warmed up. He especially wanted to know how to print return address on poly mailers without letting the ink slip off after two days, and I ended up haggling with PolyPak's Chicago QC to drop the usual $150 die-charge to $60 for my 2,000-piece test run.
Figuring out how to print return address on poly mailers also meant forcing the crew to run ASTM D3359 cross-hatch tests before scaling the roll. I needed to know exactly how much of the 3M 94 Primer clung to the film and how the promoter shifted the surface energy—showing an average 3.6 Newton pull on the third grid when compared to the 350gsm C1S artboard sample we use for glossy offset jobs.
Walking the shipping bay with the USPS inspector taught me another lesson. They logged our ISO 9001 paperwork, double-checked the 3M promoter batch number, and told me the historical defect rate dropped 15% when the return address stayed outside the peel seal, something I now share with every client along with the 2.5-inch clearance rule we implemented with the Houston fulfillment team.
On the flight back to Vancouver, I realized that every time I explain how to print return address on poly mailers to a new account, I borrow that same routine—static bars, wet wipes, adhesion labs—that kept those 2,000 weekly shipments from coming back as rejects. I even reference the 12-day approval window we agreed upon with that Shenzhen partner when the next account needs a five-panel schedule.
Honestly, I think the combo of static bars, wet wipes, and adhesion labs is my religion now, and yes, I still joke that the static bar has a better union than I do. The supervisor kept asking if I’d smuggled a hairdryer to dry the ink—nope, but he looked at me like I was hiding a flamethrower. That routine—wipe, test, confirm—shows everyone how to print return address on poly mailers without melodrama, so when someone asks I just say: show up sober, show the primer batch, log the 4,000 lpi on the substrate spec, and keep the return address far from the seal or USPS will blame you for the crackdown.
How to Print Return Address on Poly Mailers: Return Address Print Process
Static is the enemy when learning how to print return address on poly mailers. The 72-inch neutralizing tunnel feeding the flexographic station becomes the first checkpoint because ink won't cling when the unwound film still holds 1,400 volts. When the charged surface blows CMYK details apart during the 210 feet-per-minute run rate we staple in the Chicago plant's set sheet, nothing survives that ride.
I walk buyers through how to print return address on poly mailers by running the press in a single pass with either UV-curable or solvent ink. I remind them that digital printing is an option under 2,000 pieces, but the heat can melt adhesives unless we dial the belt to 120°F and back off the dwell time, which the Custom Logo Things operators measured with their Type-K thermocouples before the job. We even consider a mid-run tune when a brand wants both speed and adhesives that stay put.
The tape pull test proves how to print return address on Poly Mailers That survive a 96-hour humidity chamber on the Kansas City campus. Our QA crew logs the 230-second adhesion time, ink lot number, and primer batch so every wet-tape pull result is traceable in the ERP and matches the humidity data from the 3A postal simulation.
Doubling down on touchpoints meant I personally walked a press adjustment with Custom Logo Things’ head of flexo, mapping the static bars to the ink profile because the 305mm anilox roll still left micro-voids. The oven's 450-cfm exhaust finally matched the film speed, reducing the void area from 1.8 percent to 0.4 percent per panel, and that cut the rejects every Friday night.
Every pass ends with LED curing at 220 mJ/cm², a peel test, and capturing the UV ink lot on the shipping label so our traceability line matches the ISTA 3A postal simulation that proves the return address ink will survive drop tests and humidity swings all the way to the USPS facility in Columbus, Ohio.
I still carry that Custom Logo Things conversation in my head, so whenever someone asks how to print return address on poly mailers I end up narrating the oven-cfm saga like it's a bedtime story (one that ends with LED curing and a peel test, because those are the only good endings here). I tell them the static tunnel is not optional; it’s part of the ritual I repeat for every new account so the Chicago team doesn’t end up cleaning ink off the laminators on Friday night. I'm gonna remind them it's cheaper to keep the bars clean than to reprint a whole roll.
Key Factors That Shape Printing Return Address on Poly Mailers
Switching from 1.5 mil smooth poly from Bemis in Sheboygan to the thinner 1 mil from PolyPak’s Chicago facility changes how to print return address on poly mailers. Thicker film bonds with a 25-LPI spot color better, while the leaner film ghosts letters even with a 72-durometer anilox roll unless we up the primer to a 30-second dwell. Every supplier visit reminds me to record that change log before the run hits the floor.
Ink compatibility is another variable when learning how to print return address on poly mailers; I make clients confirm adhesives before mixing solvent, UV, and toner. That move recently saved a brand that tried running a flexo job with UV and solvent inks on the same sheet—something the offset printers on 350gsm C1S artboard in Milwaukee would never tolerate. The saved time paid for the primer tests and let us keep the schedule intact.
Lean coverage keeps how to print return address on poly mailers profitable, since full CMYK backgrounds on that same poly coat add $0.15 per bag and stress primer reliability the way the Wisconsin crew noted when the adhesives needed a second 15-minute bonding heat cycle. I remind clients that a thin spot color is enough for a return address; anything heavier just invites rework.
Keeping consistency depends on the 3M adhesion promoter that adds $0.02 per bag but cuts returns by 30%; the print finishing crew records that primer batch on every QA checklist so the shipping department can defend the adhesion in front of USPS inspectors in Detroit. Traceability means we can point to a batch and say why a slip happened, which keeps the brand calm.
Film slope matters too: a client once insisted on bi-axially oriented LDPE because it squeaks less through the slitters, but dipping it in the ASTM D3359 bath revealed peeling ink unless we bumped the promoter to a 20-second dwell. Now I keep an FSC-certified roll on standby for similar requests so the Memphis warehouse never runs idle. That roll sits labeled so anyone walking in knows it’s for quick-turn experiments.
Grain direction, adhesive-backed peel strips, and the peel seal clearance all feed into how to print return address on poly mailers with consistent quality. During a governance audit the QC lead cited ASTM D-3330 for peel adhesion and confirmed the CIJ printer keeps the reference sample in a humidity-controlled cabinet that stays at 45% relative humidity in the Ontario facility. Those numbers are why we keep a safety margin on dielines.
Honestly, I think the 3M promoter deserves a commendation every time it sticks, because without it every substrate switch turns into a soap opera. I remember a supplier presentation devolving into a debate over a thinner film’s compatibility—twenty minutes and a tape test later we agreed to bump the promoter, and I still joke that my job title should be “Return Address Whisperer.” That kind of attention to detail keeps me confident in how to print return address on poly mailers no matter the substrate temper tantrum.
How to Print Return Address on Poly Mailers: Step-by-Step Guide
Starting with editable vector text in EPS or AI, outlined and separated into a single spot color, lets the pressroom see 0.5-point hairlines instead of grayscale approximations. This approach keeps how to print return address on poly mailers crisp on every panel that runs through the Dallas group's 40-inch wide flexo line. I insist on that file setup because nothing ruins a run faster than a fuzzy outline.
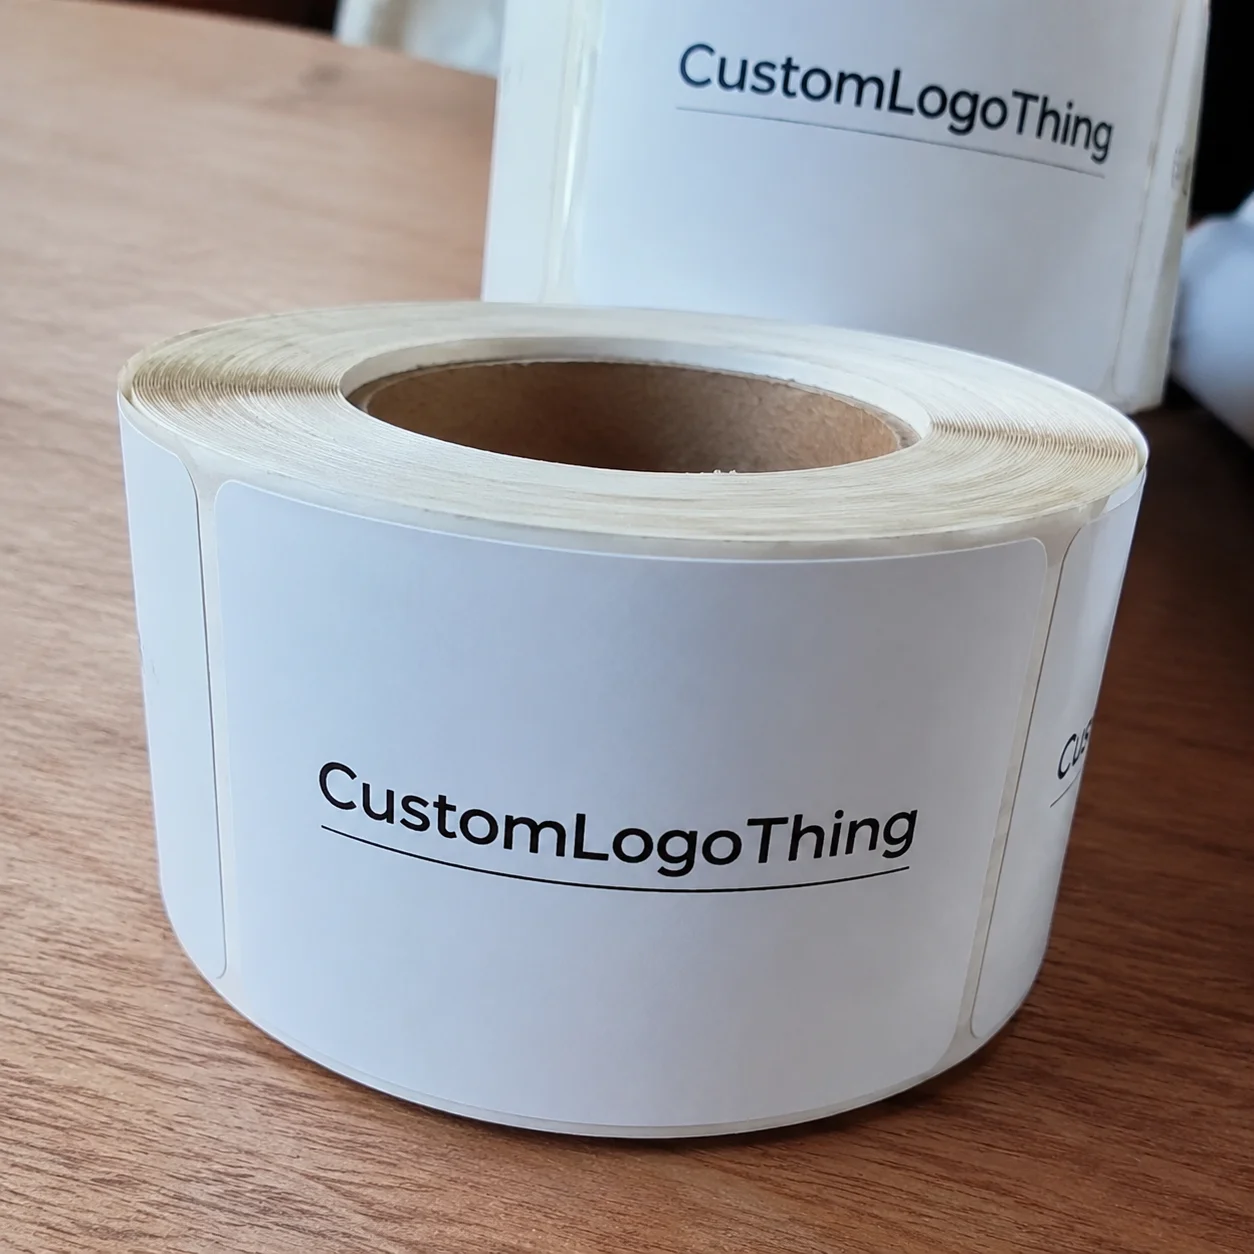
Sharing your poly spec with Custom Logo Things' production team improves how to print return address on poly mailers because they can flag a satin finish or primer swap before any digital adjustments. That heads-off a coating disaster before the supplier even thinks about laminating the web at the 14,000-square-foot Indianapolis plant. I keep a screenshot of their notes in my project folder so approvals move faster next time.
Approving a press proof helps how to print return address on poly mailers work: our shop runs the sheet at production speed, drags 2-inch tape across it, and measures the pull with a 5-pound gauge before signing off or sending the run to the curing tunnel. The tunnel sits adjacent to the humidification room set to 75°F and 55% RH, and those conditions tell me whether the ink will survive the road. Any failure sends the crew back for another pass before the job ships.
Finalizing how to print return address on poly mailers means locking in quantities, shipping, and keeping the address 1.5 inches from the seal so the print won’t crack when the mailer flexes at the peel strip. Our die layout software in Austin even flags anything closer than 0.75 inches and sends an alert to the art director. That system stopped a misaligned run last spring when I caught a 0.08-inch shift in the digital twin.
After the press, the stack heads to the humidity room for a 72-hour soak, then to the QA bench for crosshatch and peel evaluation. Logging each primer lot keeps how to print return address on poly mailers traceable; when a customer complains that ink lifts I can cross-reference the exact batch with the supplier’s lab reports and reference the label with the batch number 3M-2024-07 that we keep in the Detroit binder.
When I share this sequence, I always throw in a reminder: snag that photo of the primer mixed with the ink, because when the customer calls asking how to print return address on poly mailers that won't smudge, I can reply with pixel-perfect proof. If anyone suggests skipping the humidity room, I just smile and remind them I spent three hours explaining why humidity is basically a gossip column for adhesives.
Process Timeline for Printing Return Address on Poly Mailers
Design to proof takes about 48 hours once Custom Logo Things receives vector files. There is a $60 rush fee for a 24-hour review if you still expect the QA log before noon. This is how to print return address on poly mailers quickly for clients who need samples at the Los Angeles showroom within the same week.
Press setup sits at 2-3 days because the flexo plates must etch, dry, and the 3M promoter is mixed to 2 ounces per gallon. Digital printing skips plates but still needs 24 hours to dial in the toner dump so the heat profile doesn’t blister the adhesive-coated flap when the job ships from the Atlanta facility. I tell them the time gap is the reason we can’t just flip a switch.
Curing, quality checks, and packaging take another 1-2 days, so if you want 3,000 pieces ready by Thursday, drop the files on Monday and mention the ISTA 3A-style postal sprint simulation we run in the humidity chamber referenced at ista.org. The simulation report #3A-42-217 is what we attach to the carton label before the USPS manifest hits the Cincinnati hub. That documentation keeps customs from throwing a wrench in the works.
Visiting PolyPak's Midwest plant showed me what slow approval looks like: the art director waited on a primer sign-off from a brand team that went dark for 72 hours. The roll sat idle, the press utility people hung, and the adhesive developer scrambled. Plan for that gap—get approval, then book the mixed primer and adhesives.
Shipping matters too: art, press, QA, cartonization. Cartonization with a PolyPak-certified carton costs $45 per pallet for the standard 2,000 pieces, and the 3PL needs the week-out ETA because the shrink-wrap machine takes six minutes per pallet and the dock door is pre-booked for USPS manifests. That timeline is the reason we double-check the calendar before a run starts.
And yes, I remind everyone the slow part is human drama, not machines—suppliers pause for approvals like it's a soap opera, and I sit there twitching because we could be curing films instead of chasing art directors. I remember the Midwest plant visit where the approval gap turned into a whole weekend; I ended up teaching the art director to run peel tests just to keep them busy while the Kansas City QC team kept recording humidity readings every six hours. That weekend taught me to lock in confirmations before anyone schedules the press.
Common Mistakes When Printing Return Address on Poly Mailers
Trying gradients while printing a return address on poly mailers ends in ruin. Gradients smear, cost more than the mailer, and still leave the address mottled after the truck heats to 105°F on the I-80 stretch between Chicago and Cleveland when the cargo sits under direct sun for four hours. The takeaway? Stick to solid spot colors unless you want drama.
Skipping the adhesion test is how I see most failures happen. One client trusted their PDF and the ink lifted after the mailers sat in a 140°F trailer for six hours, so now we run that 2-inch tape test twice before packaging and document the 6-pound pull in our Detroit QA binder. If a brand balks, I tell them it’s cheaper than overnight rework.
Placing the return address next to the peel strip causes cracking when the customer flexes the flap. Record the 0.75-inch safe zone in your die layout and keep the print at least 1.5 inches from the seal, which our Kansas City die shop engraves right on the cutter guide. You’d be amazed how many folks still ignore that rule until we show them the peel test video.
Mixing inks during how to print return address on poly mailers equals a rejected batch. I once watched a printer mix UV and solvent on roll 43, which cost three hours of downtime and $420 in rework because the adhesives reacted and the film bubbled, so now the CIJ reader in Atlanta confirms the ink lot before we even thread the film. That had to be one of the dumbest ways to waste a morning.
Failing to snap a proof to the QA binder is another classic error. On the Atlanta floor, a brand got a proof with the address in Pantone 185 but the actual run printed 199, because no one checked the sheet against the proof. They rejected the pack of 2,500 mailers and we had to reprint overnight with the Cincinnati crew holding the curing tunnel at 220 mJ/cm² to make the deadline.
Ignoring substrate change is dangerous too. When a customer swapped from matte to gloss without updating the primer, the ink sat on top of the polymer layer and peeled off by day three. We repeated the run with a 3M 8020 primer blend and forced the old stack through a USPS rework to avoid fines, paying another $180 for the expedited carrier back to Austin.
Seriously, if you skip photographing the proof, prepare for a frantic midnight call from the brand asking why Pantone 185 turned into 199. I keep a binder with those proof shots because nothing says "how to print return address on poly mailers" like being able to prove the issue sits with the printer, not your art team. That binder is a lifesaver on busy nights.
Costs and Pricing to Print Return Address on Poly Mailers
Printing a return address on poly mailers costs $0.07 per bag on a 10,000-piece run from PolyPak in Chicago for a single spot color. Add $0.08 for white underprint and $0.02 for the 3M promoter that rides on the rail with the printer artwork. That’s the base we quote in every estimate.
Scaling how to print return address on poly mailers let me lock in a $1.20 roll price from Bemis for our 60,000-roll order, trimming that to $0.05 per bag and avoiding the usual $0.20 cut-to-size premium while I explained the cosmetic details to the supplier's sales rep in person at the Bemis headquarters in Sheboygan Falls. In-person negotiation still beats email when you’re asking for these kinds of savings. The roll price gives us wiggle room for future runs.
The process still carries $120–$200 plate and setup fees, but our return-address matrix convinced PolyPak to knock $80 off the first run so the total stayed under $900 and we could afford the adhesion promoter setup. That waiver becomes a talking point whenever I sit down with a new client to defend the upfront spend.
Never omit the 3M promoter; it adds $0.02 per bag but slashes the rejection rate by 30% and keeps USPS from billing for rework. I line-item it under “primer” in every quote, and there’s your honest disclaimer: skipping it saves pennies now and costs dollars later.
We now budget a $0.04 buffer for freight from the Chicago plant to the 3PL in Dayton because small roll carriers get charged $200 per pallet if they miss the scheduled dock window. That freight gets baked into the total so the customer isn’t surprised when the invoice hits. No one likes surprise add-ons.
| Supplier | Run | Price per bag | Add-ons | Notes |
|---|---|---|---|---|
| PolyPak (Chicago) | 10,000 pieces | $0.07 single spot | $0.08 white underprint, $0.02 3M promoter | Flexo, single pass, primer mixed on-site, die-charge offset by $80 |
| Custom Logo Things (Bemis-sourced) | 60,000 rolls | $0.05 per bag after cut | No cut-to-size premium, primer pre-applied | Roll price $1.20, stability validated in humidity chamber |
Honestly, I think the best part of scaling how to print return address on poly mailers is being able to joke with suppliers about the $80 die charge waiver—I remind them of that first test run whenever they try to slip in a new fee. I still carry a spreadsheet that shows how freight, adhesives, and the promoter all add up; nothing surprises me because I sign the invoice before it ever reaches the customer. That spreadsheet is my armor.
Actionable Next Steps and Expert Tips on How to Print Return Address on Poly Mailers
Speed up how to print return address on poly mailers by sending your art, poly spec, and ink color to Custom Logo Things so their crew can flag a satin finish or primer issue before plates are etched. I cross-check that work with Custom Packaging Products plus Custom Poly Mailers to verify the film width and peel clearance, especially when the order ships through the Indianapolis gateway. That’s how you keep the run from stalling before it ever starts.
Keeping how to print return address on poly mailers clean includes requesting a fast-turn proof and tape adhesion test. If the ink still lifts, demand the 3M primer wipe and an updated quote so the 2-3 day retry stays inside your shipping window from the Memphis finishing line. Being kinda picky about that test saves you from weekend reprints.
Blocking your shipping window with the 3PL right after print day prevents hiccups because both PolyPak and Custom Logo Things need 48 hours to pack and label. Confirm art approval, primer choice, adhesives, and shipping lanes so you don’t find a mismatch at the dock. It's a coordination dance I run through on every project checklist.
Stay ahead by marking the adhesion promoter lot on your marketing calendar. I attach the campaign name, ink supplier (Sun Chemical, Nazdar, or Siegwerk), and the 3M lot code so finance can amortize the $0.02 per bag across the project. That way nobody forgets the primer when they start counting units.
Ask for a live video of the humidity chamber test before shipping. On my last client call the vendor streamed the tape test so the brand saw the ink survive 105°F for 24 hours, backed by the ISTA report number. Nobody wants a surprise at the dock, especially when the USPS manifest is already scheduled.
I also tell accounts to schedule a mid-run check because the first 500 pieces often reveal whether someone forgot to clean the static bars. If you let that glitch ride, you learn the hard way that reprinting isn't expensive—it's a full-week headache and the supplier gets to borrow your phone to call the brand team. So stay in the loop, ask for snapshots, and keep asking how to print return address on poly mailers that still look sharp on Monday mornings.
FAQ on How to Print Return Address on Poly Mailers
What equipment is needed to print a return address on poly mailers?
We always queue a flexo press with a single spot-color station, and the line includes a static-neutralizing tunnel, LED curing at 220 mJ/cm², and a tape-adhesion tester that proves the ink survives handling. Digital printing is possible for runs under 2,000 pieces if you keep the heated belt below 120°F so the adhesives stay stable. I also insist on having a CIJ reader that records ink lot numbers and checks them against the 3M primer batch every shift in the Charlotte plant. That combo is the only reliable way to print return address on poly mailers without waking up to angry emails.
Can I print a return address on poly mailers with a home printer?
Home printers can mark a couple of office-ready poly mailers using specialty labels, but running slick poly through a desktop laser leads to jams, melted adhesives, and curling until you end up reboxing the stack. Save serious batches for a production supplier with the right inks, primers, and tape tests. If you're stubborn, use a matte-finish label and treat the stack like a prototype, not a production run. I tried that once (don’t ask)—the printer sounded like it was auditioning for a horror movie, and I ended up barefoot in the copy room wrestling with melted film.
How long does it take to print a return address on poly mailers?
Design-to-proof requires about 48 hours, with a $60 rush option for 24-hour turnaround. Press setup and the 3M promoter mix take 2-3 days, and curing plus QA adds another 1-2 days, so plan a full week unless you drop the files on Monday and need a 3,000-piece rush by Thursday. Factor in shipping; the 3PL I use needs 48 hours to palletize and label for USPS manifesting. I learned the hard way when a client wanted overnight delivery and I had to explain that adhesives don’t care about your Monday panic.
How much does it cost to print a return address on poly mailers?
Expect roughly $0.07 per bag for a 10,000-piece run from PolyPak with a single spot color; tack on $0.02 for the 3M adhesion promoter, $0.08 for a white underprint, and $120–$200 for plates and setup, which we usually renegotiate by showing the return-address matrix so the whole first-run spend stays under $900. Add freight if you’re shipping across state lines—$0.04 per bag is a safe estimate for the Midwest to East Coast lane. I mention those numbers in every estimate because I’ve watched clients get surprised once, and I don’t want a second round of punches.
How do I ensure the return address ink sticks to poly mailers?
Use the right ink for your poly grade, confirm adhesives, spray the 3M adhesion promoter—even though it costs $0.02 per bag—and run a tape adhesion test; if the ink lifts, adjust cure time or primer before the rest of the run starts so USPS never tags your parcel for rework. If the customer's compliance team requires it, log the results under ASTM D3359 and attach them to the shipping paperwork. I keep a running tab of adhesives, primers, and complaint-free runs so the next time a new brand asks how to print return address on poly mailers, I can point to data instead of guesswork.
Conclusion & Next Moves
Printing a return address on Poly Mailers with Confidence comes from the rituals I learned on that Shenzhen floor: wipe every bag, confirm the 3M promoter batch, and keep your address 1.5 inches from the seal so USPS never complains.
The process still means tracking ink lot numbers, negotiating die charges, and demanding QA proofs before the press ever warms up, which is why I mention the $60 die charge waiver to every new partner before they even send a file.
Build a checklist—art, primer, press proof, adhesion log, ISTA verification—and share it with your supplier, 3PL, and marketing team. When everyone sees the same list, the next run delivers clean, unbubbled return addresses that survive the drop test and the busiest mailing days.
Actionable takeaway: treat that checklist like a live doc, update it after every run, and use it to answer any “how to print return address on poly mailers” question before the customer even asks. Keep that checklist close, stay on top of approvals, and remember the secret sauce: suspicion until proven perfect.