Logo Patches Material Guide for Beer Brands to Order
Logo Patches Material Guide for Beer Brands: What Actually Matters
Most brewery patches fail for one simple reason: the material does not fit the job. Read this Logo Patches Material guide for beer brands before you approve artwork, because a patch that looks great on a limited-release cap can turn fuzzy, warped, or hard to read on a server apron after a few wash cycles.
Beer merch lives a rough life. Moisture, heat, spills, grease, patio sun, sanitizer, cooler condensation, and people who actually wear the stuff all leave a mark. A patch is not sitting in a display case next to a tasting glass. It is getting worked through a taproom shift, tossed in a trunk for a festival, or washed by someone who treats care labels like suggestions.
Logo patches are custom branded labels or badges attached to hats, jackets, work shirts, aprons, beanies, bags, cooler totes, and promo merch. For breweries, they do two jobs at once: they decorate the product and reinforce the brand. A good patch makes the merch feel finished. A bad one makes the table look rushed.
Material choice affects logo detail, texture, color accuracy, washability, durability, application method, and cost. That makes it a buying decision, not just a design decision. The main patch families are woven, embroidered, PVC or rubber, genuine leather, faux leather, chenille, printed fabric, and sublimated fabric.
The quick split is simple: use woven patches for fine detail, embroidered patches for a classic raised look, PVC patches for weather resistance, leather patches for premium lifestyle merch, printed fabric for artwork-heavy designs, and chenille for loud retro drops. Loud is the point there.
Buyer rule: choose the patch material based on the final product and how it will be worn. Then adjust the artwork to fit that material.
How Brewery Patch Materials Work on Hats, Shirts, Aprons, and Bags
A patch is a separate branded piece that gets made first and attached later. That means the patch material, border, backing, and application method all need to work with the product underneath. A 3-inch PVC patch can look sharp on a structured cap and feel awkward on a light cotton tee.
Common attachment methods include sew-on, heat press, adhesive backing, hook-and-loop, rivets, and stitched or debossed leather attachment. For brewery uniforms and retail merch, sew-on is usually the safest choice. It holds up better through washing, flexing, and repeated wear than most shortcuts. Heat-seal can work, but only when the garment fabric, press temperature, dwell time, and wash routine all line up.
The garment changes the answer fast. Structured caps can handle thicker embroidered, PVC, and leather patches. Thin T-shirts usually need lighter woven or printed fabric patches, often around 2 to 2.75 inches wide for chest placement. Aprons can take larger, tougher patches, often 3 to 4.5 inches wide, especially when the base fabric is heavy canvas or denim. Beanies need flexible patches that move with the knit instead of fighting it.
Surface behavior matters too. Woven and embroidered patches bend easily. PVC is flexible but thicker. Leather looks premium but needs care. Chenille is bulky on purpose and works best where that bulk feels intentional, like varsity-style beer club merch or anniversary drops with a little swagger.
Brewery uses range from taproom staff shirts and bartender aprons to brewer work jackets, festival hats, mug club merch, bottle release apparel, and cooler bags. A promo tote handed out by a distributor does not need the same treatment as a $34 retail cap. Same logo, different job.
If the patch is heavier than the fabric, it will drag, curl, or look like someone stapled a coaster to a shirt. Design the patch and the product together. That one step prevents a lot of bad merch.
Best Patch Materials for Beer Brand Logos and Label Art
The right material depends on logo complexity, brand personality, wear environment, and budget. The comparison below gives buyers a faster way to narrow things down before anyone spends two hours arguing about thread colors.
| Patch Material | Best For | Typical Strength | Watch-Out |
|---|---|---|---|
| Woven | Small text, hop illustrations, thin linework, detailed logos | Sharp detail with a flat finish | Less raised texture than embroidery |
| Embroidered | Classic hats, jackets, aprons, bold icons | Raised texture and strong perceived value | Tiny lettering can blur |
| PVC / Rubber | Outdoor events, cooler bags, workwear, festival hats | Water-resistant and durable | Not a good fit for photorealistic label art |
| Leather / Faux Leather | Premium caps, beanies, jackets, gift shop merch | High-end lifestyle feel | Not built for heavy washing |
| Printed / Sublimated Fabric | Seasonal labels, gradients, illustrations, full-color graphics | Best color reproduction | Flatter and less tactile |
| Chenille | Retro drops, varsity looks, bold initials, mascots | Big texture and shelf appeal | Bulky, not subtle, higher cost |
Woven patches
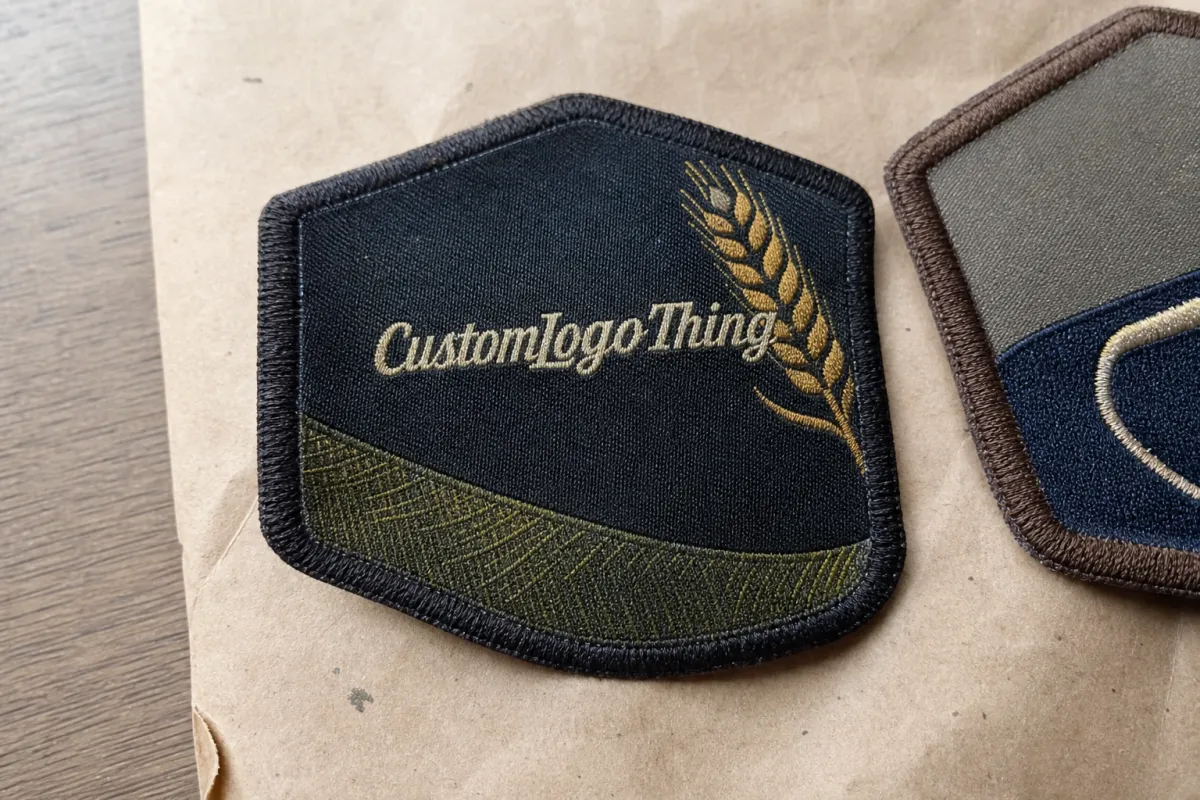
Woven patches are usually the safest pick for detailed brewery logos. If your mark has tiny founding dates, hop cones, barley linework, curved type, or a narrow badge border, woven gives cleaner detail than embroidery. The threads are packed tighter and flatter, so the design reads more like a label than a stitched illustration.
They work well on staff shirts, caps, bags, and aprons where readability matters. A 2.5-inch woven cap patch can often hold lettering that embroidery would chew up. Not every time, but enough to matter.
Woven patches can feel less dimensional than embroidery, so they are not the answer for every heritage badge or workwear-inspired design. If the buyer wants texture first and detail second, embroidery may still be the better fit.
Embroidered patches
Embroidered patches are the classic merch choice. They feel familiar, durable, and substantial. They work best for simplified logos, bold icons, block lettering, and traditional brewery branding. If your brand leans heritage lager or old-world pub, embroidered patches usually look right without trying too hard.
The tradeoff is detail. Thread has real width. It will not reproduce a tiny label line or a delicate script flourish with any kindness. The machine is not being difficult. It is being honest.
For cleaner embroidery, reduce tiny elements, thicken thin strokes, and avoid cramming extra copy into a small patch. A founding date might survive. A full tagline, city name, batch number, and decorative barley wreath inside a 2.25-inch circle probably will not.
PVC patches
PVC patches are flexible, waterproof, and tough. They are a strong choice for outdoor beer festivals, cooler bags, workwear, hats, rain jackets, and utility-style merch. They handle bold shapes, raised layers, and simple color blocking well.
They are not great for soft watercolor label art, tiny script, or photorealistic graphics. If the logo depends on fine shadows and delicate textures, PVC will flatten that out fast.
PVC also changes the feel of the merch. It can read modern, tactical, sporty, or industrial depending on the design. That works well for a trail-friendly pale ale brand or a festival cooler tote. It can feel out of place on a soft vintage tee.
Leather and faux leather patches
Leather and faux leather patches are premium lifestyle options. They fit caps, beanies, jackets, and gift shop merch. Debossed, embossed, stamped, or laser-engraved finishes work well when the brand wants a restrained, upscale look instead of something loud.
They are less forgiving than fabric when the garment gets washed hard or worn in wet conditions. They shine on the products people keep, not the ones they abuse. That makes them a strong choice for retail caps and limited-run merch, and a weaker choice for aprons that live in a busy kitchen or bar.
Leather also changes the mood of the brand. It can make a beer label feel more like a rugged outfitter, a bottle shop, or a giftable premium line. Faux leather gives a similar look with more control over cost and sourcing.
Printed and sublimated fabric patches
Printed and sublimated patches are the best fit when the artwork carries the whole design. They handle gradients, illustrations, photographic elements, and full-color label art better than woven or embroidery. If a brewery has a seasonal can label that needs to stay intact on merch, this is the format to look at first.
They are useful for promotional pieces, limited releases, and brand art with more illustration than lettering. The tradeoff is texture. They usually feel flatter and more like a printed label than a stitched patch.
That is fine when the goal is visual detail. It is less compelling when the goal is a thick, tactile badge that feels built to last.
Chenille patches
Chenille patches bring big texture and a strong retro look. They are a good match for varsity-style beer club merch, anniversary drops, mascots, and oversized initials. If the brand wants something that feels like a college sweatshirt or a club jacket, chenille does that well.
They are not subtle. That is the entire selling point. Chenille takes up space, adds weight, and makes a product look deliberate from across the room. It is the wrong answer for fine detail, but a very good one for bold statement pieces.
Cost, Pricing, MOQ, and Unit Cost Tradeoffs
Patch pricing depends on material, size, backing, shape complexity, color count, and order volume. The cheapest quote is not always the best value. A low per-unit price can still create a bad product if the material fails on the garment or the artwork gets lost.
MOQ, or minimum order quantity, is one of the first numbers buyers need to check. Suppliers often set different minimums for woven, embroidery, PVC, leather, and printed patches. A brewery ordering merch for a single event may want a lower MOQ. A retail line or staff uniform program can usually justify a larger run.
Unit cost tends to drop as volume increases, but setup fees, mold charges, digitizing, and shipping can shift the real price fast. PVC and molded rubber styles may carry extra tooling costs. Embroidered and woven patches often scale more smoothly, especially when the design stays simple and the size stays standard.
Size matters too. A 2-inch patch costs less than a 4-inch patch, and a simple round shape usually costs less than a custom die-cut edge with lots of angles. More colors can also raise the price, though the impact varies by material.
For beer brands, the practical question is not just "What does it cost?" It is "What does this patch cost relative to the margin on the finished merch?" A retail cap that sells at a healthy markup can support a better patch. A giveaway item for a launch event probably cannot.
If the goal is to keep margin healthy, simplify the art, stick to standard sizes where possible, and order enough units to spread the setup cost. The expensive part is often the first sample and the first setup, not the patch itself.
Process, Timeline, and Production Steps Before You Order
The cleaner the spec, the fewer surprises later. A supplier can quote faster and make better recommendations when they know the product, placement, size, material, backing, and target use. "Make it nice" is not a spec. It is a mood.
Start with the end use. Is the patch going on a hat, apron, jacket, beanie, tote, or shirt? Is it for staff, retail, a giveaway, or a limited release? That answer determines a lot of the material choice before anyone opens design software.
Next, check the artwork at the final size. Tiny text, thin strokes, and dense details need to be simplified early. It is easier to trim a logo before sampling than to argue about unreadable thread later.
After that, pick the backing and attachment method. Sew-on is the durable default. Heat seal can work on some garments. Hook-and-loop makes sense for tactical or modular use. Adhesive is usually more limited and more temporary.
Timeline usually includes quote, artwork review, sample or proof, production, and shipping. Straightforward woven or embroidered patches can move fairly quickly once the artwork is approved. Custom molded PVC, leather, or specialty finishes may take longer because the tooling and sample steps are more involved.
Plan for one round of adjustment if the design is new. That is normal, not a sign of trouble. Most good patch orders get better after the first proof, because the actual material reveals things the mockup did not.
Common Material Mistakes Beer Brands Make With Custom Patches
One of the easiest mistakes is picking the material because it looks cool in a sample gallery. A patch can look great in isolation and still be wrong for the garment, the wash cycle, or the brand tone.
Another common miss is trying to force too much detail into embroidery. Small lettering, thin outlines, and stacked copy often blur at production size. The artwork may look clean on screen and fail once it is translated into thread.
Some brands also choose a heavy patch for a light garment. That can make the fabric sag, pucker, or feel unbalanced. It is a small thing until the shirt is on a person and the patch keeps telling the viewer where to look.
PVC is another place where expectations need a reset. It is strong and weather-ready, but it is not a magic fix for detailed label art. If the artwork depends on subtle shading, a printed fabric style is often the better fit.
Leather gets overused as a premium move. It can be a good fit, but only when the product and use case support it. A leather patch on a rugged work apron or wash-heavy garment can age in a way that looks less "craft" and more "why is this peeling?"
The last mistake is skipping the sample stage when the design is new. A proof is cheaper than a bad production run. Every time.
Expert Tips for Matching Patch Material to Brewery Brand Style
Use the logo's weakest detail as the decision point. If the smallest part of the art is a tiny letter or a thin line, that detail should guide whether you choose woven, printed, or embroidery.
Match the material to the brand voice. Heritage lager, pub-style branding, and old-school badges usually work well with embroidery or leather. Bright seasonal releases, hop-forward illustration, and detailed can art often do better with woven or printed fabric. Outdoor gear and utility merch can lean into PVC without feeling forced.
Think about where the patch will be seen first. On a crowded merch wall, texture matters. On a detailed retail display, clarity matters more. On staff uniforms, durability and washability matter more than either one.
Do not let the patch do too much. A patch is good at one job: being a recognizable brand marker. If it also has to carry a paragraph, a full scene, and half the label copy, the result usually gets messy.
Ask for a sample against the actual garment color. A patch can look great on a white background and disappear on olive, navy, or black fabric. The contrast matters more than most buyers expect.
If the merch line has both premium retail items and workwear, split the materials instead of forcing one patch style across everything. The brewery shirt, the festival hat, and the bottle shop tote do not need the same patch to make sense.
Next Steps: Build a Patch Spec That a Supplier Can Quote
Before you request a quote, gather the basics: artwork file, target patch size, intended garment, attachment method, backing preference, color count, and expected order quantity. That gives the supplier enough information to recommend a material without guessing.
It also helps to send a note about the use case. "Taproom staff aprons," "retail hat," "festival giveaway," and "premium limited release" all point to different materials. A good supplier can narrow the field fast when the use case is clear.
If the design is still flexible, ask the supplier where they see risk. A good one will tell you whether the small text needs to be simplified, whether the patch should be resized, or whether a different material will save the design.
The best quote is not the lowest one on paper. It is the one that gives you a patch that fits the product, survives the real world, and still looks like your brand after a few weeks of actual wear.
FAQs
What patch material is best for brewery hats?
Woven, embroidery, PVC, and leather can all work on hats. Woven is the safest pick for detail, embroidery gives a classic textured look, PVC handles weather well, and leather works for a more premium retail feel.
Are woven patches or embroidered patches better for small text?
Woven usually handles small text better. Embroidery can blur tiny letters because thread has width, while woven patches keep lines flatter and more readable.
Can patches go on aprons and work shirts?
Yes. Aprons and work shirts are common patch applications for breweries. Sew-on attachment is usually the most durable choice for those pieces, especially when the garments get washed often.
What patch material works best for outdoor beer events?
PVC is a strong choice for outdoor events because it handles moisture and rough use well. Woven and embroidery can still work, but PVC is often the better fit when the gear needs to take a beating.
How do I know if my logo is too detailed for embroidery?
If the logo has tiny text, thin outlines, tight spacing, or lots of fine label art, it may need to be simplified for embroidery. A proof or sample is the fastest way to see whether the design still reads well at final size.


