Logo Patches vs Direct Embroidery Cost: The Fast Buyer Math
The cheaper decoration method on paper is not always cheaper on the invoice. Stitch count, setup charges, patch material, application labor, cap style, and order size all have opinions. Annoying, but useful.
Here is the short version. Direct embroidery usually costs less for simple logos, smaller front placements, clean text, and fast orders. Logo patches often make more sense for detailed artwork, mascot marks, badge layouts, outdoor brands, resale caps, and designs that would turn into a thread blob if stitched directly into a curved crown.
That is the real comparison behind logo patches vs direct embroidery cost. Not “which one is cheaper?” but “which one gives the cleanest logo at the lowest total cost for this cap, this quantity, and this deadline?” Different question. Better answer.
A buyer might need 48 caps for staff, 144 hats for a golf event, 500 pieces for a brewery merch table, or 2,500 caps for retail distribution. The pricing logic shifts at each quantity. Embroidery setup spreads quickly on small runs. Patch setup needs more volume to feel friendly. High stitch counts can wreck the embroidery math. Oversized patches can do the same.
Buyer rule: choose the method that keeps the logo readable, protects margin, and does not make the hat look like it came free with a lawnmower.
A proper quote needs the cap style, logo size, placement, quantity, artwork type, deadline, shipping plan, and end use. Staff uniforms and retail caps are not the same project. A giveaway hat can tolerate a simpler finish. A cap someone is expected to buy cannot look like a rushed conference leftover.
Custom Logo Things reviews both decoration paths before production when the artwork or quantity makes the decision less obvious. Guessing can work. So can buying shoes without checking the size. Neither is a strategy.
When Logo Patches Make More Sense on Custom Hats
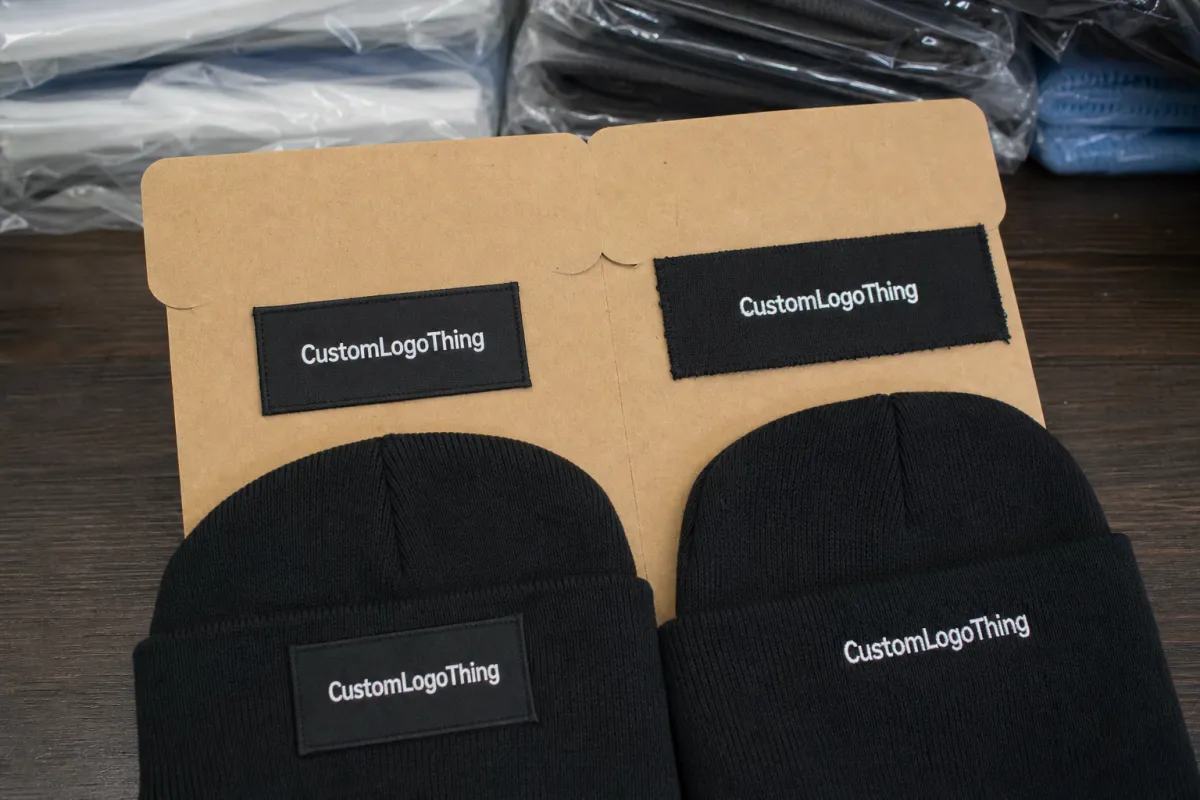
Logo patches for caps include embroidered patches, woven patches, leatherette patches, rubber PVC patches, sublimated patches, and printed fabric patches. They can be sewn on, heat applied, or attached with specialty adhesive-backed processes, depending on the patch material and cap construction.
Patches are strongest when the artwork has detail. Small type, gradients, mascots, badge shapes, outdoor marks, brewery graphics, automotive emblems, and lifestyle logos usually hold up better as patches than as direct thread on a cap panel. A patch creates a separate branded piece with its own surface, edge, texture, and finish.
That sounds cosmetic. It is not. On a basic trucker cap, a clean woven patch or leatherette patch can make the whole product feel more intentional. The blank may be the same, but the perceived value changes because the decoration looks built, not sprayed onto the cheapest possible option.
Patch type matters. Woven patches handle fine detail better than standard embroidery because the threads are thinner and the surface is flatter. Embroidered patches give a classic raised-thread look but still have limits with tiny text. PVC patches work well for rugged, outdoor, tactical, youth, and action-sport branding because they resist moisture and can hold molded shapes. Leatherette patches suit truckers, rope hats, outdoor caps, and casual retail styles. Sublimated or printed patches can reproduce full-color artwork, but they need the right border and backing or they start to look flimsy.
The downside is obvious: a patch is another component. That means production art, possible setup or mold charges, patch sampling, patch manufacturing, application labor, and an extra approval point. More steps. More chances for delays if the buyer approves artwork late or changes size after the patch file is already prepared.
Patch specs are easy to overthink and easy to underspec. A common front patch size is 2.25 to 2.5 inches tall by 2.75 to 3.75 inches wide for a standard 6-panel cap. On a taller structured crown, 3 inches tall can still look balanced. On a low-profile unstructured dad hat, even a 2.5-inch patch can feel large if the front panel is soft. Typical patch thickness runs about 0.8 mm to 2.5 mm depending on the material, backing, and border style. A merrowed border gives a cleaner edge on embroidered and woven patches, while laser-cut or heat-cut edges are common for PU leather and PVC.
Choose patches when the logo has too much detail for clean embroidery, when a raised retail look matters, or when the same patch can be used across caps, beanies, bags, jackets, and uniforms. That last point changes the math. If one 2.5-inch patch supports multiple products, the cost per branded item can start looking much better.
If the blank fabric is organic cotton or recycled polyester, ask for the relevant material certification before you compare decoration methods. GOTS is the right reference for organic cotton claims, GRS is relevant for recycled content, and OEKO-TEX Standard 100 matters when you want the blank, patch adhesive, or lining materials checked for harmful substances. If the supply chain needs social compliance documentation, WRAP or BSCI reports are commonly requested in buyer files.
When Direct Embroidery Is the Smarter Cap Branding Choice
Direct embroidery means thread is stitched straight into the cap panel using a digitized file. The file tells the machine the stitch type, density, direction, color sequence, underlay, and placement. Good digitizing is not optional. Bad digitizing can make a decent logo look warped, bulky, sunken, or weirdly fuzzy.
Embroidery works best for simple logos, bold lettering, monograms, small icons, team names, corporate uniforms, school caps, service businesses, trade crews, and promotional hats where clean branding matters more than a specialty finish. If the design uses one to six colors and does not depend on tiny copy or soft shading, embroidery deserves the first quote.
For simple artwork, direct embroidery often lowers total cost because there is no separate patch to manufacture, store, inspect, and apply. That is why embroidery tends to win in the 24 to 72 cap range, especially for standard front placements.
The cost driver buyers underestimate is stitch count. Thread is cheap. Machine time is not. A small left-front logo with open lettering may run efficiently. A large filled logo with multiple color changes can take much longer to sew and cost more per cap. As a practical planning range, a clean left-chest or front cap logo may digitize into 4,000 to 8,000 stitches, while a denser badge-style mark can land at 10,000 to 18,000 stitches or more. Once you cross that line, embroidery pricing starts acting more like machine time pricing than decoration pricing.
Tiny type is another problem. As a practical rule, lettering under about 0.25 inch tall becomes risky in standard cap embroidery. Some fonts need even more height because thin strokes close up once stitched. Fine outlines, gradients, photographic detail, and tightly packed color changes are also poor candidates. The machine is not a printer. It uses thread. Thread has thickness. Shocking, apparently.
Direct embroidery still has a major advantage: speed. Once the artwork is digitized and approved, production can move straight to sewing. No patch run. No mold wait. No separate component sitting in transit while the hats are ready. For event caps or staff uniforms with a hard deadline, fewer production stages can be the difference between “delivered” and “we have a tracking number, which is not the same thing.”
Most embroidery programs use a sequin or embroidery machine with 6 to 12 heads for volume work, and the process is controlled with sample sew-outs, thread color checks, and placement gauges before bulk production starts. A good production team will test the stitch tension on the actual cap blank, confirm the backing weight, and check that the crown does not pucker after trimming.
Cap Specs That Change the Quote Before Anyone Talks Price
Cap style changes decoration pricing before anyone gets to the unit cost. Structured trucker caps, Unstructured Dad Hats, flat bill snapbacks, five-panel caps, performance caps, rope hats, beanies, bucket hats, and foam-front caps all behave differently under embroidery needles and patch application equipment.
Structured caps hold their shape, which helps embroidery stay cleaner and gives patches a firmer surface. Soft unstructured caps can pucker under dense stitching, especially with large filled areas or poor underlay. A rigid patch on a floppy crown can also sit awkwardly. That is not premium. That is a branding speed bump.
Foam-front caps have their own rules. They can take certain patch styles well because the front panel is broad and smooth, but heat application has to be controlled. Too much heat or pressure can crush the foam or leave marks. Performance caps can also be tricky because technical fabrics may react differently to heat, adhesive, and dense needlework.
Material matters too. Common cap blanks are 100% cotton twill, brushed cotton, acrylic-wool blends, polyester mesh, nylon, and recycled polyester. Each one changes the thread pull, adhesive behavior, and hand feel. Cotton twill usually accepts embroidery cleanly. Mesh can telegraph backing if the stitch density is too high. Recycled polyester often needs a careful heat profile for patch application so the fabric does not distort.
Placement affects pricing too. Front center, left front panel, side panel, back arch, back strap, underbill, and multi-location decoration all require different setup and handling. A standard front logo is easier to run than a front logo plus side hit plus back arch. Every extra location adds machine time, placement control, trimming, inspection, and often another setup charge.
Most front cap decoration falls around 2 to 2.5 inches tall and 3.5 to 4.5 inches wide, but crown height decides what actually works. A low-profile dad hat might only accept a 2.25-inch tall left-front mark before the edge starts wrapping. A higher-profile trucker cap can handle a wider patch or larger embroidery panel without breaking the shape.
Decoration method also interacts with fabric weight. A 6-panel brushed cotton cap around 260 to 300 gsm behaves differently than a lightweight performance cap around 150 to 180 gsm. If the front panel is too thin, heavy stitch density can show the stabilizer through the fabric. If the crown is too stiff, a large patch can look boxy. The quote changes before anyone says “logo size” because the blank itself is part of the decoration system.
Cost, Pricing, and MOQ Ranges for Patches vs Embroidery
Here is the simplest pricing logic. Direct embroidery is usually the better value for smaller runs and simpler logos. Patches start to win when the artwork is detailed, when the same patch will be reused across products, or when the order volume is high enough to spread the patch setup cost.
For direct embroidery on standard caps, a realistic factory-side range is often about $2.25 to $3.75 per unit at 500 pieces for a simple one-location logo on a basic blank, and about $3.80 to $6.50 per unit at 100 pieces once setup and labor are spread over a smaller run. Digitizing is commonly a separate charge in the $25 to $75 range, depending on complexity and revisions. Extra locations, metallic thread, 3D puff, or dense fill can add cost.
For patches, the patch itself can run roughly $0.60 to $1.20 each for woven patches, $0.80 to $1.60 for embroidered patches, $0.90 to $1.80 for leatherette patches, and $1.10 to $2.25 for PVC patches at typical production volumes. Application to the cap often adds another $1.00 to $2.50 per unit depending on sew-on, heat-seal, or adhesive-backed construction. That is why a patch cap can land around $2.50 to $4.00 per unit at 500 MOQ for a basic patch-and-cap program, but it can move higher quickly if the patch is oversized, multi-color, or custom molded.
MOQ ranges usually follow the decoration method. Direct embroidery on stock blanks often starts around 24 to 48 pieces for simple orders, with 72 to 100 pieces being more efficient for cleaner pricing. Woven and embroidered patches often make sense from 100 to 300 pieces, while custom PVC or molded patches may be quoted from 100 to 500 pieces depending on size and tooling. If a supplier is offering custom patch work below those levels, ask where the cost is hiding. It is usually in setup, freight, or the blank itself.
The real comparison is not only unit price. It is total landed cost. That includes sample charges, digitizing, patch tool or screen fees, shipping, carton packing, and quality control. A cap that looks $0.40 cheaper before freight can be more expensive by the time it reaches the warehouse.
Sampling matters too. A typical sample sequence is artwork proof, digital placement mockup, one sew-out or patch proof, and then pre-production approval. For patch programs, some buyers request a physical first article because color and edge finish can shift between a screen mockup and the real material. That sample step can add 3 to 7 business days and a small fee, often credited back on larger orders.
For compliance-heavy buyers, ask early whether the blank factory or decoration partner can provide WRAP, BSCI, GRS, GOTS, or OEKO-TEX Standard 100 documentation where relevant. Certifications do not make the cap better by magic, but they do reduce procurement friction when the buyer needs evidence for the file. No one wants a one-page purchase order becoming a six-email certification scavenger hunt.
Process and Timeline From Artwork to Finished Caps
The production path is usually the same whether the buyer chooses patches or embroidery. It just takes more stops when a patch is involved. The cleanest timeline begins with artwork in vector format, ideally AI, EPS, or high-resolution PDF. Raster files can work for reference, but they need cleanup before digitizing or patch layout.
Step one is art review. The supplier checks logo dimensions, minimum stroke thickness, thread or patch color count, placement, and cap compatibility. Step two is the mockup or digitizing stage. Direct embroidery usually needs a digitized file first; patch work may need both a digital layout and a production proof for shape, border, and backing. Step three is sample approval. A sew-out or patch sample confirms proportions, thread tension, edge finish, and color balance. Step four is bulk production, trimming, backing, assembly, and final inspection.
Typical timing for a simple direct embroidery order is 18 to 22 business days from approved artwork to finished goods when the blank is in stock and no major revisions are needed. That often breaks down as 1 to 2 business days for digitizing, 1 to 2 business days for sample approval, 7 to 12 business days for production, and 3 to 5 business days for shipping and receiving. Patch programs can run a little longer because patch manufacture and attachment add an extra production stage.
A reasonable patch timeline is often 20 to 25 business days, depending on patch type. Woven patches are usually quicker than PVC or molded rubber patches because tooling and curing can take longer. If the order includes custom color matching, metallic thread, or special adhesives, plan for additional approval time. Fast turn is possible, but only if the artwork is final and the buyer does not decide to “just make the logo a little bigger” after production starts.
Inspection checkpoints should be specific. At minimum, check the blank cap color and size ratio, thread or patch color against the approved swatch, placement within about 2 to 3 mm on the front panel, backing coverage, adhesion strength or stitch integrity, loose threads, and carton counts. For retail goods, it helps to inspect a carton sample from the first 10 percent of the run and then do a final random check on the packed cases.
Mistakes That Make Custom Caps Look Cheap or Cost More
The fastest way to make a good cap look budget is to use a decoration method that fights the logo. Tiny text, skinny outlines, and detailed gradients rarely survive direct embroidery on a curved crown. Likewise, an oversized rigid patch on a soft low-profile hat can look like an afterthought glued to the front panel.
Another common mistake is ignoring stitch count or patch area. Buyers see the logo, but the machine sees labor. A dense, filled embroidery file can cost more than expected if the digitizer did not reduce unnecessary stitches. A patch with too much border area can also cost more than the design itself deserves.
Approval delays are another money leak. If the buyer waits to approve artwork or wants to change the patch shape after samples are already in motion, the schedule slips and rush fees show up. That is especially painful on orders that need heat-seal applications or special backing because the supplier may need to redo the entire test cycle.
Bad cap selection also causes trouble. A heavy 3D puff embroidery on a thin performance cap can distort the front. A PVC patch on a moisture-sensitive blank may need a different application method. A high stitch load on a lightweight 5-panel cap can show puckering around the seams. The wrong combo can turn a clean logo into a production problem.
Finally, do not skip the quality check. Look for thread breaks, misaligned patch corners, lift at the edge, melted backing, inconsistent thread sheen, and color drift between sample and bulk. If the supplier cannot show a control sample, a first article, and a final carton check, the “cheap” price may already include the defect rate.
How to Get a Quote That Actually Compares the Options
Send the supplier the logo file, cap style, intended placement, quantity, desired ship date, and whether the hat is for retail, staff, events, or resale. That context changes the recommendation more than most buyers expect.
Ask for both options when the artwork is borderline. A good quote should show direct embroidery, woven patch, embroidered patch, or PVC patch if all of them are technically possible. That lets you compare not just unit price, but also setup, sample fees, and timing.
Ask these questions up front: What is the digitizing fee? What is the patch setup or mold cost? What is the MOQ per decoration method? Can you supply a sew-out or physical patch sample? What is the lead time after approval? Which certifications are available for the blank or decoration process if the buyer file requires GOTS, GRS, OEKO-TEX Standard 100, WRAP, or BSCI?
If you are comparing resale caps, ask for the landed cost per unit at 100, 250, and 500 pieces. If you are comparing team or event caps, ask for the earliest realistic ship date at the exact quantity. Those two numbers usually reveal the better path faster than any sales pitch.
FAQs
Are patches always more expensive than embroidery?
No. At very low quantities, direct embroidery is often cheaper. At higher quantities, a reusable woven or leatherette patch can bring the unit cost down, especially if the same patch will be used on hats, bags, and jackets.
What is the best patch type for detailed logos?
Woven patches usually handle fine detail best because the weave is tighter and flatter than standard embroidered patch fill. If the artwork needs a premium molded look or weather resistance, PVC can work well, but it usually carries a higher unit cost.
What is the typical minimum order quantity?
Direct embroidery often starts around 24 to 48 caps. Woven and embroidered patches commonly start around 100 to 300 pieces. PVC and molded patches are often quoted from 100 to 500 pieces depending on size and tooling.
How long does production usually take?
For in-stock blanks and approved artwork, direct embroidery often takes 18 to 22 business days total. Patch programs often take 20 to 25 business days because there is an extra component to produce and approve.
Which decoration is better for retail hats?
Patches usually feel more retail-ready when the logo is detailed or needs a premium badge look. Direct embroidery is better when the brand wants a cleaner, more classic finish and the logo is simple enough to stitch well.
What certifications should I ask for?
Ask for GOTS when the blank is organic cotton, GRS when recycled content matters, OEKO-TEX Standard 100 when you want material safety documentation, and WRAP or BSCI when social compliance documents are part of the sourcing file.
What should I request in a sample?
Ask for a digital mockup, a sew-out for embroidery, or a physical patch proof showing border, color, backing, and placement. Check color match, edge quality, stitch tension, and how the decoration sits on the actual cap crown.
Can I compare both options on the same quote?
Yes. That is the smartest way to buy when the logo is not an obvious embroidery or patch candidate. Ask for both prices at the same quantity so you can compare total landed cost, not just decoration cost.


