Mini Custom Stickers for Small Spaces With Big Brand Impact
A tiny jar lid, lip balm tube, sample pouch, candle tin, or thank-you card can carry more brand signal than its size suggests. In many packaging layouts, mini custom stickers are the first element a buyer sees, touches, scans, peels, or remembers.
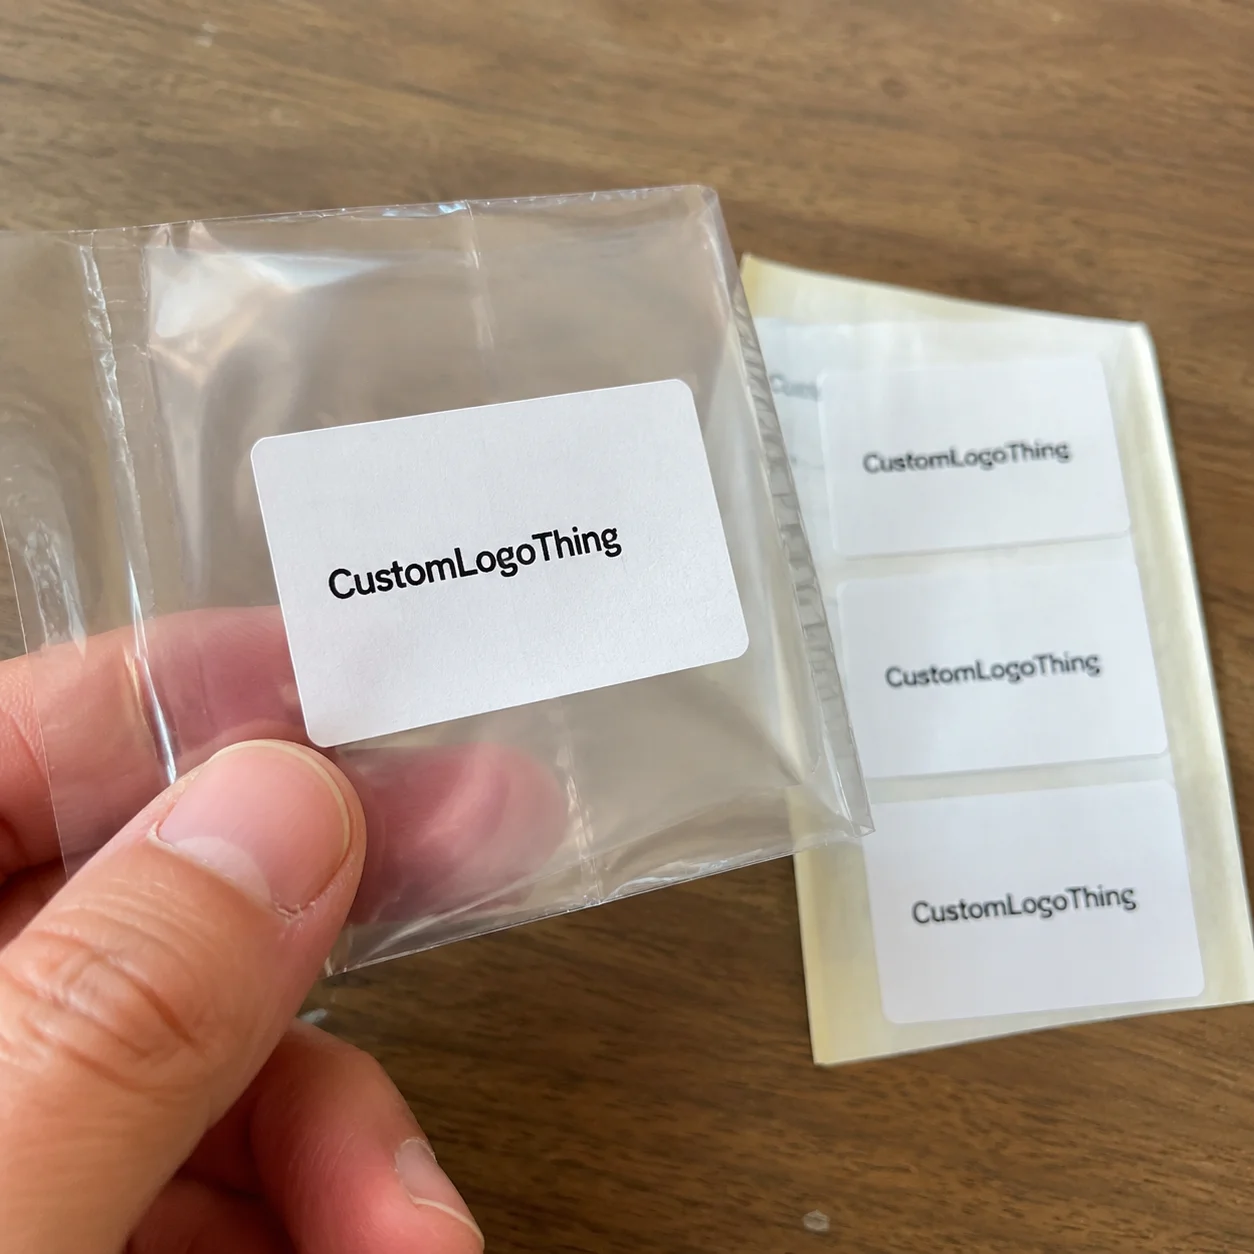
Mini custom stickers are small-format adhesive labels or decals made with custom artwork. Most fall around 0.5 to 2 inches wide, although the useful size depends on the surface, shape, viewing distance, and amount of information that must stay readable. They are used as packaging seals, logo stickers, sample labels, promotional inserts, event handouts, stationery accents, and small retail add-ons.
Small stickers are less forgiving than large labels. Fine type, delicate borders, pale colors, and thin logo strokes can look clean on a zoomed-in screen, then turn muddy once printed at one inch wide and trimmed at production speed. Adhesive choice becomes more visible too. One lifted corner on a tiny seal can make the whole package feel underbuilt.
It helps to separate the category before choosing specs. A decorative mini sticker is mostly about visual appeal. A functional mini label may need a scent name, SKU, QR code, batch detail, or compliance-adjacent instruction. A closure seal needs enough tack and flexibility to bridge a flap or lid. A barcode sticker needs scan reliability, not just attractive artwork. A logo sticker for branded packaging should look crisp, centered, and consistent across the full run.
The practical path is to choose the sticker around the job it must do. Material, printing, adhesive, size, shape, finish, timeline, and cost all connect. Get those choices aligned early, and small stickers can look polished without becoming overbuilt.
How Small-Format Sticker Printing Actually Works
Sticker production usually follows a clear sequence: artwork check, layout on sheets or rolls, printing, coating or lamination, cutting, weeding or finishing, inspection, packing, and shipping. The workflow sounds straightforward. Each step still affects how a small sticker looks in hand.
Digital printing is common for mini custom stickers because setup is flexible, several designs can often run together, and short or moderate runs do not require expensive plates. For repeat orders in higher quantities, flexographic or offset-style production may make more sense because the press can run efficiently once plates, dies, and color targets are dialed in. The right method depends on quantity, repeatability, finish, and color expectations.
Buyers often see two cutting terms. Kiss-cut means the sticker face is cut while the liner stays intact, so pieces peel easily from a sheet or roll. Die-cut often means the sticker and backing are both cut to the final shape, creating a standalone piece that works well for inserts, giveaways, and retail-style distribution.
Material selection does a lot of quiet work. White paper is economical for dry indoor use. Coated paper gives better print holdout. Kraft paper adds a natural look, though fine detail can lose contrast on the brown base. White BOPP handles moisture better than paper. Clear film can disappear on glass or plastic, provided the artwork has enough opacity. Vinyl-style materials are often used where durability and flexibility matter. None is automatically best.
Finish changes both protection and feel. Gloss coating can make color appear deeper and brighter. Matte finish gives retail packaging a softer look. Soft-touch laminate feels premium but can show oils from handling. UV coating adds scuff resistance, while film laminate usually provides better protection for products that will be rubbed, chilled, or handled frequently.
Adhesive deserves the same attention as artwork. Permanent adhesive suits many boxes, tins, and dry containers. Removable adhesive is useful for temporary promotions or reusable surfaces. Freezer-grade adhesive is built for cold-chain conditions. Repositionable adhesive gives applicators a little forgiveness, but it may not have the same final bond as a permanent option. Surface energy, temperature, curve radius, dust, and moisture all matter.
Production callout: A sticker can be printed beautifully and still fail if the adhesive is wrong for the surface. For small seals and curved containers, ask about both face stock and adhesive, not only print quality.
Key Specs That Decide Whether Tiny Stickers Look Premium
Size and shape come first. Circles, squares, rectangles, ovals, and simple custom shapes usually perform better at mini scale than intricate silhouettes with thin points or narrow bridges. A 1-inch circle can look excellent as a closure seal. A 0.75-inch custom shape with sharp tips may be harder to cut cleanly and peel without damage.
Artwork should be simplified before it is reduced. Keep the logo mark bold, remove nonessential copy, increase spacing, and choose contrast strong enough to survive trimming, shelf lighting, and real handling. A good small-format design usually carries one message: brand, flavor, scent, QR action, seal, or decorative accent. Trying to fit a full label panel into a tiny sticker is one of the fastest ways to lose clarity.
Type size is a common trouble spot. As a practical rule, avoid tiny text below roughly 5 to 6 pt unless the printer has confirmed the method, stock, and artwork can support it. Reversed-out type, especially white letters on a dark background, often needs to be larger and bolder. Hairline strokes below about 0.25 pt can disappear, break, or fill in depending on print method and coating.
Bleed, safe zone, and cut tolerance protect the design from normal production variation. Many sticker jobs use about 0.0625 inch bleed outside the trim and a safe zone of roughly 0.0625 to 0.125 inch inside the cut line. A thin border placed close to the edge may look uneven if the cut shifts by even a fraction of a millimeter. That is not a production disaster; it is a normal converting tolerance showing up in a very small format.
Color needs practical review. Artwork built in RGB can shift once converted to CMYK. Spot color matching may be possible, but it should be requested early, especially for brand-critical colors. Clear stickers may need white ink behind the logo so the design does not disappear on dark glass, amber bottles, or colored plastic. Metallic, neon, pastel, and very dark designs need extra proofing because they can behave differently across materials and coatings.
Finish should match the use case. Matte works well for understated package branding and premium stationery. Gloss gives punch to bright colors and promotional decals. Laminate helps stickers survive repeated handling. Clear film suits glass jars and plastic bottles if the adhesive and white ink setup are correct. Paper remains a smart option for dry indoor applications, sample cards, bakery boxes, and many short-life uses.
Quality control is not only a final glance at the sheet. Small stickers should be checked for registration, clean cut edges, centered artwork, readable text, color consistency, liner release, adhesive transfer, and packing count. For roll labels, core size, unwind direction, gap spacing, and roll tension also affect whether the order is easy to use.
Pricing, MOQ, and Unit Cost for Mini Sticker Orders
Mini stickers look inexpensive because they are small, but the quote is not based only on square inches of material. Setup, artwork handling, press time, waste, coating, cutting, packing style, inspection, and shipping all contribute. A tiny clear-film sticker with white ink, laminate, and a custom shape can cost more than a larger plain paper label.
The main cost drivers are quantity, artwork count, material type, finish, adhesive, shape complexity, format, and quality requirements. Roll labels often make sense for packaging lines or repeated hand application. Sheets can be efficient for small batches, kits, and multiple designs. Individually cut stickers are more labor-intensive to finish and pack, but they work nicely for inserts and giveaways.
MOQ, or minimum order quantity, exists because the supplier still has to review files, prepare proofs, set up printing, cut the material, and pack the order even if each sticker is only one inch wide. The labor does not shrink at the same rate as the sticker. That is why a 100-piece order may carry a much higher unit cost than a 2,500-piece order.
Volume lowers unit cost because setup time is spread across more pieces, presses run more efficiently, and material waste becomes a smaller share of the total. A short run might land around $0.20 to $0.60 per piece depending on finish and packing, while moderate runs can move closer to $0.04 to $0.15 per piece. High-volume roll production may go lower, but only after specs are stable and the run is efficient. These are planning ranges, not fixed pricing.
| Order Scenario | Typical Format | Common Specs | Planning Cost Range | Best Fit |
|---|---|---|---|---|
| Event or launch batch | Sheets or individual cuts | 1 to 2 inch paper or BOPP, standard shape | $0.18 to $0.60 each for small quantities | Handouts, sample kits, thank-you cards |
| Packaging batch | Sheets or rolls | White BOPP or coated paper, matte or gloss finish | $0.06 to $0.20 each for moderate quantities | Jars, tins, mailers, pouches, boxes |
| Repeat fulfillment run | Rolls | Machine-friendly unwind, stable artwork, tested adhesive | $0.02 to $0.10 each at higher volume | Ongoing retail packaging or production lines |
For a clean quote, send exact size, shape, quantity, material preference, finish, adhesive need, number of artwork versions, delivery destination, and required format. If the stickers will be applied to branded packaging, include a photo of the actual surface. Photos help flag risks such as tight curves, textured coatings, raised seams, or limited application space before production begins.
Process and Timeline From Artwork File to Finished Stickers
A typical order starts with artwork and specs, then moves to quote, proof, proof approval, production, finishing, quality checks, packing, and shipping. The clock usually starts after proof approval, not after the first email or form submission. That detail matters if you are planning a launch date, trade show, seasonal promotion, or product restock.
Proofing is the buyer’s best checkpoint. A proof should confirm size, cut line, bleed, safe zone, orientation, copy, color setup, quantity, and format. It may not perfectly simulate the final feel of matte laminate, gloss coating, adhesive tack, or opacity on clear stock. For color-critical or surface-sensitive work, ask whether a physical sample or short pilot run is available.
Clean vector artwork speeds up production. AI, EPS, PDF, or SVG files with outlined fonts and clear cut paths are usually easier to process than screenshots or low-resolution PNG files. Confirmed dimensions, standard shapes, standard materials, fast proof approval, and no last-minute copy changes can keep many jobs in the range of about 5 to 10 business days for production, plus transit. More complex work may take 12 to 20 business days or longer.
Several details can slow an order: custom dies, specialty laminates, white ink on clear film, multiple designs, split shipments, color matching, barcode verification, or unclear surface-use requirements. A small sticker for a dry paper card is straightforward. A tiny seal for a chilled glass jar with condensation is a different technical problem.
Production time and transit time should be planned separately. If you need stickers for kitting, product filling, or carton packing, build in a cushion for shipping delays and receiving inspection. For packaging that sees moisture, refrigeration, curved surfaces, oily contents, or frequent handling, a test run is not wasted money. It is usually cheaper than discovering lift, curl, or smearing after thousands of pieces are packed.
Step-by-Step Guide to Ordering the Right Mini Stickers
Ordering small stickers gets easier when the decision process follows the package, not the artwork file. Start with use, then surface, then artwork, then production format. That sequence prevents a lot of expensive backtracking.
- Define the job. Decide whether the sticker must seal packaging, display a logo, identify a flavor, carry a QR code, decorate mailers, label samples, or support a giveaway. One sticker should not be asked to do five jobs at one inch wide.
- Measure the real surface. Use a ruler or caliper on lids, tubes, jars, pouches, boxes, and tins. On curved containers, a few millimeters can change whether the sticker lays flat or wrinkles near the edge.
- Choose material and adhesive together. Paper may be perfect for dry cards and boxes, while BOPP or vinyl-style film is safer for bottles, jars, and handling. If the item is refrigerated, ask about cold-temperature adhesive.
- Simplify the artwork. Prioritize one logo, one message, or one scannable element. Leave breathing room around the design, and keep key information away from the trim edge.
- Pick the format. Rolls are efficient for repeated application and can be configured for unwind direction. Sheets are convenient for short runs and grouped designs. Individually cut pieces work well for inserts, events, and retail-style giveaways.
- Review the proof at actual size. Print the proof on paper if possible, trim it roughly, and look at it from normal viewing distance. If you cannot read it comfortably, the final sticker will not become clearer because it is printed professionally.
If you are building a broader packaging set, coordinate sticker decisions with other elements such as Custom Labels & Tags, inserts, sleeves, mailers, and Custom Printed Boxes. Consistent materials and color expectations make the whole packaging design feel intentional rather than pieced together.
Common Mistakes That Make Small Stickers Hard to Use
The most common mistake is shrinking a full-size label design into a mini format. The result is predictable: unreadable text, crowded spacing, weak shelf impact, and artwork that looks busy instead of branded. Small stickers need their own layout, not a reduced copy of a larger label.
Thin borders create another problem. Normal cutting tolerance can make a narrow border look heavy on one side and light on the other, especially on circles and ovals. If a border is part of the design, make it thick enough to tolerate slight movement, or move it farther inward so the eye does not judge every edge.
Adhesive mismatch causes many field issues. Standard paper stickers may struggle on cold jars, textured boxes, oily containers, flexible pouches, waxy coatings, or plastics with low surface energy. A flexible pouch that bends after application can stress the adhesive and cause edge lift, even if the sticker looked fine on the flat proof.
Surface preparation matters. Dust, condensation, powder, oil, and wax can prevent a good adhesive from bonding evenly. Apply stickers to clean, dry surfaces whenever possible, and avoid placing seals over raised seams, sharp folds, or areas that flex heavily during packing and shipping.
File problems can also weaken the final result. Low-resolution logos, flattened screenshots, missing fonts, no bleed, unclear cut lines, and RGB-only colors all create risk. For QR codes and barcodes, test at actual size before production. Scan distance, contrast, quiet zone, and print gain can affect readability.
Application workflow deserves a quick check. Peeling from the wrong angle can stretch small shapes. Roll orientation may slow packers if the leading edge is awkward. Machine application requires tighter control over roll direction, liner type, gap, core size, and label stiffness. If stickers are part of a larger product packaging system, review them as production components, not decorative extras.
What to Check Before You Request a Sticker Quote
Before requesting pricing, gather the basics: final size, shape, quantity, material, finish, adhesive requirement, application surface, indoor or outdoor use, artwork file, delivery destination, and preferred in-hand date. If you already know whether you need rolls, sheets, or individually cut pieces, include that too.
Test on the real surface whenever possible. Glass, plastic, metal, textured board, coated mailers, refrigerated containers, and curved tubes all behave differently. A sticker that bonds well to a paper insert may not perform the same way on a cold bottle or powder-coated tin. For sustainability-related packaging decisions, resources from the Forest Stewardship Council and the U.S. Environmental Protection Agency can help buyers understand paper sourcing and recycling considerations, though recyclability depends on the full package structure.
If readability is uncertain, prepare two artwork versions: one with fuller branding and one simplified for the small format. The simplified version often wins. For mini QR stickers, confirm scan distance and keep the quiet zone clear. For write-on stickers, ask whether the finish accepts ballpoint, gel pen, marker, or thermal transfer printing.
Ask for production input if the sticker touches food packaging, faces moisture, needs removable adhesive, must match a brand color, or will be applied by machine. You can also coordinate the sticker with other Custom Packaging Products so the package branding feels consistent across labels, boxes, inserts, and mailer components.
Mini custom stickers are practical, low-footprint branding tools, but they perform best when size, material, finish, adhesive, and use case are chosen together. Treat them like real packaging components rather than tiny afterthoughts. The finished result will look sharper, apply faster, and support the brand more reliably.
FAQ
What size counts as mini custom stickers?
Mini custom stickers are usually small-format pieces around 0.5 to 2 inches, though the right size depends on the surface, artwork, and viewing distance. A one-inch circle can work well for a logo seal, but product details, QR codes, or flavor names may need more room to stay readable.
Are mini logo stickers better on rolls or sheets?
Rolls are usually better for repeated packaging work because they are faster to peel and can be set up for hand or machine application. Sheets are practical for low-volume packing, event handouts, sample kits, and orders with several designs grouped together.
What material should I choose for small custom stickers on jars or bottles?
For glass or plastic jars and bottles, white BOPP, clear film, or vinyl-style materials often handle moisture and handling better than uncoated paper. If the container will be refrigerated, washed, or exposed to condensation, ask about moisture-resistant material, laminate, and an adhesive suited to cold or damp conditions.
How much do mini personalized stickers cost?
Cost depends on quantity, size, material, finish, adhesive, number of designs, cut shape, and whether the stickers are supplied on rolls, sheets, or individually cut. The unit cost usually drops as quantity increases because setup, proofing, and cutting time are spread across more stickers.
Can mini custom stickers include QR codes or tiny text?
Yes, but the code or text must be sized for real-world scanning and reading, not just screen previewing. Use high contrast, keep QR codes away from the cut line, test scans at actual size, and limit fine text to the details that truly need to be there.


