Order Bass Drum Stickers Custom for Cleaner Band Kits
The bass drum is often the largest logo surface a band owns. Plenty of groups still treat it like an afterthought. Brilliant. Put the name where nobody can miss it, then make it look like someone remembered five minutes before doors.
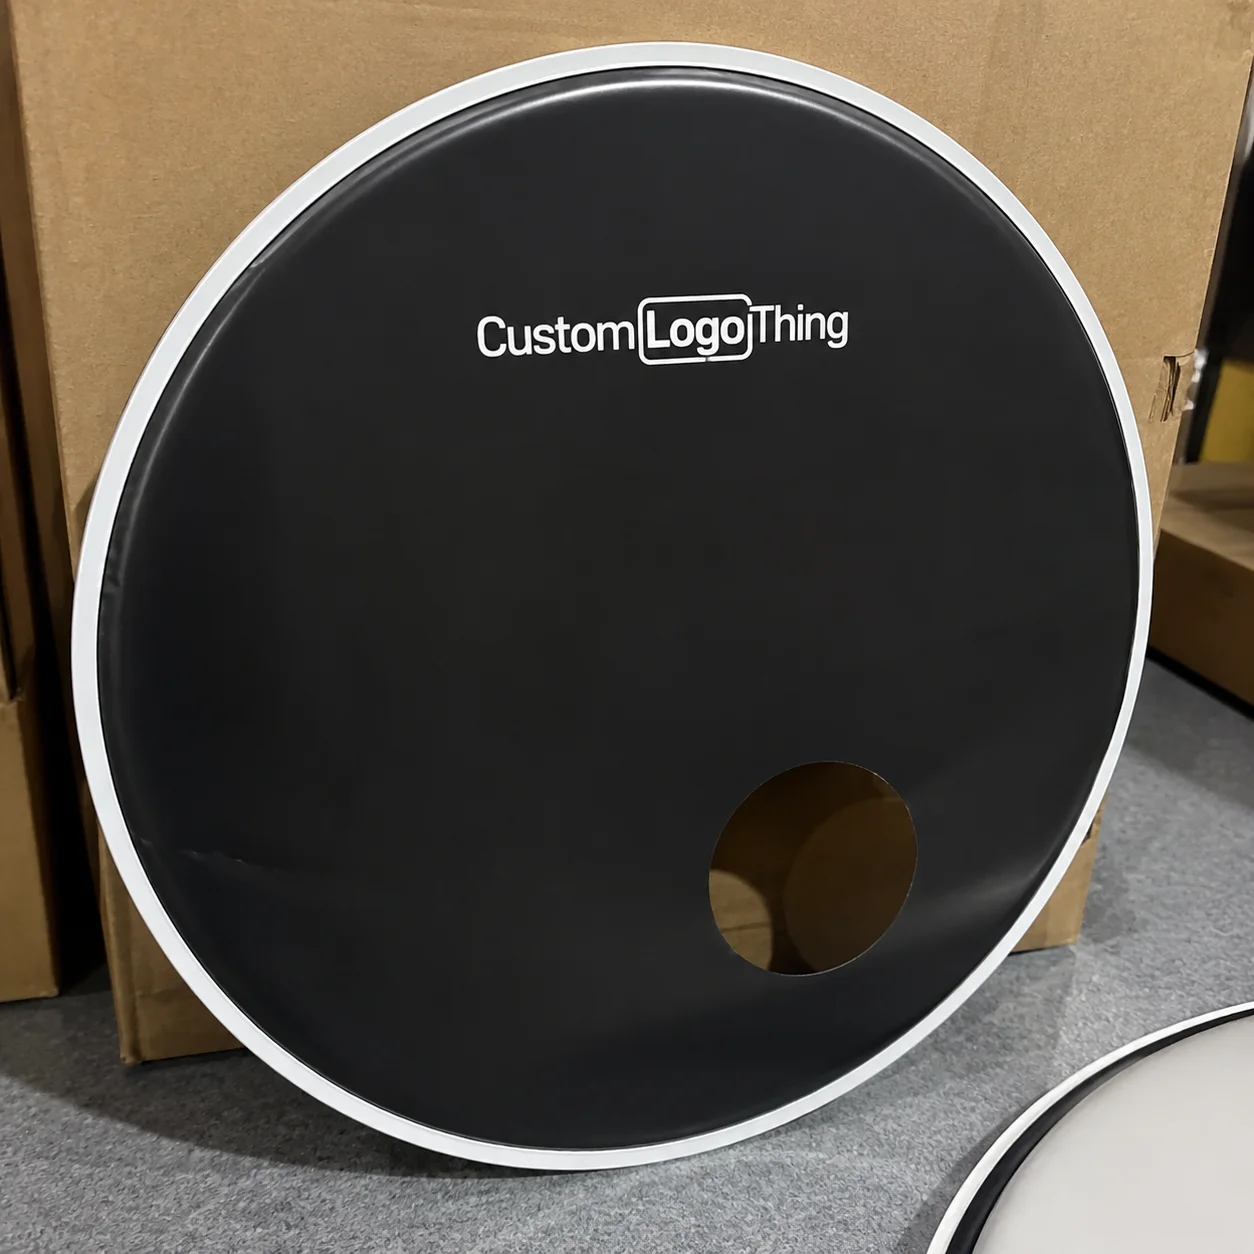
If you are ordering bass drum stickers custom for a band kit, school program, church stage, studio set, event sponsor, or rental backline, the job is simple: make the drum look intentional. That means the right size, the right adhesive, readable artwork, and a finish that behaves under lights.
What Bass Drum Stickers Custom Actually Do on Stage
Bass drum decals are vinyl graphics applied to the resonant head, usually the front head facing the audience. They can show a band name, tour logo, worship team mark, school badge, sponsor graphic, studio brand, or one-off event identity. On stage, that front head gets more visibility than most guitar cases, amp badges, and merch table signs combined.
A basic sticker is usually a printed piece with standard adhesive and a simple shape. A die-cut vinyl decal follows the outline of lettering or a logo instead of sitting inside a rectangle. A larger printed drum head decal may cover a big portion of the head with full-color artwork. A removable temporary graphic is built for short-term campaigns, sponsor swaps, one-night shows, and rental kits that need to change branding without drama.
These decals show up at live gigs, festivals, marching band events, rehearsal studios, content shoots, school concerts, and branded backline setups. They also matter for video. A 12-inch logo that looks fine in a close camera shot may disappear from the back of a 400-seat room. Scale matters. Contrast usually matters more.
Buyer reality: a good bass drum decal is not magic. It needs the right size, adhesive, finish, artwork file, and installation method, or it will look like someone attacked the drum with a bumper sticker.
From a print buyer’s point of view, the logic is familiar. Good package branding is not just “put the logo somewhere.” It is material, surface, viewing distance, print method, handling conditions, and shipping protection working together. Drum graphics follow the same rules, just with more cymbals around them.
How Custom Bass Drum Decals Work From Artwork to Application
The production path is straightforward if you give the supplier useful information. You choose the decal size, shape, vinyl type, print style, finish, and quantity. The manufacturer checks the artwork, sends a digital proof, waits for approval, then prints, cuts, packs, and ships the order.
That proof is not decoration. Read it.
The most common formats are single-color cut vinyl lettering, full-color printed decals, contour-cut logos, circular badge decals, and larger partial-cover graphics. Simple white vinyl lettering on a black drum head is clean, sharp, and usually cost-effective. Full-color printed vinyl handles gradients, illustrations, sponsor marks, photos, and layered artwork. Contour-cut logos sit between those two: more shape control than a rectangle, less coverage than a full head graphic.
For artwork, vector files are best. AI, EPS, SVG, and clean PDF files usually give the printer crisp edges and scalable cut lines. High-resolution PNG or PSD files can work for printed decals if the file is sized correctly, ideally at 300 dpi at final size for detailed graphics. Screenshots from social media are usually trash for print. Sorry, but a 900-pixel Instagram download is not a production file.
Adhesive selection depends on use. Removable vinyl is better for rentals, school events, temporary sponsors, or rotating graphics. Permanent vinyl is better for longer touring use and decals expected to stay put for months. Specialty low-tack materials may be worth asking about if the drum head is delicate, coated, textured, or expensive to replace.
Finish changes how the decal behaves under lights. Matte reduces glare and looks controlled in video. Gloss pops in photos but can reflect hard stage lighting. Satin sits in the middle. Laminated prints add scuff resistance and help protect ink on larger full-color decals, though they also add thickness and can make installation slightly less forgiving.
Installation is not complicated, but it punishes rushing. Clean the drum head. Dry it completely. Align the decal with masking tape. Use a squeegee, felt-edge applicator, or clean plastic card. Work from the center outward. Avoid stretching thin vinyl, especially around curved lettering or a port hole. If transfer tape is included, peel it back slowly at a low angle after the decal bonds.
Size, Material, Finish, and Adhesive Specs That Matter
Common bass drum head sizes include 18, 20, 22, 24, and 26 inches. A 22-inch bass drum is common for rock, pop, church, and studio kits, but that does not mean a 22-inch decal belongs on it. The visible space is smaller once you account for the rim, curvature, brand marks, tension rods, lighting shadows, and any microphone port.
Do not order based on vibes. Measure the actual head diameter, then measure the available graphic area. Decide whether the decal should sit centered, hug the lower curve, wrap around a port hole, or occupy a large middle section. For many 22-inch heads, centered logos often land around 10 to 16 inches wide. Wider band-name layouts can work, but only if the letters are not running into hardware or the head edge.
Port holes cause more layout problems than buyers expect. A logo that looked perfectly centered in the proof can look awkward once it collides with a 4-inch or 5-inch mic port. Yes, this happens constantly. Send a front-facing photo with the port measured from the nearest edge, plus the port diameter. A supplier can only design around a hole they know exists.
Vinyl thickness and flexibility matter. Thinner vinyl, often around 2 to 3 mil before adhesive, conforms better to mild curves and is easier to work into small lettering. Thicker laminated prints, often around 4 to 6 mil total construction depending on film and laminate, offer better scuff resistance but may be less forgiving on textured or coated heads. If the head surface is rough, aged, oily, or dusty, even good vinyl can struggle.
Cut vinyl versus printed vinyl is not a quality contest. It is a use-case choice. Cut vinyl is sharp, durable, and clean for simple one- or two-color logos. Printed vinyl handles gradients, photos, complex artwork, sponsor marks, and multi-color branding. If your logo has tiny distressed texture, hairline outlines, or five overlapping shadows, expect the supplier to simplify it or recommend print instead of cut vinyl.
Color contrast deserves more respect. White logos on black heads are classic because they read from 30 feet away. Black on white can also work if the drum head is clean and lighting is kind. Dark gray on black may look tasteful up close and invisible from row ten. If the drummer is paying for a decal nobody can read, that is not minimalism. That is a donation to confusion.
Packaging and shipping affect the final result too. Decals should ship flat when practical or rolled around a proper core if they are large. Transfer tape should be protected from dust, wrinkles, and edge lifting. This is the same discipline used in retail packaging, Custom Printed Boxes, and other printed materials: the product is only finished if it arrives usable.
Cost and Pricing Factors for Custom Drum Stickers
Pricing depends on size, quantity, vinyl type, print method, number of colors, contour cutting, lamination, artwork cleanup, proofing, rush timing, and shipping. One 18-inch full-color contour-cut graphic is a very different job from 100 simple white vinyl band-name decals.
Small name decals may land around $3 to $8 each in moderate bulk, depending on size and material. Larger full-color bass drum decals can run around $18 to $45 each at lower quantities, and specialty oversized or laminated pieces can go higher. One-off orders often feel expensive because setup, file checking, machine time, test cuts, waste, proofing, and packing still happen whether you order one or fifty. Fun little manufacturing reality nobody puts on a poster.
Minimum order quantities vary. Some suppliers allow a single custom decal. Better unit costs often start around 10, 25, 50, or 100 pieces depending on size and print type. Bulk makes sense for touring bands, drum shops, schools, event producers, churches with multiple kits, and rental companies that need backup graphics before the emergency hits.
| Decal Type | Best For | Typical Unit Range | Tradeoff |
|---|---|---|---|
| Single-color cut vinyl lettering | Simple band names and clean logos | $3-$12 each in small to mid runs | Sharp and durable, but limited for gradients or photos |
| Full-color printed vinyl | Complex logos, illustrations, sponsor graphics | $10-$35 each depending on size | Great color range, but print quality depends heavily on artwork |
| Laminated contour-cut decal | Touring kits and frequent handling | $18-$45 each at lower quantities | Better scuff resistance, slightly thicker installation feel |
| Temporary removable decal | Events, rentals, rotating sponsors | $8-$30 each depending on size | Easier removal, shorter service life |
Hidden costs are where buyers get annoyed. Artwork recreation can add $25 to $100 or more if the “logo file” is actually a fuzzy JPEG. Rush production can add 15% to 50%. Oversized flat shipping can cost more than expected. Replacement decals after bad installation are not usually free. Ordering the wrong size is also not the supplier’s spiritual burden.
Ask for itemized quotes that separate decal cost, setup, artwork help, shipping, and rush fees. That lets you compare apples to apples instead of mystery soup. If you already buy Custom Labels & Tags or other branded pieces, you know the drill: specs control price, and vague requests create vague quotes.
Process and Timeline: From Quote to Stage-Ready Decals
A clean buying process saves days. Start by measuring the drum head. Choose placement. Prepare artwork. Request a Quote. Review the digital proof. Approve production. Receive the order. Install carefully. None of those steps is glamorous. All of them prevent the usual mess.
Quote responses often take 1 to 2 business days. Artwork proofing may take 1 to 3 business days, especially if the supplier needs to adjust cut lines, simplify artwork, or ask for better files. Standard production can take several business days after proof approval. Shipping depends on destination, service level, and whether the decals are shipped flat or rolled.
Rush production can help, but it cannot fix unusable artwork, unclear measurements, or a buyer who approves the wrong proof and then acts surprised. Proofs exist for a reason. Check spelling, logo version, orientation, decal size, cut line, finish, color, and port hole clearance before approval.
The manufacturer will usually need the drum head size, final decal dimensions, quantity, artwork file, color preferences, finish, intended use, deadline, and shipping location. For bass drum stickers custom orders with port holes, send a straight-on photo. Add a ruler or measuring tape in the photo if possible. That one extra image can prevent a layout that technically matches the measurements but looks wrong on the actual kit.
Receiving and storage are simple. Keep decals flat or loosely rolled around their core. Store them away from heat, moisture, and direct sun. Do not leave them in a van window before a summer festival unless you enjoy watching adhesive and transfer tape get weird. Most pressure-sensitive vinyls behave best when installed around normal room temperature, commonly about 60°F to 80°F, though the exact range depends on the film.
Plan backward from the gig date. Leave time for one proof revision, production, transit, and a calm installation window. Ordering the night before soundcheck is not a procurement strategy. It is chaos wearing a lanyard.
For buyers who also manage product packaging or branded packaging, this timing should feel familiar. Printed work has checkpoints. The same patience you give Custom Packaging Products should apply to stage graphics that will sit under lights, cameras, and audience phones.
Common Ordering and Installation Mistakes to Avoid
The biggest mistake is ordering a decal too large for the visible head area. A 20-inch graphic does not belong on every 22-inch bass drum head once hardware, curvature, brand marks, and port placement enter the chat. Leave breathing room. A slightly smaller logo that reads clearly beats a huge one that looks trapped.
Artwork mistakes come next: low-resolution files, thin strokes, tiny lettering, muddy gradients, and fonts that are not outlined or supplied. For cut vinyl, very thin lines may lift during weeding or installation. For printed vinyl, low-res texture can become soft, jagged, or blotchy. If the design needs to be readable from 20 to 50 feet, small decorative details are often wasted.
Ignoring stage lighting is another classic problem. Glossy decals can glare under strong front lights. Low-contrast colors can vanish in photos and video. Matte or satin finishes usually behave better for filming, especially on black heads. Gloss can still be right for bright sponsor graphics or high-energy branding, but test the look under actual lights if the event matters.
Adhesive mismatch creates avoidable pain. Permanent vinyl may be too aggressive for temporary campaigns, rotating sponsors, or rental kits. Removable vinyl may not survive months of loading, unloading, case rub, drum head flex, and outdoor conditions. If the kit tours hard, say that upfront. If the decal only needs to survive one conference, say that too.
Installation mistakes are boring and expensive. Applying over dust, skipping alignment, touching adhesive with fingers, stretching vinyl, rushing around a port hole, or installing in cold conditions can all ruin an otherwise good decal. Clean first. Dry fully. Hinge with tape. Squeegee evenly. Peel transfer tape slowly.
Removal has risks. Peel too fast and you can stress the surface, especially on older coated heads. Warm the vinyl slightly, peel at a low angle, and avoid harsh solvents unless the drum head is disposable. If sustainability or material handling matters to your organization, the EPA recycling guidance is a useful starting point for thinking about waste, although vinyl decal disposal options vary by local program. For broader packaging material standards and transport testing, groups such as ISTA are also worth knowing.
Next Steps Before You Request a Custom Drum Decal Quote
Before you ask for pricing, gather the details that make the quote accurate. Measure the drum head diameter. Measure the available graphic area. Note the port hole position and diameter. Decide whether the decal is temporary or long-term. Pick matte, gloss, or satin. Choose the quantity with at least one backup if the deadline matters.
- Measurements: drum head size, desired decal width and height, port hole location, and visible safe area.
- Artwork: vector logo if possible, high-resolution print file if needed, brand colors, and a placement mockup.
- Use case: one-night event, touring kit, school program, rental kit, studio setup, or sponsor campaign.
- Material preference: removable vinyl, permanent vinyl, matte print, gloss print, satin finish, or laminated print.
- Timing: required delivery date, proof approval deadline, shipping address, and backup installation window.
Quantity deserves a little strategy. Order one for immediate use, one backup for installation mistakes, and extras if you have multiple kits, multiple events, or multiple schools. A single replacement ordered later can cost more per unit than adding one or two extras to the first run. Manufacturing is rude like that.
Ask the supplier direct questions: What vinyl type are you using? Is the adhesive removable or permanent? Is transfer tape included? What is the expected indoor or touring durability? Do you provide a proof with cut lines? What happens if the print arrives damaged? How are large decals packed? If the answer is vague, keep asking.
If the drum head surface is unusual, heavily textured, coated, old, or expensive to replace, consider testing with a smaller decal first. Not every adhesive loves every surface. That is not always the case, but it is common enough to respect.
The same discipline behind good packaging design applies here: start with the surface, define the viewing distance, choose the material, proof the artwork, and protect the finished piece in transit. Before ordering custom bass drum stickers for a gig, send exact measurements, clean artwork, deadline, finish preference, and a photo of the drum head so the quote is based on reality, not wishful thinking.
FAQ
What size should custom bass drum stickers be?
Measure the actual drum head first, then choose a decal that fits the visible area without hitting rims, logos, mic ports, or hardware. For a 22-inch bass drum, many centered logos work well around 10 to 16 inches wide, while wide band-name layouts may need a longer horizontal format. If there is a port hole, send a front-facing photo and measurements so the design can be positioned around it.
Are bass drum decals removable without damaging the head?
Removable vinyl is the safer choice for temporary use, rentals, school events, or rotating sponsors. Permanent vinyl lasts longer but may leave residue or stress the surface during removal, especially on older coated heads. Warm the vinyl slightly and peel slowly at a low angle; do not attack it with harsh solvents unless the drum head is disposable.
How much do custom stickers for bass drums cost?
Pricing depends on size, quantity, print type, material, lamination, cut shape, artwork cleanup, and shipping. One-off large decals cost more per piece because setup and proofing still take time. Bulk orders usually lower unit cost, especially for schools, touring groups, shops, and event teams ordering multiple decals.
What artwork file is best for a custom bass drum logo sticker?
Vector files such as AI, EPS, or SVG are best for clean logos, lettering, and cut vinyl decals. High-resolution PNG, PDF, or PSD files can work for full-color printed decals if they are sized correctly. Avoid screenshots, tiny JPEGs, and social media downloads because they usually print soft, jagged, or muddy.
How long does it take to produce bass drum stickers custom orders?
Typical orders need time for quoting, proofing, production, packing, and shipping, so plan at least several business days before the gig. Rush service may be available, but artwork issues and late proof approvals can still delay the order. For events, order early enough to allow one proof revision and a backup installation window.


