Order Custom Bicycle Wheel Stickers That Fit Right
What Custom Bicycle Wheel Stickers Really Do
A bicycle wheel passes the eye again and again in a single ride, yet many branding decisions still crowd around the frame, jersey, hang tag, or shipping box. Custom bicycle wheel stickers are printed adhesive graphics made for rims, spokes, hubs, or wheel-adjacent surfaces. They are used for branding, personalization, visibility, race identification, replacement marking, and retail presentation.
Simple category. Complicated product.
A decorative sticker on a child’s bike, a replacement-style rim decal for a carbon wheelset, a reflective commuter label, and a sponsor badge for an event wheel all carry different risks. One is mainly visual. One must look close to original equipment branding. One needs low-light visibility. One may have to survive a muddy weekend, then still photograph cleanly on a dealer rack.
From a packaging buyer’s point of view, wheel stickers behave like small-format outdoor labels forced onto awkward geometry. The surface is narrow. The application area may be 8mm, 12mm, or 18mm tall. The curve is unforgiving. If the adhesive, laminate, and cut shape are wrong, the decal sends the wrong signal: rushed, temporary, cheap.
A small cycling brand launching a limited wheelset might use rim decals to introduce a new mark without changing a mold or frame graphic. A repair shop may label rental bikes so customers return the right set. An event organizer might color-code wheels by category, wave, or sponsor. The sticker is small, but the visibility is not. Wheels create motion, repetition, and contrast against pavement, trail, grass, and display fixtures.
Good wheel stickers are not just attractive graphics. They need appropriate adhesive strength, curve tolerance, abrasion resistance, print finish, and outdoor behavior. This is the part buyers often underestimate: the design gets approved on a flat screen, but the sticker lives on a curved, dirty, spinning part.
How Wheel Decals Work on Curved, Moving Surfaces
Bicycle wheels are harder to label than flat packaging because they live in a rougher environment. A sticker on a box may face shelf lighting and handling. A rim decal sees water, dust, road oil, UV light, brake residue, cleaning sprays, transport racks, and fingers pressing around the edges.
The basic construction usually has five layers: face stock or vinyl film, printed ink, optional laminate or coating, pressure-sensitive adhesive, and release liner. On a quote sheet, that may look routine. In use, each layer has consequences. A thin vinyl may apply smoothly but scuff faster. A heavy laminate may protect ink but resist tight curves. A high-tack adhesive may grip well, then leave residue if the buyer expected clean removal after a promotion.
Compare rim stickers with laptop stickers. Both can look nearly identical on a proof. The rim version needs better edge adhesion, more flexibility, and stronger resistance to lifting because the long edge is constantly exposed. Air, water, and grime find the edge first.
Placement zones narrow the decision. Outer rim walls are highly visible but may include grooves or brake-contact areas. Inner rim channels can hold branding, though they are harder to apply neatly. Spoke areas are small and interrupted. Hub shells are compact and curved. Some brands also order matching sticker sheets for product inserts, warranty cards, or Custom Labels & Tags so the wheel graphics, retail packaging, and support materials feel connected.
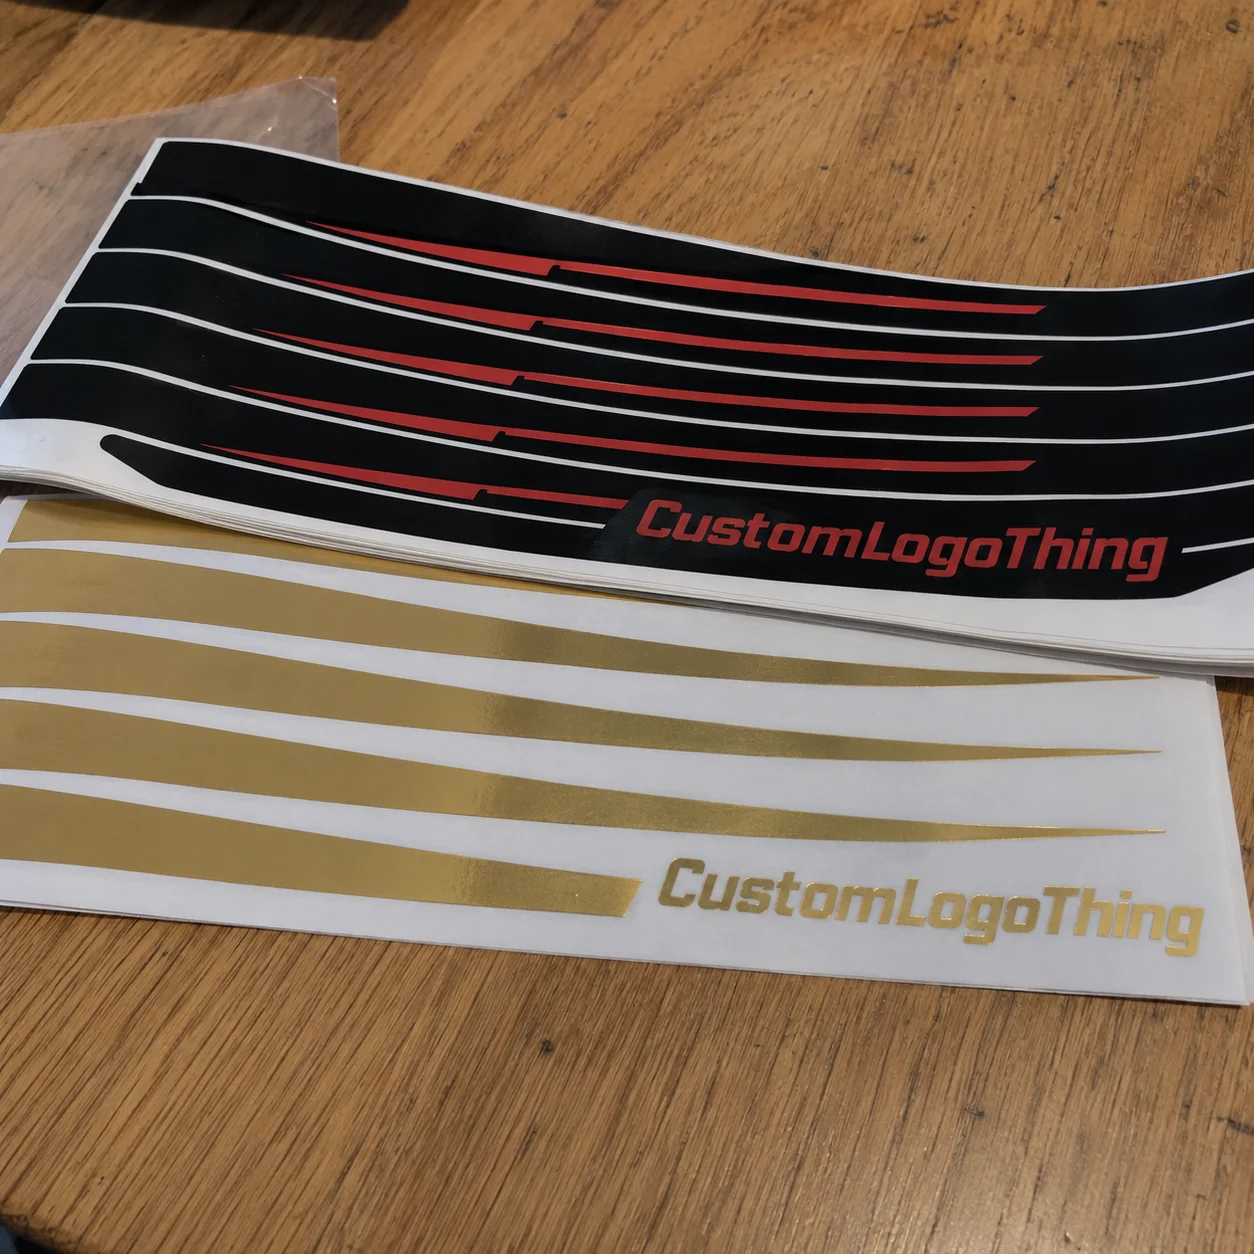
Shape matters. Long strips create a clean rim band, but they need careful alignment and a flexible film. Segmented arcs are easier to apply around a radius. Die-cut logos look premium, though very thin strokes can lift or tear. Short badges are practical for rental fleets and service shops because they apply faster and waste less material.
Finish changes the look and the performance. Gloss gives punchy color. Matte feels more restrained, especially on black or dark gray rims. Metallic film can add high-visibility accents without heavy ink coverage. Reflective film is useful when visibility is a real requirement, not just a design effect.
Practical rule: the best wheel sticker design leaves breathing room for valve holes, spoke patterns, brake surfaces, rim grooves, and manufacturer markings. Covering everything usually creates more failure points.
Key Specs That Decide Durability, Fit, and Finish
The buying specs decide whether bike wheel stickers look sharp for one photo shoot or keep working after real use. The core list is short: dimensions, material, adhesive type, print method, finish, cut style, color matching, and packing format. The implications are larger.
Start with dimensions. Measure the usable surface, not the full rim height. If a rim face is 25mm tall but only 14mm is smooth, that 14mm is the real design field. A sticker even 2mm too tall can overlap a groove, wrinkle near a spoke hole, or lift after several rides. Tight tolerances matter more on wheels than on many flat product labels.
Material is the next fork in the road. Standard outdoor vinyl is common because it balances flexibility, print quality, and cost. Cast or conformable films are better for curves and irregular profiles. Clear films work for subtle branding where the rim color should show through. Reflective films suit commuter bikes, e-bike promotions, school programs, and safety campaigns.
Adhesive selection deserves a real pause. Removable adhesive is helpful for temporary events or seasonal promotions, but it may not hold as aggressively in wet, hot, or dusty conditions. Permanent outdoor adhesive is stronger, although removal can require heat, slow peeling, and residue cleanup. High-tack adhesive may be right for textured or difficult surfaces.
Stronger is not always better. If a demo program needs clean removal after three weeks, permanent adhesive may create the complaint later.
Print durability depends on ink, laminate, and edge behavior. UV-resistant inks reduce fading. Lamination protects against abrasion and cleaning. Water resistance matters for commuters and mountain bikes. Edge sealing can help on long strips, though it is not necessary for every project. Packaging teams already think this way with branded packaging and custom printed boxes: the outer surface has to survive the journey, not just the press check.
Design constraints are less glamorous but just as commercial. Thin fonts disappear in motion. Low-contrast colors turn muddy at speed. Oversized graphics may warp visually on a curved rim. A 9mm-tall sponsor logo with fine script might look polished in a PDF, then become unreadable once the wheel spins. Use bolder shapes, fewer words, and stronger contrast.
The right spec depends on use. Commuter bikes need weather resistance. Racing wheels need clean, weight-conscious branding. Rental fleets need quick application and durable identification. Children’s bikes often prioritize bright color and safe edges. E-bike promotions may benefit from reflective accents. Retail wheel displays may need a premium finish more than long outdoor life.
| Use Case | Suggested Material | Typical Finish | Buyer Priority |
|---|---|---|---|
| Rental fleet bikes | Outdoor vinyl with permanent adhesive | Gloss or matte laminate | Fast identification and durability |
| Retail wheel display | Premium vinyl or clear film | Matte, gloss, or metallic accent | Clean presentation and brand consistency |
| Commuter safety program | Reflective film | Reflective surface with protective coating | Visibility in low light |
| Limited cycling brand launch | Conformable cast film | Matte or gloss laminate | Fit, color match, and premium feel |
Pricing, MOQ, and Unit Cost Drivers for Bike Wheel Stickers
Pricing is shaped less by the idea of the sticker and more by material, size, cut complexity, quantity, finish, proofing, and packing requirements. A small black logo badge and a long reflective rim arc are both “stickers.” They do not price the same way.
MOQ means minimum order quantity. It exists because setup, printing, cutting, inspection, and packing take time whether the order is 50 pieces or 5,000 pieces. Unit cost usually drops as quantity rises because setup is spread across more stickers and material use improves when designs gang efficiently on a sheet or roll.
For rough planning, simple vinyl bike wheel stickers may land around $0.18-$0.45 per piece at higher quantities such as 5,000 pieces, depending on size and print coverage. Smaller runs of 100-300 pieces can be several times higher per unit because setup does not shrink. Reflective films, metallic films, heavy laminate, complex die cuts, and individual bagging can push costs up quickly.
Those are planning ranges, not universal prices. Final quotes depend on final specs.
Major quote variables include the number of unique designs, sticker dimensions, indoor versus outdoor material, laminate choice, reflective or metallic film, kiss cut versus die cut, and whether the order ships as sheets, rolls, or individually cut pieces. Packing format matters. Sheets are efficient for shop use. Individual pieces may be better for event kits, mailers, or retail-ready product packaging.
Hidden cost traps are common. Too many sizes add setup. Six colors without a brand reason increase proofing and color-control work. Rush production can add fees or limit material choices. Changing artwork after proof approval may trigger a remake. The low-cost order suddenly is not low cost.
Different buyers make different tradeoffs. A repair shop may prioritize a low MOQ, simple vinyl, and one-color graphics. A cycling brand may pay more for premium film, color matching, and retail presentation that lines up with package branding, hang tags, and printed inserts. If the stickers are part of a launch kit, review related Custom Packaging Products at the same time, especially if wheel decals, labels, and inserts need one visual system.
Ask for two or three quantity breaks. Moving from 250 to 500 pieces, or from 1,000 to 2,500 pieces, may materially lower the unit cost. Or it may barely move. Compare the total project cost, not only the smallest order price.
| Order Scenario | Typical Quantity | Common Cost Drivers | Best Fit |
|---|---|---|---|
| Test run | 100-300 pieces | Setup, proofing, short-run cutting | New artwork, pilot launch, event sample |
| Shop or team order | 500-2,000 pieces | Material choice, number of sizes, packing | Repair shops, teams, rental programs |
| Brand production run | 2,500-10,000+ pieces | Color matching, laminate, inspection, kitting | Retail launch, OEM-style branding, campaign kits |
Artwork Process, Timeline, and Production Steps
The cleanest orders follow a predictable path: define the use case, measure the wheel area, submit artwork, review proofs, approve materials, produce, inspect, pack, and ship. Skipping one step rarely saves time. It usually moves the problem later, where it costs more.
Before asking for a quote, prepare the rim diameter, usable sticker area, desired quantity, number of designs, color references, finish preference, and expected application environment. A supplier can give better guidance if they know whether the decal will sit on a matte carbon rim for retail display or on aluminum rental wheels that get washed twice a week.
Artwork should be vector whenever possible. AI, EPS, SVG, or press-ready PDF files usually give the cleanest logo edges and cut paths. High-resolution raster artwork may work for simple graphics, but low-resolution screenshots are risky. Cut lines should be clearly separated from print artwork, often as a spot color or named layer, so the cutter does not confuse trim information with visible design.
Proofing is the buyer’s checkpoint. Confirm spelling, size, color placement, cut shape, spacing, valve-hole clearance, and spoke clearance. If there are left-side and right-side orientations, check both. If the design uses a metallic or reflective material, remember that a digital proof cannot fully show how light will behave on the final film.
Timelines vary. A simple repeat order with approved artwork may move in 5-8 business days before shipping, depending on workload and material availability. A new custom order with specialty film, color matching, several sizes, or complex die cutting may take 10-18 business days after proof approval. Larger kitted programs can take longer because inspection and packing become real production steps.
Rushing proof review is one of the fastest ways to turn an inexpensive sticker order into a remake. A buyer is better off spending an extra day checking the proof against a real wheel than approving in ten minutes and later discovering the decal touches a brake track.
Build buffer time for launches, race events, retail displays, influencer mailers, and dealer kits. Shipping time counts. Application time counts. If the stickers need to be included with FSC-certified paper inserts or cartons, confirm those materials separately through the Forest Stewardship Council chain-of-custody requirements rather than assuming every paper component qualifies.
Common Mistakes That Make Rim Stickers Peel or Look Cheap
The biggest mistake is treating custom bicycle wheel stickers like generic promotional stickers. A promo label on a brochure does not face the same punishment as a rim graphic moving through grit, rain, sunlight, detergent, and handling.
Application problems create many early failures. Dusty rims reduce adhesive contact. Waxed surfaces can block bonding. Wet wheels trap moisture. Cold materials stiffen the film and slow adhesive flow. Freshly cleaned parts may still hold solvent residue.
A clean, dry, room-temperature application surface is boring advice. It prevents a surprising number of complaints.
Rim geometry is another trouble spot. Decals placed across sharp ridges, textured surfaces, spoke holes, or brake contact areas are more likely to lift, wrinkle, or wear prematurely. Disc brake wheels often provide more safe branding zones than rim brake wheels, where brake tracks must remain untouched. If a decal interferes with function, it is not a good decal.
Design mistakes are easy to make because screens flatter tiny details. Too much copy, thin lines, low contrast, and tiny sponsor logos may look fine at 200% zoom. On a moving wheel, they blur. The better approach is usually one bold logo, one strong color choice, and one clear visual hierarchy.
Sizing errors often come from measuring the full rim face instead of the smooth usable area. A buyer may see 30mm of rim height and design for 28mm, then discover only 18mm is flat enough for adhesive contact. Valve openings, grooves, existing manufacturer decals, and spoke interruptions all reduce real estate.
Finish mismatch can cheapen an otherwise good design. A glossy sticker on a matte black rim can look accidental unless the contrast is intentional. A matte laminate may feel premium but reduce color pop. Clear film can look sophisticated on dark rims, but pale colors may lose contrast unless backed with white ink.
Prototype one wheel if the order has high visibility. Apply the decal, inspect it from standing distance, riding distance, and a camera angle. Then adjust. This small test is similar to drop-testing retail packaging or checking carton graphics under store lighting; standards from groups such as the International Safe Transit Association remind packaging teams that real handling conditions often expose flaws flat proofs miss.
What to Prepare Before Requesting a Quote
Before requesting a quote, define the job of the sticker. Is it for brand recognition, safety visibility, race identification, personalization, replacement branding, or retail presentation? Wheel space is limited, so the sticker needs one primary job first. Secondary goals can support it, but they should not fight it.
Measure the exact placement area with a ruler or caliper. Photograph the wheel straight-on. Note the rim material, finish, brake type, and any existing decals. Decide whether the sticker must survive outdoor riding or display use only. A display-only sticker can use different assumptions than a commuter decal that sees rain, chain oil, road grit, and cleaning.
Choose one main visual priority: readable logo, bold color band, reflective detail, premium subtlety, or sponsor visibility. Trying to achieve all five on a 12mm strip usually creates clutter. Strong packaging design follows the same discipline. Good retail packaging rarely shouts every feature at once; it chooses a hierarchy and lets the strongest message lead.
- Measure: record the smooth usable height and length, not the full rim face.
- Photograph: send straight-on and angled wheel photos so curves and obstructions are visible.
- Specify: share quantity range, number of designs, finish preference, and application environment.
- Prepare artwork: provide vector files where possible and separate cut lines from print artwork.
- Request proof details: ask for scale, cut line, finish, and placement guidance.
- Compare totals: request quantity breaks, lead time, and packing options in the same quote.
Ask for material recommendations, not only the cheapest option. Adhesive and laminate choices decide whether the sticker still looks good after real use. If the order supports a larger launch, connect the wheel sticker decision with product packaging, inserts, labels, and branded packaging so customers see one coherent system rather than separate pieces.
Custom bicycle wheel stickers work best when design, material, measurement, and application are planned together before production begins. That planning does not slow the order. It makes the finished sticker fit right, hold better, and look intentional once the wheel starts moving.
FAQs
What materials are best for custom bike wheel decals?
Outdoor-rated vinyl is the most common choice because it balances flexibility, print quality, durability, and cost. Conformable films are better for curved or irregular rim profiles, while reflective films are useful when visibility is part of the goal. A protective laminate is worth considering for wheels exposed to rain, dust, UV light, transport racks, or frequent cleaning.
How do I measure a bicycle rim for wheel stickers?
Measure only the smooth usable surface where the sticker will sit, not the full rim height. Check for valve holes, spoke holes, grooves, brake tracks, existing decals, and textured areas that could interfere with adhesion. Send photos with measurements so the artwork can be scaled before proofing.
Can custom bicycle rim stickers be removed without damage?
Removal depends on adhesive type, rim finish, application time, and environmental exposure. Removable adhesives are easier to take off but may not be as durable for harsh outdoor use. Permanent outdoor adhesives hold better, although removal may require gentle heat, slow peeling, and adhesive residue cleanup.
What affects the cost of custom wheel stickers for bikes?
Size, quantity, material, laminate, cut shape, number of designs, specialty finishes, and packing format all affect pricing. Unit cost usually decreases at higher quantities because setup and production time are spread across more stickers. Rush timing, artwork changes, metallic films, reflective films, and individual packing can raise the final quote.
How long does production take for bicycle wheel sticker orders?
Timeline depends on artwork readiness, proof approval, material availability, order quantity, finish, and cutting complexity. Simple repeat orders are usually faster than first-time custom designs with specialty films or multiple sizes. Buyers should include time for proof review, shipping, and application before an event, launch, or retail deadline.

