Why Custom Stickers Tucson Buyers Notice First
A small sticker can get handled more than the box, bag, or brochure it rides on. People touch it, peel it, scan it, save it, stick it to a laptop, or pass it to someone else. That is why custom stickers tucson buyers order are rarely just “little extras” in a packaging plan.
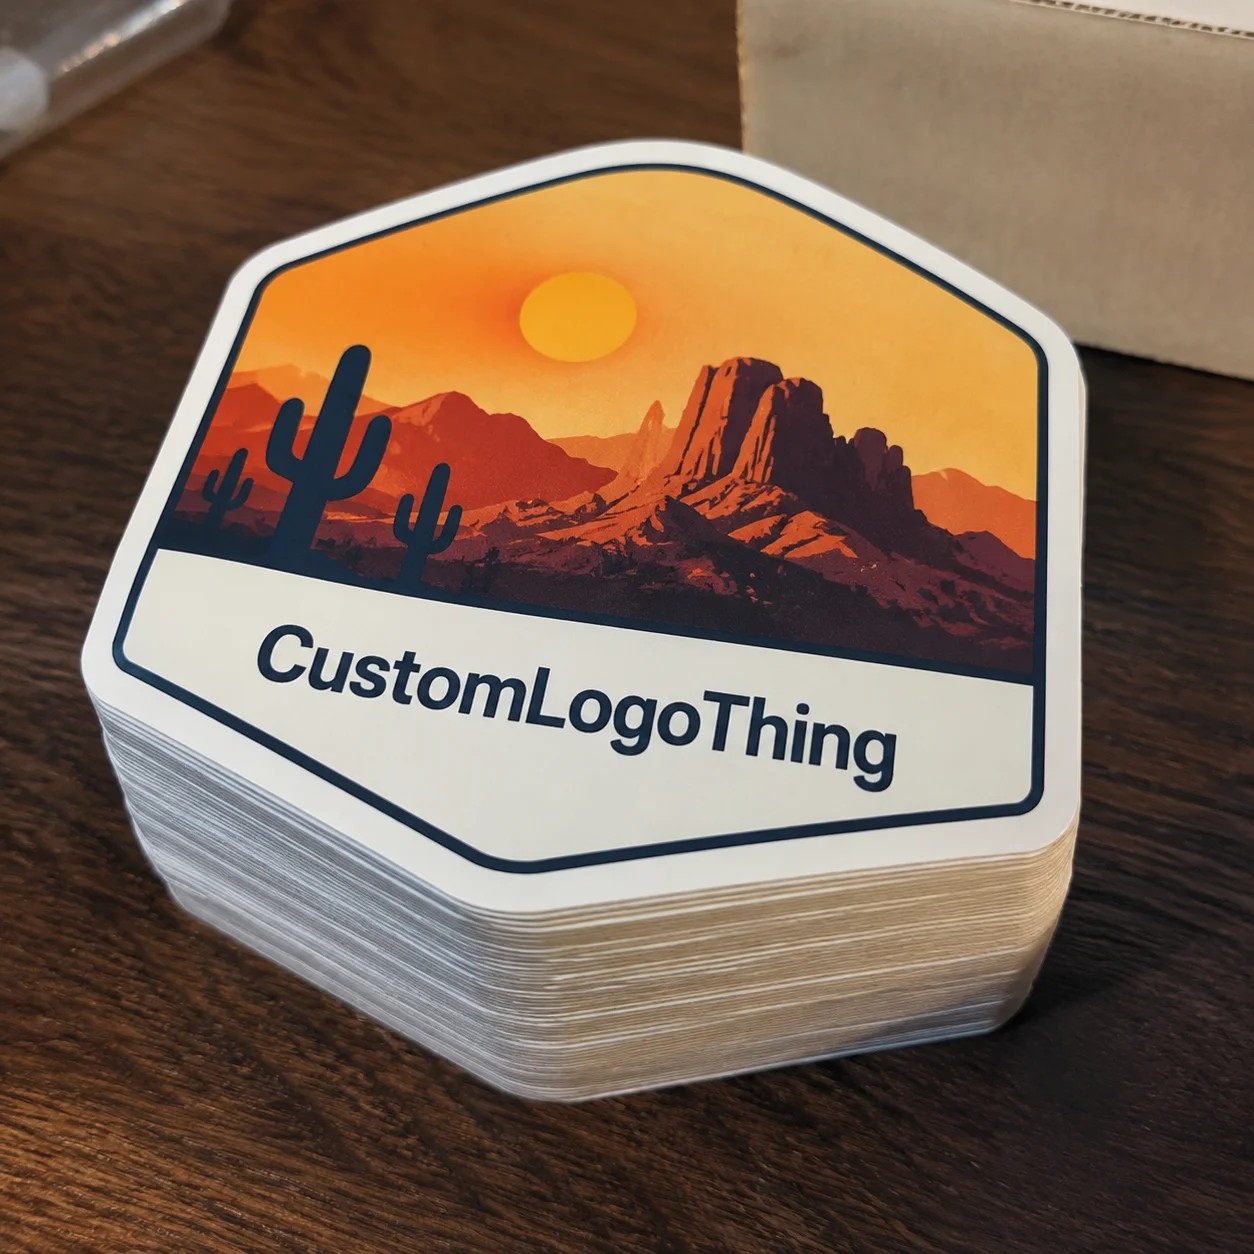
Custom stickers are printed adhesive graphics made to a specific size, shape, artwork, material, finish, and use case. That can mean a 2-inch circle label for a bakery box, a 3-by-4-inch roll label for bottled sauce, a QR-code decal for an event table, a shipping seal for a mailer, or a weather-resistant vinyl decal for a contractor’s hard hat. Same basic idea. Very different performance requirements.
Tucson adds a few conditions worth planning around: dry heat, bright sunlight, dusty surfaces, high-touch retail counters, outdoor events, and vehicles that may sit in direct sun for hours. Artwork matters, obviously. But the adhesive and face stock often decide whether the sticker still looks sharp after a week of real use.
Here is the plain-language breakdown. Decorative stickers are usually for branding, giveaways, or visual appeal. Functional labels carry product names, ingredients, warnings, barcodes, or instructions. Roll labels are wound on cores for repeated application by hand or machine. Sheet stickers are grouped on flat sheets, which works well for staff use, events, and mixed designs. Kiss-cut stickers peel away from a larger liner. Die-cut decals are trimmed to the final outline. Weather-resistant vinyl decals use tougher film and often a laminate to fight scuffing, moisture, and sun exposure.
For small businesses, restaurants, breweries, makers, clinics, contractors, schools, nonprofits, and event organizers, stickers are one of the most flexible tools in branded packaging. They can dress up plain bags, seal tissue paper, identify product packaging, add a local message to retail packaging, or create a branded giveaway without the cost and storage demands of Custom Printed Boxes.
Stickers look simple because the finished piece is small. The production decisions are not small. A label that curls on a jar, fades on a window, smears in an ice chest, or refuses to peel cleanly from the liner becomes a real problem once staff are applying hundreds of them by hand. Nobody needs that kind of tiny daily punishment.
How Sticker Materials, Adhesives, and Finishes Work
Most sticker failures start with a mismatch between the material and the job. Paper is economical and clean-looking for indoor labels, especially on bakery boxes, shopping bags, envelopes, and short-life promotions. It prints well, takes color nicely, and gives a soft, natural feel. Uncoated paper, though, absorbs moisture and oils. Even coated paper has limits if it sits in a cooler, gets rubbed all day, or rides outdoors in the sun.
BOPP, short for biaxially oriented polypropylene, is a common film for moisture-resistant product labels because it handles oils, condensation, and refrigerator cases better than paper. White BOPP gives strong color and opacity. Clear BOPP creates a “no-label” look on glass or clear plastic, although it needs careful artwork because light colors can disappear without white ink behind them. Metalized BOPP can mimic foil for premium food, beverage, cosmetic, and promotional labels.
Vinyl is tougher and more flexible. For outdoor decals, bumper stickers, hard-hat stickers, equipment labels, and window decals, vinyl is usually the safer choice. A common outdoor decal might use a 3 to 4 mil vinyl face stock, permanent acrylic adhesive, solvent or latex ink, and a gloss or matte overlaminate. The laminate is not decoration only; it protects the print from abrasion, handling, and UV exposure.
Polyester, often called PET, is used when dimensional stability matters. It resists stretching better than vinyl and is often used for asset tags, equipment labels, UL-style identification labels, and barcode stickers that must stay readable. PET can be overkill for a giveaway sticker. For labels that need to survive cleaning, rubbing, or long-term indoor service, it earns its keep.
Adhesive Choices Matter More Than Buyers Expect
Adhesive selection is not glamorous. It is also where many projects succeed or fail. Permanent adhesive is the standard choice for product labels, shipping seals, and most branded stickers. Removable adhesive is designed to come off with less residue, which helps for temporary promotions, pricing, event signage, and window graphics. Repositionable adhesive gives staff a short window to correct placement before the bond builds.
Low-tack adhesive is not the same as weak adhesive. It is engineered for a specific removal profile. High-tack adhesive is useful for rougher surfaces, textured packaging, corrugated shippers, powder-coated metal, and some plastics, but it can be aggressive enough to damage delicate substrates. Freezer-grade adhesive stays flexible in cold storage and is common for frozen food labels, ice-packed beverage labels, and refrigerated distribution.
Surface energy matters too. Glass and metal are generally easier to bond to than low-surface-energy plastics like polyethylene and polypropylene. A sticker that works beautifully on a paperboard coffee sleeve may lift on a plastic squeeze bottle unless the adhesive is built for that surface. If the sticker goes on plastic, test it on the exact container before ordering thousands.
Finishes Change Both Look and Durability
Gloss coating makes colors pop and gives stickers a bright retail feel. Matte coating reduces glare and feels more understated. Soft-touch lamination gives a velvety surface, although it can show fingerprints and scuffs depending on the film. UV coating adds shine and surface protection. Lamination costs more than a simple varnish, but for outdoor decals and high-touch stickers, it can add meaningful life.
Special effects need restraint. Foil stamping, spot UV, holographic film, embossing, and metallic ink can look excellent on premium stickers, but each one changes the cost, setup, and proofing process. If the sticker must be scanned, do not place QR codes or barcodes over reflective finishes. Scanners like contrast, quiet zones, and clean edges more than they like sparkle.
Key Specs to Decide Before You Request Artwork or Samples
A clean sticker quote starts with a clean specification. “I need stickers” is too broad for accurate pricing. A paper label for a pastry box and a laminated vinyl decal for a truck window may share the word “sticker,” but they do not share the same process, stock, adhesive, or inspection criteria.
Start with size. Common promotional sizes include 2-inch circles, 2.5-inch circles, 3-inch circles, 3-by-3-inch squares, 3-by-4-inch rectangles, and 4-by-6-inch decals. Product labels depend on the container panel, radius, and taper. If the label wraps around a bottle, leave a small gap rather than forcing edge-to-edge contact, especially on squeezable containers.
Shape comes next. Standard circles, squares, ovals, and rectangles are usually the most efficient. Custom die-cut shapes cost more if a physical die is required, although digital cutting can make short runs of custom shapes practical. Kiss-cut stickers are easier to peel and often preferred for handouts. Through-cut stickers, sometimes called die-cut singles, are cut all the way through the liner and face stock, which gives a finished individual piece.
Then choose the format. Roll labels are best for repeated application, product labeling, and label dispensers. Ask about core size, outside roll diameter, unwind direction, and quantity per roll if staff or equipment will apply them. Sheet stickers are handy for office use, event tables, schools, makers, and mixed artwork sets. Individual decals are ideal for giveaways, retail resale, and promotional packets.
Artwork requirements are straightforward but unforgiving. Use vector files for logos and type whenever possible, such as AI, EPS, or print-ready PDF. Raster art should usually be 300 dpi at final size. Bleed is commonly 0.125 inch beyond the cut line, and the safe zone is usually 0.0625 to 0.125 inch inside the trim, depending on the cut tolerance and sticker size. Tiny type under 5 points can fill in, especially on textured paper or heavy ink coverage.
Color needs a practical conversation. Digital presses often print in CMYK, while some add orange, green, violet, white, or extended-gamut inks. Pantone matching is possible on some equipment and materials, but not every spot color lands perfectly on every substrate. White ink is essential for clear, metallic, and holographic materials if you need opaque colors. Without white ink, transparent areas show the container, and metallic films can shift the final color dramatically.
If a sticker includes compliance information, do not leave it to a final art check. Ingredient statements, net weight, warning language, allergen callouts, barcode readability, and product identity panels need their own review. For shipping and distribution, ASTM and ISTA packaging test methods may be relevant if stickers are part of the closure, tamper indication, or handling instruction system. For paper-based labels, FSC-certified stock may matter if your brand has sustainability claims or retailer requirements.
Custom Sticker Pricing, MOQ, and Unit Cost Drivers
Sticker pricing is shaped by material, size, quantity, print method, finish, cutting style, and packing format. A small paper roll label can be inexpensive. A laminated contour-cut vinyl decal with white ink and individual trimming will cost more. That is not printer markup magic. It is press time, material yield, finishing labor, waste, setup, and quality control.
For simple indoor paper stickers, short digital runs may start around $0.12 to $0.35 per piece at quantities near 500 to 1,000, depending on size and coverage. At 5,000 pieces, a basic 2-inch to 3-inch paper label might land closer to $0.04 to $0.12 each. Larger labels, heavier coverage, specialty stocks, or multiple versions push that higher.
Film labels cost more but perform better around moisture and handling. A 3-by-4-inch BOPP roll label might run around $0.10 to $0.28 per unit at 5,000 pieces, depending on white ink, varnish, finish, and roll requirements. Laminated vinyl decals can range from $0.40 to $1.50 each in moderate quantities, with large sizes, complex shapes, or individual packing adding cost. These are planning ranges, not a universal price sheet.
MOQ, or minimum order quantity, depends heavily on the print method. Digital printing can handle low quantities, sometimes 50 to 250 pieces for promotional decals or small sheets. Flexographic roll labels often become attractive at higher quantities, such as 5,000, 10,000, or more, because plates and setup are spread across a longer run. Screen printing can be excellent for durable outdoor decals and bold spot colors, but setup costs make it less friendly for tiny batches.
Several details quietly drive cost. Heavy ink coverage uses more ink and can slow production. Full-bleed designs require extra material margin. Many small stickers on sheets may require more cutting time. A complex contour shape has more cut path length than a circle. Multiple artwork versions may require extra proofs, separate rolls, or tighter version control. Rush production can add fees because it disrupts normal scheduling.
If budget is tight, simplify with intent. Use a standard size. Choose one finish. Keep the shape clean. Combine versions only if they share the same material and size. Avoid specialty effects unless they support the product value. Buyers searching for custom stickers tucson often want something local, sharp, and fast, but the best cost control usually comes from a clear spec and fewer last-minute changes.
Process, Timeline, and Lead Time from File to Finished Sticker
A typical sticker job moves through quote, file review, proofing, material ordering if needed, printing, curing or drying, coating or laminating, cutting, winding or sheeting, inspection, packing, and delivery. Short digital jobs can move quickly, but every step still needs room. The fastest order is the one that arrives with approved art, known dimensions, and no unanswered performance questions.
For many standard digital sticker runs, production may take 3 to 7 business days after proof approval. Roll labels, specialty materials, laminated outdoor decals, foil effects, and larger quantities often need 7 to 15 business days. If plates, dies, specialty adhesives, or unusual stocks are involved, plan for more time. Shipping or local pickup adds another layer, especially if stickers are needed for a fixed event date.
Proofing deserves respect. A PDF proof checks content, layout, cut line, bleed, and general color placement. It does not prove adhesive performance, outdoor life, barcode scanning, or exact color on the final material. A physical proof or production sample costs more and takes longer, but it is the right move for product launches, expensive runs, outdoor decals, clear labels, metallic effects, and anything with a barcode.
Quality control should include more than a quick glance at the stack. Useful checks include cut registration, liner release, edge lifting, print scratches, color consistency across versions, roll direction, core size, quantity per roll, barcode scans, and adhesion on the intended surface. For outdoor stickers, a rub test and a short sun or heat exposure check can catch weak specs before the full order is in the field.
One more production constraint: adhesives build bond over time. A sticker may feel easy to lift immediately after application, then become much harder to remove after 24 to 72 hours. That is normal. If a label must be removable after days or weeks, specify that clearly. “Temporary” means different things to different people, which is how residue complaints are born.
Step-by-Step Guide to Ordering Stickers for Local Use
- Define the surface. Paper bag, glass jar, plastic bottle, metal case, laptop, vehicle window, corrugated box, or painted wall. Name the actual surface, not just the category.
- Define the environment. Indoor, outdoor, refrigerated, frozen, oily, dusty, high-touch, mailed, or washed. Tucson sun changes the answer for anything used outside.
- Pick the format. Rolls for repeated product labeling. Sheets for office and event use. Individual decals for handouts and resale.
- Choose a realistic size. Measure the application area with a ruler. Guessing is charming until a label wraps around a curve and wrinkles.
- Prepare the artwork. Build files at final size with bleed, safe margins, outlined fonts, embedded images, and a visible cut line on a separate layer if requested.
- Ask for the right proof. PDF proof for simple jobs. Physical sample for new materials, clear labels, outdoor decals, tight color needs, or machine-applied rolls.
- Test before scaling. Apply samples to the real surface. Check after a few hours, then again after a day or two. Look for curling, edge lift, bubbles, smearing, and residue.
- Approve production details. Confirm quantity, material, adhesive, finish, roll direction, packing, delivery date, and whether overage or underrun is acceptable.
That list looks basic because it is. Basic is good. Basic prevents expensive nonsense.
Common Mistakes That Make Stickers Look Cheap or Fail Early
The first mistake is using paper for a job that needs film. Paper may be perfect on a dry bakery box or shopping bag. It is usually a poor choice for coolers, ice buckets, outdoor events, wet hands, or containers that sweat. If the sticker has to survive moisture, start with BOPP, vinyl, or another film.
The second is ignoring the surface. Dust, oil, wax, condensation, and texture all reduce adhesion. Stickers need clean, dry surfaces unless the adhesive is specifically designed for tougher conditions. Applying labels to cold bottles pulled straight from refrigeration is a common way to create edge lift. The label gets blamed. The application method was the villain.
Poor artwork causes another batch of problems. Low-resolution logos print fuzzy. Thin borders show tiny cutting shifts. Small reverse type fills in. QR codes fail when they are too small, too low contrast, or crowded by graphics. For most QR codes, keep strong contrast, preserve the quiet zone, and test scans on the proof and the finished material.
Over-designing is its own trap. A sticker does not need five fonts, four finishes, a gradient, a foil effect, and a tiny paragraph of copy. The best stickers usually have one clear job. Brand recognition. Product identification. A scan. A seal. A warning. Pick the job, then design around it.
Storage matters too. Keep sticker rolls and sheets away from heat, direct sun, dust, and humidity swings. Store rolls upright unless the supplier recommends otherwise, and do not crush the edges. Adhesives have shelf lives. Many pressure-sensitive materials are best used within about one year when stored properly, although exact timing depends on the adhesive and liner. Old stock can still look fine until it refuses to dispense cleanly. Fun surprise. Terrible timing.
How to Match Stickers to Real Tucson Use Cases
Retail packaging usually needs clean print, easy application, and a finish that matches the brand. Matte paper can feel warm and handmade. Gloss paper feels bright and commercial. BOPP is the better call for refrigerated foods, sauces, oils, bath products, and anything handled with damp hands.
Restaurants and food makers should think beyond the first impression. Labels may touch grease, condensation, refrigerators, delivery bags, and staff hands during rush periods. Freezer or cold-temp adhesives matter for frozen goods. Tamper seals need the right size and flexibility so they do not pop open on curved lids or textured containers.
Outdoor event stickers need tougher specs. For festivals, markets, sports events, trail groups, and community campaigns, laminated vinyl is usually a safer bet than paper. If people will put the stickers on water bottles, coolers, helmets, cars, or toolboxes, use a material meant for abrasion and sunlight. Tucson UV is not subtle.
Construction, trades, and equipment labeling need durability over decoration. Hard-hat stickers, tool labels, safety reminders, and asset tags should use film materials with strong adhesive and legible print. If the label carries a serial number or barcode, test scan distance and angle. A beautiful asset tag that will not scan is just a tiny poster.
Window decals are their own category. Interior-facing window stickers can be protected from weather but may need reverse printing depending on how they are viewed. Exterior window decals need weather resistance and the right adhesive. For temporary promotions, removable adhesive can save glass cleanup later. Permanent adhesive on a short-term window campaign is an avoidable headache.
For mailers and shipping seals, flexibility and application speed matter. A seal that looks great but fights the liner slows fulfillment. If staff apply hundreds at a time, ask for a liner and format that peels cleanly. Rolls with the correct unwind direction can save more labor than buyers expect.
Next Steps: Build a Sticker Spec That Is Ready to Quote
A useful sticker request does not need to be fancy. It needs to be specific. Before asking for pricing, gather the core details: size, shape, quantity, material preference, adhesive needs, finish, artwork count, format, application surface, environment, delivery deadline, and whether a physical sample is needed.
If you are not sure about material, describe the use case honestly. “This goes on a glass salsa jar in a refrigerator case” is better than “I want a nice label.” “This goes on a truck window in full sun” is better than “vinyl sticker, I think.” The production recommendation can only be as good as the information behind it.
For buyers comparing custom stickers tucson options, the best quote is not always the lowest number. Look for clear material specs, adhesive recommendations, proofing steps, realistic lead times, and willingness to flag risks before printing. Cheap stickers are great when they are right for the job. Cheap stickers used in the wrong environment are just expensive waste with a smaller invoice.
Build the spec once and future orders get easier. Reorders become faster. Color stays more consistent. Staff know how the stickers arrive and how to apply them. The whole process gets less dramatic, which is exactly what packaging should be.
FAQ
What material works best for custom stickers in Tucson?
For indoor packaging, paper or BOPP often works well. For outdoor use, vehicle windows, water bottles, hard hats, or anything exposed to sun and abrasion, laminated vinyl is usually the better choice. Tucson heat and UV exposure make material selection more important than it looks on a screen.
Are paper stickers a bad choice?
No. Paper stickers are useful, attractive, and cost-effective for dry indoor applications such as bakery boxes, shopping bags, mailers, and short-term promotions. They are just not built for heavy moisture, outdoor exposure, or rough handling.
How long do custom stickers take to produce?
Standard digital sticker runs often take about 3 to 7 business days after proof approval. Roll labels, laminated decals, specialty materials, foil effects, and higher quantities may need 7 to 15 business days or more. Proofing, material availability, and finishing requirements affect


