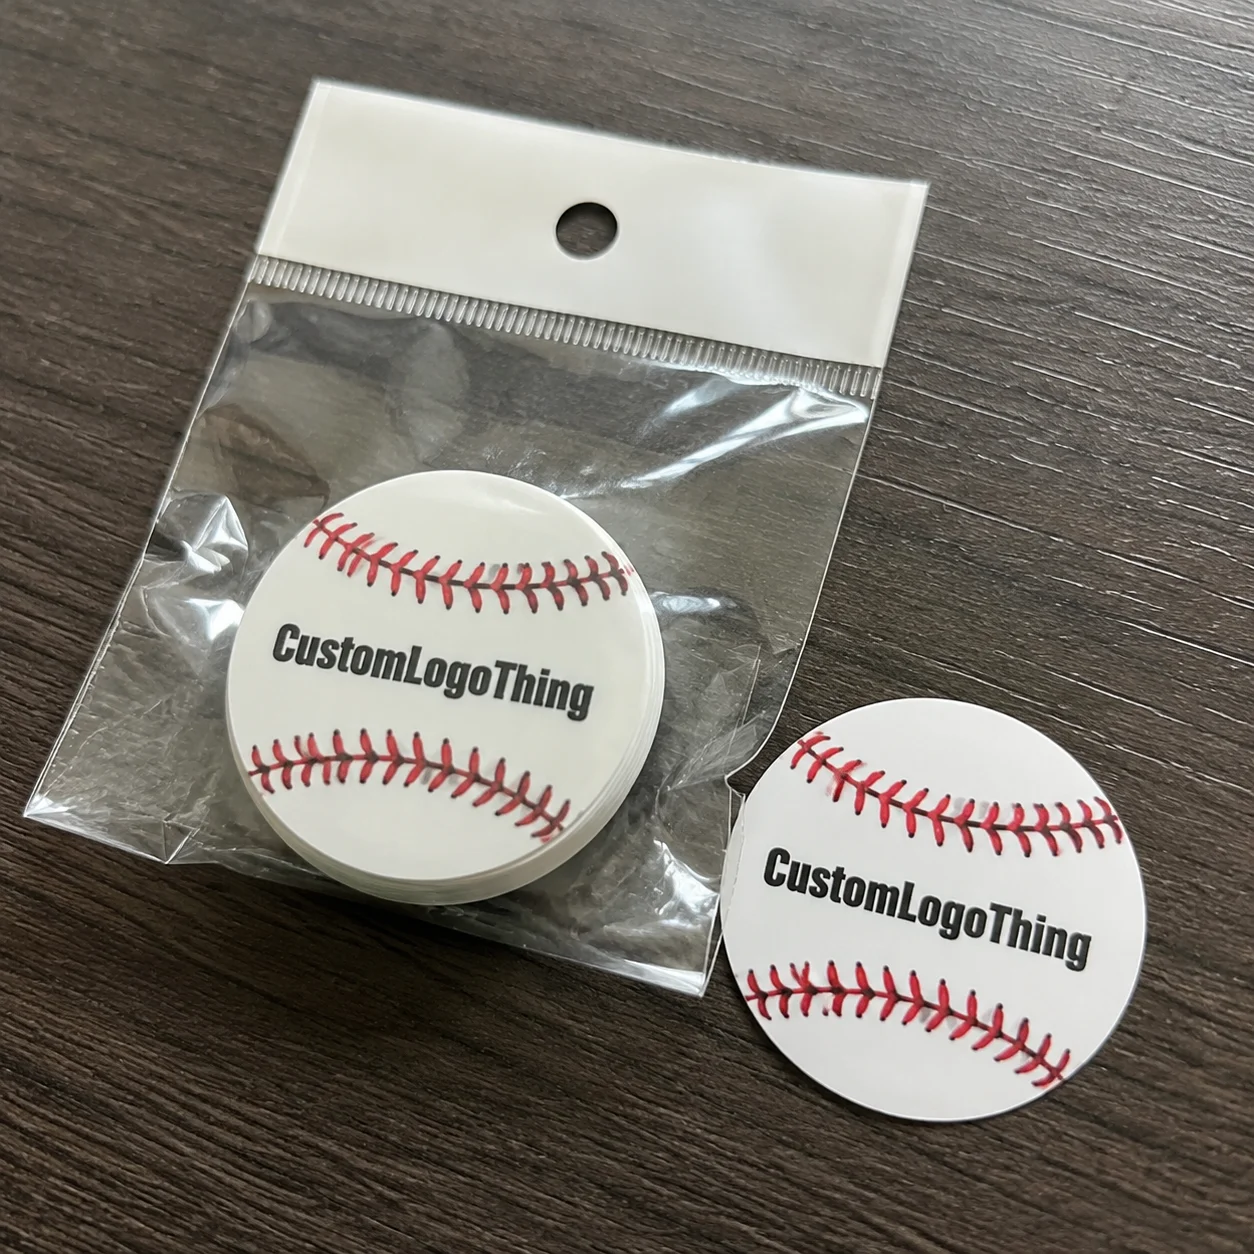
A nail sticker can be smaller than a postage stamp. Yet poor film choice, weak adhesive, fuzzy print, or a sloppy kiss-cut can make a whole salon promotion feel cheap. That is why nail stickers custom orders need the same practical thinking buyers already give to product packaging, branded labels, and other customer-facing beauty items.
For salons, nail artists, beauty brands, event teams, and promotional buyers, the job is not simply printing a tiny graphic. The finished product has to apply cleanly, look sharp on a curved nail surface, survive the intended wear period, and arrive in packaging that feels deliberate rather than improvised.
Nail Stickers Custom: What Buyers Are Really Ordering
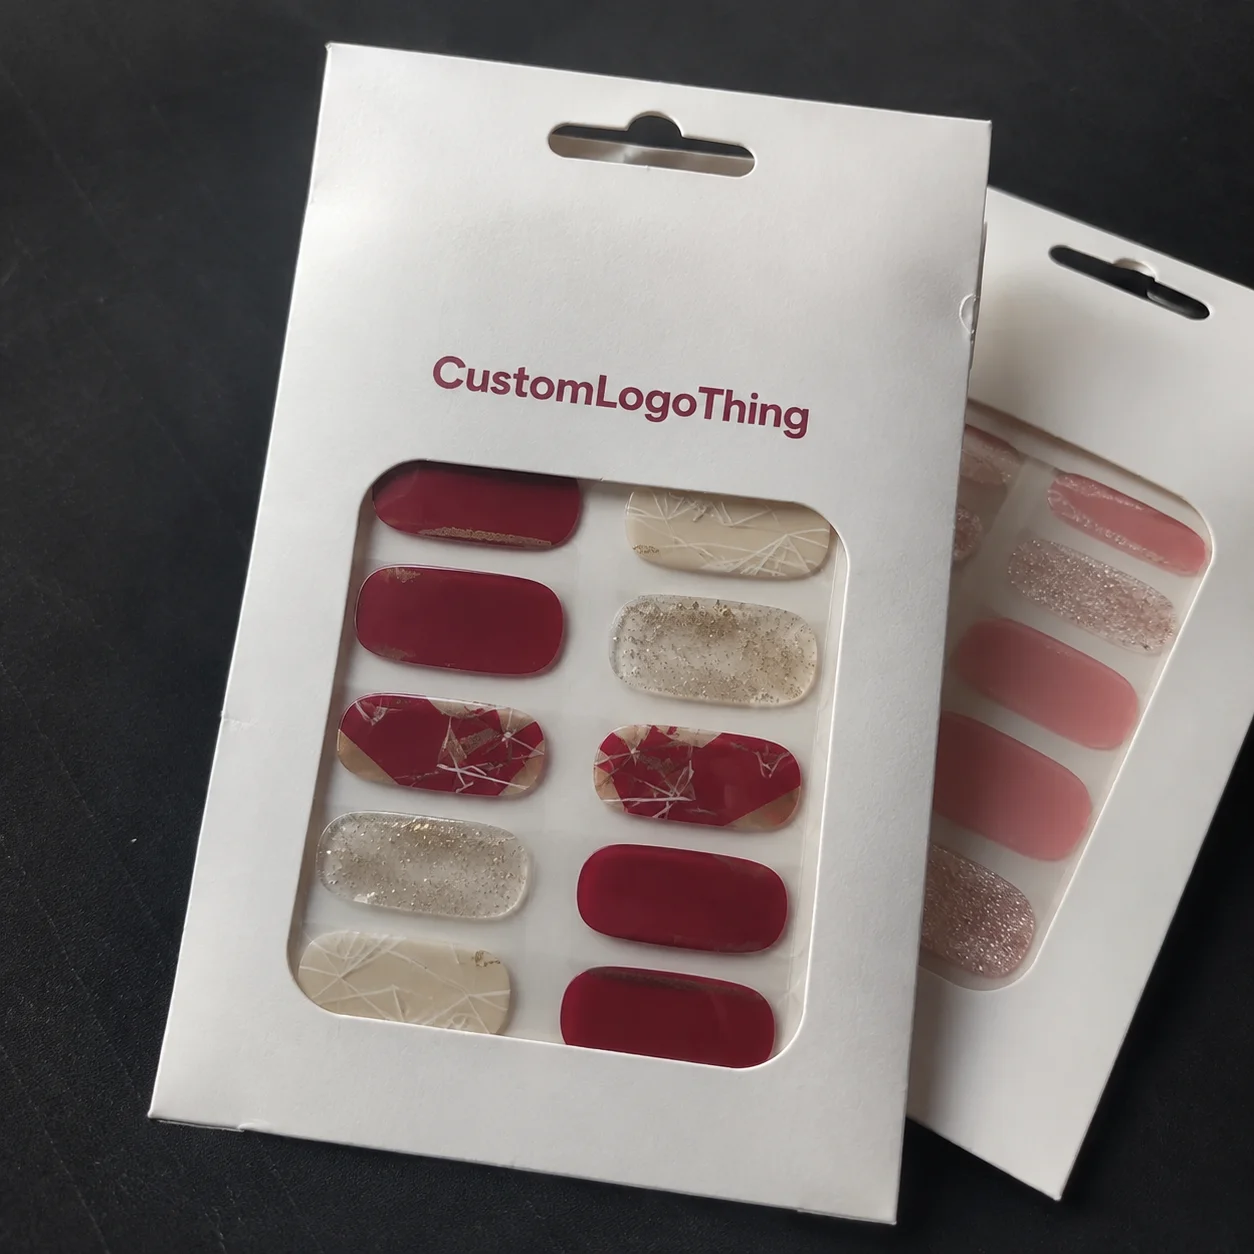
Nail stickers custom usually refers to printed adhesive nail art made to a buyer’s artwork, brand palette, sizing needs, sheet layout, and finish preferences. The format can be decorative decals, full-cover nail wraps, tiny salon logo accents, seasonal graphics, influencer merchandise, or retail-ready sticker sheets sold beside polish, press-ons, and nail care kits.
Those formats behave differently. A decorative decal may be a 4 mm star, bow, flower, initial, or smiley face meant to sit on top of gel polish. A full nail wrap has to cover the nail bed from cuticle to free edge, so the film needs enough stretch to trim and seal without bunching. A salon logo accent may be used on one nail per hand, but that tiny mark still needs enough line weight to stay recognizable.
Buyers are also choosing the production structure behind the artwork: film thickness, adhesive performance, print resolution, white ink usage, die-cut accuracy, backing sheet layout, peeling behavior, and packaging format. A nail sticker sheet can look polished in a PDF proof and still disappoint if the cuts are too tight, the pieces are hard to lift with tweezers, or the clear film disappears on the wrong polish color.
The best orders start with use-case clarity. Is the sheet a salon service add-on? A retail item? A subscription box insert? A giveaway for a product launch? Those answers shape sheet size, material, packaging, and whether the order needs branded backing cards, printed instructions, barcode labels, or a pouch that can sit neatly in a retail display.
Production callout: Treat a nail sticker sheet like a miniature consumer product, not a novelty label. The smaller the item, the less room there is for weak artwork, vague sizing, or material guesses.
How Custom Nail Sticker Materials, Adhesives, and Finishes Work
Most custom nail decal projects use thin vinyl, PET film, water-transfer decal stock, or flexible nail wrap films. Thin vinyl can be forgiving for accent decals, especially when the sticker is sealed with top coat. PET film can give a crisp printed surface and a cleaner clear look, though stiffness varies by gauge. Water-transfer decal stock is very thin and can sit beautifully under top coat, but it requires a different application process. Full nail wrap films need more stretch and conformability because they cover a larger curved area.
Flexibility matters more than many first-time buyers expect. A sticker that looks perfect on a flat proof sheet can wrinkle, bridge, or lift once pressed onto a natural nail, gel extension, acrylic, or press-on. Nail surfaces are small compound curves. Even a fraction of a millimeter of added stiffness can show up as edge lift near the sidewall or cuticle.
Adhesive selection is a balance. Low-tack repositionable adhesives are easier for customers to place, but they usually need a reliable top coat to stay down. Stronger pressure-sensitive adhesives can hold better, but if they are too aggressive, removal becomes unpleasant or the sticker can distort during placement. For short-term events, the adhesive target is different from salon work expected to last several days through normal hand washing.
Digital printing is common for detailed short runs because it supports full-color graphics without expensive plate setup. Spot white ink may be needed under pale colors printed on clear film, especially if the design will sit over dark polish. Without that white layer, light pink, yellow, cream, or pastel blue can look washed out. Brand colors can be targeted, but metallic, neon, and translucent effects need honest expectations before production.
Finishes change both the look and the handling. Gloss feels familiar and makes colors pop. Matte can look modern, though it may show scuffs faster. Holographic and glitter-effect films create movement under light, but they can compete with fine logo detail. Clear films are elegant on pale or nude polish. Metallic-look finishes can feel premium when the art is simple enough to read at nail scale.
| Material or Finish | Best Use | Buyer Watch-Out |
|---|---|---|
| Thin vinyl film | Accent decals, salon logo icons, seasonal art | Can lift if too thick or placed near nail edges |
| PET clear film | Crisp printed decals on pale polish or press-ons | May need white ink under light colors |
| Water-transfer stock | Very thin nail art sealed under top coat | Application takes more care and clearer instructions |
| Flexible wrap film | Full nail wraps and larger coverage shapes | Requires accurate sizing across nail beds |
| Holographic or metallic effect | Limited editions, influencer kits, premium sets | Fine lines can get visually busy |
Top coats, gel sealers, oils, lotions, and repeated water exposure all affect wear time. A properly placed accent decal sealed under gel can perform very differently from an unsealed sticker used at a one-day event. That is not automatically a defect. It is a specification issue. Match the material to the real application.
Key Design Specs That Make Tiny Nail Art Look Clean
Nail sticker design needs more discipline than standard sticker design because the finished image may be only 3 mm to 12 mm wide. Micro text, delicate gradients, thin hairlines, and complex illustrations can disappear at actual size. Many otherwise polished beauty concepts fail here: the art is attractive on screen, then unreadable on a nail.
Good sizing starts with realistic placement. Accent decals often land around 3 mm to 7 mm wide. Mini icons may run 2.5 mm to 5 mm. French-tip shapes and curved bands need width options because nail beds vary. Full nail wraps are commonly built in multiple sizes per sheet, from narrow pinky sizes to wider thumb sizes, with extra length for trimming.
Mixed-size sheets usually perform better than one-size art. Customers can match the sticker to the nail instead of forcing placement. That reduces wrinkling, awkward trimming, and unused pieces.
For logos and icons, vector artwork such as AI, EPS, or production-ready PDF is preferred because edges stay clean when scaled. High-resolution raster art can work for illustrations, but 300 dpi at poster size is not the same as art checked at actual nail size. Transparent backgrounds should be supplied where the film or polish color needs to show through. Fonts should be outlined so nothing shifts during prepress.
Safe zones and bleed matter even on tiny pieces. A supplier may ask for 1 mm to 2 mm of bleed around printed shapes, depending on the cut method and material. Minimum line thickness is often best kept around 0.2 mm or heavier for reliability, although print method and contrast change that threshold. Cuts placed too close together can make pieces hard to peel or can cause tearing in the liner.
Color planning deserves a slow look. Pale colors on clear film may need white ink. Black artwork over deep plum polish may vanish unless the design has contrast. Metallic effects may not look like stamped foil unless the process specifically supports that result. Neon shades are difficult to match exactly in standard CMYK digital print, so proof review should account for that limitation.
Sheet layout affects customer experience as much as the artwork. Grouping stickers by size makes application faster. Grouping by theme works well for seasonal sets. Retail sheets may need a collection name, application icons, use-by guidance if relevant, and small branding elements that do not crowd the art. If the nail stickers sit inside broader Custom Packaging Products, keep the visual system consistent with the rest of the launch.
Pricing, MOQ, and Unit Cost Factors for Custom Nail Decals
Pricing is usually driven by sheet size, material, print complexity, finish, die-cut pattern, quantity, packaging, proofing requirements, and whether the artwork needs setup help. A simple one-color decal sheet is not priced like a full-color clear PET sheet with spot white, holographic film, twelve cut shapes, backing card printing, and retail pouch packing.
MOQ means minimum order quantity, but the basis can vary. Some suppliers set MOQ by total sheets, such as 250, 500, or 1,000 sheets. Others think in total printed area or production setup efficiency. Because nail decals are tiny, the number of individual sticker pieces can sound large while the actual sheet count remains modest.
Unit cost drops with larger runs because artwork setup, print calibration, cutting setup, proofing, and quality checks are spread across more sheets. As a rough planning range, a basic small sheet in moderate quantities might land around $0.35 to $0.90 per sheet before premium packaging. More complex retail-ready sheets with specialty finish and sleeves might move closer to $1.10 to $2.50+ per packed unit. These are planning numbers, not promises. Sheet dimensions, finish, order volume, and packing labor can move the price quickly.
Hidden cost questions are worth asking early. Is design cleanup included? How many proof revisions are covered? Is a physical sample extra? Are barcode labels, backing cards, instruction inserts, shipping cartons, or retail sleeves included? Are rush fees charged if the buyer approves late? A low unit price can lose its shine once missing packaging design, freight, or rework is added.
For beauty brands building retail packaging, the nail sticker sheet is only one part of the finished cost. Backing card stock, pouch material, hang holes, batch labeling, and inspection labor all matter. If the launch includes matching Custom Labels & Tags, coordinate brand colors and package branding before proofing.
Distribution requirements may also enter the conversation for retail programs. The International Safe Transit Association is a useful reference point for packaged product transit testing, and FSC certification may be relevant if printed paper cards or cartons are part of the packaging plan.
Process and Timeline from Artwork Proof to Finished Sheets
A typical custom nail sticker order follows a steady sequence: share artwork and quantity, confirm material and finish, prepare dielines, receive a digital proof, approve production, print, cut, inspect, pack, and ship. The process is not complicated, but each handoff needs clean information.
Prepress is where the order becomes manufacturable. The team checks file resolution, scales the art to nail size, confirms cut lines, adds bleed, spaces the stickers on the sheet, and prepares the print-ready layout. If a logo looks good at 2 inches wide but loses its shape at 5 mm, that should be caught before production, not after the cartons arrive.
The proofing stage deserves more than a quick glance. Review spelling, colors, dimensions, orientation, sticker spacing, sheet labeling, and packaging details. If a sheet has multiple sizes, check that the smallest art still reads. If the design is directional, confirm left-hand and right-hand placement if that matters. If packaging includes instructions, make sure application steps match the actual material.
Physical samples can add time, often several business days plus shipping, but they are useful for new adhesives, premium retail launches, unusual finishes, or artwork with very fine detail. A digital proof can confirm layout. It cannot fully show how a flexible film behaves over a curved press-on nail or how a holographic background competes with fine line art under salon lighting.
Lead time depends on order quantity, finish complexity, material availability, revision speed, drying or curing requirements, quality control, and shipping method. Many straightforward custom decal orders fit into a 10 to 18 business day production window after proof approval. Specialty materials, physical sampling, or retail packing can extend that timeline. International freight and fixed event dates need extra cushion.
The practical timeline advice is blunt: approve artwork quickly, send brand colors early, avoid late sizing changes, and build extra days into campaigns. Nail launches often tie into holidays, influencer drops, or salon openings. A two-day delay in proof approval can matter if the event date is fixed.
Step-by-Step Buying Guide for Salon and Beauty Brand Orders
- Define the use case. Decide whether the stickers are for retail sale, a salon service add-on, a subscription box insert, an influencer kit, an event giveaway, or a press-on nail accessory.
- Choose the sticker format. Pick small accent decals, mixed design sheets, full nail wraps, logo stickers, seasonal sets, or limited-edition collections.
- Decide the nail surface. Natural nails, gel polish, acrylics, and press-ons can call for different film flexibility, adhesive behavior, and sealing instructions.
- Prepare artwork at real scale. Simplify fine details, check contrast, outline fonts, and print a paper mockup if needed so the design can be judged at nail size.
- Select finishes and packaging. Consider clear backing, branded backing cards, printed instructions, individual sleeves, hang-tab packs, or a coordinated product packaging system.
- Request a quote with full specs. Include quantity, sheet size, design count, material preference, finish, packaging, deadline, and shipping destination.
This is also the right stage to think about the larger customer presentation. A salon selling nail art as an add-on may only need tidy sheets in a protective sleeve. A beauty brand selling online may need backing cards, UPC labels, shipping cartons, and photography-friendly packaging design. A retailer may ask for hang holes, case pack quantities, carton labels, or other requirements that affect cost and production timing.
For first orders, a tight collection usually beats a giant design library. Ten strong designs in three useful sizes can outperform fifty tiny graphics that customers struggle to peel or understand. Once a salon sees what clients actually wear, the next order can expand into seasonal colors, initials, micro French accents, or matching Custom Printed Boxes for press-on kits.
Common Mistakes That Cause Lifting, Blurry Print, or Wasted Stock
The first mistake is applying standard sticker assumptions to nail products. A laptop decal, bottle label, or planner sticker is usually too thick or too stiff for a curved nail. Even if the adhesive is strong, the edge can lift because the film wants to return to its flat shape.
The second mistake is designing at screen size instead of nail size. A logo that looks clean on a 27-inch monitor may collapse into a dark dot at 4 mm wide. Tiny serif type, thin script lettering, and low-contrast gradients are common culprits. Print a scale check before approving art. It is basic, but it saves money.
Adhesive mismatch creates another round of problems. Some films lift under top coat. Others curl at the edge when handled with oily fingers. A few may feel too aggressive for quick seasonal removal. The right adhesive depends on wear expectations, nail prep, application method, and whether the sticker will be sealed.
Finish confusion can also cause disappointment. Metallic ink is not always true foil. Clear stickers will not show on every polish color. White ink may be needed under light artwork. Holographic film can look premium, but it can also make fine detail harder to read. If the visual effect is central to the product, sampling is often worth the added time.
Poor sheet layout is easy to overlook. Cuts placed too close together make stickers hard to peel. Mixed sizes without labels can confuse customers. Tiny pieces may need enough liner space around them so tweezers can grab the edge. If customers damage one out of every five stickers during peeling, the effective cost of the sheet rises fast.
Inventory mistakes are just as real as production mistakes. Ordering too many trend-based designs can leave slow-moving stock after the trend passes. Skipping application instructions increases complaints. Failing to test stickers on the polish systems customers actually use can create returns that had nothing to do with print quality.
Actionable Next Steps Before You Request a Custom Nail Sticker Quote
Before requesting a quote, gather the details a production team needs to price and proof accurately: intended use, quantity, sheet size, number of designs, material preference, finish, packaging style, deadline, shipping destination, and artwork status. If any detail is unknown, say so. A good supplier can help narrow choices, but vague quote requests usually lead to vague pricing.
Create a simple size map. It can be as plain as small, medium, and large nail placements with approximate widths, such as 4 mm, 6 mm, and 8 mm for accent icons. For wraps, include sizes for pinky through thumb and allow trimming length. That map helps the supplier scale designs accurately before the first proof.
Narrow the first order to a tested collection, especially if the salon or beauty brand is still learning what customers wear. A compact launch with clear instructions, good packaging, and reliable adhesion is better than a huge assortment that strains budget and storage space. Once real demand appears, reorder data can guide smarter colors, shapes, and finishes.
Prepare brand references, polish background colors, sample photos, and retail requirements early. If the decal must match a polish line, sit inside a press-on nail kit, or coordinate with other package branding, that information affects art choices and cost. For retail, include card size, hang-tab needs, barcode placement, and carton labeling requirements.
Ask for a physical sample when the adhesive is new, the finish is premium, the product is headed to retail, the artwork is unusually detailed, or the design must match an existing beauty line. Sampling is not always necessary, but it is cheap compared with receiving thousands of sheets that do not apply the way customers expect.
Gather the specs, review the proof like a production document, and treat nail stickers custom ordering as a small-format beauty product decision. The strongest results feel intentional from first peel to final packaging.
FAQs
What artwork files work best for custom nail stickers?
Vector files such as AI, EPS, or PDF are best for logos, icons, and cut paths because they scale cleanly to tiny nail sizes. High-resolution PNG or PSD files can work for illustrations, especially with transparent backgrounds, but the art should be checked at production size. Fonts should be outlined, colors should be specified, and the design should be reviewed at actual nail scale before proof approval.
How long do custom nail decals usually last on nails?
Wear time depends on the film, adhesive, nail prep, placement, and whether the sticker is sealed with regular top coat or gel top coat. Accent decals used for events may be short-term, while properly sealed nail stickers can last longer through normal hand washing and light wear. Oil, lotion, water exposure, and lifting at the nail edge can shorten the usable life of the sticker.
Can nail sticker sheets be made for retail packaging?
Yes, nail sticker sheets can be paired with branded backing cards, printed instructions, barcode labels, hang holes, sleeves, or retail pouches. Retail packaging should be planned before quoting because sheet dimensions, card size, packing labor, and labeling all affect cost. Instructions are especially useful for customers who are new to applying nail decals or sealing them with top coat.
What affects the cost of nail stickers custom orders the most?
The biggest cost drivers are quantity, sheet size, material, finish, number of cut paths, print complexity, packaging, and proofing or sampling needs. Special effects such as holographic film, metallic looks, white ink, or custom retail packs usually cost more than simple full-color sheets. A precise quote should include artwork, dimensions, quantity, finish, packaging, and deadline instead of only a rough sticker count.
Do custom nail stickers need a minimum order quantity?
Most custom production has some MOQ because printing, cutting, setup, proofing, and quality checks take time even for small designs. The MOQ may be based on sheet count, total printed area, or the supplier’s production setup rather than the number of individual tiny decals. If testing a new design, ask whether a smaller pilot run or sample sheet is available before ordering a larger launch quantity.