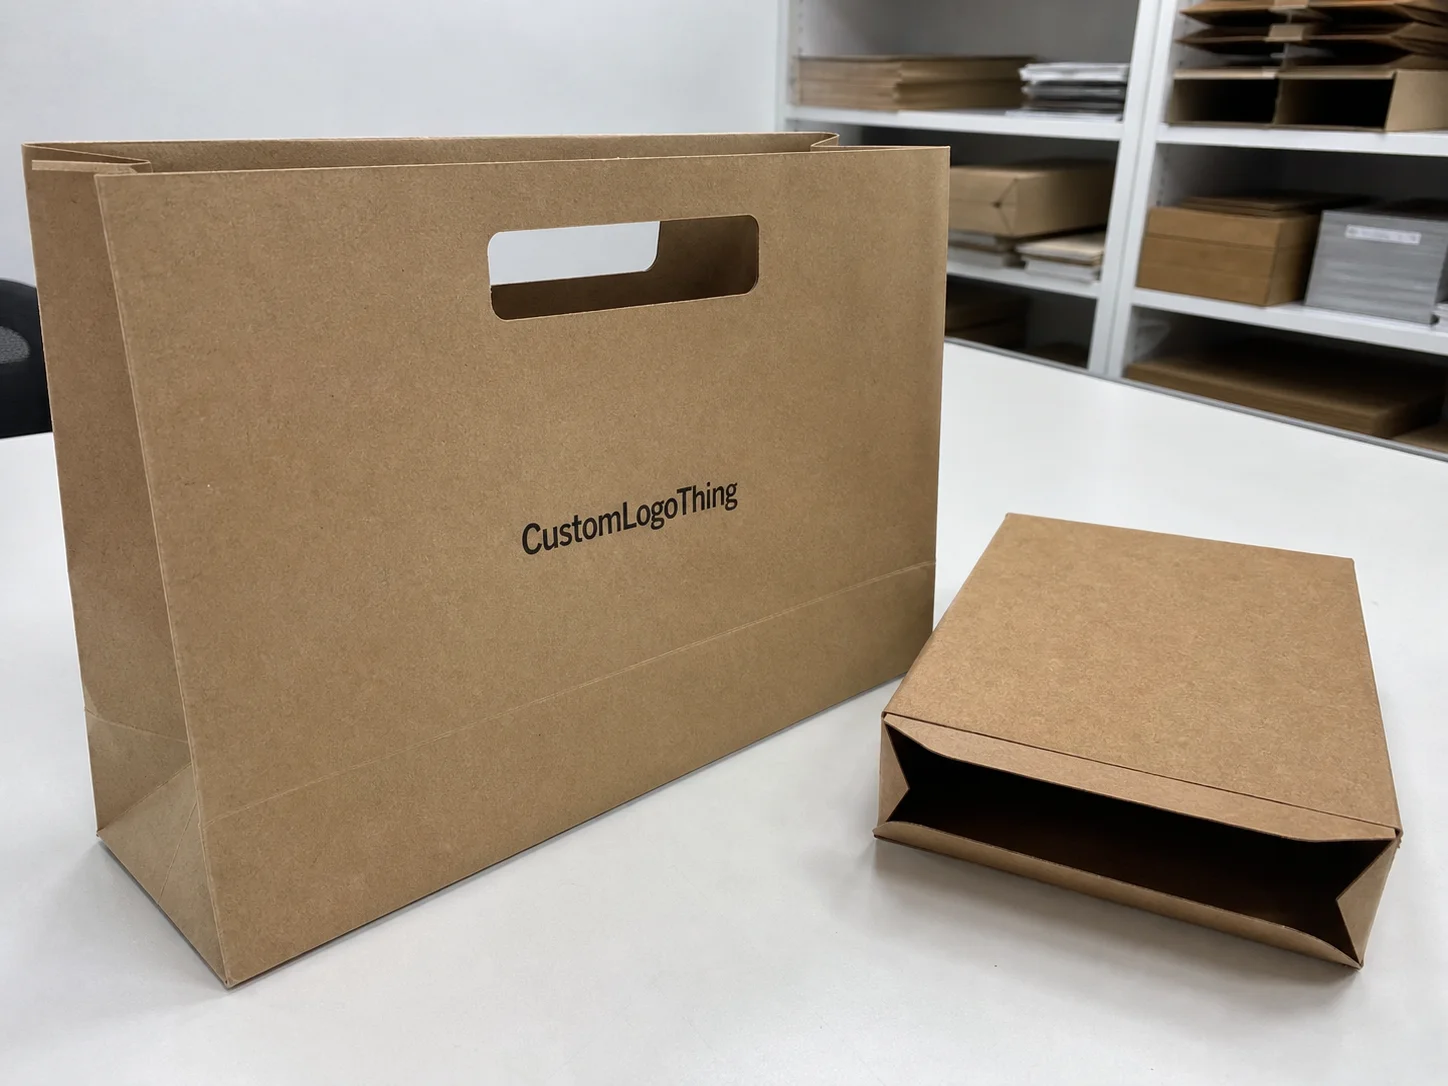
Buyer Fit Snapshot
| Best fit | Personalized Protein Bar Wrapper Printing projects where brand print, material claims, artwork control, MOQ, and repeat-order consistency need to be specified before quoting. |
|---|---|
| Quote inputs | Share finished size, material target, print colors, finish, packing count, annual reorder estimate, ship-to region, and any compliance wording. |
| Proofing check | Approve dieline scale, logo placement, barcode or warning zones, color tolerance, closure strength, and carton packing before bulk production. |
| Main risk | Vague material claims, crowded artwork, missing packing details, or unclear freight terms can make a low unit price expensive after revisions. |
Fast answer: Personalized Protein Bar Wrapper Printing: Material Claims, Seal Quality, and Freight Cost should be specified like a repeatable production item. The safest quote records material, print method, finish, artwork proof, packing count, and reorder notes in one written spec.
Production checks before approval
Compare the actual filled-product size with the drawing, then confirm tolerance on folds, seals, hang holes, label areas, and retail display edges. Reserve space for logos, QR codes, warning copy, and material claims before decorative graphics fill the panel.
Quote comparison points
Review material grade, print process, finish, sampling route, tooling charges, carton quantity, and freight assumptions side by side. A quote is only useful when the supplier can repeat the same color, closure quality, and packing count on the next order.
On a retail shelf in Chicago, a gym sample tray in Dallas, or a subscription box insert shipping out of Nashville, I’ve watched Personalized Protein Bar Wrapper printing win attention before anyone has even read the ingredient panel. A clean wrapper with sharp registration, the right finish, and a flavor cue that makes sense in half a second can move product faster than a great tasting bar sitting inside a dull package. That sounds dramatic, but after two decades around converting lines, filling machines, and late-night proof approvals, I can tell you it’s usually true. I’ve seen a $0.15-per-unit wrapper for 5,000 pieces do more for conversion than a $5,000 photo shoot.
Custom packaging for protein bars is not only about looking polished. personalized protein bar wrapper printing has to work as a practical piece of packaging: it needs to survive handling, shipping vibration, temperature swings, and the occasional oil spot from nut butter or chocolate. If the wrapper smears, the seal misbehaves, or the barcode lands in the wrong place, the whole launch gets harder than it should be. And yes, I’ve had a package show up looking perfect in the proof stage and then act like it had a personal vendetta against the filling line. Not fun. A wrapper printed on 350gsm C1S artboard for a carton insert can behave very differently from a metallized film wrap on a high-speed line in Austin or Shenzhen.
Why Personalized Protein Bar Wrapper Printing Matters
Here’s the blunt factory-floor version: in many cases, the wrapper influences the first purchase faster than the product itself. I’ve stood beside end-cap displays in a regional natural foods chain in Minneapolis where shoppers picked up the bar with the most readable protein claim and the clearest flavor color, even when the nutrition values were nearly identical. That’s the quiet power of personalized protein bar wrapper printing. A 2-second shelf glance in a store on King Street in Toronto can decide the sale before taste ever enters the conversation.
In plain language, personalized protein bar wrapper printing means printing custom outer wraps, labels, or pouches for protein bars, snack bars, or nutrition bars so the packaging matches the brand and the product. That printed surface can carry artwork, ingredients, bar codes, allergen statements, QR codes, promo messages, or a clean flavor callout like “Chocolate Almond Crunch” in a way that feels intentional instead of generic. For a 60 g bar, that usually means a flat panel around 125 mm wide by 70 mm high, with enough safe space to keep the UPC at least 3 mm from the trim.
It helps to separate the common formats. A simple pressure-sensitive label is usually the quickest option, but it only covers part of the package and may not give you the moisture or grease resistance a bar demands. A full-wrap film provides more branding real estate and can create a more premium look. A laminated pouch, meanwhile, is a different animal altogether: it is often used when the brand wants more barrier protection, a reclosable feature, or a higher-end retail presentation. Not every protein bar package is printed the same way, and that difference matters more than many first-time buyers realize. A short-run digitally printed label in Houston may cost $0.18 per unit for 2,000 pieces, while a flexo film run out of Dongguan can drop much lower once you pass 25,000 units.
Honestly, I think this is where brands sometimes get tripped up. They treat the wrapper like a decorative layer, when in practice it’s also a performance component. If you’re selling through retail, direct-to-consumer shipping, gym sampling, or corporate wellness programs, personalized protein bar wrapper printing can improve shelf appeal, flavor differentiation, and consistency across SKUs while still supporting the very practical needs of packaging line speed and inventory control. I once watched a 12,000-unit launch in Columbus lose three days because the wrapper roll was 2 mm too wide for the infeed. Tiny mistake. Big headache.
There’s also a trust factor. A tidy wrapper with solid ink coverage, proper nutrition content, and consistent color helps the product look established. That matters for private label launches and for small brands trying to look like they belong next to the national names. I’ve seen a brand go from “new and untested” to “serious competitor” simply because the packaging looked engineered instead of improvised. I remember one buyer in New Jersey telling me, half-joking and half-serious, “We didn’t change the bar, we changed the wrapper, and suddenly the whole thing stopped looking like a science fair project.” Fair point. On a shelf in Newark or Rotterdam, a precise wrapper does half the credibility work before the customer even reads the protein count.
“We changed nothing in the recipe, only the wrapper, and the sample tray finally looked like a premium brand instead of a test batch.”
That line came from a client meeting in Jersey City after they switched from hand-applied stickers to a cleaner printed format. It was a small packaging move, but it changed the entire perception of the product. That is the kind of result strong personalized protein bar wrapper printing can deliver. They moved from a messy 1,000-piece trial to a 10,000-piece reprint in under two weeks, and the buyer noticed the difference immediately.
How Personalized Protein Bar Wrapper Printing Works
The process usually starts with the artwork file, but good packaging work starts earlier than that. Before the first file ever reaches press, the printer or converter needs dimensions, seal locations, filling method, and a dieline that matches the real bar or pouch shape. In personalized protein bar wrapper printing, a 2 mm shift in a fold or a 3 mm trim error can move a logo onto a seam, and once that happens, the whole run looks off. On a 15,000-piece order, that mistake can turn into a reprint bill fast.
From there, the artwork is built around bleed, safe zones, and registration marks. If the packaging is a wrapper, the design has to wrap around the structure without losing key text in the fold area. If it’s a pouch, the front panel has to stay clear of the seal edges and top closures. I’ve sat in prepress rooms in Los Angeles and Wenzhou where the difference between a clean launch and a headache came down to whether the designer understood the physical package instead of just the screen mockup. That’s one of those moments where the computer people and the factory people need to stop talking past each other (rare, but magical when it happens).
Digital printing is often the fastest path for short runs, test flavors, seasonal SKUs, and brands that need fewer units with a quicker turnaround. It usually handles variable artwork well and can be a smart fit when the order doesn’t justify a large press setup. For a 3,000-piece seasonal run, you might see proof approval on Monday and finished goods in about 12-15 business days. Flexographic printing, on the other hand, is common for larger quantities because the unit price usually improves as volume rises, and the color consistency on long production runs can be excellent when the job is dialed in properly. For some designs, offset printing still has a place in the broader packaging world, especially for folded cartons and printed inserts, though it’s less common for many flexible protein bar wrapper structures than digital or flexo.
The substrate matters just as much as the print method. Common materials include metallized film, BOPP, PE, paper-based wraps, and laminated structures. If the bar contains nut butters, added oils, or a soft center, barrier properties matter because oxygen and moisture can change texture, flavor, and shelf life. I’ve seen a chewy bar turn firm too quickly because the selected film didn’t hold the right moisture barrier for the distribution lane they were using. One warehouse cycle in July in Phoenix and suddenly everyone is “surprised” the bar is now basically a brick. Lovely. For bars moving through Florida or Singapore, a 0.025 mm PET/PE laminate can outperform a cheaper paper-based option by a mile.
Finishing is another area where the details stack up fast. Print finishing can include matte or gloss lamination, varnish, cold seal compatibility, tear notches, and easy-open features. A matte finish can make a premium brand feel more restrained and upscale, while a gloss finish can make colors punch harder under retail lighting. Neither is automatically better; it depends on the brand story, the filling equipment, and how much scuff resistance you need during transit. If you’re shipping into 40°C warehouses in Dubai or Miami, a gloss varnish over a stable film often survives better than a soft-touch finish that looks great but scratches if you breathe on it.
Quality control is not optional. In a converting or packaging line, the usual checks include registration accuracy, ink adhesion, seal strength, roll tension, and fit verification against the actual filling machine. For regulated food packaging, teams often reference standards and testing guidance from groups like the International Safe Transit Association, especially when shipments will face vibration, stacking, or drops before they reach store shelves. A 10-minute line check at 8 a.m. can save a 3,000-unit scrap pile by noon.
| Print method | Best for | Typical strengths | Usual tradeoff |
|---|---|---|---|
| Digital printing | Short runs, multiple SKUs, fast proof cycles | Quick setup, flexible design changes, lower minimums | Higher unit cost at scale |
| Flexographic printing | Mid-to-high volumes | Strong consistency, lower unit cost for larger orders | More setup time and plate considerations |
| Offset printing | Cartons, inserts, some premium packaging components | Very sharp detail, strong image quality | Less common for many flexible bar wrappers |
One more practical point: if the wrapper is part of a broader packaging system, it should be designed with the rest of the line in mind. I always tell brands to look at the filler, the sealer, the case packer, and the carton pack-out before they finalize personalized protein bar wrapper printing. It saves time, materials, and a fair amount of frustration. On a co-pack line in Atlanta, I watched a simple roll width change cut downtime by 18 minutes per shift. That’s not glamorous, but it pays rent.
Key Factors That Affect Design, Materials, and Cost
Artwork complexity is usually the first cost driver people notice, and it really does matter. A simple two-color design with a clear logo, one flavor panel, and tight typography is easier to print and proof than a wrapper with full-bleed photography, multiple gradients, and six different bar variants. In personalized protein bar wrapper printing, every extra visual element can influence setup, press time, and make-ready waste. A clean 4-color design on 10,000 wrappers in Kansas City is a very different job from a 7-color launch with foil accents in Milan.
Color count matters too. If you’re building a design in CMYK with a few targeted spot color elements, you may achieve strong brand consistency without overcomplicating the job. A well-chosen spot orange or deep brown can anchor a premium protein bar line nicely. I’ve had more than one client save money by trimming unnecessary special effects and keeping the design focused on one or two bold brand signals instead of trying to print every idea onto a 2-inch-wide wrapper. Marketing teams do love to cram an entire mood board onto one package. Bless them. A single Pantone 476 C for the brand block can look better than three nearly identical browns fighting each other for attention.
Material performance is the other major cost lever. Protein bars with nuts, whey, chocolate, or soft centers often require grease resistance, oxygen barrier, and moisture barrier protection. If the bar is destined for long shelf life or hot warehouse storage, film selection gets even more important. A cheap substrate that looks fine on day one can create a freshness issue later, and that costs more than the price difference between films ever would. A $0.04 savings on material means nothing if the product loses texture after 60 days in a Houston distribution center.
Compliance also affects both the design and the budget. Nutrition panels, ingredient statements, allergen disclosure, UPC placement, and market-specific label rules all need room. If you sell into retail, distributors may ask for bar code clarity and size requirements that have to be respected. The FDA food labeling guidance is the kind of reference team members should keep close during artwork review, because a beautiful wrapper still has to be legally usable. In the UK, a 1.5 mm minimum x-height for tiny copy can also become a surprise if you’re exporting the same package overseas.
Now for the money part. Pricing is usually shaped by a handful of variables: run length, print method, material gauge, finishing, setup fees, proofing revisions, and freight. Short runs cost more per unit because the fixed work is spread across fewer pieces. Larger runs can bring the unit cost down, but they ask for more inventory commitment up front. That tradeoff is normal in personalized protein bar wrapper printing; there is no magic shortcut around it. A 5,000-piece order might land around $0.15 per unit with a straightforward digital print, while 25,000 pieces of a simpler flexo run might come down closer to $0.08 per unit depending on the plant in Ohio, Guangdong, or Nuevo León.
Here’s a practical pricing snapshot from the kind of jobs I’ve seen quoted for flexible food packaging, though exact numbers depend on structure, color count, and the plant doing the work:
| Order size | Typical unit range | What drives the price |
|---|---|---|
| 2,000–5,000 pieces | $0.18–$0.42/unit | Setup time, digital print efficiency, multiple revisions |
| 10,000–25,000 pieces | $0.08–$0.22/unit | Improved press utilization, more stable material buying |
| 50,000+ pieces | $0.04–$0.12/unit | Volume efficiency, lower per-piece labor, better material economics |
Those ranges are only directional. A metallized structure with high barrier and matte lamination will not price the same as a simple printed label. And if you’re using multiple SKUs, the cost of managing color changes, art versions, and pack separation can climb faster than people expect. A three-flavor launch in Denver may be fine at 6,000 units total, but once you split that into six flavors, the per-SKU overhead shows up fast.
Packaging format can also change labor costs. Roll format may work better on automated lines, while pre-formed wrappers or carton-packed units can make handling easier for smaller facilities. I once toured a co-packer in Ohio where the team was losing almost a full shift a week because the wrappers arrived in a format that didn’t suit the infeed. One change in roll width fixed the problem. That’s the sort of detail that makes or breaks personalized protein bar wrapper printing outcomes. A 120 mm roll width versus a 128 mm roll width can be the difference between smooth feeding and a pile of curled scrap by 2 p.m.
If sustainability is part of your brief, that can affect substrate choice as well. Some brands ask about FSC-certified paper components or lower-impact materials, and that’s a fair question. For broader packaging and forestry standards, the Forest Stewardship Council is a useful reference point. Just remember that “eco-friendly” is not one material category; it depends on the structure, the barrier need, and the end-of-life realities. A recyclable structure in California may not exist in the same recycling stream in Alberta or Bavaria.
Step-by-Step Process for Personalized Protein Bar Wrapper Printing
The cleanest projects begin with product specs, not logo files. Before personalized protein bar wrapper printing starts, define the bar dimensions, filling type, target shelf life, expected temperature exposure, and whether the package needs tamper evidence or cold-seal behavior. A bar shipped in summer to distribution centers in Texas needs a different packaging conversation than a bar sold locally through a refrigerated café chain. I’ve seen a 35 g bar and a 70 g bar use the same dieline proposal, which is a great way to waste a week and annoy three departments.
Next comes design development. This is where brand colors, messaging hierarchy, barcode placement, and legal copy all get arranged into a real package layout. The printable area has to match the printer’s dieline, and the artwork should be checked in both digital view and a physical package map. A strong design is not only attractive; it is readable, manufacturable, and aligned with the realities of the filling line. If you’re printing in Barcelona, Shenzhen, or Guadalajara, ask for the exact flat size in millimeters before your designer starts decorating the page like it’s a concert poster.
Proofing is where the job either becomes smooth or starts to wobble. Digital proofs are useful for layout and text checks, but they do not fully replace a physical sample. Press checks can show color accuracy and ink behavior, while a finished sample confirms fold lines, seal areas, and fit. I’ve seen a beautiful screen proof turn into a headache because the barcode sat too close to a seam, and the scanner picked up the fold instead of the code. That kind of problem is expensive, but it is also preventable. I still remember one approval meeting in New York where everyone nodded at the PDF, then the first sample came back and the logo was basically arguing with the seam. Silence. Then laughter. Then rework. That reprint added four business days and about $900 in avoidable cost.
Production planning usually includes quoting, artwork review, proof approval, print production, converting, and delivery. For a straightforward order with ready artwork and commonly stocked film, timelines can be fairly tight. For a more customized structure, or if the job needs multiple approval rounds, it takes longer. A realistic range for many packaging jobs like this might be 12 to 15 business days from final proof approval, though material availability and current plant load can shift that. personalized protein bar wrapper printing moves faster when the brand gives clean files and decisive feedback. If the film has to be sourced from a mill in South Korea or a converter in Poland, add another 3 to 5 business days for freight and customs buffer.
Then comes line readiness. Wrappers or rolls should arrive counted, protected from damage, and labeled clearly by SKU. Before a full production run, teams should test a small batch to confirm seals, print alignment, and feeding behavior. That small trial is cheap insurance. It’s also where a good operations team notices if the wrapper stiffness, roll winding, or seal temperature needs a tweak. A 20-minute setup run in one plant in Charlotte can save 2,000 wasted wraps by the end of the shift.
Here’s the sequence I usually recommend to clients:
- Measure the bar and confirm the packaging format.
- Build the artwork around the dieline and safe zones.
- Review all nutrition and regulatory copy.
- Approve a proof or physical sample.
- Run a small fill test before committing to full production.
- Check finished inventory against the purchase order and SKU plan.
At Custom Logo Things, this is also where our Manufacturing Capabilities conversation becomes useful, because the best print choice depends on the exact job, not a generic assumption. A brand trying to launch three flavors in a small test run has different needs than a national account running 100,000 wrappers into a high-speed line. I’ve seen a startup in San Diego save almost 22% by switching from a premium laminate to a simpler film for the first production lot.
If you want one practical rule from the factory floor, here it is: approve the printed package only after you have seen it in the context it will actually live in. Put it next to the bar, under store lighting, and if possible through the actual pack line. I’ve never regretted that step, and I’ve rarely seen a client who did. A sample approved on a laptop at 9 p.m. in Seattle is not the same thing as a sample checked beside a running sealer at 6 a.m. in a warehouse in Atlanta.
Common Mistakes to Avoid in Personalized Protein Bar Wrapper Printing
The biggest mistake I see is designing for looks and forgetting performance. A wrapper can look sharp on a monitor and still fail in use if the barrier is weak, the seal area is undersized, or the surface scuffs too easily. In personalized protein bar wrapper printing, the package has to look good after filling, stacking, shipping, and handling by people who may never treat it gently. A 500-unit test in Portland that survives shelf time does not automatically mean a 50,000-unit run will behave the same way in Las Vegas heat.
Another common issue is putting critical copy too close to the trim or fold lines. Protein bar wrappers often wrap around a narrow shape, so the safe zone is tighter than many designers expect. If a flavor claim lands on a seam, it can disappear on the shelf. If a legal line sits at the very edge, it may get cut off or distort when the wrapper forms. Leave at least 3 mm of breathing room wherever possible, and a little more if the converter is using tighter folds.
Low-resolution imagery causes avoidable trouble too. A blurry nut cluster or softened brand mark can make the whole package feel cheap. I’ve had conversations with marketing teams who wanted to “just use the web image,” and that almost never works well once the file is enlarged for print. Keep the file resolution high, use the correct CMYK profile, and make sure fonts are properly outlined or embedded. If your artwork is built at 150 dpi instead of 300 dpi, the package will remind everyone that shortcuts are visible.
Timing is another trap. Brands often underestimate how long regulatory review, proofing, and shipping really take. Then a launch date gets fixed by sales, the retailer wants pallets by a certain week, and everyone is suddenly asking for shortcuts that do not exist. If the design needs FDA review, co-packer signoff, and a sample test, plan for that from the start. A three-step approval path in Toronto can easily turn into 10 business days before production even starts.
Ordering the wrong quantity is especially painful on test launches. Too little inventory means reordering under pressure, which usually raises cost. Too much means you’re sitting on packaging that may need to be updated after a recipe change, a new UPC, or a design refresh. I’ve seen one startup warehouse boxes of obsolete wrappers because they forecast the bar sell-through correctly but forgot that the packaging itself would need a revision after flavor number two launched. That was a very expensive reminder that the wrapper is part of the inventory too.
There is also a quality control mistake that gets overlooked: not verifying seal behavior under realistic conditions. A wrapper that seals fine at 70°F may behave differently in a hotter production room. If the bar contains oils or a soft filling, the seal margin and film compatibility need to be checked carefully. That is why testing is not a luxury in personalized protein bar wrapper printing; it is basic risk management. One bad seal setting in a facility in Nashville can create 1,200 weak packs before lunch.
Expert Tips for Better Personalized Protein Bar Wrapper Printing Results
My first tip is simple: build the package for the line, not just for the mockup. A package that looks beautiful in a PDF can still be awkward on a filling machine if the film is too stiff, the seal zone is too narrow, or the roll unwind doesn’t suit the equipment. Good personalized protein bar wrapper printing comes from understanding how the package behaves after it leaves prepress and hits the factory floor. If the machine in your plant in St. Louis runs at 85 packs per minute, design for that reality, not for a fantasy render.
Second, work with a printer or converter that can talk honestly about substrate compatibility, seal performance, and food-contact considerations before the art is finalized. If a supplier waits until the final proof to point out a material mismatch, you’re already behind. I prefer vendors who ask annoying but useful questions early, because those questions usually save a launch. Yes, they can feel picky. I like picky. Picky keeps me from getting a panic call on a Friday night. A good supplier in Guangdong or Wisconsin will tell you straight whether your selected film can handle nut oil migration or not.
Third, make SKU identification easy. In multi-flavor protein bar lines, a clear color system and consistent typography prevent confusion in fulfillment, in retail resets, and on the production floor. One client I worked with used a different band color for every flavor, then kept the brand block in exactly the same place. Their warehouse team said picking mistakes dropped almost immediately because the wrapper structure made sense at a glance. A strawberry SKU with a red band and a peanut butter SKU with a tan band is not revolutionary. It is just useful.
Fourth, request samples under realistic conditions. If the bar will live in a warm warehouse, a refrigerated retail case, or a shipping lane with summer exposure, test for that. A sample that looks fine at room temperature may tell a different story after two days in transit. That is especially true with matte laminates, some paper-like substrates, and packages with dark solid inks. I’ve watched a matte brown wrapper scuff badly on a truck run from Seattle to Boise, and the brand was not thrilled when the “premium” finish looked tired before it hit the shelf.
Fifth, pay attention to small line-side details. On a production visit in a Midwest co-packing plant outside Indianapolis, I watched a minor change in seal margin reduce waste by a noticeable amount because the jaws stopped catching on the edge of the film. It was not flashy. It was just smart packaging engineering. In my experience, small adjustments to seal temperature, ink density, or laminate selection can make a surprising difference in run stability and scrap rate. A 5°C seal temperature change can be the difference between a clean pack and a pile of reject bars.
Here are a few checks I recommend before release:
- Confirm the barcode scans cleanly on a flat sample and a filled sample.
- Check all flavor variants for consistent typography and logo placement.
- Verify that allergen text is readable without magnification.
- Review how the package looks under bright retail lighting and softer warehouse light.
- Ask for a real sample of the final print finish, not only a digital mockup.
One final thought: if the project has room for a premium cue, use it deliberately. A soft-touch surface, a restrained matte finish, or a targeted spot color can elevate the package without turning it into a design circus. That kind of restraint is often what makes personalized protein bar wrapper printing look expensive in a good way. A $0.03 upgrade on finish can be worth it if the wrapper ends up on shelf in London, Singapore, or Los Angeles next to direct competitors.
What to Do Next Before You Order Personalized Protein Bar Wrapper Printing
Before you ask for quotes, gather the basics: bar dimensions, ingredient copy, barcode data, target quantity, package style, and any compliance requirements. If you can hand a supplier a clean brief, personalized protein bar wrapper printing becomes much easier to quote accurately and much less likely to stall in revision. A supplier in Ho Chi Minh City or New Jersey can usually quote faster when they get a flat sketch, exact unit count, and the final artwork dimensions in millimeters.
I also recommend putting together a short packaging brief with shelf-life goals, distribution channels, and any retail expectations. A DTC bar that ships in small boxes has different needs than a club-store bar moving by the pallet. If the packaging has to fit inside a larger shipper, or if it will be handed out at events, say that early. Those details change material and print choices more than most people expect. A product going into gyms in Atlanta and airport kiosks in Phoenix is not the same packaging job.
Ask for two or three material options with side-by-side pricing. One option might be a more premium barrier film, another a lighter structure, and a third a cost-focused choice for the test run. That comparison usually helps decision-makers balance appearance with unit economics instead of guessing. I’ve found that once teams see the tradeoffs clearly, they make faster, better packaging calls. A quote at $0.22 per unit versus $0.14 per unit means something only when you can see what barrier, finish, and timeline each price buys.
Confirm the timeline checkpoints in writing. You want to know when the proof is due, when the sample will arrive, when production starts, and when the shipment leaves. That prevents the classic “we thought it was already approved” problem. For personalized protein bar wrapper printing, a written schedule is worth a lot more than a vague promise. A straightforward job might move from proof approval to shipment in 12-15 business days, while a complicated multi-SKU launch in Montreal or Bangkok may need closer to 20 business days.
And before you release the order, do one physical fit test. Measure the bar, review the copy, request samples, compare the substrate options, and only approve after you have seen the package work in real life. I’ve seen enough rushed packaging launches to say this plainly: the brands that slow down for one careful sample almost always spend less time fixing mistakes later. That one sample can save a reprint, a missed store date, and a very unpleasant call with sales.
If you’re planning personalized protein bar wrapper printing for a new flavor line, a private label program, or a retail refresh, the smartest next move is to collect your specs, talk through print method options, and check the package in the same conditions it will face on the shelf and in transit. That’s how you get a wrapper that looks sharp, prints cleanly, and actually helps the product sell. I’d rather spend 30 minutes on a sample review in Philadelphia than 3 days fixing a mistake after pallets have already left the dock.
FAQ
What is personalized protein bar wrapper printing used for?
It is used to Create Custom Packaging for protein bars that matches the brand, flavor, and product requirements. It helps with shelf appeal, product identification, ingredient communication, and promotional campaigns. It can be used for retail, subscription boxes, gyms, sports events, and private label launches, whether the run is 2,000 units in Minneapolis or 80,000 units in Shenzhen.
How much does personalized protein bar wrapper printing usually cost?
Pricing depends on run length, print method, material choice, finishing, and artwork complexity. Short runs usually cost more per unit, while larger runs often reduce unit cost but require higher upfront commitment. Special barrier films, lamination, and multiple SKUs can also raise the price. A realistic quote might be $0.15 per unit for 5,000 pieces or closer to $0.08 per unit at 25,000 pieces, depending on the plant and substrate.
How long does the personalized protein bar wrapper printing process take?
Timelines vary based on proofing, material availability, and whether the job uses digital or flexographic printing. Simple jobs with finalized artwork can move faster, while custom structures and multiple approvals take longer. A physical sample or press proof is often the step that adds the most calendar time. For many jobs, expect 12-15 business days from proof approval, plus extra time if materials need to be sourced from overseas.
What file format is best for personalized protein bar wrapper printing?
Vector files such as AI, EPS, or print-ready PDF are usually preferred for sharp text and accurate color placement. Files should include bleed, safe zones, and linked images at print resolution. Printers often ask for spot colors or CMYK setup depending on the print method. If you’re sending files for a 125 mm by 70 mm wrapper, make sure the dieline is locked and the barcode has a clean quiet zone around it.
What should I check before approving a wrapper proof?
Verify dimensions, fold lines, seal areas, barcode placement, ingredient text, and allergen statements. Check color accuracy, logo clarity, and whether important details stay clear of trim edges. If possible, approve a physical sample to confirm fit and real-world appearance. I also recommend checking the proof under the same lighting you’ll see in stores, like bright retail LEDs or warehouse fluorescents.