What personalized sewing labels for clothing actually solve
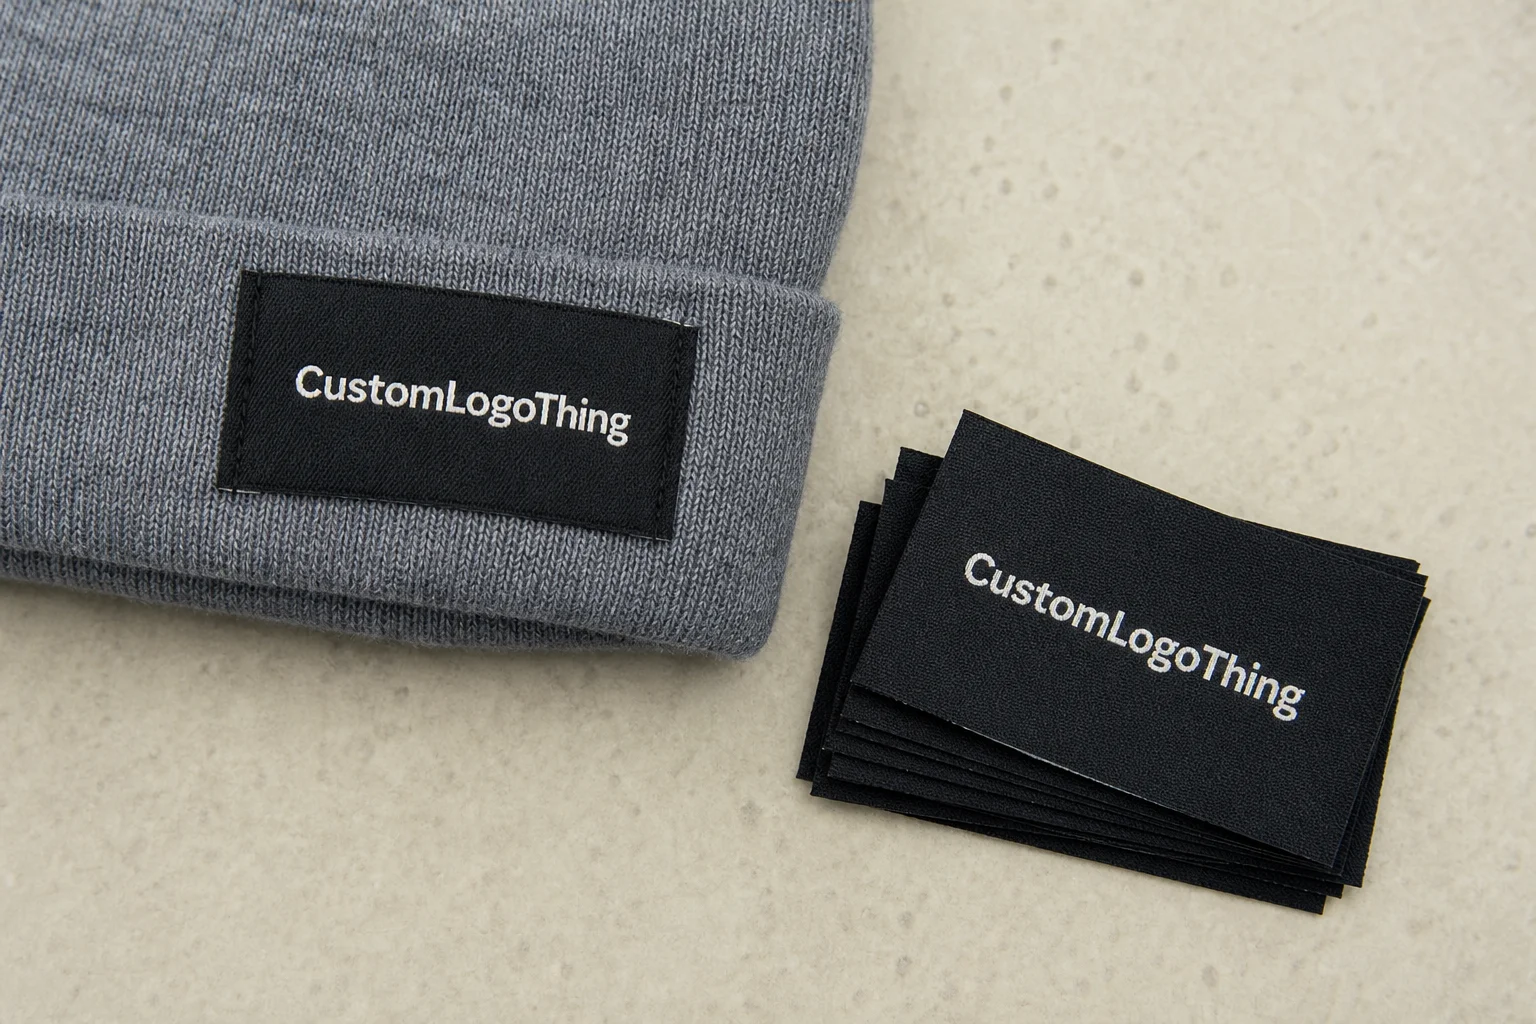
Personalized Sewing Labels for clothing do more than identify a brand. They close the loop between the garment and the person buying it. A label can make a handmade top feel retail-ready, help a boutique customer tell one size from another, and keep care information attached to the product instead of disappearing into a hangtag or box insert.
That matters because the inside of a garment is part of the customer experience. Buyers inspect seams, thread, trims, and labels more closely than brands often expect. If the label looks thin, crooked, or mismatched to the fabric, the garment can feel unfinished even when the construction is otherwise strong. A good label does the opposite. It reinforces the impression that the maker paid attention all the way through production.
There are several functions to separate early. A branding label carries the logo or brand name. A care label lists washing, drying, fiber content, or compliance details. A size tab keeps product sorting simple. Decorative labels are mostly about identity and visual tone. These are related, but they are not interchangeable. A brand that orders the wrong type usually ends up paying for a second run or trying to force one label to do three jobs badly.
Material choice shapes both appearance and wear. Woven labels are usually the first stop for brands that want a sharper look and better durability. Satin is smoother and often easier on skin. Cotton has a softer, more natural feel and works well for brands with a handmade or eco-leaning position. Printed labels can hold tiny text and fine graphics, but they depend heavily on the print process and the wash requirements of the garment.
Practical rule: the best label is the one that works after the garment is worn and washed, not the one that looks best in a mockup. A soft baby tee, a denim overshirt, and a technical hoodie do not want the same label construction. That sounds obvious. It is still the mistake that creates the most reorders.
For buyers comparing options in Custom Labels & Tags, it helps to think like a production manager rather than a designer. Ask what the label has to survive, where it will sit on the body, and how much space the garment actually gives you.
How the label production process and timeline work
The production path for personalized sewing labels for clothing is usually simple on paper and less simple in practice. It starts with artwork review. A supplier checks whether the file is sharp enough, whether the text will survive the final size, and whether the design can be woven or printed without losing legibility. Then comes proofing. That stage confirms spelling, fold type, color placement, dimensions, and any special instructions.
After proof approval, the order moves into production. Woven labels are typically set on looms. Printed labels are prepared through the relevant print process. Then the labels are cut, folded or finished, inspected, packed, and shipped. Each step adds small amounts of time, but the biggest schedule risk is usually not the machine work. It is the back-and-forth before approval.
A clean, standard woven label can move faster than a multi-color satin label with tiny type and a custom fold. The difference is not cosmetic. Fine detail requires tighter setup and more careful checking. A short label with one or two colors is easier to keep consistent across a large run. A complex label may still be worth producing, but it should be ordered with realistic timing.
Common lead times are often around 12 to 15 business days after proof approval for a straightforward custom run, with longer timelines for detailed artwork, unusually small quantities, peak season congestion, or special finishing. Sample orders can arrive sooner, but sample timing is not a substitute for bulk timing. A sample proves the look and feel; it does not reserve the bulk machine slot.
Shipping should be treated as part of production, not as an afterthought. Domestic delivery is usually predictable. International freight adds customs clearance, transit variability, and occasionally pallet or carton delays. If the labels must arrive with finished garments, or before a wholesale delivery window, a margin of safety is necessary. Working backward from the actual deadline usually produces a better schedule than counting from the order date.
A proof is not paperwork. It is the last checkpoint before the order becomes expensive to change.
Cost, pricing, and MOQ factors that change your quote
Pricing for personalized sewing labels for clothing is driven mostly by quantity, material, size, color count, and finishing. MOQ, or minimum order quantity, matters because setup costs are fixed while the number of units changes. A small run carries the same basic prepress and machine setup burden as a larger one, so the unit price is usually higher when the order is small.
That is why two quotes can look similar on the surface and still produce very different economics. A label with a lower unit price may still cost more in total if it uses a special fold, a dense weave, or a more expensive finish. The opposite also happens. A slightly higher unit price can be the better move if it eliminates a second label type or reduces sewing complexity on the garment line.
For planning purposes, here is a useful comparison:
| Option | Typical Cost Driver | Best For | Tradeoff |
|---|---|---|---|
| Woven label | Thread count, color count, size | Durable branding, retail garments, heavier use | Very fine detail raises setup complexity |
| Satin label | Soft hand feel, print coverage | Neck labels, children's wear, light fabrics | Less textured than woven construction |
| Cotton label | Material and finishing | Natural, handmade, or understated product lines | Less crisp for tiny logos or dense text |
| Printed label | Ink coverage, print method, coverage area | Care text, minimal branding, small layouts | Feel and durability depend on the substrate |
For small brands, a rough planning range for Custom Woven Labels might land around $0.18 to $0.28 per unit at a 5,000-piece run, with smaller orders or more complex finishing often higher than that. That is a planning figure, not a quote. Actual pricing depends on size, weave detail, colors, fold style, and freight. The landed cost is the number that matters, because shipping and customs can erase a low unit price fast.
There are also moments when paying more is rational. Premium outerwear, children’s garments, and high-touch retail pieces usually need better wash resistance, softer edges, and tighter construction tolerances. A label that survives abrasion, repeated laundering, and close inspection protects the garment more than a marginal discount would. In that sense, the label behaves like any other production component: it should be specified against the use case, not against the lowest line item.
For buyers comparing sourcing standards, it helps to think in the same way packaging teams do when they evaluate material performance against transport or handling conditions. Organizations such as the ISTA and the FSC are useful references for how spec discipline affects outcomes, even if the label itself is not a shipping carton or paper insert.
How to choose the right material, fold, and finish
Material choice starts with touch, then moves to durability. Woven labels are the default for brands that want crisp detail and strong wear performance. Satin is smoother, which makes it a better fit for garments that sit against skin. Cotton is softer in tone and texture, and it works well for brands that want the label to feel less manufactured. Printed labels can carry fine lines, small legal text, and simple logos efficiently, but the substrate and print method need to match the wash cycle.
Fold style changes how the label installs and how it reads on the garment. A center fold is common when the label is sewn into a seam or folded over an edge. End folds are useful when the label needs hidden edges or a cleaner finish in the neckline or side seam. Loop folds are helpful for hanging or visible branding details. Straight-cut labels are flexible, but they need a clear sewing plan so the edges do not fray or distort.
Finish matters as much as the main material. A firm woven label can look excellent on denim but feel intrusive on a baby garment. A soft satin label can disappear nicely inside a blouse but may not project the same visual weight on a structured jacket. Edge quality also affects perception. Fraying, curling, or rough trimming makes even a strong design look inexpensive.
Size matters more than most buyers expect. A logo that reads clearly at 2 inches wide may become muddy at 0.75 inch. Tiny text should be judged at actual production size, not at desktop zoom. White space is part of the design, not wasted space. Crowded layouts tend to look cheaper because they are harder to read and harder to sew cleanly.
The garment category should drive the spec. A luxury knit line may call for a softer woven label with restrained contrast. A workwear brand might prefer a bolder, heavier label that feels durable. Handmade baby clothing usually needs softness and clarity above everything else. The best label is not the most elaborate one. It is the one that matches the fabric, the customer, and the wash behavior of the product.
For brands concerned about sourcing, the packaging and outer materials may deserve certification checks, but the label spec should still stay practical. Overbuilding a label to make it sound premium is usually wasted money. A label that performs cleanly and fits the product is enough.
Step-by-step: ordering personalized sewing labels for clothing
Start with a production-ready brief. Gather the logo file, exact wording, label dimensions, garment type, preferred placement, color direction, and whether the label needs branding only or branding plus care information. If the label must fit in a narrow seam allowance, mention that up front. If the garment uses a stretch knit or very soft fabric, that matters too.
Then review the proof carefully. Check spelling, line breaks, icon placement, fold type, and the way the artwork reads at the actual size. The screen may make a thin line look strong, but that same line can disappear in the finished weave. Contrast should be checked under realistic conditions, not just on a bright monitor. If the brand is new to sewn labels, a proof that shows the label on an actual garment mockup is more useful than a flat artwork preview.
If a physical sample is available, use it. A sample reveals details that a PDF cannot: hand feel, edge behavior, how the label sits after sewing, and whether the fabric texture interferes with the logo. It also exposes hidden problems such as labels that twist, buckle, or feel harsher than expected when stitched into the garment.
After approval, the job is effectively locked. That is where most preventable mistakes become expensive. Production then moves through cutting, finishing, inspection, and packing before shipping. If there is a customs step, add that to the schedule immediately. A label that arrives two days late can delay a garment launch, a retail intake, or a wholesale shipment, and that delay often costs more than the labels themselves.
Use this Checklist Before You confirm the order:
- Confirm the exact brand name, logo treatment, and any legal text.
- Choose the garment category and intended placement.
- Decide whether you need branding only or branding plus care details.
- Specify size, fold, finish, and any softness requirements.
- Review the proof on a full screen, not just a phone preview.
- Ask about sample timing if the launch window is tight.
- Verify whether the quote includes freight, taxes, or customs handling.
Common mistakes that make clothing labels look cheap
The first mistake is choosing a material that works against the garment. A stiff label on a soft knit feels wrong immediately. A label that is too thin for a jacket can wrinkle, curl, or wear out before the garment does. Comfort and structure have to be matched to the fabric.
The second mistake is crowding too much into too little space. Small labels do not forgive dense copy, low contrast, or too many colors. If the design must fit into a tight area, the artwork should be simplified before production, not after. That usually means fewer words, fewer icons, and more breathing room around the logo.
The third mistake is using one label for every job. Branding labels, size tabs, and care labels serve different functions. A decorative tag is not a wash instruction label. A size marker should remain legible after laundering and repeated handling. Brands that blur those roles often end up with labels that look polished in a proof and confusing in real use.
Proof review is another weak point. Long care-copy lines, misplaced symbols, and abbreviations are easy to miss when a deadline is tight. One missing letter or one incorrect fold note can force a reprint. That is not a hypothetical problem; it is one of the most common sources of avoidable cost in apparel trim orders.
Undershooting quantity also creates trouble. A small first order can feel cautious, but if the product sells faster than expected, a reorder may cost more and create a slight visual mismatch between batches. Buyers notice batch drift. So do retailers. Consistency in labels is part of consistency in the product line.
Finally, do not judge the label by the mockup alone. A flat artwork file cannot show how the label behaves on a seam, how it bends over fabric thickness, or how the finish changes in daylight. The label that looks elegant on a screen can look thin or awkward once it is sewn into actual clothing.
Expert tips for better results and a smoother reorder process
Design for the garment first. Sewing space, seam thickness, stretch, and placement all affect the final result. A label that looks balanced in a file may shift once it is stitched into a curved neckline or a narrow side seam. That is why the most useful spec is not just an artwork file. It is an artwork file tied to a garment use case.
Keep one master specification sheet for each label style. Include the approved artwork, exact size, fold type, color references, and placement notes. That prevents drift when the order is repeated later by a different person or a different team. Reorders go wrong most often when a small detail is remembered from memory instead of pulled from a controlled spec.
Test the label against the actual fabric category. A satin finish that feels fine on a blouse may not hold up the same way on outerwear. A woven label that works on denim can feel too firm on a soft knit. If there is doubt, buy a small test quantity and sew it before committing to volume. The cost of one sample run is usually lower than the cost of customer complaints.
Think in systems rather than one-off artwork requests. A clean label program often includes three components: branding label, size tab, and care or content label. That structure keeps the line organized and makes future production easier. It also creates a more consistent customer experience, because the garment reads as one product family rather than a set of isolated items.
Order a buffer. Replacements happen. Promotional runs happen. Pieces get damaged, and sometimes a small edit to packaging or care text forces a new batch. Having extra labels from the same run protects color continuity and prevents rushed reorders. For brands comparing Custom Labels & Tags across several product lines, that buffer is often the difference between a smooth season and an unnecessary scramble.
Next steps for ordering the right labels
Start with function. Identify where the label will sit, how visible it needs to be, and what information it must carry. A neck label, side-seam label, hem tag, and care label all face different constraints. Once the role is clear, the rest of the specification gets easier to narrow down.
Then gather the essentials: logo file, exact wording, size target, color direction, fold preference, and any wash or fiber information. If you are choosing between materials, compare them against the garment rather than against a catalog sample. The right label should fit the cloth, survive the wash cycle, and match the tone of the brand without creating comfort issues.
Ask for a proof before production and pin down the schedule with enough margin for shipping. If the labels have to arrive for a launch, wholesale shipment, or seasonal drop, work backward from that date and leave room for revisions. The cheapest quote is not a good quote if it lands late or requires a reprint.
If you are choosing between two plausible options, shortlisting one softer construction and one more structured construction is usually the cleanest way to decide. The better option is the one that suits the garment category, the wearing experience, and the reality of your production timeline. Personalized sewing labels for clothing are small pieces of trim, but they carry a large share of the product’s first impression. That is why the spec has to be treated seriously.
How do personalized sewing labels for clothing differ from printed tags?
Sewn labels are attached physically and usually create a more durable, finished look. Printed tags can be thinner and softer, which is useful for small information sets or applications where bulk matters. The better choice depends on fabric weight, wash durability, and how the label will feel against skin.
What information should I include on custom clothing labels?
At minimum, include the brand name or logo. If the garment needs it, add size, fiber content, and care instructions. Keep the text short enough to remain readable at the final label size, and avoid crowding the design with extra detail that does not help the customer.
What affects the price of personalized sewing labels the most?
Quantity is usually the biggest factor because setup costs are spread across more units in larger runs. Material choice, size, color count, fold type, and finishing also change the price. Rush timing, freight, and customs can raise the landed cost even when the unit quote looks reasonable.
How long does it usually take to produce custom clothing labels?
Lead time depends on proof approval, quantity, material, and the complexity of the design. A straightforward run may ship in roughly 12 to 15 business days after approval, while more detailed or heavily customized orders can take longer. Shipping time should always be included in the overall schedule.
What is the best fold or finish for sewing labels on garments?
The best fold depends on where the label will be sewn and how the garment is worn. Center folds and end folds are common for side seams and neck areas, while straight-cut labels can work for many branded applications. Comfort, stitch space, and wash durability should guide the final choice.