Personalized sewing Labels for Clothing do a job that is easy to overlook and hard to replace once it is done badly. A label sits inside a seam, but it still carries brand identity, size information, care guidance, and a quiet signal about quality. People may not study it for long. They do register the difference between a label that feels considered and one that looks like an afterthought.
That distinction shows up quickly. Two tees can be cut from the same fabric, sewn on the same machine, and priced within a few dollars of each other. One arrives with a rough tag, fuzzy text, and frayed edges. The other has a neat woven label with proper fold allowance and enough contrast to read in dim light. The garment has not changed. The perceived value has.
For brands, makers, and small production runs, personalized sewing labels for clothing are less about decoration than about consistency. They keep the garment tied to the brand after the hang tag is gone and the packaging has been thrown away. They also reduce avoidable support questions, especially when size, fiber content, and care instructions need to stay attached to the product. If a project needs a wider trim mix, the right starting point is usually Custom Labels & Tags, then narrowing by structure, finish, and wash requirements.
The useful rule is simple: the cheapest label is rarely the least expensive decision, and the prettiest mockup is not always the most legible one. The details below are the ones that usually decide whether a label works in real production or only on screen.
Why small labels shape how a garment is read
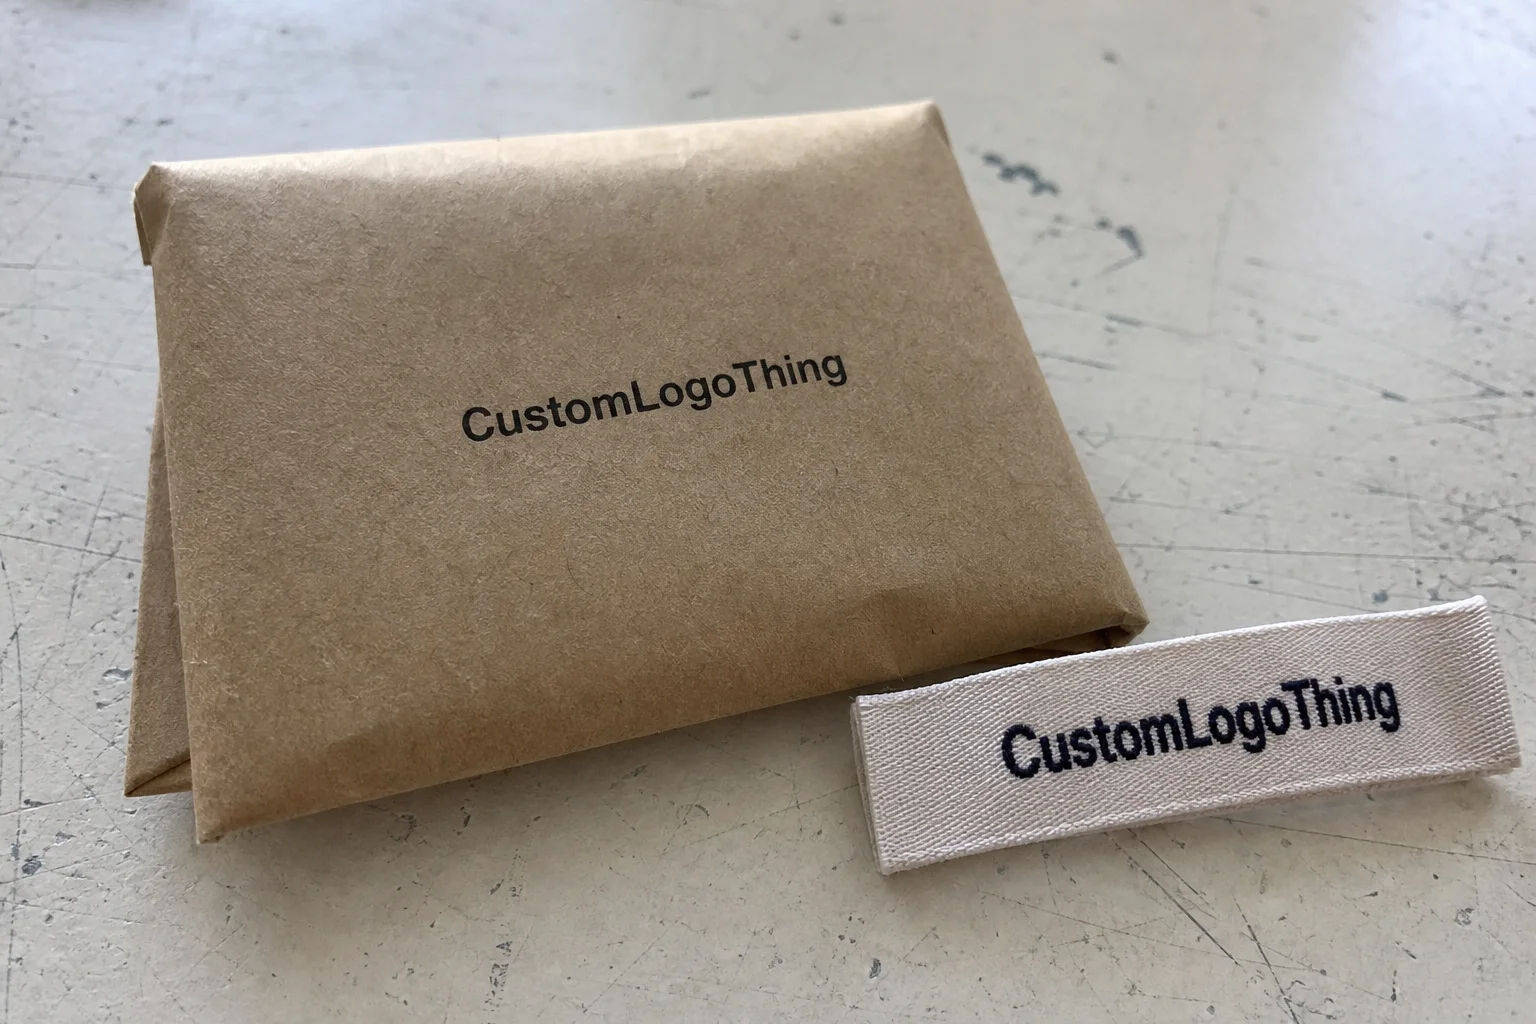
A label does not need much space to influence the entire product. It is one of the few components that can change how a garment feels without changing the cut, stitching, or fabric weight. That is why experienced buyers treat labeling as part of the product build, not a separate branding exercise.
There are three jobs a good label performs at once. It identifies the maker. It helps the garment survive retail handling and repeated washing without losing its identity. It gives the buyer a clean point of reference for care, sizing, or collection updates. The result is practical, not theatrical. Still, the effect on perception is real.
There is also a resale and repair angle that often gets ignored. When a garment keeps its identity through the label, it remains easier to recognize, resell, sort, or restitch later. That is especially useful for clothing that is meant to last beyond a single season. A label that stays readable after repeated laundering is not glamorous. It is what separates durable branding from disposable branding.
For a small run, the label can even change how people describe the item to others. A well-made woven label makes a basic shirt feel finished. A weak one makes the same shirt feel anonymous. That gap matters in categories where customers compare details, not just silhouettes.
One practical test helps here: if the label were removed, would the garment still communicate the same level of care? If the answer is no, the label is doing more than decoration. It is supporting the product’s commercial position.
The smallest component is often the first thing people use to judge whether a garment belongs in the price tier you want.
That may sound severe, but apparel buyers are ruthless about tiny visual cues. A rough edge, an off-center fold, or text that disappears into the weave reads as poor control, even when the garment itself is well made. The label is a compressed version of your production standards.
From artwork to approval: how the order process actually runs
The ordering workflow should be boring in the best possible way. If the process feels vague, the supplier is leaving room for mistakes. A clean order usually starts with artwork, moves through proofing, and ends with production and finishing after approval. That sequence sounds ordinary because it should be.
- Submit the logo file, text, and any required care or size information.
- Choose the label type, dimensions, fold style, and attachment method.
- Review the digital proof with the garment in mind, not just the artwork.
- Approve the sample or corrected proof before production starts.
- Wait for weaving, printing, cutting, finishing, packing, and shipment.
Vector artwork is preferred because it keeps line edges clean at small sizes. Raster files can work in some cases, but they often introduce soft corners, blurred type, or awkward spacing when the design gets scaled down. If a label includes thin lines or small text, the artwork needs to survive compression before it reaches the loom or press.
The proof is where expensive problems can still be prevented. Check spelling first. Then check the hierarchy of the text, especially if the label carries a brand name, size marker, care line, and country-of-origin data. On a screen, all of those can look balanced. Once folded and sewn, the layout may read differently. A line that looked centered can end up hidden in the seam allowance. A small logo can vanish when the label is trimmed.
Woven labels are usually chosen when the brand mark needs durability and a cleaner edge. The design is built into the fabric, so the result tends to hold up better through washing and abrasion. Printed labels are a better fit when the artwork uses finer detail, lighter color builds, or a lower-cost entry point. They can perform well, but their lifespan depends heavily on the print method, the substrate, and how aggressively the garment is washed.
That is why a supplier should be able to tell you what is being used, not just what the label will look like. Fabric base, yarn type, weave density, and finishing method all matter. If the answer is vague, the quote is incomplete.
For orders that need multiple formats across one collection, the safest approach is to standardize the brand logic and vary only what the garment forces you to change. A baby bodysuit, a heavyweight hoodie, and a lightweight tee do not need the same label structure. They do need the same attention to readability and wear comfort.
Materials, folds, and sewing details that change the result
The material determines the hand feel. The fold determines how the label sits in the garment. The attachment method determines whether the label behaves well in production. If any one of those is mismatched, the label can look polished in mockup and awkward in the finished piece.
| Material or build | Best use | Hand feel | Durability | Typical cost pressure |
|---|---|---|---|---|
| Polyester woven | Everyday apparel, uniforms, repeated wash cycles | Firm, stable, crisp | High | Usually the most cost-effective woven option |
| Satin | Premium basics, lingerie, inner-neck branding | Smooth, soft, low-friction | Medium to high, depending on finish | Mid-range |
| Cotton | Natural, heritage, or matte brand styling | Textured, softer visual texture | Medium | Mid-range to higher when detail is complex |
| Heat-transfer | Light garments, technical wear, low-bulk placement | Very low profile | Depends on press settings and wash care | Efficient for simple marks and data lines |
For price context, a standard polyester woven label at moderate volume often lands around $0.08-$0.18 per piece before shipping, setup, and extras. Small runs can move into the $0.25-$0.60 range quickly, especially with multiple colors, custom folds, specialty edges, or low quantities. That is not a markup trick. It is the normal result of spreading setup labor across fewer pieces.
Fold style matters more than many first-time buyers expect. A center fold is common for neck seams because it gives a clean two-sided presentation. An end fold works better for side seams or edge placement. A loop fold is useful when the label needs to show from both sides or stand away from the garment body. A straight cut leaves the most flexibility but also asks the sewing line to manage more raw edge. The fold should follow the garment, not the mood board.
Dimensions need the same discipline. A label that is too wide for the seam allowance will either bunch, twist, or force production to improvise. That becomes obvious on thin fabrics, activewear, baby garments, and anything worn close to the skin. Small garments usually need compact labels with limited copy. Outerwear can accept larger labels, but even there, bulk is a risk if the label sits in a sensitive area like the neck or cuff.
Readability is the part people underestimate most. Thin lettering, low contrast, and crowded layouts may look refined in a digital proof and then lose clarity once woven. If the design has small type or multiple colors, ask for a sample or a physical strike-off. Screens are useful. They are not proof of real-world legibility.
For brands that need both branding and regulatory information, personalized sewing Labels for Clothing work best when the hierarchy is disciplined. Brand name first. Required information second. Decorative elements last. If the label is too busy, the most important line loses visibility and the whole thing starts working against itself.
One more practical issue: apparel labels do not exist in isolation. If the product also uses hang tags, folding cartons, or insert cards, the visual language should be consistent across all of them. For paper components, FSC-certified stock is a sensible baseline, and the guidance at FSC is useful when you need traceable paper sourcing. If your garments ship through distribution centers or retail channels, ISTA testing standards are worth reviewing before packaging is locked.
Pricing, MOQ, and what a real quote should include
Good pricing is specific. Weak pricing is just a number. If a supplier does not ask about size, fold, material, color count, and finish, the quote is probably too loose to compare meaningfully. Label pricing is built from several inputs, and each one can change the final unit cost.
MOQ means minimum order quantity, and it usually exists to cover setup time, machine preparation, proofing, and finishing labor. In plain terms, the lower the quantity, the less each piece benefits from scale. A small order is useful for testing a design, but the unit cost will usually be higher. That is normal and predictable.
When comparing quotes, the useful questions are concrete:
- Does the price include artwork setup or proofing?
- Are shipping, taxes, and packaging included?
- Is the quoted lead time counted from payment or from proof approval?
- Do special folds, color matching, or edge finishes add separate charges?
- Is there a one-time setup fee, or does it recur on reorder?
That checklist matters because a cheap-looking quote can become expensive once all the extras are added. A label at $0.09 each sounds attractive until setup, shipping, and revision fees are layered in. A quote at $0.14 that already includes the real work may be the better deal. Apparel production is full of that kind of comparison error.
One useful habit is to ask for a spec sheet in writing before you compare anything. If one supplier is quoting polyester woven with a center fold and another is quoting printed satin with a straight cut, the unit price is almost meaningless as a comparison. Those are different products. Treating them as identical leads to bad decisions.
For small brands, the most sensible goal is not the absolute lowest unit price. It is the best balance of durability, readability, and production reliability. A label that survives laundering, remains legible, and fits the garment without creating bulk is worth more than a slightly cheaper one that has to be replaced later.
That tradeoff becomes more obvious with personalized sewing Labels for Clothing that go into multiple collections. If one line is premium and another is meant to be functional and quick-turn, the label specs do not need to be identical. What they do need is consistency inside each line, so the brand feels deliberate rather than improvised.
Production timelines and quality-control checkpoints
Lead time is usually longer than the first quote makes it sound, because the quote rarely captures the back-and-forth before approval. A realistic timeline starts with artwork review, moves through proofing, then production, finishing, packing, and shipping. If any approval step stalls, the calendar moves with it.
For standard runs, 10-15 business days after proof approval is a common window, though actual timing depends on order size, material availability, and design complexity. Rush production can be faster, but it usually costs more and leaves less room for correction. If the labels are tied to a launch, a market drop, or a seasonal delivery, build in buffer time. Tight calendars punish small mistakes.
Several factors usually speed a label order up:
- Vector artwork that is already clean and properly sized.
- Clear dimensions and fold direction from the start.
- Simple color structures with no special finishes.
- Fast approval from the buyer once the proof arrives.
- Materials already in stock rather than needing a custom run.
Several factors slow it down:
- Revisions after proofing begins.
- Color matching requests that need extra testing.
- Unusual folds or edge treatments.
- Artwork that is too small, too busy, or supplied in the wrong format.
- Approval delays over weekends or across time zones.
The most overlooked checkpoint is the start date itself. Some suppliers count lead time from payment, others count from proof approval. Those are not interchangeable. If the garment production line is waiting on labels, a one- or two-day misunderstanding can be enough to slow the whole order.
Physical sample approval is worth the time when the design is complex or the garment is sensitive to texture. A sample tells you what the proof cannot: how the label feels against skin, how the fold sits in a seam, whether the contrast is readable in real lighting, and whether the label creates unwanted bulk. A mockup can be accurate and still be the wrong answer.
This is where quality control stops being abstract. Inspect the edge finish, the thread tension, the cut line, the spelling, the color consistency, and the stiffness of the final piece. A good label should read cleanly and stay where it is sewn. If it twists, curls, or scratches, the spec needs adjustment before the run scales up.
Ordering mistakes that create extra cost
The first common mistake is treating all garments the same. A label that works on a hoodie can be too thick for a lightweight tee or babywear. Thin fabrics punish bulk. Sensitive skin punishes rough texture. Technical garments punish anything that traps heat or prevents clean movement. The right construction depends on where the label is going, not just what the brand wants it to say.
The second mistake is asking for too much detail at too small a size. Tiny text, crowded icons, and thin lines are where woven labels lose clarity fastest. Designers often build a proof on a screen and assume the same image will survive at 15 or 20 millimeters wide. It usually will not. If the supplier says the detail is at risk, they are usually saving you from a bad run.
The third mistake is poor placement. A label that sits in the wrong seam can twist, pucker, or irritate the wearer. A label that is too rigid can also change how the neckline drapes. Those are small failures, but they are visible. In apparel, visible often means expensive.
The fourth mistake is leaving compliance information until the end. Fiber content, size marking, and care instructions are not decorative. If the branding fills the available area, there may be no room left for required text. That means redesign, reproofing, and more cost. It is a simple problem with a predictable bill.
The fifth mistake is ordering a large run before checking a finished sample on the actual garment. A label can look correct when flat and still behave badly when sewn into fabric. One sample is usually enough to catch spacing, bulk, or contrast problems. Skipping that step is how brands pay twice for the same lesson.
Most of these errors happen because buyers treat personalized sewing Labels for Clothing as decoration instead of production hardware. That is the wrong mental model. The label has to fit the sewing operation, the fabric, the wash cycle, and the customer’s skin. If it fails any one of those, the cost of the mistake tends to spread.
How to prepare before requesting samples
Before requesting samples, gather the basics in one place: brand name, logo file, garment type, label size target, fold preference, and any required care or size copy. That reduces back-and-forth and gives the supplier a better chance of producing a useful first proof. Guessing is what slows small projects down.
Measure the actual seam space on the garment. Not the intended space, the real one. A label that is only a few millimeters too wide can create a fit issue once it is folded and stitched. The problem may seem trivial on paper and then turn into a line-speed issue during production.
If the design includes fine text, multiple colors, or a premium finish, ask for a sample or strike-off before approving the full run. The sample should be checked under normal lighting against the fabric it will actually be sewn into. A label that looks balanced in a digital proof can read too dark, too light, or too crowded on the real garment.
Compare at least two quotes using the same spec sheet. If one quote includes a woven center-fold label and another includes a printed straight-cut version, the numbers do not mean the same thing. That is not a fair comparison. It is two different products being priced as if they were identical.
For larger product launches, review the label alongside the rest of the trim package. Hang tags, cartons, inserts, and labels should feel like they belong to the same line. The point is not ornament. The point is control. Well-made labels support the garment by staying legible, comfortable, and consistent across the collection.
The final check is a simple one: will this label still work after the garment is worn, washed, and handled a few times? If the answer is yes, the spec is probably right. If the answer is uncertain, the next step should be another proof, not a larger order.
What materials work best for personalized sewing labels for clothing?
Polyester Woven Labels are the safest default because they hold detail well and usually stand up to repeated washing. Satin works well when the label needs a softer hand feel or a more premium finish near the skin. Cotton can suit natural or heritage styling, but it usually trades some sharpness and durability for texture.
How many personalized sewing labels for clothing should I order?
Start with the quantity tied to one production run, then add a small buffer for sampling errors or replacement needs. If the supplier has an MOQ, compare the unit price at the minimum against the next break point. Ordering far above tested demand just to lower the per-piece cost is often a false economy.
Are woven or printed personalized sewing labels for clothing better?
Woven labels usually last longer and look more structured because the design is built into the fabric. Printed labels can be the better choice when the artwork needs very fine detail or the budget is tighter. The right choice depends on wear, wash frequency, and how much visual precision the garment needs.
How long do personalized sewing labels for clothing take to produce?
Standard timelines often fall around 10-15 business days after proof approval, but that can change with quantity, material stock, and design complexity. Rush orders are possible in some cases, though they usually raise the price and leave less time for correction. The approval date matters as much as the order date.
What size should personalized sewing labels for clothing be?
The right size depends on the garment and the amount of information the label must hold. Small garments usually need compact formats with minimal copy, while jackets or outerwear can support larger labels. Measure the seam allowance first, then size the label to the garment instead of forcing the garment to accept the label.