Poly Mailers for Retail bundles solve a packaging problem that is easy to underestimate. A bundle rarely behaves like a single item. Add a folded garment, an insert card, a hangtag, a sticker sheet, or a pair of accessories, and the pack suddenly becomes thicker, less uniform, and more sensitive to seal stress. That gap between the flat product and the finished bundle is where a lot of shipping trouble starts.
For packaging buyers, the question is not whether a mailer costs less than a carton. It is whether the right mailer helps a team pack faster, hold shape in transit, and present a bundled order cleanly enough that it feels intentional. In many cases, the answer is yes. The catch is simple: the spec has to match the bundle as it ships, not the product as it sits on a table.
What poly mailers for retail bundles actually solve
A retail bundle is not a neat little rectangle. Two folded tees, an insert card, and a branded sticker may look harmless during planning, then take up surprising depth once the order is assembled. That is where poly mailers for retail bundles become useful: they give you a thin, lightweight outer package with enough flexibility to hold a set together without forcing every order into a carton.
On a packing line, the difference shows up quickly. A mailer is faster to load, faster to seal, and easier to store in volume than a box. If a promotion sends out several hundred identical sets, shaving even a few seconds from pack-out can reduce labor pressure. That matters more than most first-time buyers expect. The savings are not limited to freight; they also come from lower storage volume and less overpacking.
Presentation is the other half of the equation. A bundle in a properly sized mailer looks planned. A bundle in an oversized bag looks loose, even if nothing inside is damaged. That distinction matters for apparel, accessory sets, subscription kits, and promotional packs, where the outer package is part of the customer’s first impression.
If the bundle rattles inside the mailer, the cheapest bag is usually the most expensive choice.
Experienced buyers think in terms of finished pack-out, not individual product dimensions. That means accounting for folds, corner stress, label placement, privacy needs, and whether the bundle needs to be easy to reseal or verify at the receiving end. The best mailer is the one that fits the shipment as it leaves the warehouse.
How bundle mailers seal, ship, and present product sets
The workflow is plain enough: load the set, press out extra air, align the opening, seal the flap or closure, and apply the label. Yet the small details determine whether the package survives the trip. A weak seal, a bag that is too short, or a label applied across a wrinkle can turn a low-cost package into a return.
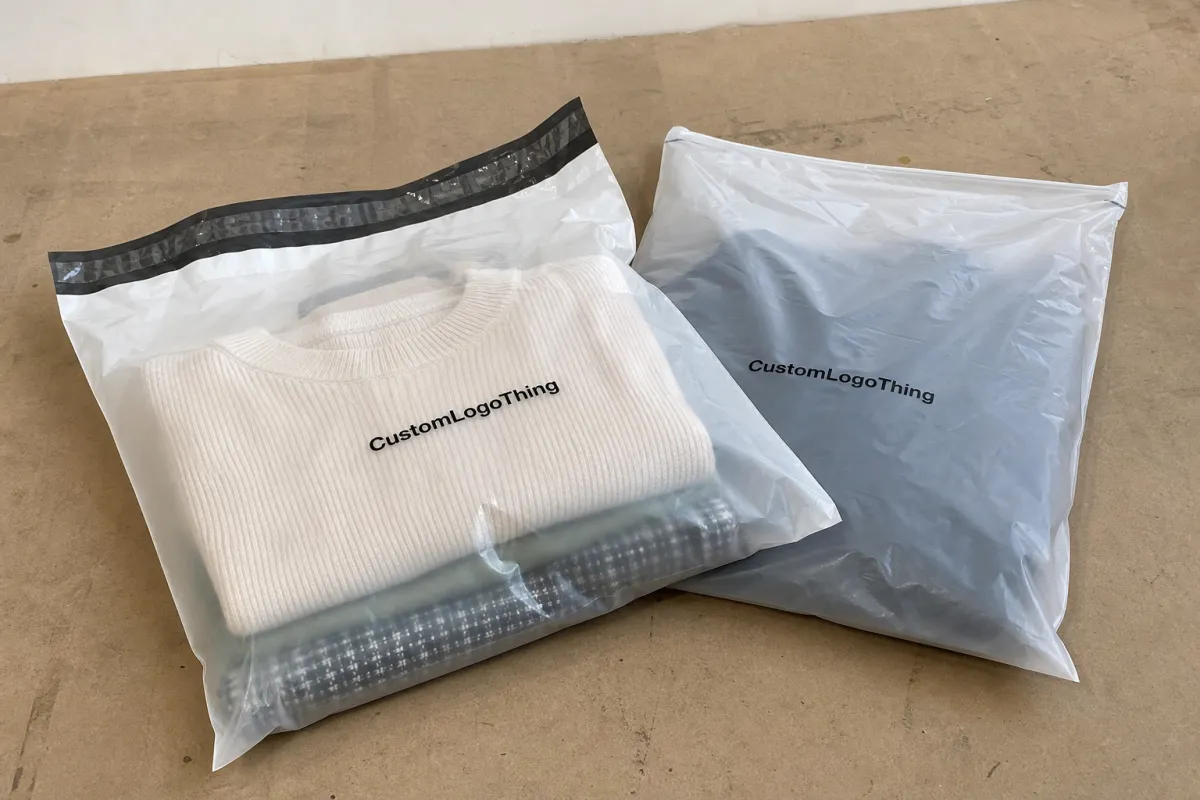
Material choice changes the customer’s experience more than many teams realize. Clear mailers show the bundle and can work well for retail kits that rely on visual order. Opaque mailers hide the contents and usually make more sense for mixed-sku sets, privacy-sensitive products, or bundles where a clean outer appearance matters more than visibility. Tinted or frosted films sit between those two extremes and often feel a little more premium than plain translucent plastic.
| Mailer style | Best for | Main advantage | Tradeoff |
|---|---|---|---|
| Clear | Apparel sets, visible promo bundles, retail kits | Quick content checks and product visibility | Contents need to be tidy; privacy is minimal |
| Opaque white or black | Subscription bundles, mixed-sku packs, sensitive items | Privacy and a cleaner outer appearance | No visibility without opening the package |
| Tinted or frosted | Gift sets, accessory packs, branded seasonal bundles | Balanced look with partial concealment | Usually costs more than plain stock film |
These mailers work best for low-fragility bundles with soft edges and even pressure distribution. Apparel bundles, soft goods, accessory kits, paper-based sets, and some promotional packs are good fits. Once the bundle includes sharp corners, rigid boxes, or fragile components, the decision gets more complicated. Sometimes a mailer still works. Sometimes a carton is the safer move.
For teams comparing package formats, transit-test guidance from ISTA is useful because it frames the problem the way carriers do: drop, vibration, compression, and abrasion. Packaging standards published by Packaging.org also help buyers think beyond the purchase price and into the actual behavior of the pack.
Dimensions, film strength, and print choices that change performance
Packed dimensions matter more than product dimensions. A bundle of folded garments may look thin before assembly, then gain a half inch or more once tags, inserts, and air pockets are included. That is why the first measurement should always be the finished bundle. If the bag is too tight, the seal area takes the stress. If it is too loose, the contents slide and rub during transit.
Thickness, usually listed in mils, is only one part of performance. For light retail bundles, 2.0 to 2.5 mil can be enough. For heavier sets, or anything with a rigid accessory inside, 3.0 to 4.0 mil is often a more realistic starting point. Seal strength matters just as much as film gauge. A weak adhesive strip or a poor side seam can fail even when the sheet stock itself looks fine.
There is also the issue of puncture resistance. Tags, clips, folded cardboard, and sharp corners can stress the inside wall of a bag long before the package reaches the carrier network. The failure may start as a scuff and end as a split seam. That is why a bundle that feels acceptable in hand may still fail once it is stacked with other cartons, compressed on a conveyor, or dragged across a rough sorting surface.
Print choices change both appearance and workflow. Full-coverage printing hides contents better, but it can raise cost and slow production a little. A single-color logo on white or opaque film is usually easier to hold to budget. Matte finishes conceal scuffs better and tend to look more restrained in hand. Gloss can feel sharper visually, though it shows abrasion more quickly on longer routes.
Closure style should match the repeat use case. Adhesive flaps are simple and fast. Tamper-evident seals help when the bundle needs visible opening evidence. Resealable strips are useful for returns or recurring shipments, but they add cost and sometimes complicate pack-out. There is no universal winner here. The right choice depends on how the package is handled after it leaves the warehouse.
- Measure the packed state: width, depth, and seal allowance, not just flat product size.
- Check edge stress: clips, tags, and paper inserts can puncture thin film.
- Match finish to use: matte for scuff resistance, gloss for stronger visual contrast.
- Confirm closure type: adhesive, tamper-evident, or resealable based on the workflow.
A useful rule: start with the lightest package that survives realistic handling, then move up only if testing exposes a failure mode. That keeps material spend under control and avoids overengineering a bundle that only needs a better fit.
Pricing, MOQ, and unit cost for bundled retail orders
Unit cost for bundle mailers is driven by a few predictable inputs: size, film weight, print coverage, closure style, and order quantity. A stock-size mailer with a simple logo is priced very differently from a custom-sized, full-coverage printed bag with a tamper-evident strip. For buyers, the right comparison is not sticker price alone. It is the cost per packed order after labor, freight, and waste are included.
At larger runs, stock poly mailers can sit in the low cents per unit, while custom retail bundle mailers often move into the mid-teens or higher depending on spec. At around 5,000 pieces, a practical quote might fall somewhere near $0.12 to $0.35 per unit. Thicker film, wider bags, special finishes, and heavier print coverage can push that higher. Short runs usually cost more per piece because setup costs are spread across fewer units.
| Option | Typical order behavior | Price tendency | Best fit |
|---|---|---|---|
| Stock size, no print | Low MOQ, fast to source | Lowest upfront cost | Testing, seasonal runs, internal use |
| Stock size with logo | Moderate MOQ, standard artwork | Mid-range | Repeat bundles with stable dimensions |
| Custom size, custom print | Higher MOQ, proofing and tooling | Higher upfront, better fit | Long-running retail programs |
MOQ tradeoffs matter more than they first appear. Stock sizes are often the right move while a bundle is still being refined. Custom mailers tend to win once a program repeats often enough that wasted space, damage, or slow pack-out costs more than the higher order minimum. That is why experienced buyers look at total landed cost, not just the printed unit rate.
Freight, overages, sample charges, and artwork setup fees can change the final number. So can tear notches, frosted film, thicker adhesive, or recycled-content requests. If a supplier’s quote does not clearly state what is included, ask. A slightly higher unit price can still be the better deal if it avoids add-ons later or a rushed reorder two weeks after launch.
Production steps and turnaround timeline from quote to delivery
The usual process starts with a brief: dimensions, quantity, print style, closure type, and any handling needs. Then comes the quote, followed by artwork proofing, sample approval, production, packing, and freight booking. Simple stock jobs move faster. Custom runs with detailed print or unusual sizing take longer because each step depends on the one before it.
For planning purposes, a straightforward stock order may ship in about a week to two weeks. Custom printed jobs often fall into the 12-20 business day range after proof approval, depending on line load, materials, and artwork complexity. Tooling for custom dimensions, multiple proof revisions, or seasonal demand can stretch the schedule. The slowest step usually sets the timeline, not the most obvious one.
There is a reason packaging teams build reorder windows into the calendar. If a promotion launches on the first of the month, packaging should not be ordered as though it can arrive on the last day with no risk. A buffer of two to four weeks is common for bundle programs that rely on custom print or exact fit. A late proof or material shortage can force a substitute that does not match the original plan.
Documentation helps. A buyer who keeps the approved art, dimensions, quantity range, and closure spec on file can reorder faster next time. If a program already uses a defined format such as Custom Poly Mailers or sits inside a broader packaging system like Custom Packaging Products, the comparison gets easier because the next order starts from a known baseline instead of a fresh guess.
A step-by-step guide to choosing the right bundle mailer
Step 1: Measure the bundle after it is fully packed. Do not size from the flat product alone. Include inserts, folded edges, and any secondary wrap. If the set includes rigid parts, add clearance so the opening can be sealed without forcing the contents into the corners.
Step 2: Match the film and closure to the product. A soft apparel bundle may only need a standard sealed mailer. A set with harder edges may need thicker film or a more carefully sized bag. If the brand wants a premium finish, decide whether matte, frosted, or opaque film supports that look best.
Step 3: Ask for samples and pack real orders. Use the same team that will handle the final product. Check seal strength, label adhesion, scuffing, and whether the package is awkward in the hand. A sample that survives a desk test but slows the line is not ready for production.
Step 4: Lock the spec sheet. Record dimensions, gauge, print coverage, closure style, quantity breaks, and reorder trigger. That last item gets missed often. Once the spec is documented, future purchases become easier to compare and less likely to drift into guesswork.
Step 5: Think through the carrier path, not just the warehouse path. A mailer that looks fine at packing may still scuff, crease, or split after it rides through sorting equipment. That is why a bundle should be judged on how it behaves after compression, stacking, and abrasion, not only on how it opens on the bench.
One more practical point: a bundle rarely changes in one dimension only. A larger insert can increase depth, which changes seal stress and also changes how the package settles inside the mailer. That is why good packaging programs are iterative. The first spec should be treated as a controlled starting point, not a final law.
Common mistakes that trigger returns, tears, or reorders
The biggest mistake is underestimating thickness after the bundle is assembled. A one-inch stack of apparel can become a tighter, less forgiving shape once labels, inserts, and folds are added. That hidden growth creates seal stress, especially near the flap edge. If the bag is barely large enough, the failure may not happen in the warehouse. It may happen in transit, which is worse.
Another common error is approving a sample that nobody uses in real production. A sample can look perfect on a desk and still be awkward on the packing line. If the fold sequence is slow, if the adhesive grabs too early, or if the opening is too tight for gloved hands, the mailer is not suitable no matter how polished it looks.
Carrier handling is its own test. Packages get stacked, slid, twisted, and dropped in ways that internal packing benches never reproduce. That is where weak seams and thin film show their weakness. The cheapest quote can become the most expensive option if it causes replacements, damaged goods, or customer complaints that force reshipments.
Another failure point is inconsistent artwork or film thickness. Print registration that wanders a little on a proof can become obvious across a large shipment. Film that varies from roll to roll can change how the seal behaves or how the mailer feels in the hand. If a supplier cannot explain its tolerances, that is a warning sign. Consistency matters more than flashy sample photos.
Finally, do not ignore freight and lead time. A low unit price can hide a long transit route, limited overage, or a production calendar that does not match your launch date. Ask for a sample, a landed-cost estimate, and a realistic schedule before committing. The order that looks cheapest on paper is not always the best buy.
Quality checks that separate a good sample from a launch-ready mailer
A sample is useful only if it is tested like a production item. That means more than opening the bag and looking at the print. Run the actual bundle through the same motion the pack line will use. Check whether the flap seals evenly across the full width, whether the contents slide during insertion, and whether the package stays closed after a few minutes of handling.
There are a few checks that catch problems early. A simple peel test shows whether the adhesive strip has enough bite. A quick rub test can reveal whether the print scuffs easily. A drop or corner-compression test, even if informal, can show whether the film gives up at the seam before the contents do. None of these replace formal transit testing, but they often surface the weak point before the first shipment leaves the building.
Label adhesion deserves its own attention. Some films accept labels cleanly; others resist, especially if the surface is glossy or lightly textured. If the shipping label curls, shifts, or lifts at the corners, the problem can turn into a scan issue later. It is a small detail with outsized consequences.
Pack speed is another quality metric. A beautiful mailer that slows down every order is not a better mailer. If the opening fights the operator, if the closure is finicky, or if the package needs too much adjustment to look neat, the material cost savings disappear quickly. Packaging should support the line, not force the line to adapt to it.
Expert checks before you place the order
Before placing the order, confirm the bundle dimensions in its packed state, the target quantity, and whether stock or custom sizing makes more sense. Then define the customer experience. Is the mailer meant to stay invisible in the shipping process, or is it part of the brand presentation? Those two goals can point to different film colors, finishes, and closure styles.
It also helps to request a sample set and a landed-cost quote before committing. That is especially true when the bundle will repeat across several SKUs, because a mistake scales quickly. If the set is likely to become a standing program, ask how reorder pricing changes at higher volumes and whether artwork or tooling changes will carry over cleanly to the next run.
For buyers handling multiple pack formats, a one-page pack-out SOP pays off. Include the approved mailer size, the sealing method, label placement, acceptable overage, and reorder trigger. Keep the final spec with the purchasing record. That prevents the next order from drifting into a slightly larger bag, a different adhesive, or an untested finish simply because someone reordered from memory.
How do I size retail bundle poly mailers for multi-item packs?
Measure the bundle after it is fully packed, not by the item’s flat dimensions. Add clearance for seams, sealing space, and any folded edge or insert inside the mailer. If the bundle includes rigid parts, boxes, or thick apparel, test the actual pack-out instead of relying on a spec sheet alone.
Are poly mailers for retail bundles strong enough for heavier sets?
They can be, if the film gauge, seam strength, and closure are matched to the packed weight and shape. Heavier or sharper bundles usually need thicker film and more careful sizing to avoid stress points. Always test drop, abrasion, and seal performance with the real product mix before launch.
What affects the price of custom retail bundle poly mailers?
Material weight, bag size, print coverage, and order quantity are the biggest drivers. Freight, setup, samples, and any custom finishing can change the true landed cost. Stock sizes often cost less up front, but custom sizing can reduce waste and improve pack speed.
How long does production usually take for bundle mailers?
Timeline depends on proofing, sample approval, print complexity, and whether the size is stock or custom. Simple stock orders move faster; custom sizes and detailed artwork take longer. Build in extra time before launches or promotions so a late proof does not delay fulfillment.
What should I test on a sample before ordering retail bundle mailers?
Check seal strength, puncture resistance, and whether the bundle slides in without forcing the film. Look at shelf presentation, label adhesion, and how the mailer feels when customers open it. Run a small pack-out test with the real team to catch workflow issues before production starts.
Get the spec right once, and poly mailers for retail bundles become a stable part of the operation instead of a recurring problem. The real gain is not a prettier package. It is fewer surprises, cleaner packs, and a mailer choice that holds up when orders leave the bench and enter the carrier network.


