A presentation box does one job badly if the structure is wrong and very well if the structure is right. It protects the product, frames the reveal, and signals value before anyone reads a line of copy. That is why presentation boxes custom matter so much for gift sets, launch kits, sample programs, and premium retail packaging. The box is not decoration. It is part of the product experience.
The mistake most teams make is starting with print effects. Foil, matte, gloss, embossing, soft-touch, spot UV. Those are the last decisions, not the first ones. Size, board strength, insert design, and closure style usually decide whether the final box feels intentional or sloppy. A good-looking box that arrives crushed or rattles on the inside is still a bad box.
If you need more than one packaging format, compare related options in our Custom Packaging Products catalog. Sometimes the right answer is a rigid presentation box. Sometimes it is a folding carton or sleeve system that does the same job with less material and less labor.
That is the practical side of package branding. Better perceived value. Cleaner transit. Fewer revisions. Less waste. And a package that helps sell the product instead of fighting it.
What Presentation Boxes Custom Actually Solve
Presentation packaging earns its keep when the product needs more than a shipping shell. A plain mailer can move an item from A to B, but it rarely adds much to the experience. A custom-built presentation box can do both: protect the contents and make them feel worth opening. That matters for premium cosmetics, electronic accessories, tasting kits, press mailers, subscription inserts, and gifting programs where the first impression has to land immediately.
From a buyer’s standpoint, the box solves three problems at once. It keeps the product centered, reduces movement in transit, and makes the unboxing process feel controlled. If the product shifts, slides, or sits in a cavity that looks too large, customers notice. They may not articulate it as a packaging issue, but they absolutely read it as lower quality.
The structure also affects how durable the box feels after repeated handling. A lid that opens cleanly the first time and binds on the third open is a sign the build was not thought through. Same with a magnetic closure that looks premium but snaps too aggressively, or an insert that looks neat but leaves too much give around the product. The right spec prevents those problems before production starts.
Retail adds another layer. If the box is meant to sit on a shelf, the front panel hierarchy, shelf footprint, hanging features, and opening direction all matter. For a box that only lives in shipping cartons, you can prioritize protection and cost. For a box that has to sell itself in person, presentation and handling become part of the brief. That is the difference between packaging and packaging that has to do a job.
A box can fit the product and still fail if the hand feel is wrong. Buyers usually catch that in the sample stage, not after launch. The sample is where the truth shows up.
That is the real purpose of presentation boxes custom: give the product a better frame, reduce damage risk, and remove friction from the customer experience. Everything else is secondary.
How the Box Structure, Insert, and Finish Work
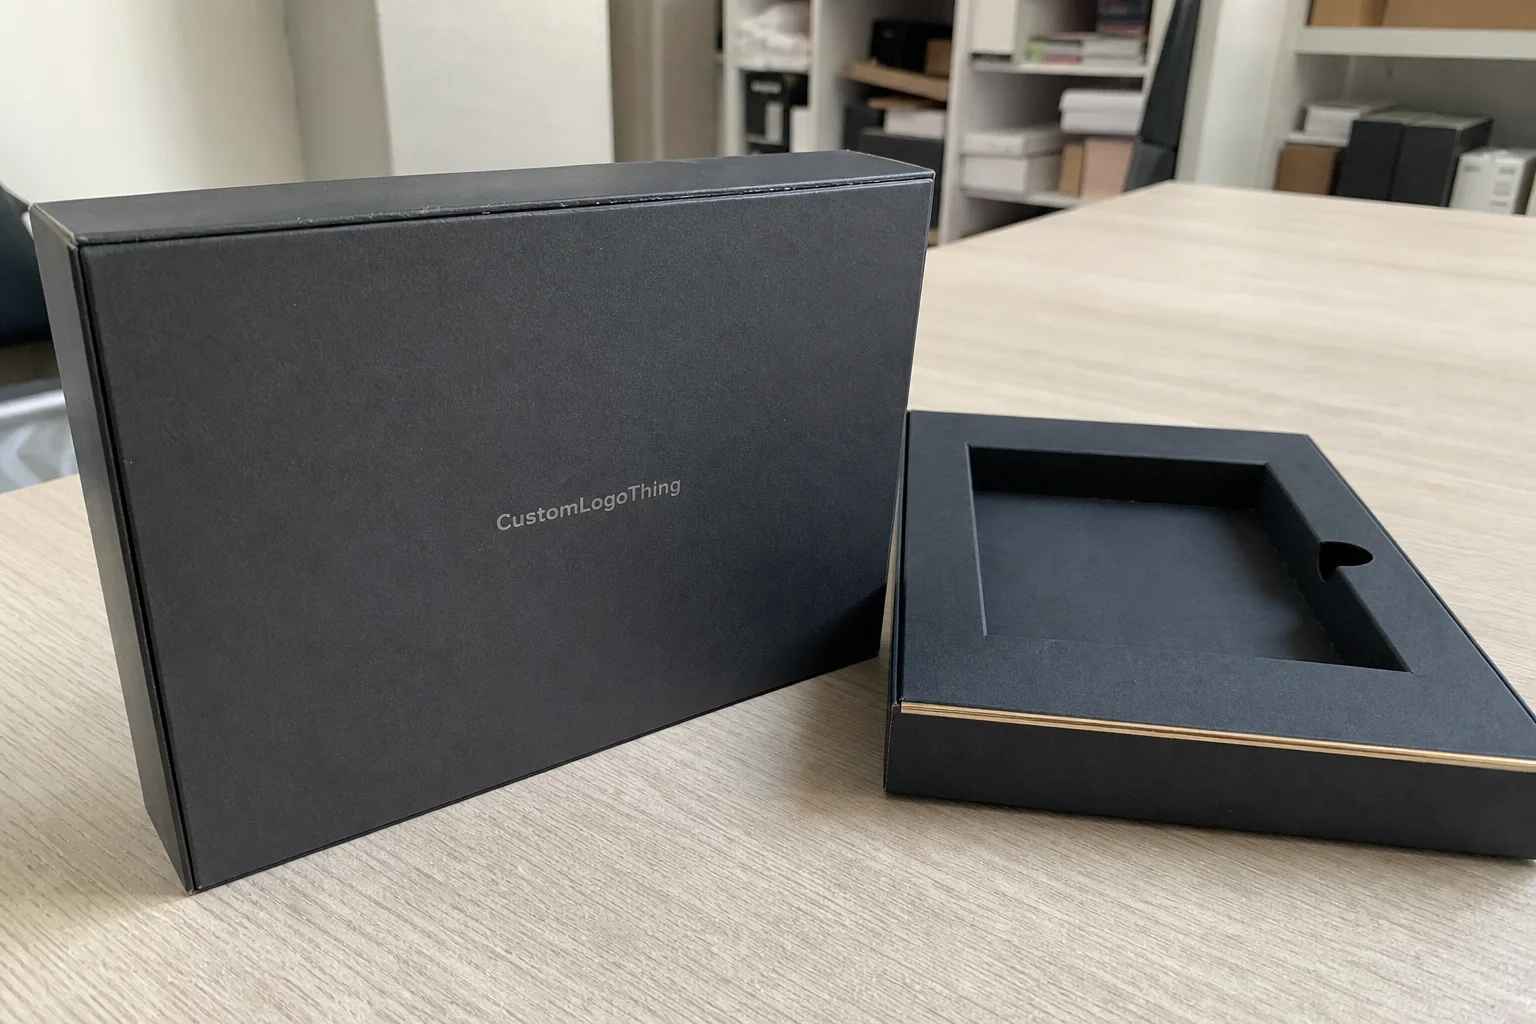
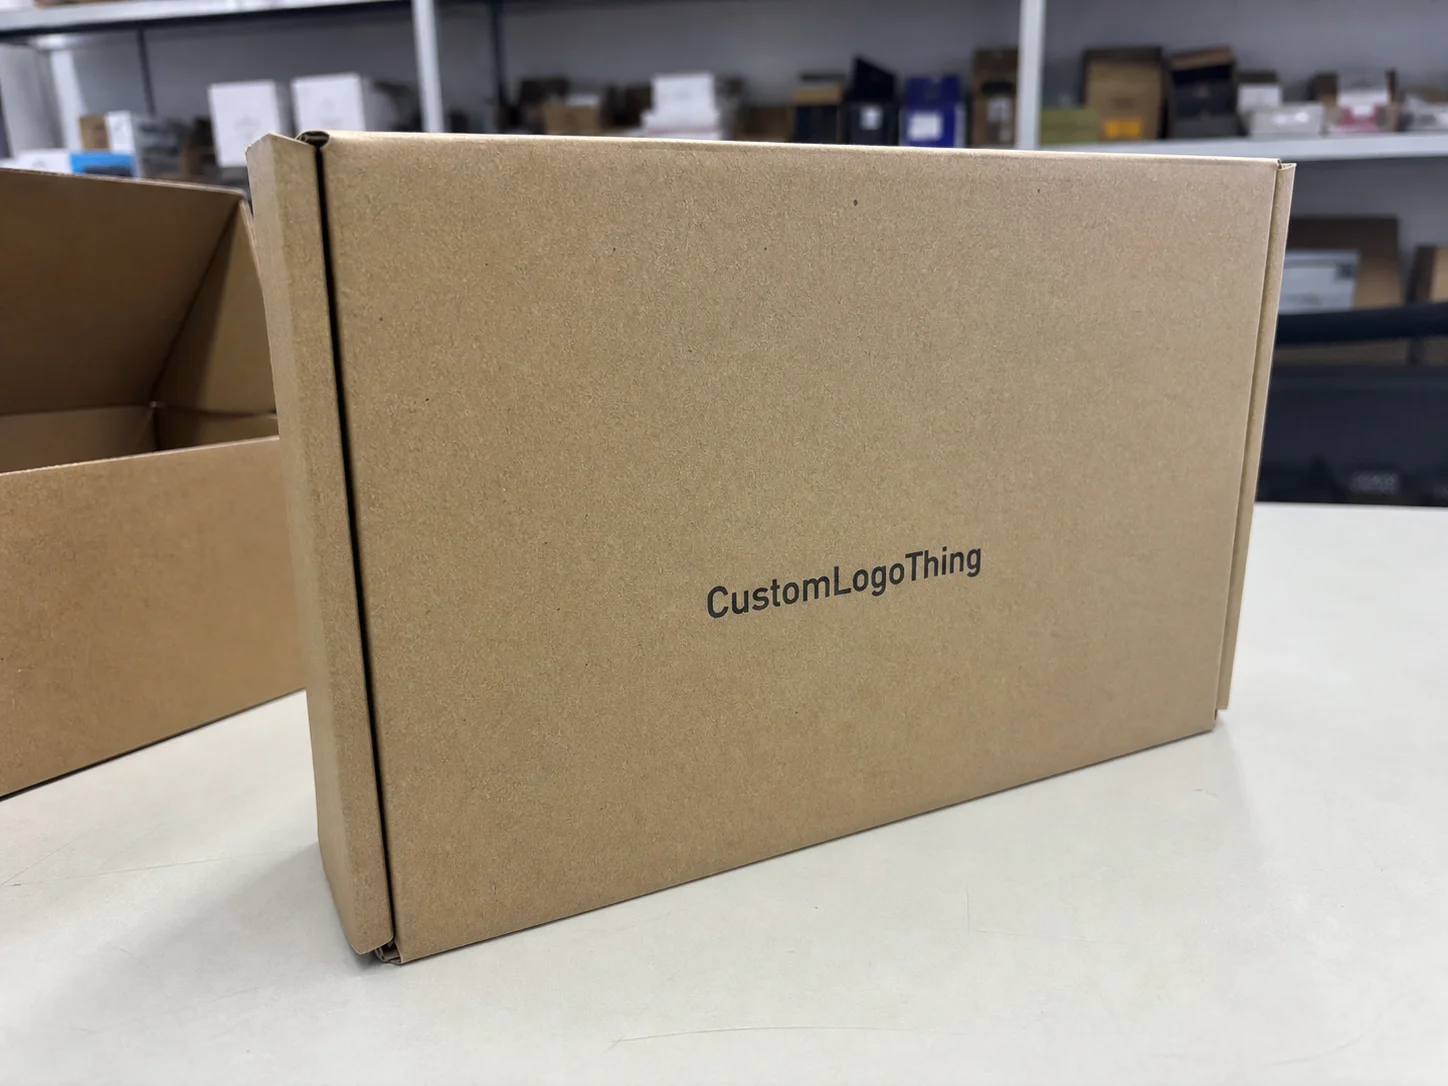
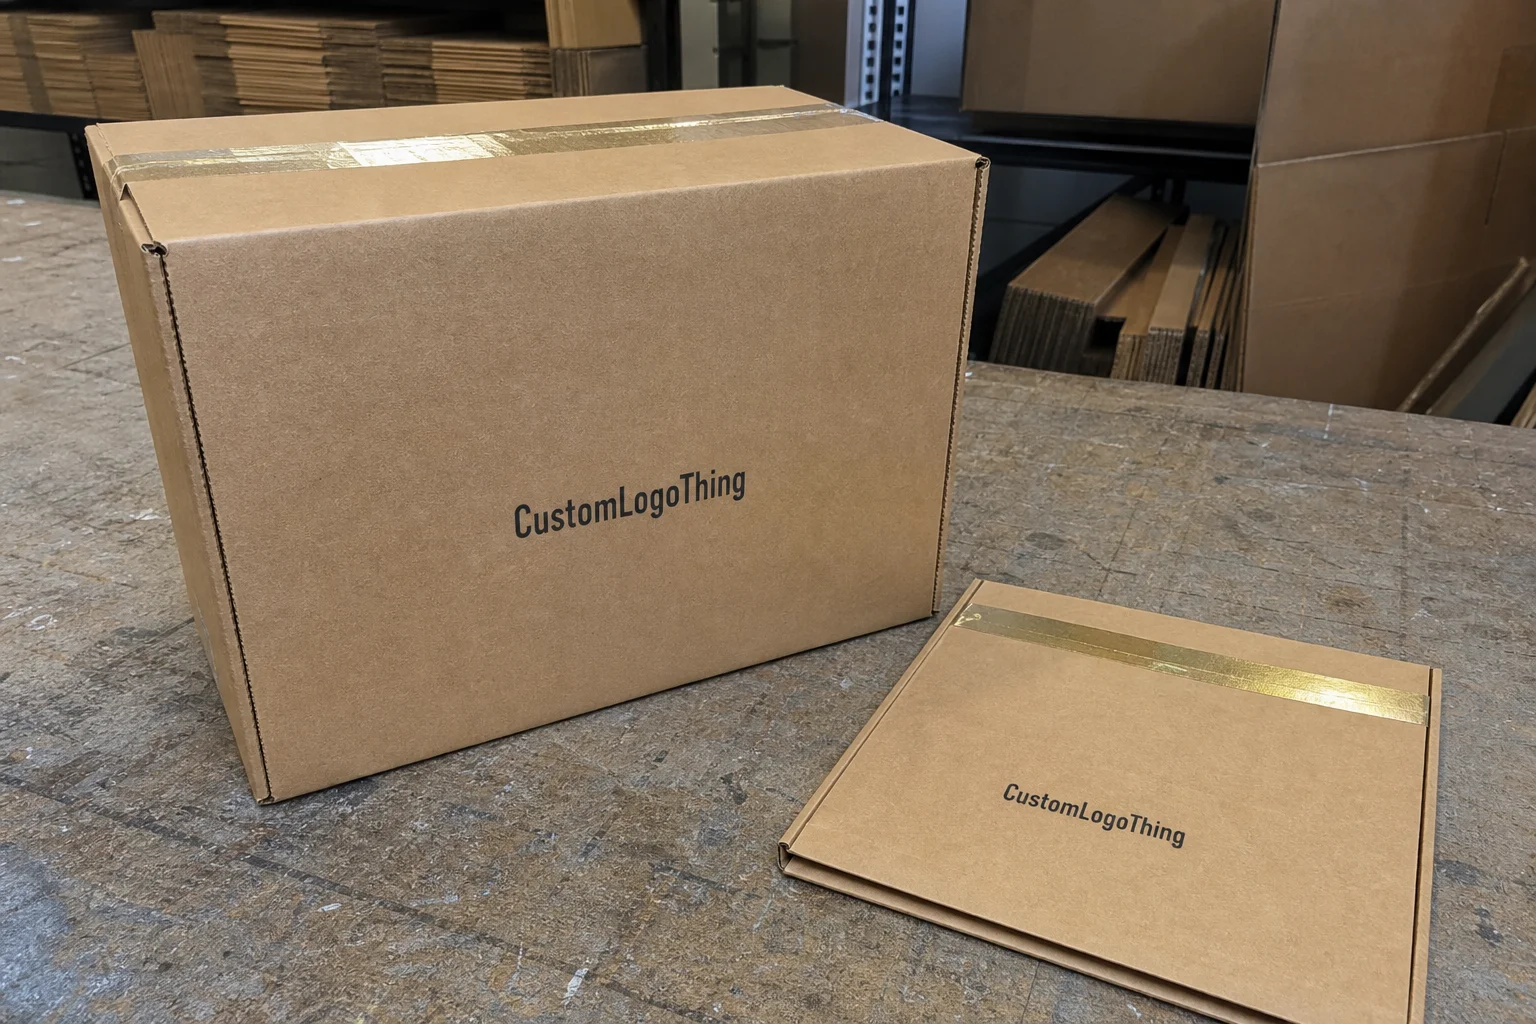
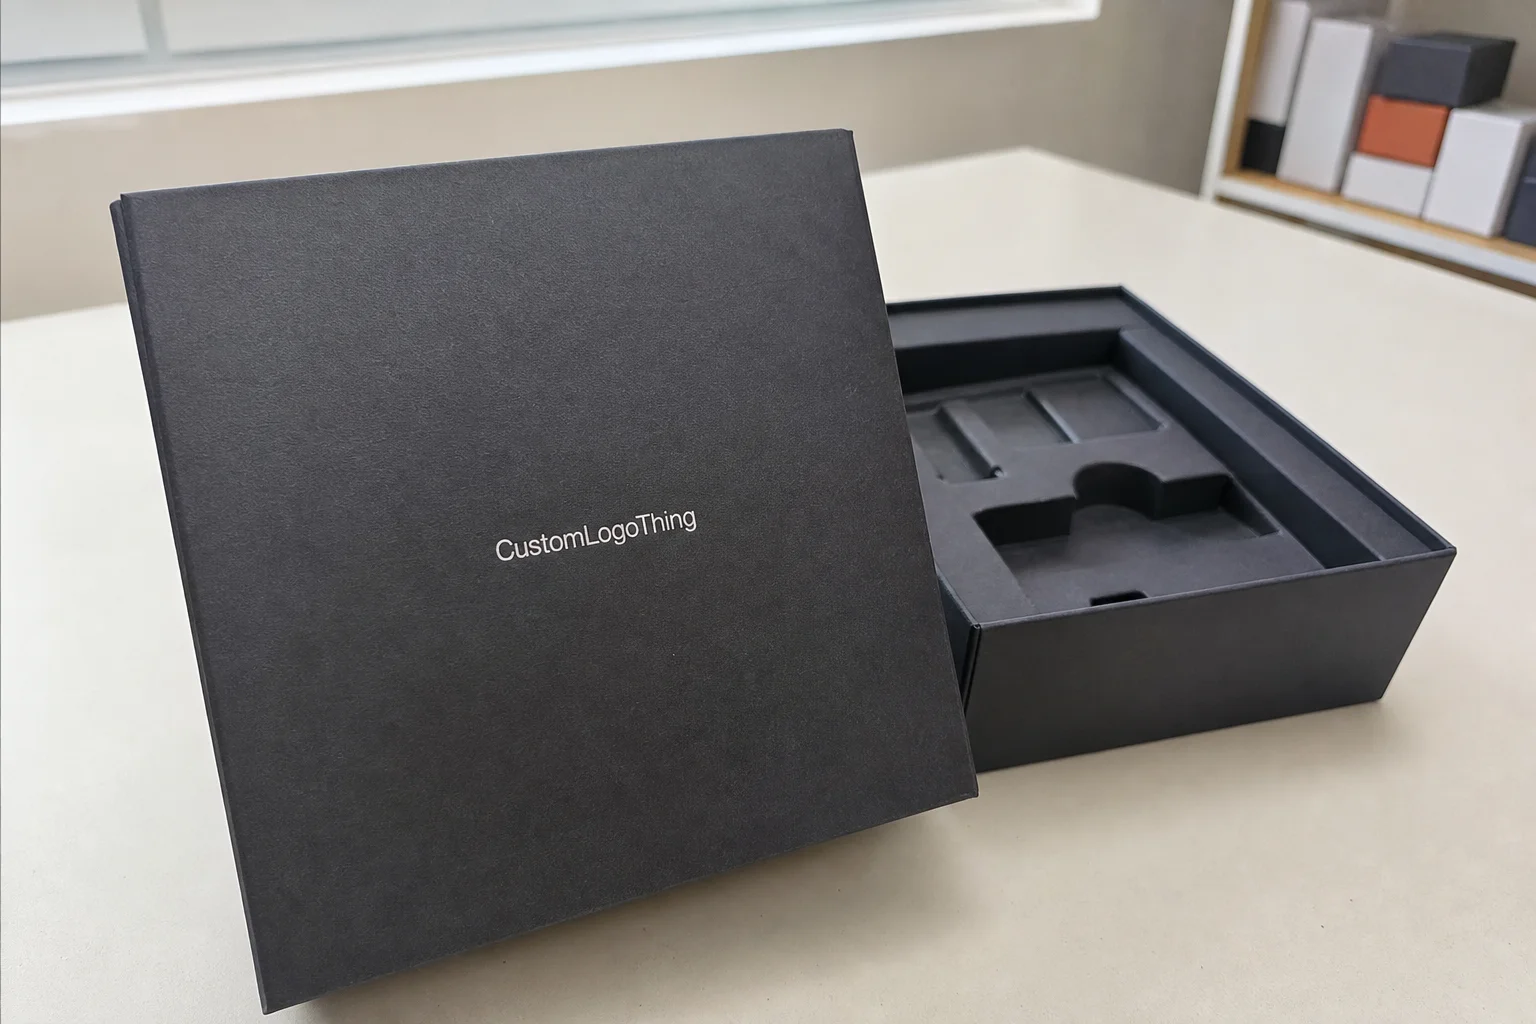
Not all presentation boxes are built the same way. A rigid setup box feels substantial because its walls are built from thick chipboard and wrapped in printed or plain paper. It holds shape well and stacks cleanly, which is why it is common for premium kits and gift packaging. A folding carton ships flat and is cheaper to produce, which makes it a better fit for lighter products and higher quantities. Sleeve-and-tray formats can create a cleaner, more modern look without the cost of a fully rigid build. Magnetic closure boxes add ceremony, but they also add labor and material cost.
The insert is just as important as the outer shell. Foam gives the most precise hold, but it is not always the best choice if a brand is trying to reduce plastic use or simplify recycling. Paperboard inserts are lighter, often easier to recycle, and usually enough for stable products. Molded pulp works well for many protective applications and gives a less polished but more material-efficient feel. Die-cut partitions are useful for kits with multiple components, though they add complexity when the layout gets busy.
Finish choices change both the look and the production behavior. Soft-touch lamination gives a velvety surface, but it can scuff if the order is handled aggressively. Matte lamination is safer for everyday handling and usually easier to keep consistent. Foil stamping creates strong contrast, but it slows setup and becomes expensive when the artwork is crowded. Embossing adds depth, though it works best on simpler graphics. Spot UV can make a logo or mark stand out, but it looks strongest when the rest of the box stays restrained. Uncoated stock gives a more natural feel and is often the right choice for brands that want texture instead of shine.
These decisions are connected. Heavier board can change folding behavior. A deeper insert can alter the inside dimensions. A magnetic lid can change how the box ships in master cartons. A bright finish can expose print defects that a matte finish would hide. Packaging is not a set of independent options. Change one element and the others often need to move with it.
Before you lock anything in, check what the supplier means by “premium.” That word covers a lot of ground. It may mean thicker board, better wrap paper, tighter print registration, or just more decoration. Those are not the same thing, and they do not cost the same. For sourcing terms and material references, industry sources such as packaging.org and fiber certification groups like FSC are useful checks. They will not price the order, but they help keep the conversation honest.
Cost, Pricing, MOQ, and Unit Cost Drivers
Packaging cost usually comes down to six things: size, material thickness, print coverage, finish complexity, insert design, and labor. Size drives material usage and freight. Board thickness affects structure and board cost. Heavy ink coverage and specialty finishes increase setup time and waste. Inserts add engineering and assembly work. None of this is mysterious. It just compounds faster than buyers expect.
MOQ matters because setup cost has to be spread across the run. A 500-piece order is almost always more expensive per unit than a 5,000-piece order with the same spec. The press setup, die cutting, make-ready, inspection, and assembly time do not shrink just because the quantity is smaller. If the box is rigid or has hand assembly, that spread becomes even more obvious.
Quote formatting can mislead people. One supplier may include the box, insert, proofing, and packing. Another may quote only the structure and print, then add freight and finishing later. Those numbers are not comparable until the scope is clear. If you are sourcing presentation boxes custom for a launch, ask exactly what is included before you compare unit price.
| Option | Typical Use | Common Unit Range | What Moves the Price |
|---|---|---|---|
| Folding carton | Light retail packaging, small kits, flat-packed programs | $0.18-$0.45 at 5,000 pcs | Board weight, ink coverage, finish, die complexity |
| Sleeve + tray | Cosmetics, accessories, set packaging | $0.35-$0.90 at 3,000 pcs | Tray style, board choice, print on sleeve only or both parts |
| Rigid setup box | Gift sets, premium product packaging, presentation kits | $1.20-$3.50 at 1,000 pcs | Board caliper, wrap paper, insert style, hand assembly |
| Magnetic closure rigid box | Luxury gifts, launch kits, high perceived value items | $1.80-$4.50 at 1,000 pcs | Magnet count, wrap finish, foil, embossing, boxing labor |
| Custom mailer with insert | E-commerce launches, subscription sends, protected shipping | $0.75-$2.10 at 2,000 pcs | Corrugated grade, insert complexity, print coverage |
These are working ranges, not guarantees. A simple one-color folding carton can sit below the range. A large rigid set with foil, soft-touch, and a multi-part insert can push above it quickly. That is normal. The useful question is not “Why is this expensive?” It is “Which parts are driving the number, and which parts can move without breaking the brief?”
If budget is tight, price the structure first, then the insert, then the finish. That order keeps the conversation rational. It also makes trimming easier if the quote comes back above target. In many cases, the insert or the closure adds more cost than an extra print color ever will.
Sample charges can be worth paying if the design has tight tolerances. Some suppliers credit sample fees against the production order. Some do not. Ask before you assume. A cheap sample that does not match final materials is not useful. A more expensive sample that catches an assembly issue early usually is.
Process and Timeline: From Spec Sheet to Delivery
The production sequence is usually simple on paper: brief, dieline, artwork, proofing, sample approval, material purchase, printing, converting, assembly, inspection, and shipping. The schedule is not simple in practice because each step depends on the one before it. If the dieline is wrong, the artwork changes. If the artwork is late, the proof slips. If approval sits untouched for days, the factory waits. That is how delivery dates drift.
Simple printed cartons move faster than rigid presentation boxes with specialty finishing. Add foil, embossing, custom inserts, or unusual board construction and you are usually adding days or weeks, depending on factory load and how quickly approvals come back. Teams often ask for a launch date before the spec is final. That is not a schedule. That is a guess with a deadline attached.
The most common delays are avoidable. Wrong dimensions. Missing bleed. Copy changes after proofing. Unclear finish callouts. A logo that was approved in one color and then revised again after plates or tooling were already planned. The press is rarely the biggest problem. The approval chain is.
For shipping-heavy programs, it also helps to think about distribution stress. If the boxes will be bulk shipped, stacked, or repacked before retail use, ask about compression resistance and carton packing. Formal testing is not required for every order, but ISTA testing protocols are a useful benchmark when fragile products or multiple handoffs are involved. The point is to know how much abuse the package has to survive before it reaches the customer.
One practical checkpoint: if the supplier offers a physical sample, confirm whether it uses the final board, final insert material, and final finish. A mockup that only matches the shape is not enough for a premium job. If the lid closes differently on the final version, the sample did its job only halfway.
Step-by-Step Spec Checklist Before You Request a Quote
Start with the product, not the packaging. Measure the actual item with lids, caps, accessories, and inserts included. Then add only the clearance needed for removal and safe fit. If you guess at dimensions, the quote becomes less useful and the sample is more likely to fail on the first pass.
- Confirm exact dimensions. Measure width, depth, and height of the full set, not just the hero product.
- Define the job. Retail display, PR gifting, subscription kit, protected shipping, or multi-piece presentation each point to a different structure.
- Choose the structure. Rigid box, folding carton, sleeve, magnetic closure, or mailer with insert should match the use case.
- Set the finish limit. Pick the minimum viable finish that supports the brand without turning the order into an exercise in excess.
- Prepare the file package. Logo art, panel copy, color target, barcode, insert layout, and quantity should all be in the brief.
- State the deadline clearly. Give a target in-hands date and destination, not just a month.
The list is basic, but basic is where most orders break down. Buyers often send artwork before the structure is final. Then the dieline changes, copy moves, and another proof is needed. That is how a straightforward custom packaging order turns into a slow one. The box should drive the art, not the other way around.
Ask for the spec in writing. If the supplier cannot state the board grade, insert material, finish, estimated production window, and included services, you do not yet have a quote you can trust. You have a placeholder.
When the order is part of a broader packaging program, compare it against other formats in our Custom Packaging Products range. A cleaner structure with a smarter insert can outperform a more expensive, more decorated box.
Common Ordering Mistakes That Inflate Costs
The easiest way to waste money is oversizing the box. Too much empty space raises material use, increases freight cost, and weakens the presentation. Empty volume does not equal premium. It usually just looks like a spec that was never tightened.
Another common mistake is approving artwork before the dieline is final. If the structure changes later, the layout may need to be rebuilt and reproofed. That adds time and usually creates avoidable frustration. If the dimensions are still moving, the artwork is not done yet.
Feature creep is another budget leak. Foil, embossing, soft-touch, spot UV, ribbon pulls, custom foam, and magnetic closures all have valid uses. They do not all need to appear in one order. The more effects you stack, the more you increase risk during assembly, shipping, and quality control. A premium box should feel controlled, not crowded.
Vague feedback also burns money. Comments like “make it pop” or “make it more high-end” are too loose to be useful. Say what needs to change. More contrast. Less gloss. Softer color. Stronger logo presence. Cleaner interior. Suppliers can act on specifics. They cannot work with a mood.
People also overestimate how cheap sustainable packaging should be. FSC-certified board, recycled content, and fiber-based inserts can be good choices, but they are still subject to print method, board size, coating, and assembly complexity. Sustainability is a design constraint, not a discount code. Treat it that way and the quote makes more sense.
Last, do not ignore transit. A box that looks excellent on a table but crushes in master cartons is a bad purchase. Ask how the finished boxes pack, how many fit per shipper, and whether the structure holds up under stacking. Quality control should include edge crush, print registration, glue integrity, lid fit, insert alignment, and surface scuff checks before the order leaves the floor.
Expert Tips and Next Steps for a Faster Order
Request a Quote that separates structure, print, finish, insert, and freight. That makes the spend readable. More important, it shows which element is actually expensive. Too many quotes hide the real driver inside one blended number, which makes comparison almost useless.
For complex builds, ask for a pre-production sample or a high-quality proof. If the box has tight tolerances, a custom insert, or a finish that matters to the sale, a flat proof is not enough. A photo cannot tell you whether a lid sits square or whether the insert grabs the product too tightly. A sample can.
Lock decisions in order: dimensions first, material second, finish third, artwork last. Changing all four at once is how schedules slip. If you need a faster path, keep the brief narrow and the choices disciplined. The job gets easier when the scope stops expanding every time someone sees a new finish sample.
For brands sourcing presentation boxes custom as part of a launch or packaging refresh, the smartest move is usually to build around the product, not around a list of optional upgrades. If the item is fragile, protection matters more. If the box is meant for gifting, the reveal matters more. If it has to ship well and still look polished, both have to work together. There is no prize for overbuilding a package that does not need it.
Send a complete spec sheet, confirm the approval window, ask for the earliest realistic ship date, and make sure the quote states exactly what is included. That is how you reduce surprises and make the order easier to manage.
Frequently Asked Questions
What size should I choose for presentation boxes custom orders?
Measure the product with any lid, cap, accessory, or insert included, then add only the clearance needed for safe fit and easy removal. If the item can move inside the box, it usually feels cheaper and has a higher chance of damage. For multi-item kits, plan the internal layout first so the box follows the product instead of forcing the product to fit a box that is already too large or too small.
How long do custom presentation boxes usually take?
Simple printed folding cartons are usually faster than rigid boxes with specialty finishes and custom inserts. The biggest timing variable is approval speed, especially when dielines, artwork, or samples need revisions. If you need a hard in-hands date, ask for sample timing, production timing, and freight timing separately so the schedule is clear instead of vague.
What drives the price of presentation boxes custom the most?
Box structure, size, insert style, finish level, and order quantity are the biggest pricing levers. Short runs usually cost more per unit because setup and changeover costs are spread across fewer boxes. Specialty finishing can add more than extra print colors, so compare options before assuming artwork is the expensive part.
Can I get a sample before placing a full order?
Yes, and you should if the box has tight dimensions, special inserts, or premium finishing. A sample helps catch fit issues, color concerns, and assembly problems before production locks in. If a physical sample is not practical, at least request a digital proof and dieline review before approval.
What file should I send for presentation boxes custom artwork?
Send editable vector artwork when possible, plus the correct dieline template and any linked images. Include color references, copy, barcode placement, and finish callouts so nobody has to guess. Flat JPEGs are fine for reference, but they are not enough for clean production artwork.