Personalized Packaging Boxes: How to Order the Right Fit
Personalized packaging boxes do more than carry a product from point A to point B. They shape the first impression, control how the item moves through the supply chain, and decide whether the customer sees a polished brand or just another carton.
That matters most when the product starts in a poly bag, pouch, tray, or shrink wrap and still needs to look finished on arrival. A plain stock box can work, but it often leaves gaps in fit, presentation, or protection. Custom work earns its keep when those gaps start costing money.
The better question is not whether a box can be printed. It is whether the structure, material, finish, and pack-out method actually fit the product and the channel. That is where personalized packaging boxes either pay off or turn into expensive shelf filler.
Brands usually pay for custom packaging because the value shows up in several places at once. Fit improves. Damage drops. Shelf presence gets stronger. Assembly in the warehouse gets easier if the format is built with the real packing process in mind.
For ecommerce, the box has to survive handling and still look intentional after transit. For retail, it has to read quickly and carry the brand without noise. For kits and subscription sets, the outer box becomes part of the product story, not just protection around it.
The cheapest box is rarely the cheapest packaging decision. The one that fits, ships, and reorders cleanly usually wins.
What personalized packaging boxes change for buyers
The main mistake is treating the carton as a container only. A packaging box also works as a sales surface, a protection layer, and a process tool. That combination matters because each channel pushes the box differently.
Retail wants strong shelf recognition. Ecommerce wants a neat unboxing and enough crush resistance to survive transit. Subscription programs want repeatability across multiple SKUs. Bundle packs need structure, because loose contents look unfinished even if the products themselves are solid.
That is why buyers should compare packaging options against the actual use case, not just the design file. A branded sleeve can solve one problem. A mailer can solve another. A full custom carton from Custom Packaging Products makes sense when fit and presentation both matter, but not every SKU needs that level of build.
Personalized packaging boxes also force cleaner decisions inside the buying team. Size, insert style, finish, and reorder plan all have to be decided early. That sounds tedious. It is also where a lot of hidden costs are avoided.
How the design and print workflow works
Good packaging design starts with measurements, not artwork. Begin with the finished product dimensions, the weight, and the way the item will sit inside the pack. Then add any pouch, wrap, seal, divider, or insert. Those details define the dieline before a designer touches layout.
The dieline is not just a template. It sets the footprint, folds, glue flaps, and trim allowances. If that base is wrong, the box can still look good on a monitor and fail in production. That is a common problem with personalized packaging boxes: the artwork gets approved before the structure does.
The print method should match the run size and finish requirements. Digital printing suits shorter runs, frequent artwork changes, and variable data. Offset printing is usually the better fit for larger quantities and tighter brand color control. Flexographic printing can make sense for simple graphics on corrugated stock or labels. Some programs mix methods when the outer carton and inner component need different handling.
Artwork has to respect the physical limits of the box. Bleed keeps color from stopping short of the edge. Safe zones keep text away from trim. Fold lines and glue areas are not decorative space. Barcode placement, warning copy, recycling marks, and legal text all compete for room.
For retail packaging, the layout has to be legible at arm’s length. A box that looks strong in a mockup can still fail if the front panel is too busy or the brand mark disappears at shelf distance. Clear hierarchy beats decoration every time.
Proofing should happen in layers. Digital proofs catch spelling, layout, and basic alignment errors. Physical samples catch fit, finish, and tactile issues that screens hide. If the product depends on color accuracy, board stiffness, or insert fit, a sample is worth the extra time.
Interior customization matters too. Custom inserts, printed inner panels, QR codes, and assembly notes can change the unboxing without changing the exterior size. That is useful for kit packaging, because the customer experiences the box in stages. The outer layer sets the expectation. The inside confirms it.
Cost, pricing, and MOQ: what moves the quote
Most packaging quotes come down to four things: size, substrate, print coverage, and quantity. A smaller box uses less board, but cost does not fall in a straight line because setup, cutting dies, proofing, and press time still exist. That is why short runs often feel expensive. The fixed costs are being spread over fewer units.
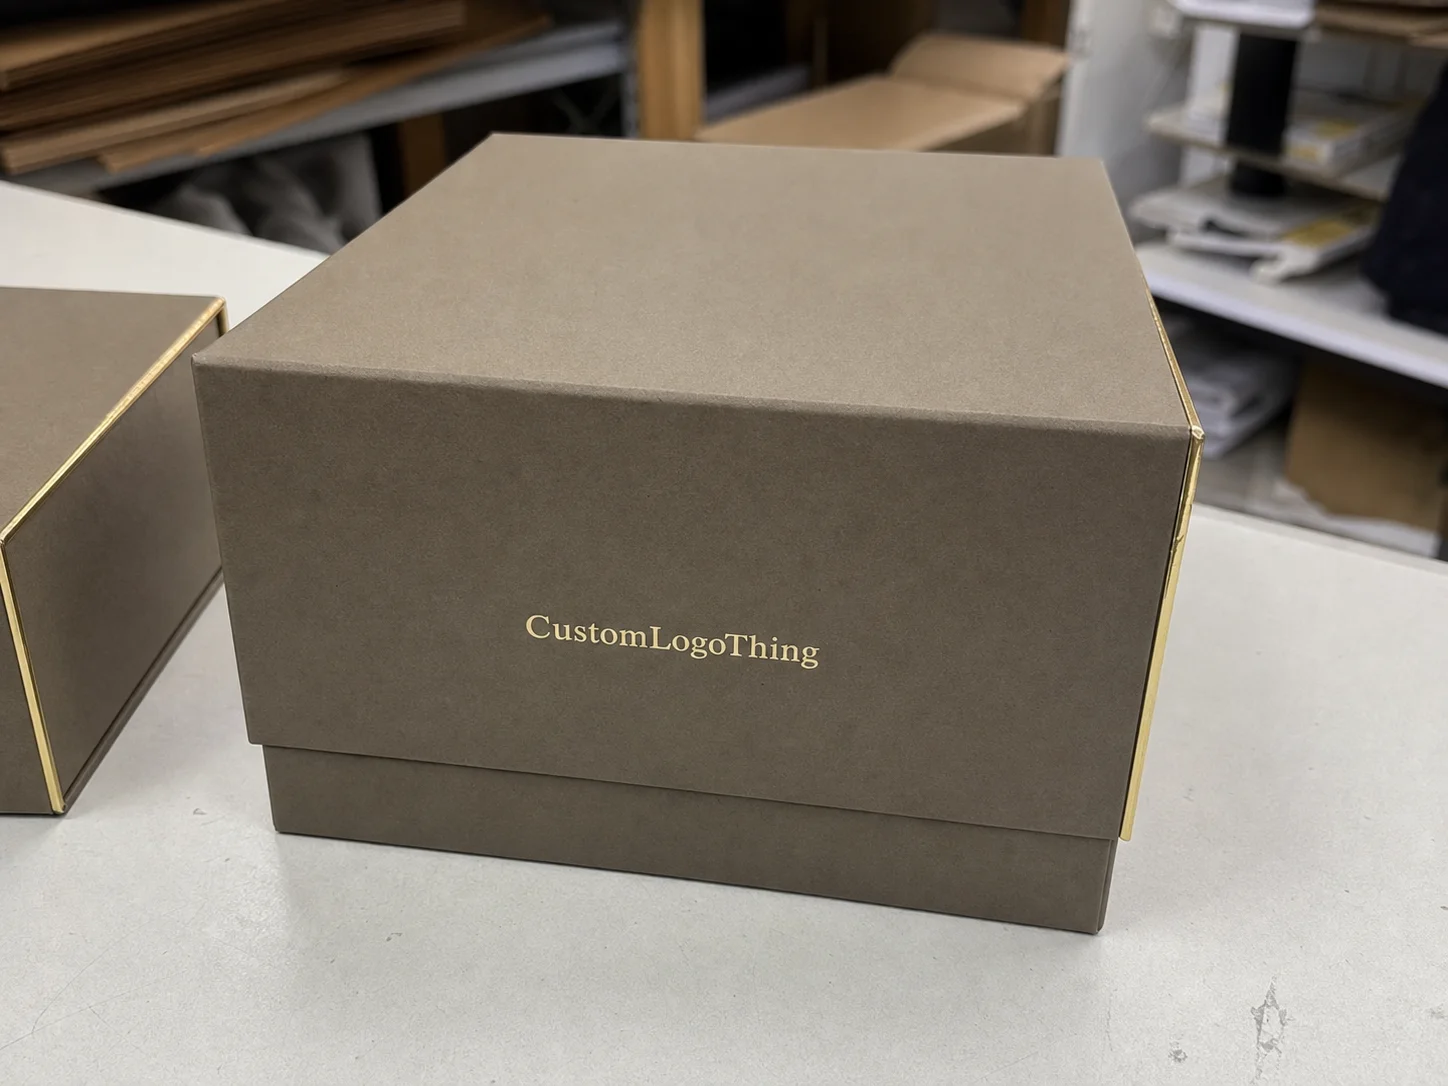
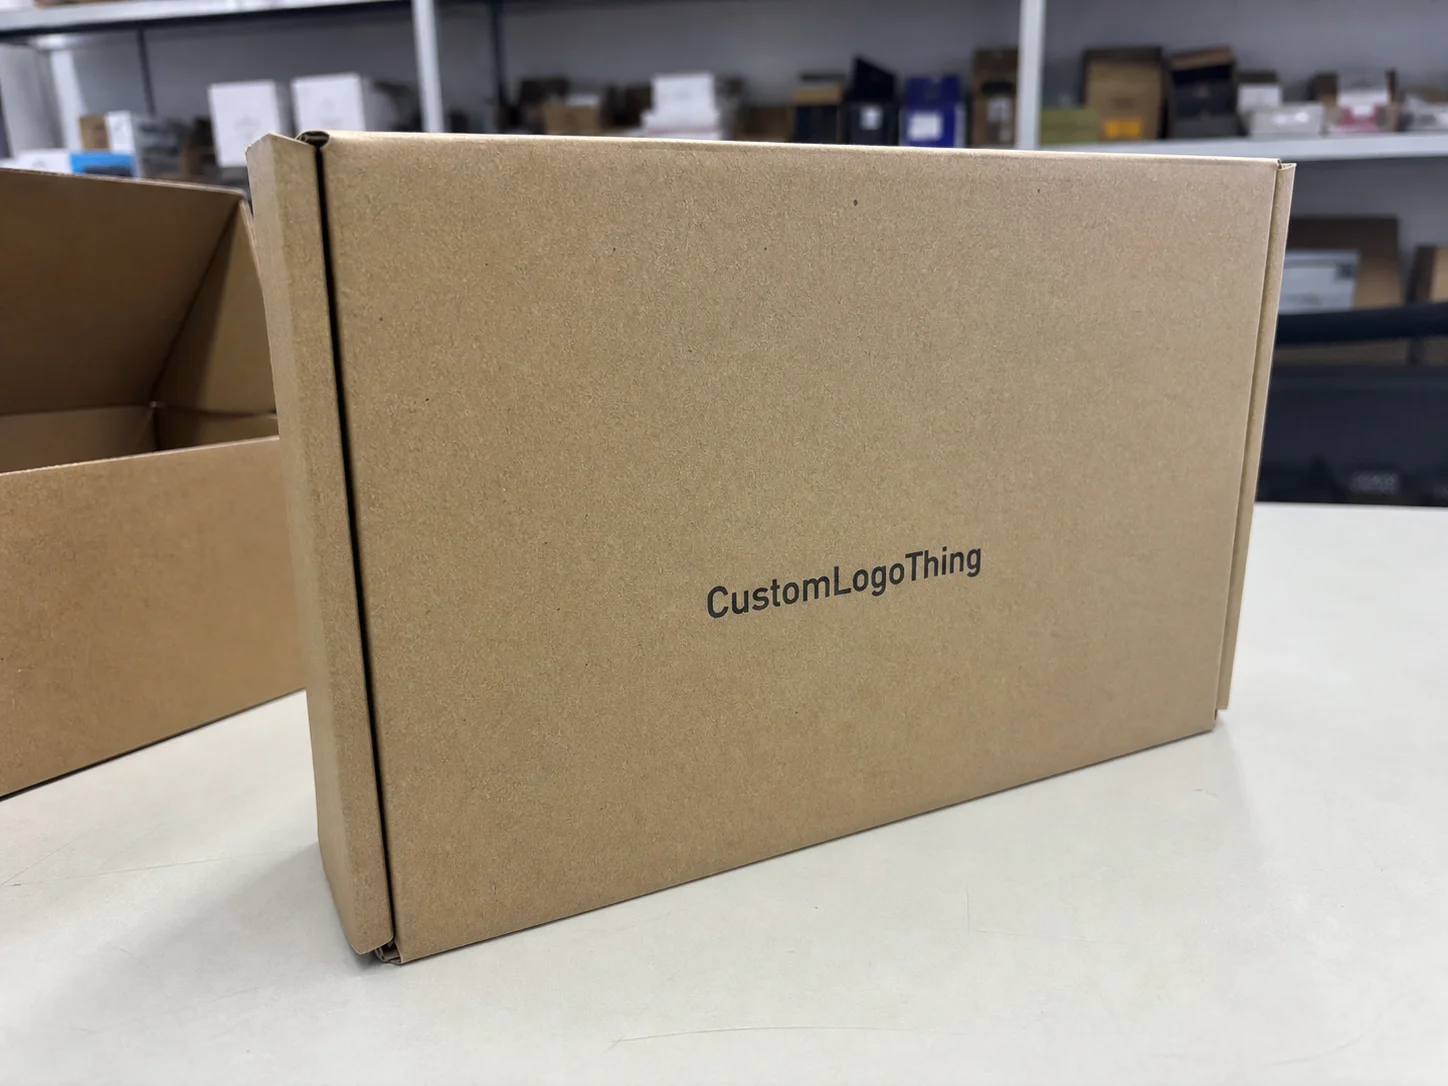
Material choice changes the number fast. A 350gsm C1S folding carton is usually cheaper than a rigid setup box. Corrugated mailers cost more than a basic folding carton, but they give better ship strength. Specialty finishes add another layer. Foil, embossing, soft-touch lamination, spot UV, and windows all raise cost and usually increase production time.
For a directional benchmark, a simple 350gsm C1S folding carton at 5,000 units may land around $0.18-$0.28 per unit, depending on size, coverage, and structure. Add soft-touch lamination, foil, embossing, or a window and the range can move toward $0.35-$0.70 per unit or more. Rigid presentation boxes, custom inserts, and manual assembly push higher still. Those are working ranges, not promises.
MOQ matters because the unit price usually drops as the run gets larger. The tradeoff is inventory. Saving a few cents per box is not a win if the design changes before the stock is used. Obsolete packaging is dead money. It cannot be sold, and it takes up space until someone admits the forecast was too optimistic.
Other line items can move the quote in ways buyers miss at first glance. Tooling for custom shapes. Sampling. Freight. Rush fees. Rework after late artwork changes. Hand assembly. A simple-looking box can still be expensive if the finish stack is complicated or the job requires multiple production steps.
| Packaging option | Typical unit cost at 5,000 pieces | Best use | Main tradeoff |
|---|---|---|---|
| Simple folding carton | $0.18-$0.28 | Light products, retail sets, ecommerce inserts | Lower cost, less structural presence |
| Mailer box with print | $0.28-$0.48 | Subscription, direct-to-consumer shipments | Better ship strength, more board usage |
| Rigid setup box | $0.80-$2.50 | Premium gifts, luxury retail packaging | Strong presentation, higher material and labor cost |
| Box with insert or tray | $0.35-$0.95 | Kits, bundled SKUs, fragile product packaging | Cleaner fit, extra assembly and tooling |
To compare vendors fairly, make sure every quote is built on the same assumptions. Use the same dimensions, board grade, print method, finish, quantity, lead time, and destination. If one quote assumes a simpler dieline or excludes freight, the number is not directly comparable. That is one of the easiest ways to overpay without realizing it.
Production steps and turnaround: from proof to shipment
The production flow is usually predictable. First comes intake and specification review. Then file checking. Then proofing. After approval, material sourcing and printing begin. Converting follows, then finishing, packing, and shipment. Each step depends on the one before it.
From a buyer’s perspective, the biggest delay is often not the press. It is the proof. One day of delay on artwork approval can ripple through the rest of the schedule, especially if machine time or substrate has already been reserved. Complex finishes tighten the window even more because coating, cutting, and assembly have to happen in sequence.
Turnaround stretches when the job depends on custom materials, seasonal demand, or late copy changes. Straightforward orders can often land around 12-15 business days from proof approval. More complex runs usually take longer. Freight adds its own clock. Air shipping is faster but expensive. Ocean or ground freight is cheaper only if the transit time was built into the plan early enough.
The practical rule is simple: back-schedule from the launch date, not from the quote date. If a retail reset or product drop is fixed on the calendar, the packaging order should be timed backward from the ship date and proof deadline. That leaves room for revisions, sampling, and the small delays that show up right before a deadline.
For distribution-heavy programs, packaging should be judged on handling stress, not just appearance. ISTA test methods are useful references when a box needs to survive compression, vibration, or transit abuse. A carton can look perfect on a table and still fail in a warehouse stack. The shipping route decides more than the mockup does.
Specs to lock before you approve the dieline
Before anyone signs off on the dieline, lock the finished product dimensions, weight, and orientation. A box can be printable and still fail in practice if the product sits the wrong way or the internal clearance is too tight. That is especially true for products packed in bags or wraps, where the final packed size is different from the bare item.
Then define the packing method. Will the product arrive in a sealed pouch, a tray, a divider system, or a pre-glued insert? These details affect usable interior space and how much pressure the board needs to handle. If the box must work for both retail display and ecommerce shipping, the structure should be chosen for the harsher use case.
Non-negotiables should be written down before artwork is finalized. Barcode position. Legal copy. Brand hierarchy. Recycling marks. Matte, gloss, or soft-touch finish. If the packaging makes sustainability claims, the material story needs to be clear and supportable. For fiber-based stock, FSC chain-of-custody guidance from FSC is a useful reference when sourcing discipline matters.
Storage and assembly also affect the final decision. Flat-packed cartons save warehouse space but require labor at pack-out. Pre-glued forms cut assembly time but cost more and use more volume in transit. Manually packed kits can be flexible, but they need clear instructions if the team wants consistent results.
If the project is likely to expand into a larger packaging family, this is the time to check long-term fit across SKUs. A good Custom Packaging Products discussion is not only about one box. It is about whether the structure can handle a size change, a seasonal version, or a line extension without forcing a full redesign.
Common mistakes that create waste or reorders
The most expensive mistake is measuring the product instead of the finished pack. Once a bag, closure, insert, or fold is added, the real dimensions change. A box that looks generous on paper can become tight in the warehouse, and a box that seems modest may leave too much movement in transit.
Artwork mistakes cost just as much. Ignoring bleed, fold lines, or safe zones can make a clean PDF print badly. A barcode too close to a crease can stop scanning. Text near the trim edge can disappear. The monitor may look fine. The press sheet will not be forgiving.
Color approval is another trap. An uncalibrated screen can hide drift, especially on warm neutrals, deep blacks, and brand-critical reds. Compare proof standards, not just visual impressions. Ask whether the supplier is matching to Pantone, lab values, or a prior sample. That detail seems minor until a reprint lands with a visibly different tone and the buyer now has two versions of the same package in circulation.
Shipping tests get skipped because the box looks good. That is backward. If a carton is going into palletized freight or retail handling, compression and transit stress should be part of the review. A lightweight structure can be fine for display and weak for stacking. Damage usually shows up at the worst moment, after the product is packed and labeled.
Do not order early if regulatory copy, pricing, or flavor details are still moving. Obsolete inventory is expensive because it cannot be sold, even if the box looks great. That is one of the least visible costs in packaging and one of the easiest to avoid with a stricter approval process.
Expert tips for a cleaner first run
Start with fewer sizes if the product line is still changing. SKU sprawl looks manageable at first and gets messy fast. One or two core formats are easier to forecast, easier to store, and easier to reorder. That matters when the packaging is tied to a launch, because every extra box size adds another place for errors to creep in.
Ask for a physical sample when color, fit, or finish matters more than speed. A prototype is cheaper than a correction run. It can show whether the closure feels too loose, whether the insert needs a tighter tolerance, or whether the finish hides fingerprints the way the team expects. For personalized packaging boxes, one sample often reveals more than a stack of PDF proofs.
Think ahead to the next variation. If the line may expand into new flavors, sizes, claims, or seasonal editions, leave room in the system for that change. A design that can accept a badge, a different SKU code, or a small copy shift lasts longer than one that needs to be rebuilt every time the catalog changes.
Channel fit matters as much as visual style. Ecommerce needs crush resistance and predictable pack-out. Retail needs shelf visibility and fast recognition from a distance. Subscription kits need a controlled unboxing sequence. A single structure can do more than one job, but it should be chosen for the hardest job first.
Keep a revision log. Record file names, approval dates, copy changes, and artwork swaps. That sounds dull until the first discrepancy appears. Then it becomes the only clean way to trace what changed and when.
The best first run is the one that does not create drama. Straightforward materials. Clean print. Predictable assembly. Repeatable reorders. That is usually the mark of a packaging program built with discipline instead of optimism.
Next steps before you request samples
Before requesting samples, build a one-page spec sheet. Include dimensions, target quantity, product weight, preferred material, print needs, budget range, and required delivery date. The clearer the brief, the less likely the quote will miss the actual job.
Then collect two or three reference packages. Note what should be copied, what should be avoided, and what should be improved. That makes supplier conversations concrete. Instead of saying the pack should feel premium, say the finish should be matte, the fit should be tighter, and the shelf face should be cleaner than the reference sample.
Separate fixed requirements from flexible ones before pricing starts. Fixed means the product must fit, the barcode must scan, or the legal text must stay. Flexible means the finish could shift, the insert could simplify, or the quantity could change. That distinction helps buyers balance Cost, Lead Time, and presentation without guessing.
Ask every supplier for the same three items: a sample option, a quote with assumptions, and an estimated turnaround window tied to approval. Those three inputs reveal a lot. If a vendor cannot state the assumptions clearly, the buyer will probably pay for them later. If the assumptions are clear, the comparison becomes much cleaner.
Before the first order is placed, make sure the personalized packaging boxes match the product, the channel, and the reorder plan. That is the real test. A good box is not just attractive on day one. It is easy to repeat on day ninety, when the next run has to match the first without extra drama.
Frequently Asked Questions
What information do I need before requesting custom packaging box pricing?
Start with the finished product dimensions, weight, and how it will be packed inside the box. Add the expected order quantity, because MOQ has a direct effect on unit cost. Include artwork needs such as color count, special finishes, and barcode or legal copy placement so the supplier can quote the job against the real spec.
How do I choose the right size for personalized packaging boxes?
Measure the finished product, not just the item before bagging, wrapping, or inserting. Leave room for fit, protection, and pack-out efficiency without creating too much void space. Then request a sample or dieline check before approving artwork, because a box that fits on paper may still fail in the pack line.
What affects turnaround time the most?
Proof approval speed is usually the biggest variable buyers can control. Special finishes, custom materials, and high-demand seasons can add days or weeks. Freight distance and rush requests can change the total delivery window too, so the delivery plan should be built around the approval date, not the quote date.
Is a higher MOQ always better for unit cost?
Usually yes for unit price, but only if the business can store and use the inventory. Larger runs lower per-piece cost, yet they also increase the amount of cash tied up in packaging. A smaller run can be the better choice when artwork, claims, or product details are still changing.
Can one box style work for multiple SKUs?
Yes, if the size range is tight and the internal protection can be standardized. That can reduce tooling, simplify reorders, and make forecasting easier. The tradeoff is less exact fit, so the structure has to tolerate both the largest and smallest product in the set without looking loose or compressed.