Printed Corrugated Packaging Box: Buyer’s Guide to Specs
A printed corrugated packaging box has to do more than carry a logo. It needs to protect the product in transit, present the brand clearly, and still fit a real budget once board, print, tooling, freight, and fulfillment are all counted. That is where many programs get misaligned: one team optimizes for shipping strength, another for shelf appearance, and the final box ends up underperforming in both directions.
The better approach is to treat structure and graphics as one decision. Flute profile, board grade, print method, and finish all affect how the box looks, how it stacks, and how it survives handling. A box that is supposed to ship well but is designed like a retail carton can create avoidable damage. A box that looks clean on screen but ignores compression and scuff resistance can turn expensive very quickly.
For buyers, the goal is not simply to order a printed corrugated packaging box that looks attractive in a sample photo. The goal is to choose a spec that matches the product, the route to market, and the pressure points in production and distribution. Once those are clear, the rest becomes a series of practical tradeoffs instead of guesswork.
What a Printed Corrugated Packaging Box Actually Does
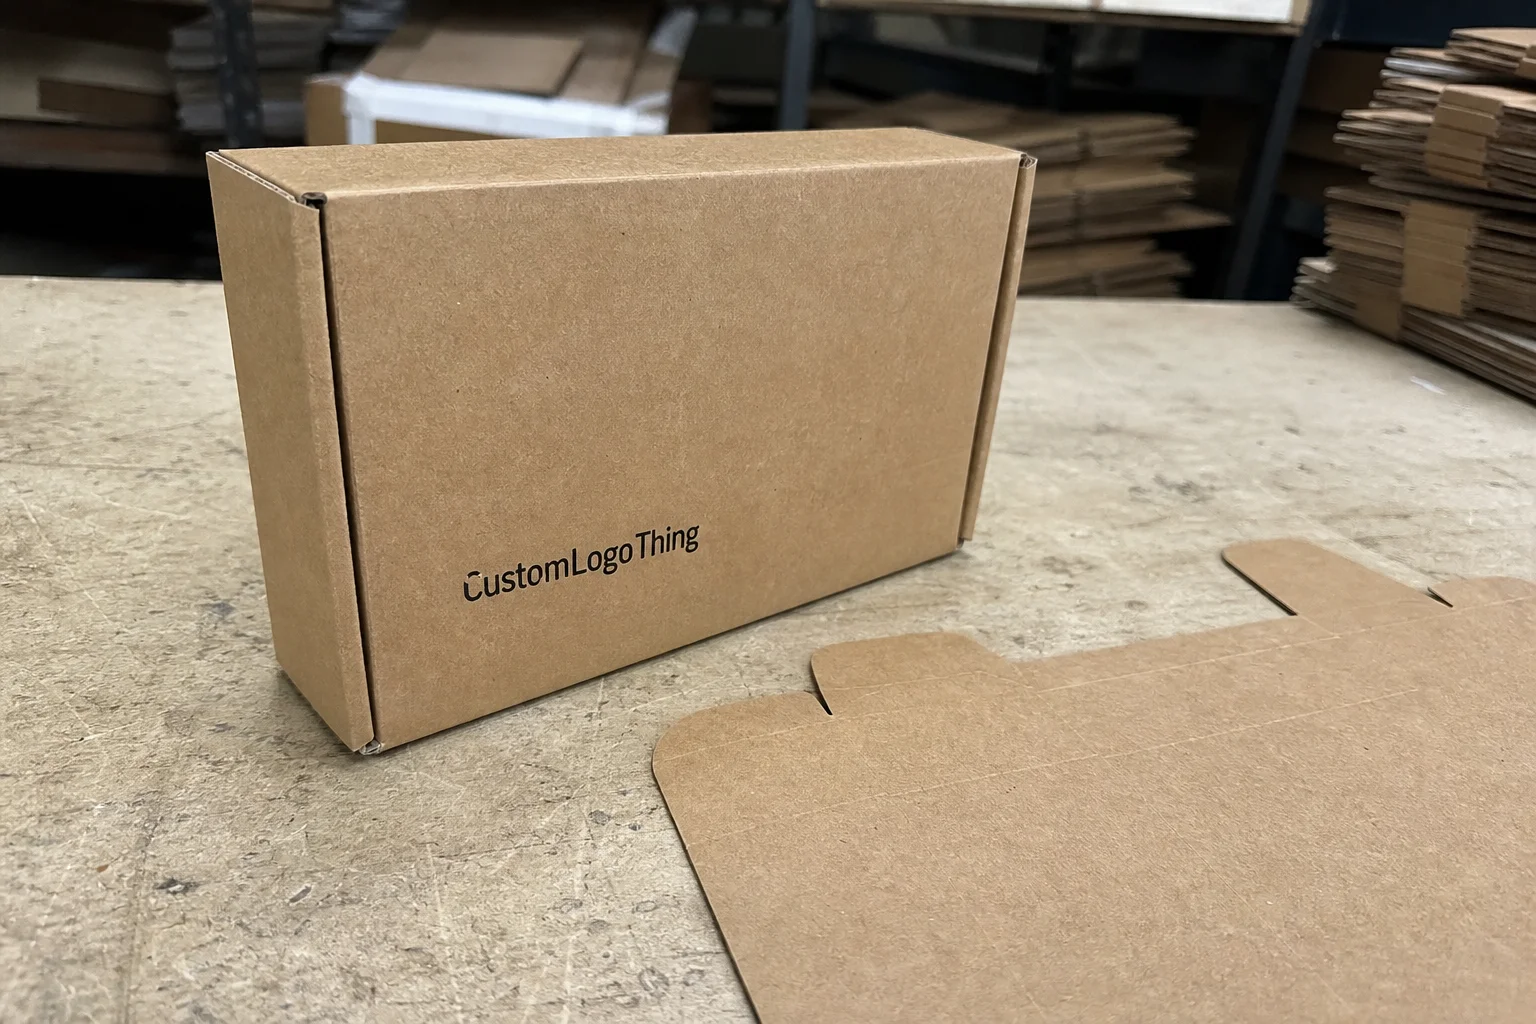
A printed corrugated packaging box is a corrugated shipper or retail-ready carton with graphics, product information, instructions, or regulatory text printed directly on the board or on a laminated outer sheet. The box still relies on the corrugated structure for strength. The print layer adds brand recognition, scanability, and a more finished presentation without requiring extra labels or sleeves in every case.
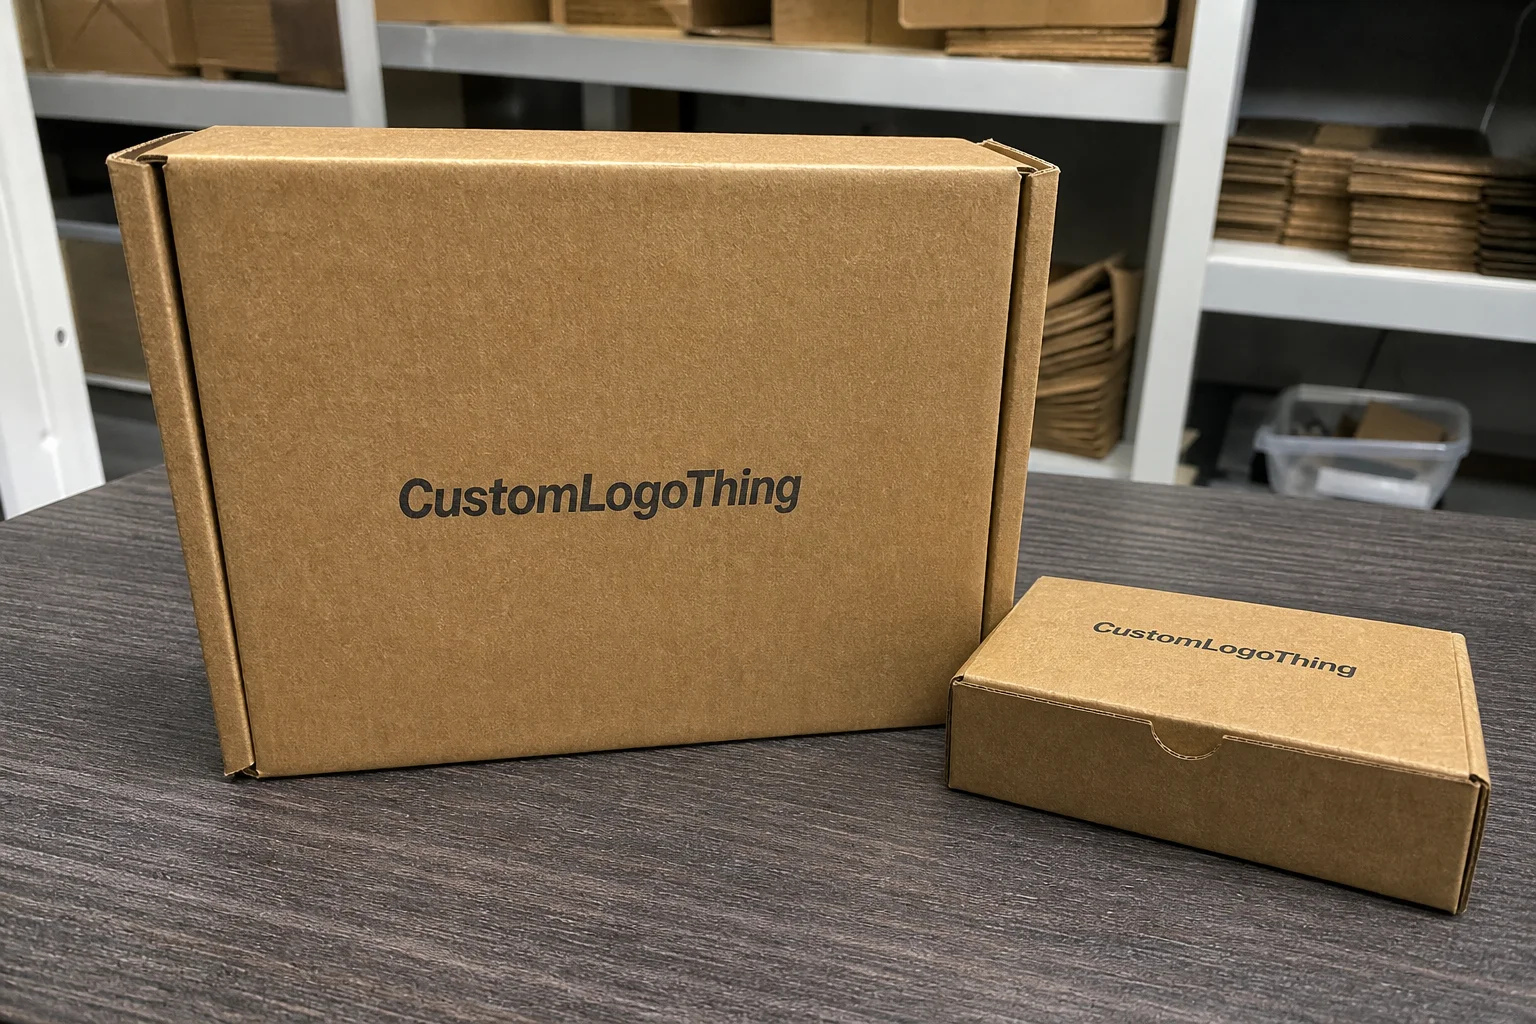
That combination makes corrugated unusually versatile. A shipping box can be plain and durable, or it can carry enough brand detail to support an ecommerce unboxing moment. A retail-ready pack can move through warehousing, stacking, and parcel delivery while still reading clearly on shelf. In practical terms, corrugated sits in the middle between lightweight folding cartons and low-cost plastic packaging: stronger than paperboard, more print-friendly than a standard transit carton, and usually easier to source in volume.
What the box is supposed to achieve should be defined before artwork starts. If the primary risk is crushing, the spec should favor board performance and structural fit. If the priority is shelf impact, surface smoothness and print quality matter more. If the product travels through parcel networks, scuff resistance, barcode placement, and edge durability become part of the design brief rather than afterthoughts.
That is also why a printed corrugated packaging box should not be evaluated only by its outside appearance. A box can look premium and still be too weak for stack load, too rough for clean print, or too large for efficient fulfillment. The usable version is the one that protects the product and supports the supply chain without creating waste at the packing bench or the receiving dock.
How the Printing Process Works on Corrugated Board
Corrugated board consists of a liner, a fluted medium, and another liner. The top liner is the main print surface, and its quality has a direct effect on the final image. A smoother liner gives finer detail and cleaner solids; a more recycled or textured liner can absorb ink unevenly and make dark areas look less consistent. Flute type matters too. E-flute generally supports sharper graphics, while B-flute and C-flute are often chosen when compression strength and stacking performance are more important than image resolution.
Most projects use one of four print routes: flexographic printing, litho lamination, digital printing, or direct-to-board systems. Flexo is the most common workhorse for corrugated packaging because it is efficient for medium and larger runs, especially when the art is bold and uncomplicated. Litho lamination is used when image quality is close to retail carton standards and the outer face needs a premium look. Digital printing is useful for short runs, multiple versions, test launches, and jobs that need artwork changes with minimal setup. Direct-to-board options can reduce prepress complexity, but the visual result still depends heavily on the board surface and the press configuration.
The production sequence is usually straightforward. Artwork is checked against the dieline, proofs are reviewed, plates or digital files are prepared, then the job moves to press, drying, die-cutting, folding, and gluing. If the box needs slots, windows, partitions, or inserts, those features should be locked before the job is approved. A last-minute shift in a fold line or glue tab can distort the panel layout and create wasted inventory.
Color control is one of the most underestimated parts of the process. Ink density, registration, and coverage all affect how a brand color lands on corrugated board. A simple one- or two-color shipper can stay very consistent. A design with dark solids, gradients, small type, and heavy coverage is harder to hold, especially on a recycled liner. That is why print method and surface expectations should be specified together rather than as separate decisions.
For distribution testing, many suppliers reference ISTA protocols, and teams often compare those with ASTM methods such as D4169 when parcel or distribution performance matters. If the program requires certified fiber, FSC chain-of-custody language may also be part of the request. None of those references replace actual fit-for-use testing, but they give buyers a useful framework for comparing suppliers and expectations.
Key Specs That Change Appearance, Strength, and Performance
The best-looking sample is not always the best-performing box. The specs that matter most are usually board grade, flute profile, ECT rating, print method, finish, dimensions, and tolerance control. If the carton needs to stack in a warehouse, the board has to carry load without bowing. If it needs to look clean on shelf or during unboxing, the liner, ink system, and coating have to support the artwork. Those goals can work together, but they do not behave the same way.
Board grade is the first decision that shapes performance. A common single-wall mailer might use 32 ECT board, while heavier products may require 44 ECT or a double-wall build. Buyers still see burst strength in some specs, but ECT is often more useful because it reflects stacking and compression behavior in real shipping conditions. If the product is heavy, dense, or unevenly distributed, a stronger board is usually worth the extra cost.
Flute profile changes both structure and appearance. E-flute is thinner and typically offers better print detail. B-flute and C-flute are thicker and often perform better for stacking or cushioning. Double-wall options are used when the box must handle higher weights, longer transit, or rougher fulfillment environments. The right choice depends less on what looks good in a sample and more on how the packaged product will actually move through the chain.
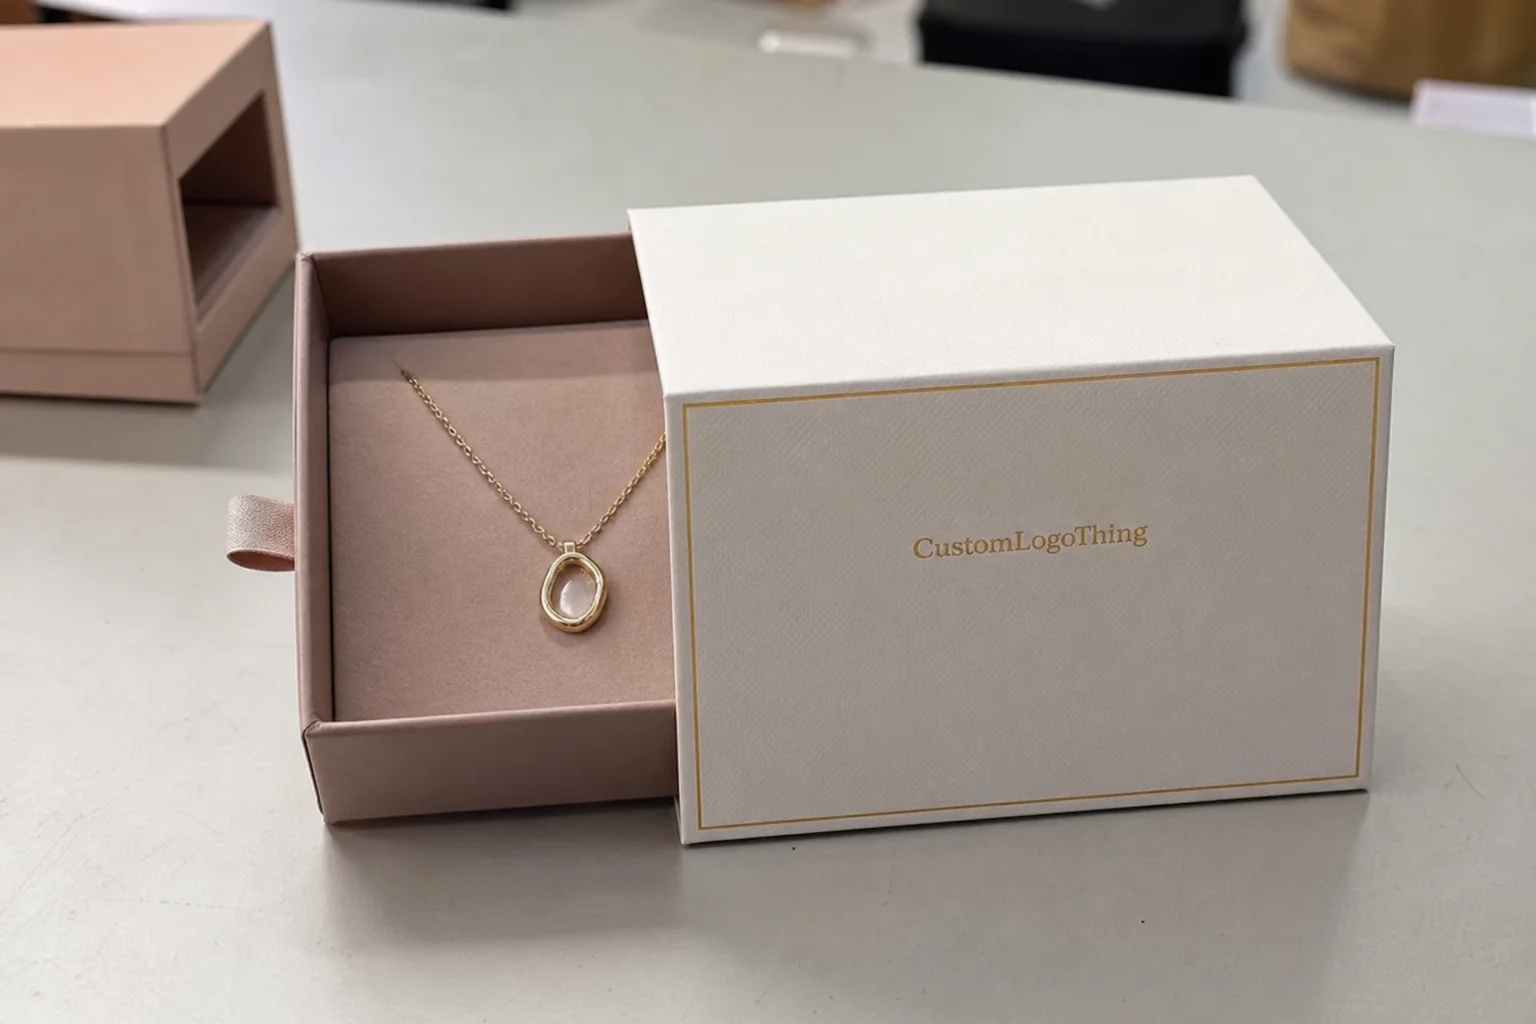
Finish affects both appearance and handling. An uncoated surface can keep the packaging natural-looking and may fit recyclability goals well, but it is more vulnerable to rub marks and scuffing. An aqueous coating or varnish can improve color clarity and abrasion resistance. Specialty coatings such as matte, soft-touch, or high-gloss finishes can upgrade presentation, but they add cost and may complicate recyclability or convertibility depending on the program. If boxes are handled by fulfillment staff before reaching the customer, finish durability should be treated as a functional spec, not only a visual one.
Sizing and tolerance are often overlooked until a product starts moving inside the box. Even a few millimeters off can create corner crush, product rattling, awkward void fill, or poor insert alignment. If trays, partitions, or molded pulp inserts are part of the build, the box and insert need to be designed as one system. A good quote should confirm whether dimensions are internal or external, because that detail alone can change the outcome.
Sustainability should be discussed in practical terms. Recycled content, recyclability, FSC certification, adhesive choice, and ink system all affect how the packaging is sourced and received by downstream partners. For some programs, low-odor water-based inks and a recyclable single-wall structure are enough. For others, the product’s use case may be driven by barcodes, warning text, or food-contact constraints before environmental claims come into play. The most useful spec is the one that matches the actual route to market.
- For shipping strength: prioritize ECT, flute choice, and carton fit.
- For retail presentation: prioritize liner smoothness, print consistency, and coating.
- For compliance: confirm barcode contrast, warning text, and required symbols before proof approval.
Cost, Pricing, and MOQ Factors Buyers Should Compare
Pricing for a printed corrugated packaging box is usually a combination of board cost, print method, tooling, finishing, quantity, and logistics. A one-color flexo shipper with a standard die cut will typically cost far less than a litho-laminated box with complex graphics and a specialty coating. The hard part is that unit price alone can hide the real difference between options.
As a directional benchmark, short-run digital boxes can often land around $1.20-$3.50 per unit depending on size, board, and coverage. A mid-volume flexo program may fall in the $0.35-$0.85 per unit range at higher quantities. Litho-laminated builds commonly sit around $0.90-$2.25 per unit or more, especially when image quality and finishing requirements are tighter. These numbers are only reference points, but they are useful for checking whether a quote is in a realistic range.
| Option | Typical Volume | Directional Unit Cost | Best Fit | Tradeoff |
|---|---|---|---|---|
| Digital print on corrugated | 200-2,000 units | $1.20-$3.50 | Short runs, prototypes, multiple SKUs | Higher unit price at scale |
| Flexographic print | 2,000-25,000+ units | $0.35-$0.85 | Simple branding, shipping cartons, repeat orders | Less detail than premium methods |
| Litho lamination | 1,000-10,000+ units | $0.90-$2.25 | Retail packaging, premium graphics, shelf impact | More setup, longer lead time |
MOQ is a practical constraint, not just a sales term. Digital printing usually supports lower minimums, but the unit price rises as the run gets shorter. Flexo and litho become more economical as quantity increases, yet tooling and setup can make small runs unattractive. Seasonal launches, subscription programs, and fast-changing SKUs often benefit from digital or hybrid strategies, while stable programs usually get better economics from flexo or litho at scale.
Hidden costs deserve a careful look. Freight on bulky corrugated cartons can change the landed cost more than buyers expect. Warehousing matters if you are ordering ahead of demand. Revisions can add expense if artwork is not final before proofing. Assembly labor becomes important when the box includes inserts, partitions, or multiple folding steps. A quote that looks low at the unit level may become less attractive once those pieces are counted.
The comparison that actually helps is total landed cost. That means board, print, tooling, freight, storage, and any labor needed to convert the box into a usable shipping or retail format. If those items are not in the same calculation, the buyer is not comparing like with like.
Production Steps, Timeline, and Lead Time Expectations
The production process usually begins with a brief that covers dimensions, product weight, shipping method, artwork files, and the target ship date. From there, the supplier checks the structure, confirms the dieline, and reviews the print area. A clear brief shortens the back-and-forth later because it reduces uncertainty before the first proof is prepared.
Artwork review is where delays often start. Missing dieline data, low-resolution logos, poor barcode contrast, and late copy changes can add days or even push a job back a full production window. If the box has fold lines, glue tabs, or cutouts, those elements need to be verified before final approval. A proof is not just about visual polish; it is the last checkpoint before the box becomes inventory.
Lead time depends heavily on process and finish. Fast-turn digital jobs can sometimes move in under two weeks once artwork is approved. Flexographic projects generally take longer because plates or tooling may be required. Litho-laminated or specialty-finished cartons usually need more calendar time because printing, lamination, die-cutting, drying, and finishing add more steps. The more premium the look, the more likely the schedule will stretch.
Before requesting quotes, it helps to have these details ready:
- Internal and external dimensions.
- Product weight and fragility.
- How the box will ship, stack, and be handled.
- Artwork files in editable format.
- Brand color references, if available.
- Target quantity range, not just one number.
If you are still deciding on format, it helps to compare the box against other Custom Packaging Products and then narrow the fit against Custom Shipping Boxes. That comparison is useful because it keeps the program grounded in function. A retail-looking package is not always the right answer for a warehouse product, and a heavy-duty shipper can look overly plain if the customer is supposed to open it on camera or on shelf.
Scheduling should follow complexity, not just quantity. A small run with a multi-step finish can take longer than a larger order with simple one-color print. That is one reason launch calendars get squeezed: teams plan by volume and forget that specialty coatings, inserts, and premium print require more time to move through production.
Common Ordering Mistakes That Create Waste or Reprints
The first mistake is choosing the wrong structure for the product weight or shipping route. A lightweight mailer can work well with E-flute, but a denser kit or multi-pack may need more compression resistance. If the board is too light, the box may crush, bow, or split under stack load. If it is too heavy, the buyer can end up paying for strength the product never uses.
The second mistake is approving artwork before checking print-safe margins, barcode contrast, and fold lines. A design can look clean on a monitor and still place text across a crease or push a barcode too close to a seam. That turns into a production issue, not just a design issue, because scanability and legibility are part of the box’s function.
The third mistake is skipping testing. Even a modest program should consider compression, fit, and transit handling. If the carton will move through parcel networks, ISTA-based testing is worth discussing with the supplier. If the box must still look good at point of sale, scuffing and edge wear matter just as much as stack performance. A design that survives a proof can still fail once vibration, compression, and moisture enter the picture.
“If the box is printed for shelf appeal, test it like a shipper. If it is printed for shipping, mock it up like a retail piece.”
The fourth mistake is choosing a finish because it looks attractive in a sample image rather than in actual use. High-gloss surfaces can deliver strong contrast, but they may reveal scratches more easily. Matte surfaces can look more refined, but dark artwork may appear softer than expected. Finish should be tested against handling, lighting, and storage conditions, not only against a mood board.
The last mistake is buying to a unit-price target without accounting for freight, fulfillment, and storage. A box that saves a few cents on print can lose that advantage if it arrives late, stores poorly, or takes more labor to assemble. A printed corrugated packaging box should be judged by the full operating cost, not the invoice alone.
Expert Tips for Better Box Design, Better Quotes, and Better Results
Start with the product’s failure point. If the product is fragile, the spec should lean toward structure and cushioning. If the main concern is moisture, the coating and storage path matter more. If the box sits on a shelf, color fidelity and front-panel readability matter more than squeezing out a tiny board savings. Weak specs usually begin with the box shape first and the risk profile second.
Keep the artwork aligned with the print process. Bold typography, controlled color fields, and fewer small reverse-out elements typically print more cleanly and quote more predictably. Detailed graphics are possible, but they should be chosen with the press behavior in mind. A design that looks good on screen but creates registration problems or excessive coverage can slow production and increase cost.
Ask for a sample or printed prototype before scaling. A one-off sample will not replicate every detail of a full production run, but it will reveal enough to matter: color shift, panel alignment, fold behavior, barcode contrast, and finish feel. For a launch SKU, that kind of check can prevent a reprint that costs far more than the sample.
Build a better quote package. Include dimensions, board spec, print coverage, finish, target quantity, and shipping conditions. Once those details are on the table, quotes become comparable instead of vague. That is where a packaging supplier adds value: not only by pricing the job, but by flagging weak assumptions and suggesting tradeoffs that keep the project on track.
A useful mindset is to treat the supplier as a technical reviewer, not only a vendor. That changes the discussion from “How cheap can this be?” to “What spec actually fits the job?” In practice, that is when a custom box stops being a commodity line item and starts functioning as part of the product experience.
Next Steps: How to Spec Your Box Before Requesting a Quote
The fastest route to useful pricing is a one-page spec sheet. Keep it plain: product size, product weight, shipping method, print goals, quantity range, and target ship date are enough to start. If you have brand guidelines, include them. If you already know the preferred board grade or finish, add that too. A concrete brief reduces revisions and makes the quote more dependable.
Next, gather the artwork files and define what matters most. Is the box meant to protect, to sell, or to reduce fulfillment cost? A good printed corrugated packaging box can do two of those very well, but all three only when the spec is disciplined. That choice should happen before quoting, not after the first sample arrives.
It also helps to request two or three pricing paths: value, balanced, and premium. A value option might use simpler print and a standard finish. A balanced option might keep the same structure but improve graphics or coating. A premium option might move to litho lamination or a more refined surface treatment. Seeing the options side by side makes the tradeoff easier to evaluate.
Ask for the sample process, revision policy, and expected lead time in writing. If a supplier cannot explain where delays usually occur, that is a warning sign. A straightforward process should be able to state how the proof is handled, what counts as an approved change, and what happens if artwork changes after sign-off.
Once those pieces are in place, the final decision becomes clearer: prioritize durability, retail impact, or cost efficiency. That ranking is the real specification. Everything else supports it. For a printed corrugated packaging box that may be reordered many times, that clarity saves time and reduces mistakes on every repeat run.
What is a printed corrugated packaging box used for?
It protects products during shipping while also carrying branding, product information, or retail graphics. It is commonly used when a business needs more presentation than a plain shipper but still needs the strength of corrugated board.
How does print quality differ between corrugated box printing methods?
Flexographic printing is efficient for larger runs and simpler graphics, while digital printing is often better for short runs and fast artwork changes. Litho lamination usually gives the sharpest and most premium image quality, but it can cost more and take longer to produce.
What affects the cost of a printed corrugated packaging box the most?
The biggest drivers are box size, board grade, print method, color count, finishing, and order volume. Setup, tooling, freight, and revisions can also change the final unit cost significantly.
How long is the typical turnaround for custom printed corrugated boxes?
Simple digital jobs can move faster, while complex multi-color or specialty-finished boxes usually take longer. Artwork approval speed is one of the biggest factors in overall lead time.
What should I send before asking for a quote on a printed corrugated packaging box?
Send product dimensions, weight, desired quantity, artwork files, shipping needs, and any required print or compliance details. Including those items helps suppliers recommend the right board, print method, and timeline.
If the spec is treated as a production document instead of a marketing wish list, the result is usually better in every direction: fewer surprises, cleaner print, stronger transit performance, and a more credible branded packaging experience. That is the real job of a printed corrugated packaging box.