Printed neck labels are easy to overlook until they fail. If the print cracks, scratches, or washes out, the issue shows up where garments get the most friction and heat. The real job is not just to print a logo. It is to keep the interior mark soft, readable, and stable through wear and laundering.
Printed Neck Labels: Why the Smallest Label Can Make the Biggest Difference
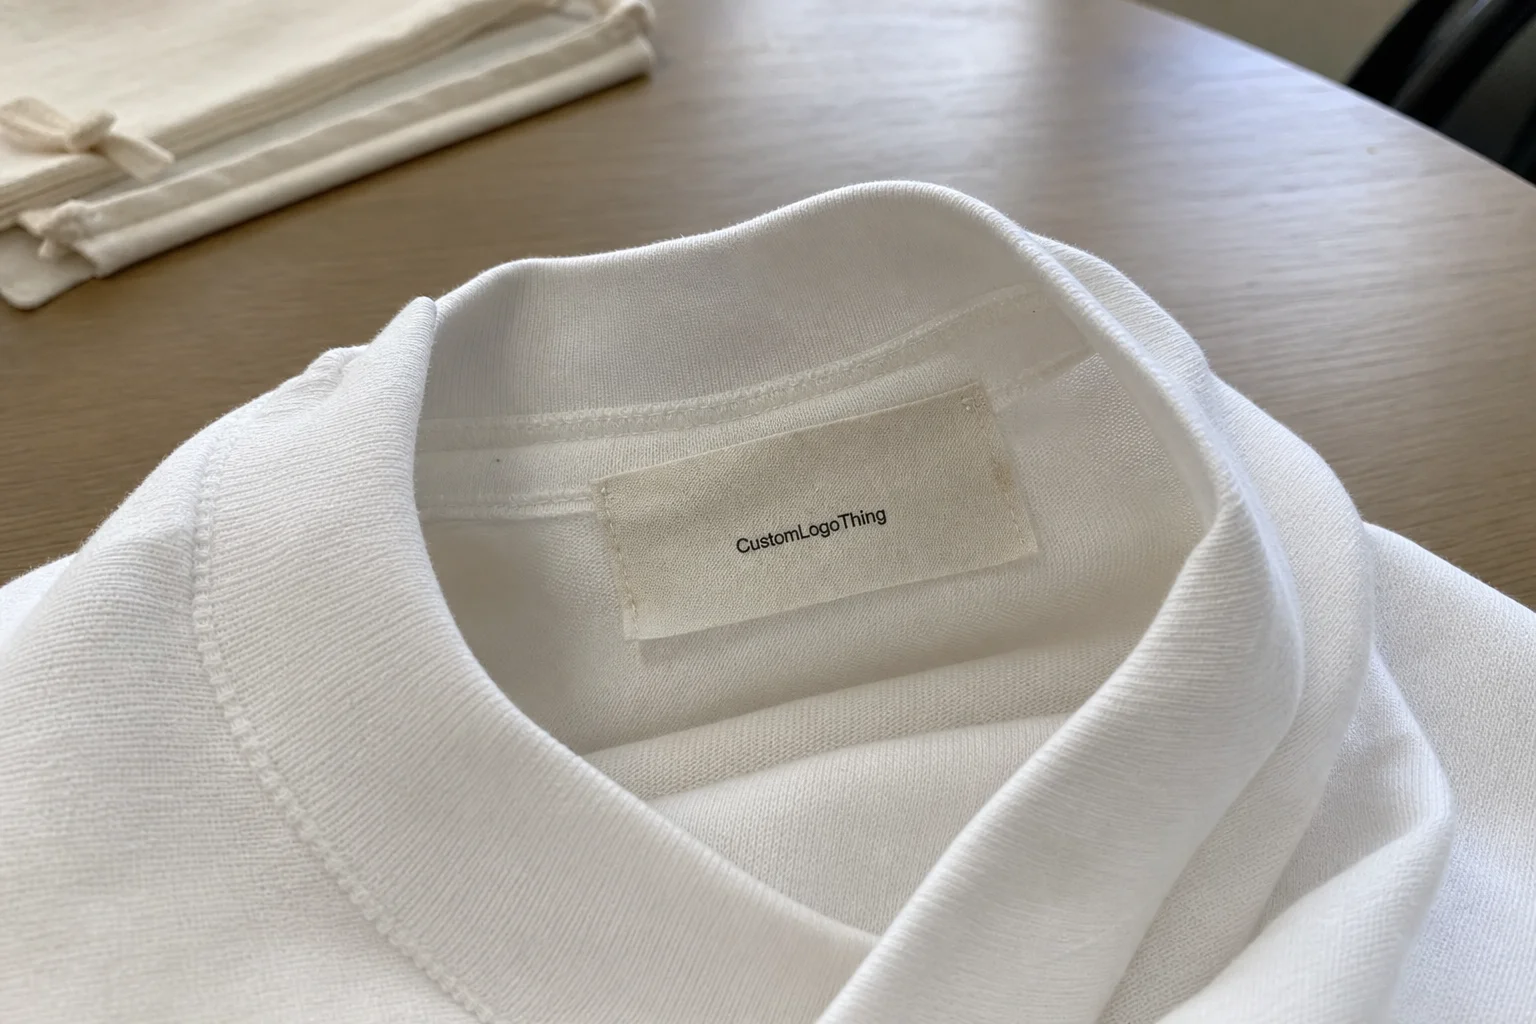
A neck label sits under pressure from stretching, sweat, repeated washing, and constant contact with skin. That is why many brands use a printed interior mark instead of a sewn-in tag when comfort and a clean finish matter.
In practical terms, the label is printed directly onto the garment for brand, size, care, or origin information. Depending on the method, it can look like a soft tagless print, a heat-applied transfer, or a low-profile mark that replaces a traditional woven or satin label.
Brands usually choose this format for three reasons: less rubbing at the neck, a flatter interior appearance, and easier use on tees, babywear, loungewear, and activewear. The tradeoff is that the print has to balance softness, legibility, and wash resistance on a very small surface.
The real standard is simple: the label should still look acceptable after repeated washing, not just on day one.
How the Printing Process Creates a Soft, Durable Mark
The workflow is straightforward, but each step affects the result. Artwork is prepared, placement and size are set, the print method is chosen, and the sample or strike-off is checked before production starts. If the cure, pressure, or ink choice is off, the label can look fine on press and still fail in wear testing.
Common production approaches
- Screen-printed tagless applications for simple branding and size information on cotton-rich garments.
- Heat-transfer neck labels for sharper detail, smoother laydown, and cleaner small text.
- Direct print methods for compatible garments where the fabric accepts the ink system consistently.
No single method wins every time. Screen printing is strong for bold marks and solid opacity. Heat transfer is better for small text and tighter detail. Direct print can work well on the right substrate, but it is more sensitive to fiber mix, finish, and stretch.
Cure control matters because the ink has to bond without making the neck area stiff or glossy. Cotton is usually the easiest surface. Polyester, stretch blends, and moisture-wicking fabrics need more caution because coatings and recovery can affect adhesion.
Buyers should test on the actual garment, not just a similar one. A print that passes on a basic tee can behave differently on a performance knit or a brushed blend. Ask for wash testing, adhesion checks, and a hand-stretch review before approving production.
For brands comparing interior branding options across multiple product lines, start with the Custom Labels & Tags category. If you need to review sewn and printed formats together, the same label options for your garments make it easier to compare what fits each style.
Industry testing language also matters. Textile buyers often reference ASTM methods and wash testing, while broader packaging teams may look at guidance from organizations like ISTA and material sourcing standards such as FSC when paper or packaging components are part of the program. The label is small, but the process should still be controlled.
Material, Size, and Ink Choices That Change the Result
The key specs are the garment, the print area, and how much information has to fit inside that space. A small logo is simple. A full neck mark with brand, size, care copy, fiber content, and origin details needs a tighter layout and cleaner spacing.
Fabric content has a bigger effect than many buyers expect. Cotton is usually forgiving. Polyester can be more difficult because some inks bond less reliably or show migration. Blends fall in between, but the exact ratio matters. A 60/40 tee is not the same as a 95/5 fashion blend.
Stretch is another factor that can expose weak ink or thin linework. If the neckline opens in wear, brittle ink or very fine type can split. That makes font choice and stroke weight part of the durability decision, not just the design decision.
Placement is usually center-back, but seams, yokes, and construction details can force an offset. The usable print area is not always the same as the visible panel, so the spec should be based on the real garment, not a generic template.
Practical spec choices to lock down early
- Garment type: tee, sweatshirt, babywear, activewear, or another fabric category.
- Print area: the usable space inside the neck seam.
- Ink opacity: especially important on dark garments.
- Color count: one-color marks are usually easier to keep consistent.
- Required text: brand name, size, fiber content, country of origin, and care data if needed.
There is always a balance between softness and longevity. Very light prints can feel better, but they may wash down faster. Heavier prints can last longer, but they may feel more noticeable inside the garment. The right call depends on the product and the price point.
| Option | Best Use | Feel | Durability Profile | Typical Order Behavior |
|---|---|---|---|---|
| Screen-printed neck label | Simple logos, size marks, basic compliance text | Very soft when well cured | Strong on cotton-rich goods; less forgiving on tricky synthetics | Often better for repeat programs with consistent artwork |
| Heat-transfer neck label | Fine detail, small text, cleaner edges | Very smooth and low bulk | Good if matched to the fabric and pressed correctly | Useful when legibility matters more than bold coverage |
| Direct printed tagless mark | Compatible garments with controlled surface behavior | Can be nearly invisible inside the garment | Depends heavily on fabric type, ink system, and cure control | Best when the factory already knows the textile well |
Step-by-Step Ordering and Timeline for Approval
Start with the garment spec, not the logo file. If the supplier does not know the fabric content, neckline construction, or intended placement, the quote and proof are only rough estimates. Better input leads to fewer revisions.
- Define the garment: style, fabric content, color, and neck construction.
- Confirm placement: center-back or offset, plus the usable print area.
- Prepare artwork: vector preferred, with text converted and colors specified.
- Review the proof: check size, spelling, line thickness, and compliance text.
- Approve sample or strike-off: especially for new fabrics or new ink systems.
- Release production: only after the proof matches the garment reality.
Lead time depends on artwork complexity, sample requirements, and fabric behavior. Simple reorders can move quickly. New substrates, tiny legal text, or multi-step approvals add time. A realistic range for many custom programs is 12-15 business days after proof approval.
Proof review is where buyers save the most money. Check spelling, sizing, logo position, Pantone or closest color match, wash symbols, fiber content, and country of origin if required. If the proof is blurred or scaled incorrectly, stop there and correct it.
A fast approval is only useful when the proof is already right.
That matters most when switching from sewn-in labels to printed neck labels for the first time. Keep a reference sample from the approved run so future orders can be compared against the same standard, even if a different operator handles the reorder.
Printed Neck Labels Cost: What Drives Unit Price and MOQ
Pricing is usually driven by setup time, print complexity, fabric compatibility, and quantity. On small runs, fixed setup costs have a bigger effect on unit price. On larger runs, those costs spread out, which is why MOQ matters.
A factory has to prepare screens, transfer tooling, press settings, and inspection time before the first sellable piece is made. That is why a run of 100 pieces can cost much more per unit than a run of 5,000. Small orders are not a problem; they are simply less efficient.
The lowest quote is not always the lowest total cost. A cheaper label that feels stiff, fades early, or needs replacement becomes more expensive once rework and delays are included.
Typical pricing questions to ask
- What is included in setup?
- Are proofs or samples charged separately?
- Is the sample cost credited if I place the order?
- How are reorders handled if the artwork stays the same?
- Are there price breaks at 1,000, 2,500, or 5,000 pieces?
As a rough benchmark, simple printed neck labels on standard cotton garments may land around $0.18-$0.28 per unit at 5,000 pieces, depending on coverage and color count. Smaller runs, special fabrics, or compliance-heavy layouts can push that higher. A more complex tagless program with extra text and testing can move the number up further.
Two orders with the same artwork can still price differently if one goes onto a basic cotton tee and the other onto a polyester performance top. For a usable quote, the garment must be specified, not just the design.
Common Mistakes That Lead to Scratchy Labels or Rework
The most common artwork problem is trying to force too much into a small space. Tiny type, hairline rules, low-contrast text, and overcomplicated logos become risky once the design is reduced to neck-label size. If compliance text is required too, the layout has to be disciplined.
Another issue is using a process that does not match the fabric. A method that behaves well on one knit can crack, smear, or feel abrasive on another. Stretch fabrics and performance textiles expose weaknesses quickly, especially after a few wash cycles.
Wash testing is important whenever the garment is new, the fabric is unusual, or the program expects frequent laundering. The first wash often reveals edge lift or weak cure that visual inspection alone will not catch.
Business mistakes that waste time
- Approving proofs before the final garment spec is locked.
- Skipping compliance text until the last minute.
- Sending low-resolution artwork and expecting the factory to rebuild it.
- Ordering before placement and size range are confirmed.
Another mistake is assuming all neck applications are interchangeable. They are not. A label designed for softness may not carry dense legal text well, while one designed for crisp detail may feel more noticeable on the skin. The buyer has to decide which attribute matters most for the product.
Sampling is the fastest way to reduce risk. A reference piece shows whether the label sits flat, whether the text stays clear, and whether the finish feels acceptable against the neck.
Expert Tips and Next Steps Before You Request a Quote
Before asking for pricing, gather the garment spec first. Include fabric content, style number, neck construction, intended placement, target label size, artwork, care copy, and the wash expectation. If the garment is for athletic or babywear use, say so.
Request a sample or reference piece whenever the application is new. That is especially important if you are replacing sewn-in labels with printed neck labels for the first time. The sample should be checked on the actual garment, not a similar one.
Also confirm how the label interacts with the garment finish. Soft-hand inks, stretch performance, moisture-wicking coatings, and brushed interiors can all affect the result. If the supplier knows the finish before production starts, they can Choose the Right process instead of forcing a generic one.
For larger apparel programs, standardize artwork, compliance lines, and placement rules across styles so reorders are faster and fewer decisions need to be made twice. Using the same internal spec sheet across items also makes it easier to compare Custom Labels & Tags against printed alternatives and Choose the Right format for each line.
Ask what tolerance the factory uses for placement and print variation. On a small neck mark, a millimeter or two can matter. Clear tolerances reduce disputes and keep expectations aligned from the start.
Are printed neck labels comfortable for everyday wear?
Yes, when the ink system and garment fabric are matched correctly, they are usually softer than sewn-in labels and reduce rubbing at the neck. Comfort depends on print thickness, cure quality, and placement, so a sample check matters before full production.
What affects the durability of printed neck labels after washing?
The main factors are fabric content, curing conditions, ink chemistry, and whether the print method was chosen for that textile. Repeated washing and tumble drying can expose weak process choices, so testing on the actual garment is the safest approach.
How do I choose the right size and placement for neck printing?
Start with the shirt size range and the amount of text or logo you need to fit, then confirm the center-back or off-center placement based on brand standards. A good layout stays readable without crowding the neckline, size info, or care copy.
Why does MOQ change the price of printed neck labels?
Because setup, screening, and press preparation are spread across the order, smaller runs carry a higher cost per piece. Larger quantities usually lower unit cost, especially when the artwork and print method stay consistent across reorders.
What should I send when requesting a quote for printed neck labels?
Send the garment type, fabric content, label dimensions, artwork file, color count, placement details, and any care or compliance text. If you already know your target quantity and timeline, include those too so pricing and lead time are accurate.