Buyer Fit Snapshot
| Best fit | Printed Sleeves with Offset Printing projects where brand print, material claims, artwork control, MOQ, and repeat-order consistency need to be specified before quoting. |
|---|---|
| Quote inputs | Share finished size, material target, print colors, finish, packing count, annual reorder estimate, ship-to region, and any compliance wording. |
| Proofing check | Approve dieline scale, logo placement, barcode or warning zones, color tolerance, closure strength, and carton packing before bulk production. |
| Main risk | Vague material claims, crowded artwork, missing packing details, or unclear freight terms can make a low unit price expensive after revisions. |
Fast answer: Printed Sleeves with Offset Printing: Cost, Quality, Timing should be specified like a repeatable production item. The safest quote records material, print method, finish, artwork proof, packing count, and reorder notes in one written spec.
Production checks before approval
Compare the actual filled-product size with the drawing, then confirm tolerance on folds, seals, hang holes, label areas, and retail display edges. Reserve space for logos, QR codes, warning copy, and material claims before decorative graphics fill the panel.
Quote comparison points
Review material grade, print process, finish, sampling route, tooling charges, carton quantity, and freight assumptions side by side. A quote is only useful when the supplier can repeat the same color, closure quality, and packing count on the next order.
Printed Sleeves with Offset Printing: Cost, Quality, Timing
A plain carton can go from forgettable to retail-ready in a single pass, and printed sleeves with offset printing are one of the fastest ways to make that jump. Brands that want sharper color, tighter type, and a more premium shelf read without rebuilding the whole package often land here. Printed sleeves with offset printing sit in a useful middle ground: high visual impact, limited structural change, and far less packaging disruption than a full custom box program.
Packaging buyers come back to the format for a reason. A sleeve can wrap a carton, tray, clamshell, or multi-pack and change the story immediately. The base pack stays simple. The outer face carries branding, claims, and the visual hierarchy shoppers notice in a few seconds. In practical terms, printed sleeves with offset printing deliver a strong presentation layer without forcing the rest of the package to become complicated.
There is a production reason this format keeps winning. Offset printing is built for crisp detail, stable color, and efficient repeat production. Artwork with photography, fine gradients, tiny legal text, or a brand color that must stay consistent from run to run usually benefits from that control. Printed sleeves with offset printing tend to outperform rushed compromises because the press process is suited to detail, not just speed. The real work is understanding where the money goes, where the time goes, and which specs actually move the final result.
Printed Sleeves with Offset Printing: What They Are and Why They Stand Out
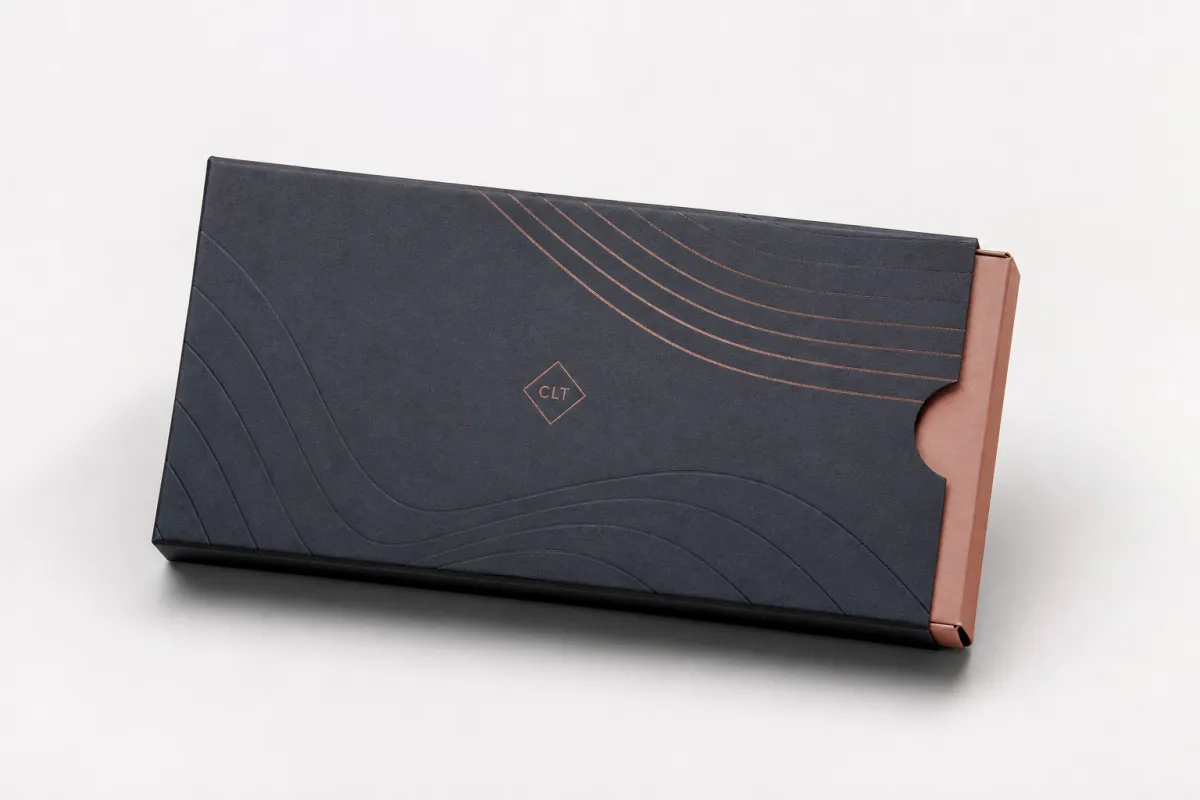
At the simplest level, a sleeve is a wrap or band that fits over an existing package. It may be a full wrap, a belly band, or a partial cover that frames a window and leaves part of the substrate visible. That flexibility is one reason printed sleeves with offset printing have become such a practical tool for brands that want more shelf presence without redesigning the whole structure.
From the buyer’s side, the appeal is easy to explain. A stock carton, tray, or insert can stay in place while the visible surface gets stronger graphics, clearer messaging, and a cleaner retail face. Instead of paying for a fully custom rigid structure, the spend goes into the area shoppers actually judge. Studies on in-store behavior have long suggested that first impressions are formed fast, sometimes in less than three seconds. A sleeve that improves that moment can be a smart trade, especially when the package only needs to look more finished rather than structurally different.
Offset printing matters because it handles detail exceptionally well. Plates transfer ink to a rubber blanket and then to the sheet, giving the press operator fine control over registration and tonal range. That is useful for printed sleeves with offset printing that rely on photography, gradients, or tight reverse type. CMYK builds are common, yet many brands still add a spot color for a logo, a signature blue, or a metallic accent that would drift too much in process color alone.
There is a bigger strategic point here. Printed sleeves are not just decoration. They can carry a promotion, a seasonal message, a regulatory panel, a QR code, or a bundle identifier. That makes printed sleeves with offset printing a cost lever as much as a visual upgrade. If the base pack already does the structural job, a sleeve can handle the communication layer while the underlying carton stays simpler and cheaper to source.
Offset is not the only route. Digital printing can make sense for very short runs, variable content, or test launches. Flexographic printing can be a better fit for some film wraps and simpler graphics. Once the job asks for higher image fidelity, stable color, and a medium-to-large quantity, printed sleeves with offset printing usually become the more controlled answer.
One detail buyers sometimes miss is how the sleeve changes perception without changing the product itself. A matte-coated sleeve over an uncoated carton can feel more premium right away. A spot UV hit on a logo can create a focal point that photographs well. A tighter window or cleaner fold can make the whole pack feel more intentional. That is why printed sleeves with offset printing often deliver more shelf value than the material cost suggests.
I have sat through enough press checks to know that a sleeve can look elegant in a PDF and still feel oddly cheap in hand if the stock is wrong or the finish is overworked. Once, a brand team insisted on a soft-touch coat for a freezer-friendly product. The result was pretty, sure, but the surface picked up scuffs from handling almost immediately. That kind of mismatch is why the best sleeve spec starts with use, not with decoration.
If you are comparing packaging formats, start with the job the sleeve needs to do: branding, promotion, information, or tamper indication. If a broader look at structure and decoration would help, the Manufacturing Capabilities page is a useful place to compare options before narrowing the sleeve spec.
"The best sleeve is the one that upgrades perception without creating avoidable complexity." That is the practical lens I would use for printed sleeves with offset printing.
How Printed Sleeves with Offset Printing Works: Process and Timeline
The production flow starts long before the press runs. First comes the dieline, which defines the size, folds, glue area, and any cutouts. Then the artwork team builds the design to that dieline, checking bleed, safe zones, barcode placement, and copy fit. For printed sleeves with offset printing, this setup stage is where later problems are either prevented or locked in.
Once the file is ready, prepress reviews the artwork and separates the colors. A simple job may stay in CMYK with a defined black. If the brand color is critical, a spot color can be added to protect consistency. That choice matters more than many buyers realize. A sleeve carrying a visible logo or panel across several SKUs can look inconsistent very quickly if the color strategy is weak. With printed sleeves with offset printing, the prepress decisions often determine whether the final result feels premium or merely printed.
The next step is proofing. Depending on the supplier, that might involve a digital proof, a contract proof, or a physical sample. The goal is not only to confirm color. It is to confirm layout, fold behavior, and how the sleeve will act once it is wrapped around the real pack. For brands that care about shelf accuracy, this is the moment to catch small text issues, barcode quiet zone problems, or a seam that lands in an awkward place. Skipping this stage can make printed sleeves with offset printing look cheaper than they really are.
After approval, plates are made and the press is scheduled. Offset printing is efficient once the line is running, but make-ready still takes time. Operators need to balance ink density, registration, paper feed, and drying behavior. A typical production schedule may move through plate creation, press setup, print run, curing or drying, die cutting, finishing, and final packing. If the sleeve needs folding, gluing, or a special varnish, each step adds time and a little more risk. That is normal. It is also why printed sleeves with offset printing are rarely the best answer for a rush order that has not been fully specified.
Timeline is usually driven by a few predictable factors:
- Artwork readiness: clean dielines and final copy save days.
- Color complexity: tight spot color matching takes more review than a plain CMYK job.
- Print finishing: foil, embossing, soft-touch lamination, or spot UV can add steps.
- Die cutting and folding: intricate sleeve geometry slows down post-press handling.
- Freight and packing: palletizing and shipping schedules can matter as much as press time.
The rough timing for printed sleeves with offset printing is often around 10 to 20 business days after proof approval for standard jobs, though that range moves with quantity and finish. A simple sleeve with a straightforward coating may land at the shorter end. A premium sleeve with special print finishing and tight registration can push longer. That is not a flaw in the process; it is the reality of controlled manufacturing.
Delays tend to come from the same unglamorous places. Late copy changes. Missing board specs. A last-minute shift from matte to gloss. An artwork file that looked fine on screen but breaks at press scale. Those issues rarely improve the outcome. They mostly consume time. For printed sleeves with offset printing, speed is won before production begins.
If the sleeve is part of a larger retail pack or shipper that must survive transport testing, it is worth checking performance standards too. Packaging is not only about appearance. Groups such as ISTA publish transit-test frameworks that help buyers think beyond print quality alone. A sleeve that looks sharp but scuffs, splits, or shifts in transit is still a packaging problem.
There is also a useful comparison with other print methods. Digital printing can win for short runs because there are no plates. Flexographic printing can work well for simple, high-speed applications, especially on certain substrates. For medium-to-high volume runs where image quality matters, printed sleeves with offset printing often offer the most predictable balance of detail, consistency, and line speed.
Cost, Pricing, MOQ, and Quote Factors for Printed Sleeves
Cost for printed sleeves with offset printing is shaped by a handful of variables, and none of them are mysterious. Size, substrate, ink coverage, coating, fold complexity, and finishing all change the price. A small sleeve with one-color text is a very different job from a full-bleed photographic wrap with matte lamination and foil. The press count may look similar, but the production effort is not.
MOQ is where the economics become more visible. Offset has setup costs, so unit pricing falls as quantity rises. That is why the format usually favors planned production volumes. A buyer ordering 1,000 sleeves divides plate, setup, and prepress costs across a small pool. A buyer ordering 10,000 or 25,000 sleeves spreads those same costs across a much larger run, which can materially improve the unit price for printed sleeves with offset printing.
A quote that looks low at the top line is not always the best quote if it hides added waste, separate proof charges, or freight that only appears late. Ask for the whole picture: prepress, plates, press time, finishing, packing, overages, freight, and rush fees if relevant. The cheapest line item can become the most expensive choice once it is assembled into a real landed cost.
| Run Size | Likely Economics | Indicative Unit Range | Best Fit |
|---|---|---|---|
| 1,000-2,500 sleeves | Higher setup burden per unit; plates and make-ready weigh heavily | $0.32-$0.68 | Pilots, launch testing, limited promotions |
| 5,000-10,000 sleeves | Balanced setup-to-volume ratio; offset starts to show clear value | $0.14-$0.32 | Seasonal packs, repeat retail programs |
| 20,000+ sleeves | Best absorption of setup and finishing costs | $0.08-$0.20 | National rollouts, stable SKUs, long production windows |
These numbers are broad on purpose. Sleeve dimensions, paper stock, and finish quality can move them up or down quickly. The pattern is reliable, though: printed sleeves with offset printing reward volume. If the launch plan supports that, the economics can be compelling. If it does not, digital printing may be a better bridge while the SKU proves itself.
Quote structure matters almost as much as price. A useful quote should spell out sheet size, paper or board grade, print method, coating, die cutting, glue or folding requirements, and delivery terms. If FSC-certified paper is part of the brief, say so early. The Forest Stewardship Council publishes certification expectations that many brands now use as a baseline for responsible sourcing, especially in retail-facing packaging.
For brands comparing suppliers, total landed cost is the number to watch. That means adding freight, packaging for shipment, overage policy, and reprint risk to the unit price. A supplier with a slightly higher quote but tighter spec discipline may actually be cheaper once the job is completed. That is especially true with printed sleeves with offset printing, because a bad run can burn both time and inventory.
MOQ is not only about price. It is also about schedule. A supplier with a press already suited to your sheet size and finish can often quote a more favorable lead time. A supplier that has to piece together your job across multiple setups may need a higher MOQ or a longer production window. That is normal, and it is one reason comparing two quotes on identical specifications is so valuable for printed sleeves with offset printing.
If your base package design is still fluid, start by narrowing the structural choices first. The sleeve will not rescue a carton that is too small, too loose, or too awkward to assemble. It amplifies the structure you already have. For many buyers, that is exactly the point.
Step-by-Step Guide to Ordering Offset-Printed Sleeves
The cleanest ordering process starts with fit. Measure the actual carton, tray, or bundle that the sleeve will cover, not a conceptual size from a drawing. Confirm width, depth, height, flap clearance, and any closure features that could interfere with the sleeve. If the pack is hand-assembled, check how much tolerance the line can handle. A difference of even 1 or 2 mm can matter with printed sleeves with offset printing.
Then build the artwork on the correct dieline. Do not improvise around it. A proper dieline should include trim, fold marks, glue areas, and the safe areas where text should stay away from cuts and seams. This is also the stage to specify bleeds, barcodes, legal copy, and any spot color requirements. If a brand color is a core asset, say so clearly. A precise spec makes printed sleeves with offset printing easier to proof and easier to approve.
A sensible approval path looks like this:
- Confirm dimensions and dieline.
- Review prepress file checks and color setup.
- Approve a digital proof or printed sample.
- Lock the final production spec.
- Release the job to press and track shipping details.
That sequence sounds ordinary. It is also where a lot of value sits. Every change after approval has a cost. A text edit may seem tiny, but if plates have already been made, the correction may restart part of the schedule. If the finish changes, the supplier may need a different line or a different coating pass. Good planning keeps printed sleeves with offset printing efficient instead of reactive.
As the proof comes back, inspect more than the hero panel. Check the seam placement. Check the barcode scan area. Check the fold direction. Check whether the sleeve can be assembled quickly by hand or whether it needs a jig. A sleeve that looks perfect flat can still create frustration on the line if the seam lands in the wrong spot or the friction fit is too tight. This is one reason a physical sample can pay for itself quickly in printed sleeves with offset printing.
Once the job is approved, clarify how it will be packed. Count per carton. Carton labeling. Pallet pattern. Moisture protection if needed. These details sound small until the sleeves arrive at a kitting operation and nobody can tell which carton goes where. The best suppliers treat shipping as part of the packaging system, not an afterthought. That mindset matters with printed sleeves with offset printing, especially if the sleeves are being stored before assembly.
If you want to compare this against the broader packaging offer, the wider Manufacturing Capabilities view helps buyers think through whether the sleeve should sit on a carton, a tray, or a wrapped bundle. Sometimes the most efficient path is not a better sleeve. It is a clearer pack architecture that makes the sleeve easier to run.
Common Mistakes That Raise Waste and Reprint Risk
The most expensive mistake is often the simplest one: wrong sizing. If the sleeve is too loose, it shifts and looks sloppy. If it is too tight, it tears, slows the packing line, or scuffs at the seam. When teams rush, they sometimes size to a spec sheet instead of the real product. That shortcut can turn printed sleeves with offset printing into a reprint problem before the first pallet ships.
Artwork mistakes are the next big source of trouble. Tiny reverse type, low-resolution photos, and overly subtle color gradients are all more punishing on press than they look on screen. Offset printing is strong, but it is not magic. If the design depends on effects that the substrate cannot hold cleanly, the final result will show it. A smarter route is to design with the process, not against it. That is true for printed sleeves with offset printing as well as any other printed pack.
Another common issue is incomplete communication. Buyers sometimes ask for a quote without specifying coating, finish, or delivery format. The supplier then estimates one version, while the buyer imagines another. The mismatch is not malicious. It is just avoidable. If you want matte versus gloss, aqueous coating versus lamination, or special print finishing like foil or embossing, write it down. Clarity keeps printed sleeves with offset printing aligned with the actual expectation.
Late changes deserve their own warning. Once the job is on press, changes can create ripple effects through plates, drying time, and shipping. Even a small copy correction can be expensive if it arrives after approval. Teams sometimes treat the sleeve as the last thing to finalize, then discover it is one of the first things that has to be locked. That ordering mistake slows everything down. With printed sleeves with offset printing, timing discipline is part of cost control.
Skipping the sample is often a false economy. A sleeve that looks fine in a PDF may behave differently in the hand, especially if it wraps over a closure, a handle, or a rounded edge. The fit changes the visual. The fold changes the assembly speed. The finish changes the feel. If the pack has to survive distribution, test it as a real package, not just a layout. Good packaging teams use both visual review and practical trial runs because printed sleeves with offset printing are about performance as much as appearance.
One more trap: over-designing a sleeve that needs to do too many jobs at once. I have seen teams try to cram promotion, compliance copy, anti-tamper messaging, and brand storytelling onto one narrow wrap. It can be done, but the result often reads like a crowded receipt. Breathing room matters. A cleaner hierarchy usually sells better and reproduces better. That is the kind of thing an attractive mockup hides until production starts.
Expert Tips for Better Color, Fit, and Supplier Selection
Pick the substrate for the experience you want, not just the lowest quote. A smoother sheet can sharpen photography. A heavier board can improve stiffness and reduce the floppy feel that sometimes undermines a premium look. A matte coating can calm glare under retail lighting, while a gloss coat may push color punch and contrast. For printed sleeves with offset printing, material choice and print result are tied together more tightly than many buyers expect.
Color control deserves serious attention. Ask how the printer checks registration, how they handle target colors, and whether they rely on press checks, densitometry, or a standard proofing workflow. The answer says more about the supplier than a polished sales pitch does. If a printer can explain how they hold a spot color across a run, or how they manage CMYK consistency from one batch to the next, that is a good sign for printed sleeves with offset printing.
It also helps to compare suppliers on communication quality. Fast estimates matter, but accurate estimates matter more. A responsive prepress team can spot a missing bleed or a weak barcode before it becomes a problem. A sloppy estimate can look attractive until the final invoice arrives. For many brands, the most reliable supplier is the one that asks careful questions before quoting printed sleeves with offset printing.
"We would rather catch a fit issue on a sample than on the packing line." That is the right instinct for printed sleeves with offset printing, because a sleeve is only valuable if it behaves well in production.
Ask about testing, too. If the sleeve is going on a pack that will be ship-tested or distribution-tested, check whether the supplier understands transit standards such as ISTA methods or broader packaging validation approaches like ASTM D4169. The goal is not to overcomplicate the purchase. It is to make sure the sleeve does not create failures once the product leaves the print room. A well-made sleeve can survive distribution very well; a poorly planned one can open, scuff, or shift. That is not a print issue alone. It is a packaging system issue, and printed sleeves with offset printing should be judged that way.
There is a final practical tip that saves time and money: keep the graphic system simple where it can be simple. Use the premium finish where the customer actually sees it. Keep the legal copy legible. Leave enough safe zone around folds and cuts. If a spot color is only used for one small mark, ask whether it is truly needed. The best printed sleeves with offset printing jobs usually balance ambition with production simplicity, not one at the expense of the other.
For teams that are still shaping the broader packaging brief, it helps to think like a manufacturing buyer rather than a design-only buyer. Does the sleeve need to do branding, promotion, or tamper evidence? Does the outer pack need to be FSC-certified? Does the finish need to resist scuffing in transit? Those questions sharpen the quote and reduce surprises. They also make printed sleeves with offset printing easier to compare against digital printing or flexographic printing if you are still deciding on the right route.
Next Steps for Printed Sleeves with Offset Printing
If you want a quote that is actually useful, gather the spec before you send the request. The dimensions. The quantity. The substrate preference. The finish. The target ship date. The artwork files. A printer can only price what you define clearly, and printed sleeves with offset printing get much easier to compare once every supplier is quoting the same thing.
Then ask for at least two quotations based on identical inputs. Not a rough estimate and a formal quote. Two real apples-to-apples offers. Check whether plates, proofing, waste allowance, finishing, and freight are included or added separately. If one supplier looks cheaper but the quote is thinner, the comparison is probably false. The right number for printed sleeves with offset printing is the one that reflects the full landed cost, not just the press line.
If the sleeve has to fit tightly, match a brand color standard, or carry regulated information, ask for a proof path early. If the package will sit on a retail shelf, a sample can be worth more than another round of emails. If your brand is leaning on sustainability claims, confirm the paper source and certification status before production begins. That keeps the final pack honest as well as attractive.
For most brands, the conclusion is simpler than the process around it. Printed sleeves with offset printing work best when the brief is specific, the artwork respects the press, and the supplier knows how to manage print finishing without inflating cost. Get those three things aligned and the sleeve does what it is supposed to do: sell the product better, while leaving the base pack easier to manage.
If you only do one thing before approving a sleeve, make it this: lock the dieline, confirm the coating, and request a physical proof before plates are made. That one sequence catches most of the expensive surprises, and it keeps printed sleeves with offset printing on schedule instead of drifting into rework.
FAQ
Are printed sleeves with offset printing cheaper than custom boxes?
They can be cheaper if you only need to upgrade the visible surface and keep the base carton or tray simple. In many cases, printed sleeves with offset printing reduce structural complexity while still delivering a premium shelf face. The real comparison should include setup, finishing, freight, and reprint risk, not just the print price.
What is the usual MOQ for printed sleeves with offset printing?
MOQ depends on sheet size, press setup, and finishing, so there is no single universal number. Offset jobs usually make more sense once the run is large enough to absorb plate and make-ready costs. If your launch is small, ask whether a digital proof or a short-run bridge option can support printed sleeves with offset printing until demand is clearer.
How long do printed sleeves with offset printing usually take?
Timeline depends on artwork approval, plate creation, press scheduling, finishing, and shipping. Simple sleeves move faster, while coatings, special folds, and tight color matching add time. The most common delays are late changes and missing specs, which is why printed sleeves with offset printing should be locked with a clean brief before production starts.
What files are needed for printed sleeves with offset printing?
Provide the correct dieline, editable artwork, bleed, safe zones, and any barcode or color requirements. Ask the printer whether they prefer PDF, AI, or another format before final submission. Good prepress depends on clean input, and that is especially true for printed sleeves with offset printing where folds and seams matter.
How do I compare quotes for printed sleeves with offset printing?
Make sure every quote uses the same size, material, finish, quantity, and shipping destination. Check whether plates, proofing, waste allowance, and finishing are included or billed separately. The cheapest quote is not always the best if it hides setup fees, slow turnaround, or weak quality control, which is why printed sleeves with offset printing should be reviewed as total landed cost rather than a single unit price.


