A premium bakery gift box can look expensive right up until the little insert label curls, frays, smells odd, or gives the wrong storage instruction. Tiny label. Big embarrassment. Packaging is dramatic like that, which is why a Printed Woven Labels Food packaging insert checklist can save real money before the first production run starts.
For food brands, woven inserts sit in an odd but useful lane. They are not the nutrition panel. They are not the tamper seal. They are usually not the direct food-contact label either. They are the tactile brand detail that makes a cookie assortment, tea sampler, chocolate box, jam kit, or reusable snack pouch feel more intentional.
The catch: textile labels behave differently from paper inserts, stickers, and folding carton print. They have thread texture, edge finishes, fold bulk, color limits, odor considerations, and placement risks. Treat them like tiny paper flyers and they will punish you for it. Quietly at first. Publicly once customers start unboxing.
Printed Woven Labels Food Packaging Insert Checklist: What It Solves
A Printed Woven Labels Food packaging insert checklist is a pre-production planning tool for brands using textile-style labels inside or around food packaging. Think gift-box accents, hang-in cards, fabric tags, reusable pouch labels, jar neck tags, Subscription Box Inserts, or small branded reminders tucked near wrapped items.
The checklist forces decisions before quoting and sampling. That matters because vague requests like “make it premium” are not specs. A supplier needs label size, material, fold style, artwork, color references, placement, quantity, shipping destination, and whether the label gets anywhere near food contact. Inspiration images are useful for mood. They are not production instructions.
Printed woven labels crossed over from apparel because texture signals craft. A woven tag can make branded packaging feel more handmade, more giftable, and more durable than a disposable paper insert. That is useful for specialty foods where price is tied to presentation: chocolate collections, small-batch granola, preserved goods, wedding favors, corporate food gifts, and seasonal retail packaging.
Here is the line buyers need to respect: most printed woven labels used in food packaging are decorative or informational inserts placed outside the primary food-contact area. They should not touch unwrapped cookies, candies, nuts, dried fruit, or baked goods unless the material, inks, coatings, fibers, and placement have been specified for that exact use. “It looks clean” is not a compliance strategy. It is a wish with a logo on it.
A useful checklist aligns practical details: label dimensions, edge finish, material, print method, text limits, attachment method, pack-out format, quality standard, and compliance notes. It also gives your packaging supplier enough information to quote accurately through Custom Labels & Tags instead of guessing. Guessing is how brands get the wrong fold, wrong color, wrong carton count, and wrong delivery date in one tidy disaster.
Practical rule: if the woven insert affects perceived value, sample it physically. A flat proof cannot show fold thickness, thread shine, edge feel, odor, or how the label sits inside the box.
How Printed Woven Inserts Work Inside Food Packaging
Printed woven inserts start with a woven base, usually polyester or a similar yarn. The weave creates the background, logo field, border, or main label structure. Printed details can add short copy, batch-style graphics, QR codes, product messages, or brand marks depending on the print method, artwork quality, and available surface area.
Common uses are simple but effective. A textile label can be tucked inside a rigid gift box with wrapped chocolates. It can be tied to a reusable cloth bag for coffee beans. It can hang from a jar neck with cotton string. It can sit inside a confectionery sleeve, attach to a bread bag, or ride inside a subscription box as a small brand touch. In premium product packaging, little tactile details often do more work than another paragraph of brand story.
Woven inserts are different from paper inserts, stickers, and synthetic tags. Paper wins for fine print, legal copy, nutrition facts, ingredient statements, and low-cost high-volume campaigns. Stickers win when you need adhesive application, seals, or variable SKU information. Synthetic tags win for water resistance and clean-cut edges. Woven labels win on perceived value, durability, texture, reuse, and unboxing impact.
Placement matters. Keep woven inserts away from unwrapped food unless the supplier confirms the label is suitable for that direct-contact scenario. Wrapped food gives you more flexibility. A label placed near a sealed pouch, on the outside of a jar, or tied to secondary packaging carries a very different risk profile than one dropped onto bare truffles. Yes, this matters. No, common sense does not replace documentation.
Typical information on these inserts includes a logo, product name, short brand story, care or reuse instructions, QR code, gift note, origin statement, sustainability message, or a pointer such as “see bottom panel for allergens.” The textile label should support required packaging information, not pretend to be the whole compliance department.
Dense ingredient lists, tiny serif type, nutrition tables, and long legal panels usually belong somewhere else. Use custom printed boxes, paper inserts, or compliant primary labels for that job. A cute woven label trying to hold 600 characters of regulatory copy is not clever. It is punishment with thread.
Key Specs to Lock Before Sampling
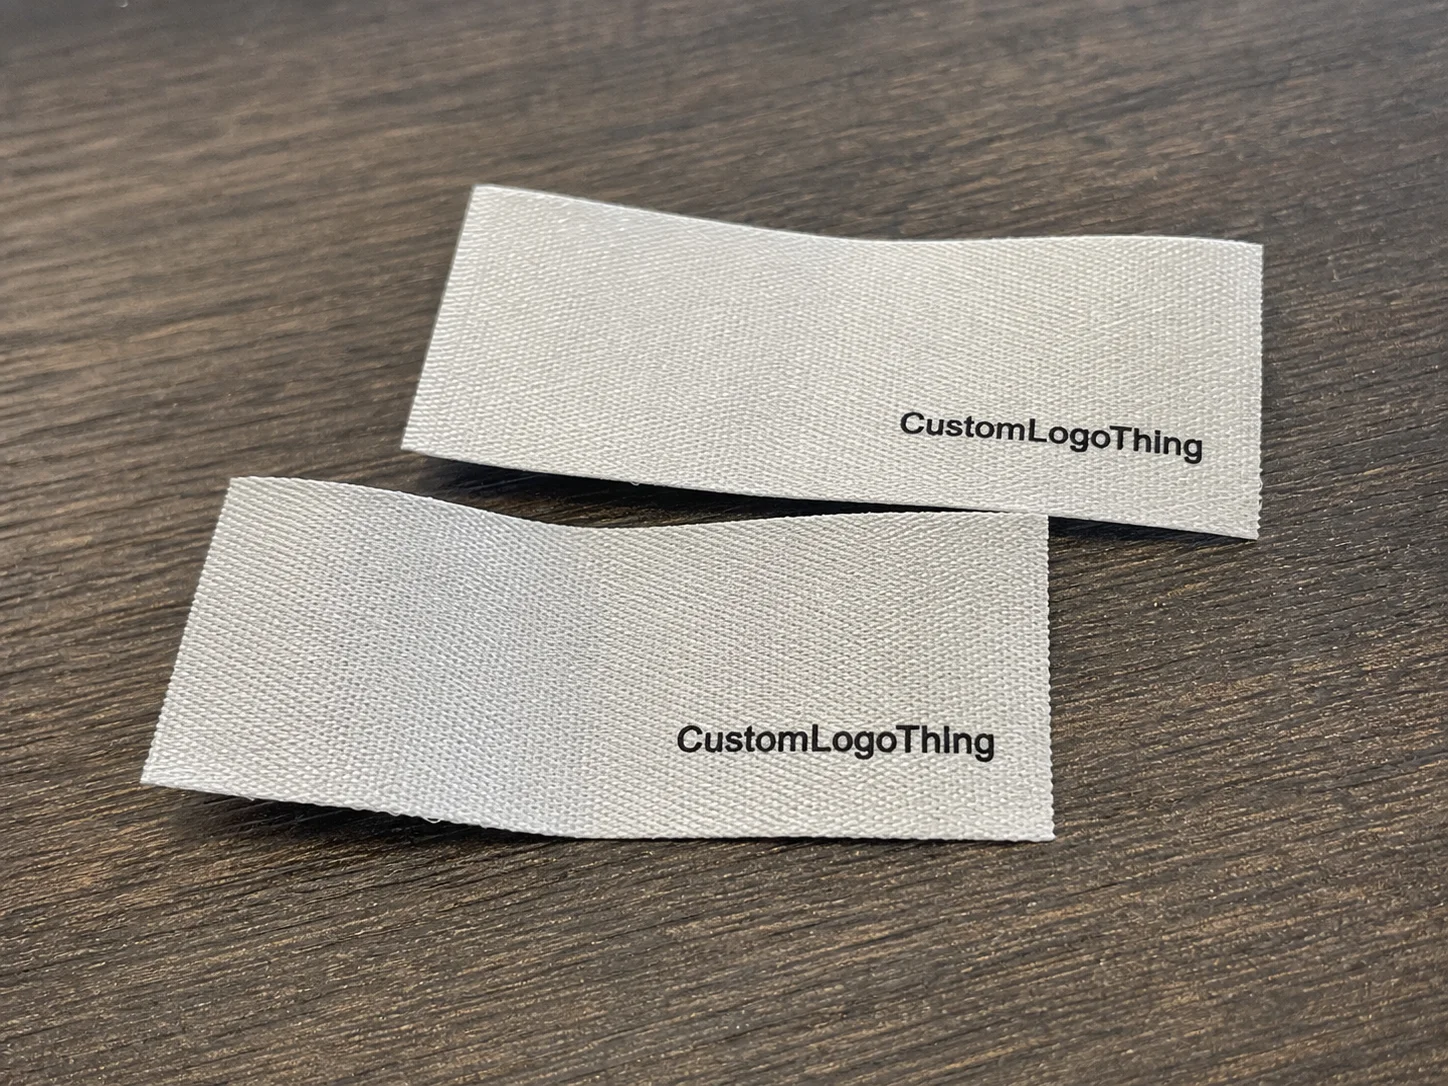
The Printed Woven Labels Food packaging insert checklist starts with size because everything else depends on it. Small insert labels commonly run around 1 x 2 inches, 1.5 x 2.5 inches, or 2 x 3 inches. Larger textile cards for gift boxes can work, but only if the box layout, filler, and product arrangement can hold them without bending, covering, or swallowing the label.
Material choice drives appearance and performance. Polyester is common because it gives durable woven detail, stable edges, and good color consistency. Cotton-style yarns, recycled yarns, or natural-look blends can support an earthy food brand, but they may soften detail, increase lint risk, or raise cost. Recycled content and FSC-certified paper are not the same thing, by the way. If you need responsible sourcing across mixed packaging materials, review guidance from FSC and ask for documentation specific to the label material.
Edge finish is not decoration only. Straight cut works for simple flat inserts. Heat cut can reduce fraying on synthetic yarns. End fold and center fold are common for sewn, tucked, or looped labels. Manhattan fold gives a cleaner premium profile for certain attachment styles. Custom shapes can look sharp, but they often add tooling, sample time, and inspection complexity.
Color planning deserves more respect than it usually gets. Thread colors, printed ink colors, background contrast, and Pantone targets should be discussed early. Textile production is not CMYK paper printing. Thread reflects and absorbs light differently. A beige base with pale gold print may look tasteful on a mood board and useless under warehouse lighting. Color drift happens when buyers expect fabric to behave like coated art paper. It will not. Fabric has boundaries. Rude, but true.
Artwork should be production-ready. Send vector logo files where possible, usually AI, EPS, or clean PDF. Keep small text readable. Build safe margins of at least 1/16 inch on small labels and more on folded pieces. Simplify thin linework. If a QR code is included, test the printed size before approval; many brands should stay at 0.8 inches square or larger depending on contrast, fabric texture, and scanner distance.
Food packaging adds extra considerations: odor, dye transfer, loose fibers, grease exposure, humidity, condensation, and contact placement. A woven insert sitting beside a sealed granola pouch has one job. A label touching an oily pastry wrapper has a different job. A label in a refrigerated dessert kit has a different job again. Your checklist should describe the real pack-out environment, not the clean fantasy version from the design deck.
Attachment also needs an early decision. Loose inserts are easy to pack but can shift or disappear under filler. String ties look premium but add labor and tangle risk. Adhesive backing must match the packaging surface and temperature. Sewn labels work for reusable pouches but not for rigid boxes unless another component carries them. If the insert must face up when the customer opens the package, say that in the spec. Factories cannot read your unboxing dreams.
| Insert Type | Best Use | Typical Cost Behavior | Tradeoff |
|---|---|---|---|
| Paper insert card | Ingredients, story cards, coupons, instructions | Lowest unit cost at volume | Less tactile and less durable |
| Printed woven label | Premium accents, reusable bags, gift packaging | Higher setup impact on small runs | Limited fine detail and small text |
| Synthetic hang tag | Moisture-resistant jar or pouch tags | Mid-range, varies by stock and finish | Less soft and less craft-focused |
| Sticker label | Seals, variable SKUs, outer packaging | Efficient for repeat orders | Adhesive must match surface and temperature |
Ask for a physical sample when the insert affects premium presentation. Screen photos are charming little liars. They hide texture, thickness, edge quality, and half the color problems buyers complain about later.
Cost, MOQ, and Quote Details Buyers Should Expect
Pricing for printed woven inserts depends on label size, material, fold type, number of colors, print method, backing, attachment method, sample requirements, inspection level, packaging format, quantity, and freight. That is a lot of variables because physical products enjoy making simple things annoying.
For simpler custom woven labels, minimums often start around 500 to 1,000 pieces. More complex printed woven inserts, specialty yarns, custom folds, hang strings, backing cards, or added packing requirements may push minimums higher. Small runs carry higher unit costs because setup is spread across fewer pieces. Larger runs usually drop sharply once the loom, print setup, cutting, folding, and packing labor are already moving.
As a rough buying expectation, a very small woven insert may land around $0.18 to $0.60 per piece at mid-range quantities, depending on size and finish. Specialty shapes, attachment strings, recycled yarns, premium folding, extra sorting, or strict inspection can push that higher. Sample fees may run $40 to $150 or more depending on complexity, and rush freight can make the “cheap” quote suddenly look less adorable. Funny how math works when shipping shows up.
Prepare quote inputs before contacting a supplier. Send dimensions, order quantity, quantity breaks, artwork file, Pantone or color references, fold or edge finish, intended packaging use, direct or indirect food-contact placement, attachment needs, packing format, delivery destination, and required in-hand date. If you are ordering other Custom Packaging Products at the same time, say so. Coordinating inserts with boxes, pouches, sleeves, or mailers can prevent pack-out drama.
Ask for two or three quantity tiers, such as 1,000, 3,000, and 5,000 units. The best price break is rarely obvious from one number. A 3,000-piece order might cost only slightly more than 1,000 once setup is included, or it might not. Depends on the factory, finishing, and freight. Annoying, but true.
Separate line items matter. Setup fees, sample fees, rush fees, carton packing, inspection upgrades, compliance documentation, and freight should not be buried inside a vague unit price. If direct food-contact documentation or material testing is required, budget added cost and time. ASTM packaging test methods and ISTA transport procedures may also come up for larger retail programs or shipped kits; ISTA is a useful reference point for distribution testing expectations.
Quote comparisons should look at the finished landed cost, not just the unit price. A low unit price can lose quickly if the label needs repacking, arrives late, uses weak cartons, or fails inspection because the approved color target was never written down. Buyers tend to remember the quote. Fulfillment teams remember the mess.
Process and Timeline from Artwork to Packed Inserts
A clean production flow looks like this: spec confirmation, artwork review, digital proof, physical sample if needed, sample approval, bulk production, quality check, packing, and shipping. Skip steps if you enjoy surprises. Most buyers do not enjoy surprises after paying deposits.
Digital proofs may take a few business days once the supplier has usable files. Physical samples often take one to two weeks depending on weave complexity, print detail, fold style, and finishing. Bulk production commonly takes two to four weeks after approval. Add freight time after that. Air shipping may take days; ocean or consolidated freight takes longer and needs earlier planning.
The checklist should be scheduled backward from the food pack-out date, not the launch date. Inserts must arrive before kitting, photography, influencer mailers, fulfillment assembly, retail display builds, and final shipping. If your food product packs on a Tuesday, the labels arriving the following Friday are not “close.” They are late.
Delays usually come from predictable sources: unclear artwork, missing dimensions, late copy changes, late color changes, compliance questions, holiday production schedules, rush freight decisions, or the buyer discovering at the last second that the insert does not fit inside the box. The last one is painfully common. Measure the real box. Measure the filler. Measure the product. Then measure again because corrugated, paperboard, and pouch fill levels all steal space.
Approvals should be written and specific. Approve dimensions, material, base color, print color, fold, edge, copy, QR code, attachment method, packing format, and carton count. “Looks good” is not an approval standard. It is how bad reorders happen.
A pre-production sample is especially useful for premium food gifts, subscription boxes, influencer mailers, retail-ready displays, and anything sold at a higher price because of presentation. Tactile details influence perceived value. A woven label that feels crisp and sits cleanly inside the pack can help package branding feel intentional. A thick folded label jammed awkwardly under a truffle tray does the opposite.
Keep one approved sample on file for reorder matching. Store it with the spec sheet, proof, invoice, and packaging placement photo. Reorders are easier when everyone can compare against a real target instead of someone’s memory of “kind of cream, but warmer.”
Common Mistakes That Make Inserts Look Cheap
The biggest mistake is trying to cram ingredients, nutrition facts, allergen warnings, origin claims, QR code, brand story, and care instructions onto one small woven label. That is not design. That is punishment. Use the woven label for one or two clear jobs. Put regulatory copy on proper food labels, cartons, sleeves, or inserts designed for readable text.
Poor contrast is another repeat offender. Light beige thread with pale gold print can look premium on a render and unreadable in a packing room. Dark navy on black? Same problem. If customers need to read it, build contrast. If customers only need to feel it, fine, but do not pretend invisible copy is “subtle.” It is invisible.
Tiny text fails fast on woven substrates. Serif fonts, thin strokes, condensed type, and low-resolution artwork all get worse after weaving, printing, cutting, and folding. Keep the logo clean. Keep text short. For QR codes, test the size and contrast from the real label, not the PDF on a 27-inch monitor. A 0.5-inch QR code on textured fabric is often a bad bet.
Placement can ruin a beautiful label. Inserts can slide under filler paper, stick to condensation, touch oily wrappers, snag on basket shred, or land face-down during kitting. If the label is supposed to be seen first, design the pack-out so it is actually seen first. Gravity exists. So does warehouse labor.
Another mistake is assuming apparel-label materials automatically work for food packaging. Clothing tags are usually built for garments, laundering, and branding. Food packaging has odor concerns, fiber shedding, ink stability questions, grease exposure, humidity, and contact placement issues. Same format, different risk profile.
Skipped sampling causes predictable complaints. Buyers approve a flat proof, then act shocked when fabric texture, fold thickness, or color looks different in real life. Samples exist because production is physical. Wild concept.
Compliance overreach is just as risky. Do not print claims such as organic, compostable, recycled, food-safe, allergen-free, biodegradable, or made in a specific region unless documentation supports them. Package claims can trigger review beyond the label itself, especially for retail packaging. If a claim matters to the sale, it matters to compliance.
Loose quality standards create another quiet problem. If the supplier does not know the acceptable tolerance for size, fold alignment, color variation, fraying, odor, stains, missing strings, or print registration, inspection becomes an argument. Set the rules before production. Arguing over finished cartons is a hobby nobody needs.
Final Approval Checklist
Before approval, run the printed woven labels food packaging insert checklist like a final gate. Confirm the label purpose, food-contact position, size, material, edge or fold finish, thread colors, print colors, artwork file, copy, QR code, attachment method, quantity, ship date, and pack-out requirements.
- Purpose: decorative accent, reuse instruction, QR prompt, gift note, product identifier, or short brand message.
- Placement: loose insert, tied tag, pouch label, jar neck tag, outer box detail, or secondary packaging accent.
- Food-contact status: no contact, near wrapped food, attached to outer packaging, or direct contact requiring documentation.
- Size and layout: finished dimensions, safe margins, fold allowance, readable text size, QR code size, and visible face direction.
- Materials: yarn type, backing, string or adhesive, odor expectations, lint risk, moisture exposure, and color references.
- Quality checks: edge fray, fold accuracy, print registration, stains, loose fibers, color match, pack count, and carton labeling.
Create a one-page spec sheet. Include dimensions, artwork file name, color references, fold style, material, placement photo, packing count, carton requirements, and any compliance notes. Factories love clarity. Everyone else should try it sometime.
Request a quote with at least three quantity breaks, sample cost, production lead time, shipping estimate, reorder terms, and any added documentation fees. If you are pairing inserts with custom printed boxes or other product packaging, ask whether production schedules can be aligned. Coordinated timing matters more than a pretty mockup sitting in the wrong warehouse.
Test the insert inside the actual box, pouch, sleeve, jar kit, basket, mailer, or retail tray before bulk approval. Fit beats imagination every time. Check how the label sits after the package is shaken, stacked, refrigerated, or opened by someone who does not know the design intent. Customers do not unbox politely for your dieline.
Your final approval check should be boring and strict: read every word, scan every QR code, compare color to the approved target, tug the edges, smell the material, rub the surface, confirm fold direction, check pack count per polybag or carton, and verify the label does not touch unwrapped food unless it has been specified for that purpose.
Use the checklist before artwork approval, sampling, and bulk production. If you want a usable quote, send exact specs instead of vague inspiration images. A good supplier can work with clear details. Nobody can manufacture “make it feel artisanal” without turning that into size, material, color, finish, quantity, and placement.
FAQs
Can printed woven labels be used as food packaging inserts?
Yes, printed woven labels can be used as decorative or informational food packaging inserts when they are placed appropriately. For direct food contact, confirm the material, ink, coating, dye, fiber behavior, and compliance requirements before production. The safer default is to keep woven labels outside the primary food-contact area unless the supplier confirms suitability for that exact use.
What should be included in a printed woven label insert checklist?
A printed woven labels food packaging insert checklist should include size, material, fold or edge finish, artwork file type, colors, text, QR code needs, placement, attachment method, quantity, deadline, shipping location, sample approval, and final pack-out checks. It should also state whether the label touches food, wrapped food, outer packaging, or decorative filler only.
How much do custom printed woven labels for food packaging inserts cost?
Cost depends on size, quantity, material, color count, printing method, fold style, sampling, compliance documentation, and freight. As a rough expectation, small woven inserts may run about $0.18 to $0.60 per piece at mid-range quantities, with higher costs for specialty finishes or added attachment parts. Ask for several quantity breaks because the best value point is rarely obvious from a single quote.
What is the lead time for printed woven labels used in packaging inserts?
Digital proofing may take a few business days, physical sampling often takes one to two weeks, and bulk production commonly takes two to four weeks after approval. Rush timelines may be possible, but they can increase cost and reduce room for proper sampling. Build the schedule around the pack-out date, not only the product launch date.
Are woven labels better than paper inserts for premium food packaging?
Woven labels are better for texture, durability, gifting, reusable packaging, and premium unboxing. Paper inserts are better for long copy, legal details, nutrition information, and low-cost high-volume campaigns. Many brands use both: paper for required information and woven inserts for tactile brand presentation.


