Restaurant Embroidered Beanies Digital Proof Checklist sounds narrow until you have a real order in front of you. Then it becomes the difference between headwear that reads cleanly on staff and headwear that comes back as a correction. The weak point is rarely the embroidery machine. More often it is the proof: a logo scaled a little too small, a placement line that ignores the cuff fold, a thread color that looked fine on a screen and wrong on knit fabric.
Restaurant teams usually buy beanies for a reason that leaves little room for error. Opening week. Winter service. Outdoor patios. A seasonal refresh. Multi-location consistency. In those moments, a proof is not decoration; it is a production instruction. If the document is vague, the order becomes a guessing game, and guessing is expensive.
Restaurant Embroidered Beanies Digital Proof Checklist: What to Catch First
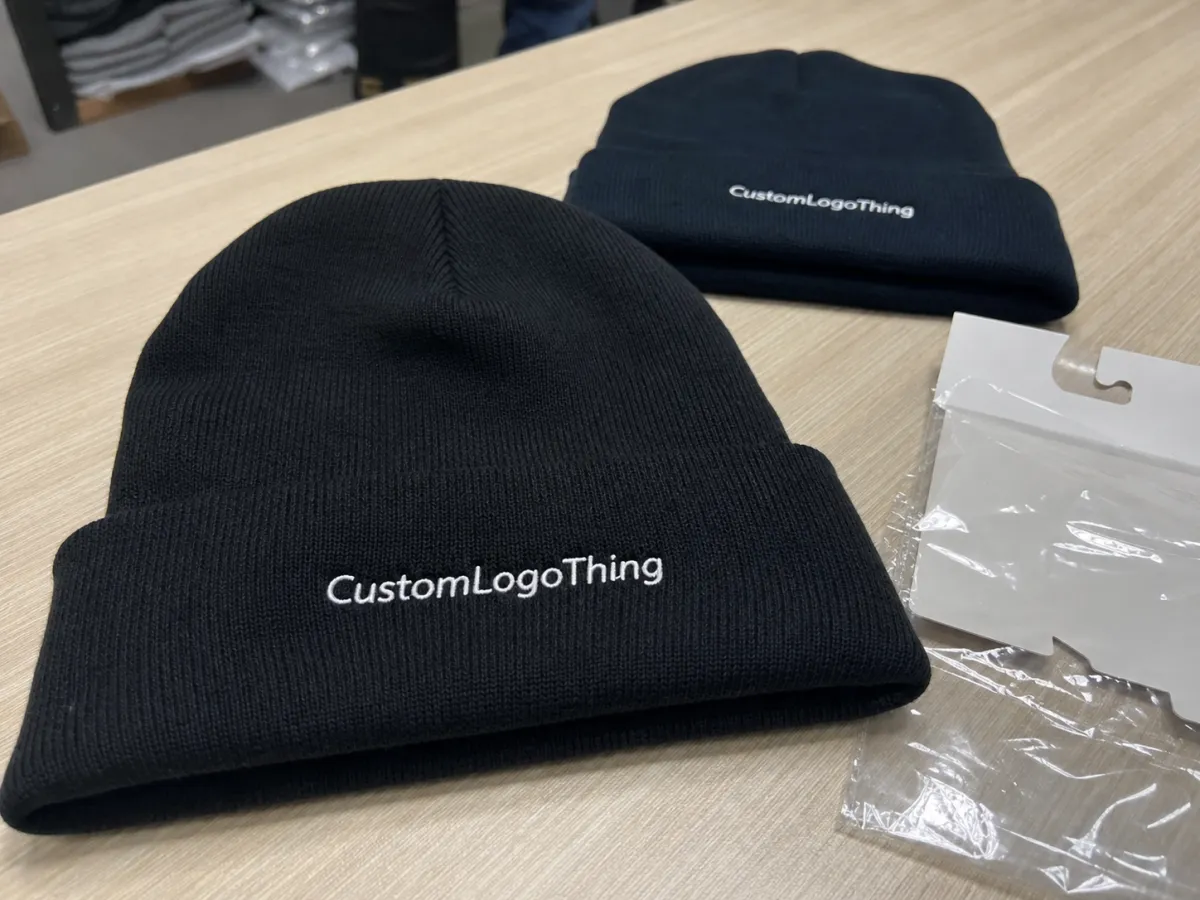
The first job of the proof is simple: show what will actually be made. That means the beanie style, decoration method, logo dimensions, placement reference, thread callouts, and any notes that change setup. A mockup without measurements looks polished, but it does not protect the buyer from avoidable mistakes.
Headwear is less forgiving than a flat garment. A chest logo on a shirt can sit where the panel stays still. A cuffed beanie moves, stretches, and folds when worn. A design that looks balanced in a render can drift off-center once the cuff is rolled or the crown is pulled down. That is why the checklist has to focus on production reality, not presentation.
Start with the details that are hardest to correct later:
- Placement - exact position from the cuff, seam, or center front.
- Size - finished logo width and height, not just a scaled image.
- Thread colors - matched to brand standards or approved substitutes.
- Legibility - whether small letters, thin lines, and gaps will stitch cleanly.
- Beanie style - cuffed, slouch, rib knit, double-layer, fleece-lined, or patch-based.
If the proof leaves room for interpretation, production will fill in the blanks. It usually fills them in the cheapest possible way.
That is the part buyers underestimate. Once digitizing is approved and the run starts, even a small change can trigger a second setup, a delay, or a partial remake. A proof should prevent that, not document it after the fact.
If you need a broader look at decorated apparel workflows, the Manufacturing Capabilities page is a useful reference point. The same discipline that protects a beanie order also protects patches, polos, and outerwear, especially when brand consistency matters across a whole restaurant group.
How the Digital Proofing Workflow Works From File to Approval
Most problems begin before stitching ever starts. The workflow usually opens with artwork intake, where the supplier checks whether the logo is usable as a vector file or needs cleanup. Clean AI (Adobe Illustrator), EPS, or PDF files are easier to work with than low-resolution PNGs because embroidery depends on clear edges and controlled shapes. If the art is blurry at intake, the stitch file usually inherits that weakness.
From there, the design is translated into stitches. That translation is not a direct copy. Thin strokes may need to be widened. Tiny text may need to be simplified. Gradients may need to become solid thread blocks. On knit headwear, those changes are not a sign of poor execution; they are what keeps the design readable after it is sewn into a stretchy surface.
A useful proof package usually includes front and side views, finished dimensions, thread codes, stitch type, and the exact beanie color. If the decoration is a patch rather than direct embroidery, the proof should say so plainly. The difference affects texture, price, durability, and how much detail the logo can hold.
A clean approval loop often looks like this:
- Artwork intake and file review.
- Digitizing or cleanup.
- Digital proof with measurements and notes.
- Buyer revisions or written approval.
- Production release and queue placement.
That loop matters more on restaurant programs than on one-off merchandise. Franchise groups and multi-location operators need the same logo height, the same thread shade, and the same placement from store to store. Otherwise, a rollout looks inconsistent before the first customer even notices the hats.
For packaging and shipment planning, outside references such as ISTA testing standards and industry guidance from The Packaging School and packaging industry resources are useful. They do not explain embroidery, but they do reinforce the same operating principle: every detail before freight leaves the dock affects what arrives intact.
Beanie Specs That Change Stitch Quality and Logo Readability
Beanie construction changes the result more than most buyers expect. A rib knit fabric stretches and relaxes as it is handled. A tighter acrylic blend often holds stitches cleanly, while a looser knit can let the embroidery sink into the surface or warp slightly around the edges. Double-layer styles usually give the decoration a flatter base. Fleece-lined versions add bulk and can make the logo sit higher than expected.
Logo complexity is the other half of the equation. A restaurant mark with thin outlines, tiny lettering, or delicate internal gaps may look elegant on a website and still fail on a knit surface. Embroidery wants structure. Small text, in particular, should be treated carefully; if the type has to shrink too far, the letters can close up or blur into one another. A stacked version or a simplified lockup often performs better than forcing a full horizontal mark into a small space.
Placement affects both visibility and comfort. The common options are straightforward, but each comes with tradeoffs:
- Front cuff - strong visibility and easy brand recognition on the floor.
- Center front - works well for compact, symmetrical logos.
- Side placement - a quieter look, though easier to miss if the beanie shifts.
- Patch decoration - useful when the logo needs cleaner edges than direct stitch can provide.
Color contrast deserves closer review than it usually gets. Dark thread on dark knit fabric can disappear under low dining-room light or late-shift lighting. Light thread on heathered yarn can read softer and less crisp than the proof suggests. Screen color is flat; thread has sheen, texture, and direction. A buyer who approves color from a monitor alone is approving a rough approximation, not the final effect.
There is also the question of how the beanie behaves in motion. A centered mark can shift once the cuff is rolled. A side logo can rotate slightly as the wearer adjusts the hat. A proof that ignores that movement may look fine on paper and awkward in service. The best proofs account for how the item will actually sit on a head, not how it lies on a table.
For teams building a more responsible collateral program, it can be worth checking fiber and paper sourcing standards through FSC resources when hangtags, packaging inserts, or shipping materials are part of the order. It does not affect the embroidery itself, but it helps keep the whole presentation consistent with the brand story.
Step-by-Step Digital Proof Checklist for Restaurant Orders
Use the proof like a production gate. If a detail is unclear here, it is likely to become a cost or timing issue later.
- Confirm the artwork file - use the approved logo version, ideally vector, and make sure the name, tagline, and symbols match the brand file exactly.
- Verify the beanie style - cuffed, slouch, rib knit, fleece-lined, and patch-backed styles all change the way the logo reads.
- Check placement measurements - ask for dimensions from the cuff edge, seam, or centerline, not just a visual mockup.
- Review size at actual scale - a logo that looks balanced on screen may still be too small for clean stitching.
- Match thread colors - document exact thread codes or confirm the closest substitution in writing.
- Inspect stitch type and density - satin, fill, and running stitches behave differently on knit fabric, especially around letters and outlines.
- Look for backing notes - stabilizer choice affects pull, puckering, and whether the design sits flat.
- Approve every view - front, angled, and folded presentations should all still make sense on a worn beanie.
For repeat orders, the checklist has one more job: compare the new proof to the previously approved version. Restaurant teams often assume a reorder will match the first run automatically, but stock changes, digitizing updates, and thread substitutions can shift the final result. A previous approval is helpful only if it is actually being referenced.
Expert tip: ask for an annotated proof with dimensions, thread codes, and exception notes written directly on the file. That keeps the approval attached to the artwork instead of scattered across email threads and screenshots.
Expert tip: if the logo contains small text, request a minimum stitch-size recommendation before approval. A supplier that can explain why a word holds at 2.25 inches wide but not at 1.75 inches is giving a real production answer.
Cost, MOQ, and Unit Pricing Drivers for Embroidered Beanies
Beanie pricing is driven by more than the blank hat. Setup work matters. Digitizing, cleanup, machine programming, and proof preparation all happen before the first unit is stitched. A simple restaurant logo may keep setup modest. A design with multiple thread colors, dense fills, or tiny lettering can make setup much more visible on the quote.
Quantity changes the math quickly. A 50-piece order spreads setup across fewer items, so the unit price is usually higher. A 500-piece order lowers the per-unit cost because digitizing and prep are amortized over more pieces. That is why two quotes for the same logo can look far apart without either one being wrong.
MOQ usually depends on decoration complexity, blank availability, and whether the beanie is a stock item or a special order. A common acrylic cuffed beanie is usually easier to source than a custom color or a heavyweight knit. Add woven labels, private labeling, or custom packaging, and the minimum can rise again because more steps are involved.
| Decoration Option | Typical Use | Common Price Range Per Unit | Notes |
|---|---|---|---|
| Direct embroidery | Simple restaurant logos on cuffed beanies | $4.25-$7.50 | Best for clean vector art and moderate stitch counts |
| Embroidered patch | Sharper edge detail or heavier knit fabrics | $5.50-$9.25 | Adds structure and can help with tiny details |
| Woven label or sewn label | Minimal branding or secondary mark placement | $3.75-$6.50 | Lower stitch complexity, but less dimensional feel |
Those ranges are planning tools, not promises. A dense logo, a rush schedule, a premium blank, or a second proof round can push the price up. The cleanest way to compare quotes is by line item: ask whether digitizing is included, whether revisions are capped, whether shipping is extra, and whether setup changes if the proof needs a second pass.
That kind of comparison matters most on smaller restaurant orders. A low quote that omits setup can end up more expensive than a higher quote that includes art cleanup, one revision, and standard freight. On a small run, one hidden charge changes the whole margin.
Process and Turnaround Timeline From Proof to Shipment
A typical workflow moves from intake to proof, from proof to revision, from approval to production, then to finishing, packing, and shipment. Clean artwork and quick responses keep the order on schedule. Multiple revision rounds stretch the timeline almost immediately.
A few variables matter more than others. Vector art speeds digitizing. In-stock beanies move faster than special-order blanks. Single-location restaurant orders are easier than multi-store rollouts with different size mixes or routing instructions. If the buyer changes thread color, placement, or wording after approval, the schedule usually shifts with it.
There are predictable timing traps:
- Waiting for internal signoff after the proof has already been prepared.
- Changing thread colors after the first approval round.
- Revising placement after digitizing has been released to production.
- Launching a seasonal program with too little time for shipping and sorting.
For openings, winter service pushes, and holiday launches, the safest approach is to build in slack before the target date. A rushed schedule tends to create more pressure on proof approval than on the sewing step itself. Paradoxically, a careful approval process often saves more time than a quoted short turnaround, because the order does not bounce back and forth for correction.
One practical rule holds up across almost every restaurant order: get the final approver involved early. Waiting until the end to gather signatures is how simple orders become late orders. It is not a dramatic point, but it is one of the most reliable ones in production.
Common Mistakes, Expert Tips, and Next Steps
The most common mistake is approving the proof without checking how the logo sits against the beanie fold. A centered design can look balanced on a flat mockup and still drift once the cuff is rolled or the hat is worn. That offset is enough to make the piece feel slightly wrong in person.
Another frequent miss is assuming screen color and thread color will read the same way. They do not. Thread has texture and shine; screens do not. On dark knit fabrics, the difference is even more obvious. Brand colors that look precise online can feel softer, deeper, or flatter once they are stitched.
Common mistake: trusting a mockup without checking measurements. A proof that says “approximately this size” is less useful than one that lists width, height, and placement from a reference point.
Common mistake: forgetting to compare the proof with a previously approved run. For restaurant groups reordering across several locations, the safest reference is the version already signed off and worn by staff.
A few habits make approvals cleaner and cheaper:
- Keep the vector logo, brand colors, and approval contact in one folder.
- Ask for a sewout or sample recommendation if the logo has tiny lettering.
- Document exceptions in the proof itself, not only in email.
- Check the beanie color under normal indoor light and, if possible, under restaurant lighting.
For buyers, the next step is practical: gather the vector logo, target quantity, size mix, delivery window, and final approver before sending the proof back. That one move usually speeds approval, protects consistency, and reduces the odds that the first production run needs to be corrected.
There is a larger lesson buried here. The cheapest embroidery order is not the one with the lowest quote. It is the one that gets approved correctly the first time, with no rework, no freight delay, and no staff member wearing a beanie that looks slightly off in the dining room. That is especially true for restaurants, where branded uniforms are part of the room as much as the menu.
What should a beanie digital proof show before I approve it?
It should show exact logo placement, finished size, thread colors, and the specific beanie style being decorated. Look for spelling, line spacing, stitch type, backing notes, and any simplified artwork changes. If the proof does not show measurements, ask for them before approval.
How do I know if my restaurant logo is too detailed for embroidered beanies?
Fine lines, tiny text, and gradient effects are the biggest warning signs on knit headwear. If the logo has to be very small to fit the beanie, it may need simplification before stitching. Ask for a digitized test or a proof recommendation when the design has delicate details.
What affects embroidered beanie pricing the most for restaurant orders?
The biggest price drivers are setup work, logo complexity, quantity, and the beanie style selected. Rush timing, extra revisions, and add-ons like woven labels or custom packaging can also raise the total. Unit price usually improves when the order quantity is higher.
How long does proof approval usually take for restaurant beanie orders?
Simple orders can move quickly if the logo file is clean and the brand contact responds fast. Delays usually come from artwork edits, color changes, or waiting on internal restaurant approvals. The fastest way to shorten the timeline is to approve a complete proof with no missing details.
Can I make changes after approving the digital proof?
Sometimes, but changes after approval can trigger extra fees or production delays. If the order has already been queued or digitized, even a small change may require a revised setup. Review every detail carefully before final signoff to avoid rework.
For restaurant buyers, the value of a strong proof process is control: control over placement, thread color, size, readability, timing, and cost. Handle those decisions before approval, and the production run usually feels orderly instead of rushed. For branded headwear, that is the standard worth aiming for.


