Buyer Fit Snapshot
| Best fit | Seal Stickers With Logo projects where brand print, material claims, artwork control, MOQ, and repeat-order consistency need to be specified before quoting. |
|---|---|
| Quote inputs | Share finished size, material target, print colors, finish, packing count, annual reorder estimate, ship-to region, and any compliance wording. |
| Proofing check | Approve dieline scale, logo placement, barcode or warning zones, color tolerance, closure strength, and carton packing before bulk production. |
| Main risk | Vague material claims, crowded artwork, missing packing details, or unclear freight terms can make a low unit price expensive after revisions. |
Fast answer: Seal Stickers With Logo: What They Are and How They Work should be specified like a repeatable production item. The safest quote records material, print method, finish, artwork proof, packing count, and reorder notes in one written spec.
Production checks before approval
Compare the actual filled-product size with the drawing, then confirm tolerance on folds, seals, hang holes, label areas, and retail display edges. Reserve space for logos, QR codes, warning copy, and material claims before decorative graphics fill the panel.
Quote comparison points
Review material grade, print process, finish, sampling route, tooling charges, carton quantity, and freight assumptions side by side. A quote is only useful when the supplier can repeat the same color, closure quality, and packing count on the next order.
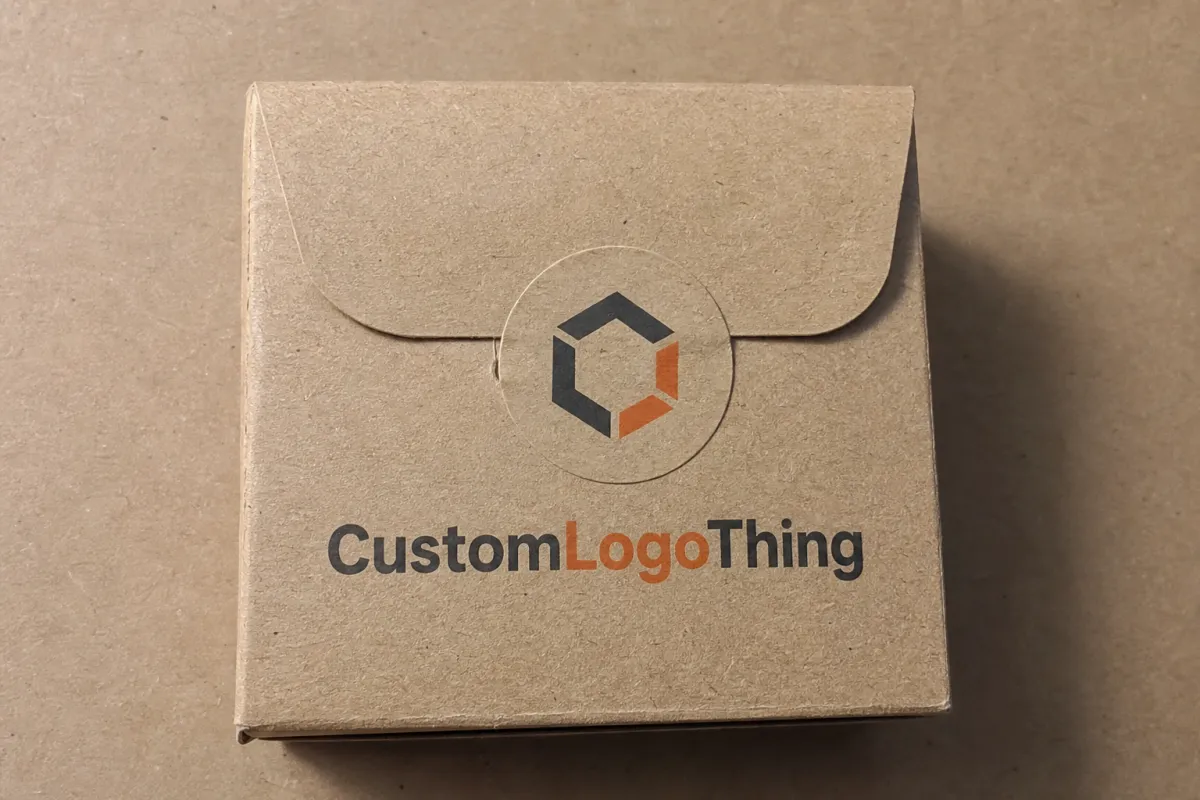
Seal Stickers With Logo: What They Are and How They Work - a small printed seal can carry more weight than its size suggests. seal stickers with logo can close a package, signal that a seal was intact, sharpen the unboxing sequence, and make a carton, jar, or mailer feel finished the moment a hand touches it.
That value is practical, not decorative. One adhesive piece can act as a closure, a brand marker, and a quiet quality cue at the same time. For a packaging buyer, that matters because it turns a small functional detail into something customers actually notice, while still doing the basic job of holding flaps, seams, or wraps in place.
Brands shipping folded cartons, tuck-top boxes, retail mailers, pouches, or glass jars often find that a seal is the easiest place to add identity without rebuilding the entire pack. It sits on the closure line, so it catches attention exactly where the consumer already looks. On shelf, in transit, and during opening, that position counts.
If your packaging already includes printed labels, it helps to think of seals as part of the same visual system rather than an extra accessory. Many teams keep the artwork aligned by matching the seal design to Custom Labels & Tags, so the carton, insert, and outer pack read like one coordinated set.
Why seal stickers with logo can change the first unpacking moment
A seal occupies a small patch of surface area, yet it lands at a high-attention moment. The seam or flap is often the first thing someone sees while opening a mailer or folding carton, and that is exactly where a branded sticker can do two jobs at once. It says the package was closed on purpose. It also says the brand cared enough to place detail where hands and eyes meet.
That effect shows up strongest on packaging that already has a natural closure line. Folding cartons, tuck-top boxes, sleeves, paperboard mailers, paper wraps, product bands, and jars with top seals all benefit because the sticker works with the structure instead of fighting it.
A visible seam can make a package feel split in two. A well-placed seal pulls that structure together. It bridges surfaces, covers a break line, and gives the eye a reason to read the package as complete. Brands use them on gifts, launches, limited editions, handmade goods, cosmetics, food gifts, supplements, and subscription kits for exactly that reason.
Here is the plainest way to describe it: a logo seal sticker is a printed adhesive label used to close, decorate, or authenticate a package, usually placed where two surfaces meet or where a flap needs a clear visual cue. That definition covers the function, but it leaves out the material decisions hiding underneath.
Those decisions matter. Size, shape, adhesive, face stock, finish, and print method all change how a seal performs. A 1-inch paper seal on a kraft carton reads one way; a clear film seal with metallic ink on a coated box reads another. Some seals are built mainly for decoration. Some are meant to show tampering. Some do both, but only if the spec is matched to the package.
Buyers comparing options usually end up with three questions:
- What must the sticker do on the package: close, seal, show evidence of opening, or simply decorate?
- What can the surface support: paperboard, coated carton, glass, plastic film, textured board, or something else?
- What budget and production window are realistic for the run size, proofing, and repeat orders?
That frame keeps the project grounded. It also avoids a common trap: choosing the prettiest option before checking whether it will actually stay put on the substrate. A seal can look elegant in a proof and still lift on a coated box or slide on a cold jar if the adhesive is mismatched.
If the seal looks polished on the desk but fails on the line, the spec is wrong. Packaging has to survive real handling, not just a mockup.
Packaging teams usually evaluate branded seals the same way they evaluate cartons, labels, and shipping graphics: the surface, use case, and handling conditions come first, and the artwork follows. Good design matters. Fit matters more.
How seal stickers with logo work on real packaging
The mechanics are simple enough. A seal sticker crosses a closure line and forms a small bridge between two surfaces. That bridge adds friction across the seam, covers the opening point, and can make tampering visible if the material tears, stretches, or leaves residue when removed. Depending on the stock, it may also become the strongest visual cue on the package face.
Adhesive choice is where many buyers underestimate the problem. A sticker can print beautifully and still fail if the adhesive is wrong for the package material. Paperboard, varnished cartons, glass, polyethylene film, polypropylene tubs, and textured kraft all behave differently. Surface energy, coating, dust, moisture, and temperature influence bond strength more than many first-time buyers expect.
A standard permanent adhesive may work well on a dry carton at room temperature, then struggle on a chilled jar or a coated box with a slick finish. A stronger acrylic adhesive may fit harder surfaces better. Removable adhesive makes sense only when the seal is meant to come off cleanly. For packaging that should feel tamper-evident, the goal is usually a bond that holds confidently enough to show opening without damaging the pack in the wrong way.
There is also a distinction worth making clearly: not every branded seal is truly tamper-evident. A decorative closure can suggest care and completion, but true tamper evidence usually requires a destructible stock, a void pattern, or a construction that clearly shows interference after removal. That difference matters in food, supplements, cosmetics, and any category where buyers need more than a visual cue.
Common formats include circles, ovals, rectangles, folded-tab shapes, and custom die-cuts built around a logo or icon. Shape changes the rhythm of the package. A circle feels compact and direct. An oval can read more formal. A rectangle gives room for type and small details. A custom die-cut can look distinctive, though it may add cost and production time if the cut path is complex.
Finish changes tone as much as shape. Matte paper stocks tend to feel softer, quieter, and closer to natural or artisanal branding. Gloss finishes read brighter and sharpen color contrast, especially for saturated logos. Soft-touch lamination brings a premium hand feel, but it can mute fine details if the artwork is already delicate. Clear film can make the seal appear printed directly on the package, which is useful when the package material should stay visible.
The same logo can look like four different brands depending on the face stock:
- Matte paper for a natural, handmade, or eco-conscious look.
- Gloss film for high contrast and stronger visual pop.
- Soft-touch stock for a more premium tactile feel.
- Clear material for a low-profile seal that lets the package surface show through.
Application method matters too. Hand application is forgiving and works well for short runs, small teams, and startup fulfillment tables. Machine application changes the spec entirely because the label may need to arrive on rolls with a specific core size, unwind direction, gap, and outer diameter. If the seal will be applied on a line at speed, the physical format has to fit the equipment, not just the artwork.
Testing habits from distribution standards are useful here. Teams often refer to guidance from organizations such as the International Safe Transit Association when they want to understand how a pack will survive shipping and handling. That perspective helps even with small branded seals, because a label that lifts in transit can undo the impression the brand was trying to create.
If your packaging set includes tags, inserts, or secondary labels, a matching family can keep the whole system coherent. A seal, a front label, and an insert card do not need to be identical, but they should feel designed together. That is one reason brands repeat the same icon or border treatment across Custom Labels & Tags and closure seals.
Seal stickers with logo: cost, pricing, and MOQ basics
Pricing usually reflects several moving parts rather than one single driver. Size, shape, substrate, adhesive, number of colors, finish, and cutting method all affect the quote. A simple one-color round seal on paper stock is typically far less expensive than a custom die-cut seal with metallic ink, clear film, and specialty adhesive.
The main cost drivers usually include:
- Size: larger seals use more material and can reduce how many pieces fit on a sheet or roll.
- Shape complexity: circles and rectangles are easier to produce than intricate custom outlines.
- Stock choice: paper is often more economical than specialty film or laminated constructions.
- Adhesive: standard permanent adhesives are usually simpler than pressure-sensitive formulas built for difficult surfaces.
- Print method: fewer colors and simpler artwork generally reduce setup complexity.
- Finish: varnish, lamination, foil effects, and soft-touch coatings add cost and time.
MOQ, or minimum order quantity, is the other part buyers feel immediately. Small test runs make sense, especially when the seal has to fit a specific carton seam or jar neck. Smaller orders are possible, but the unit price tends to rise because setup cost is spread across fewer pieces. Larger runs usually bring the price per seal down because press setup, cutting, and proofing are distributed across more quantity.
For rough planning, smaller branded seal orders may start with a few hundred pieces, while custom production often becomes more economical at 1,000, 2,500, or 5,000 pieces and above. Exact thresholds vary by vendor, print method, and material, so the more useful question is not "What is the cheapest quantity?" but "What quantity gives me a sensible unit cost without creating dead inventory?"
The table below shows how different spec levels often compare in a real purchasing discussion. These are not universal prices, just the kinds of ranges buyers use to set expectations.
| Option | Typical Use | Common Material | Relative Cost | Typical Notes |
|---|---|---|---|---|
| Basic round paper seal | Simple box closure or branding | Matte paper stock with permanent adhesive | $ | Good for dry cartons, easy hand application, clean look |
| Custom die-cut seal | Distinctive logo shape or signature mark | Paper or film, cut to outline | $$ | Higher setup cost, stronger brand presence, more waste in cutting |
| Film seal for durability | Moisture, handling, or shelf abrasion | BOPP or similar film | $$ | Better resistance to scuffing and humidity than plain paper |
| Premium finish seal | Gift packaging or launch kits | Soft-touch, foil, or laminated stock | $$$ | Strong tactile appeal, but more expensive and sometimes slower to produce |
Comparing quotes works best when every request uses the same data. Ask for dimensions, quantity, stock, adhesive, finish, print colors, die-cut detail, proofing fees, and whether the seals come on sheets or rolls. If the seal will be machine applied, ask for core size, unwind direction, and roll orientation too. Missing those details can turn a reasonable quote into a packaging delay later.
Budget planning gets easier when you think in tiers. Many brands keep one economical version for everyday production and one upgraded version for seasonal launches or premium kits. That approach keeps cost under control while giving higher-value packs a more polished closure. Another useful move is simplifying the artwork before cutting quality. Thin lines, tiny text, and overworked graphics often cost readability before they save real money.
For paper-based seals, sourcing deserves attention if sustainability is part of the brand story. The Forest Stewardship Council is a useful reference point when teams want to source paper responsibly and communicate that choice with more confidence. It does not replace a full packaging review, but it helps align material selection with brand positioning.
If your packaging line also uses tags, inserts, or secondary labels, coordinating all of them through one spec set can reduce reapproval time. That is another place where a consistent label family, such as Custom Labels & Tags, can keep purchasing and reordering simpler over time.
Production process and timeline for seal stickers with logo
Most buyers see the proof and the finished pack. The path between those two points matters. A typical production flow starts with artwork intake and file review, then moves through proofing, setup, printing, finishing, cutting, inspection, packaging, and shipping. The slowest part is often not the press. It is the back-and-forth around artwork and approval.
Digital printing often gives the fastest path for short runs and rapid proofing because setup is lighter and revisions are easier to absorb. That makes it useful for startup packs, seasonal test runs, or any project where the design is still being refined. Other methods can be more economical at scale, but they usually need more preparation before the first piece is made. Timing should match the quantity and complexity of the order.
Most delays are predictable:
- Logo files arrive in low resolution or with inconsistent colors.
- No dieline is available for a custom shape.
- The chosen adhesive is not suitable for the real package surface.
- Internal approvals take longer than expected.
- The requested stock is out of inventory and needs substitution.
That last point gets overlooked often. A seal specification can look finished on paper, but if the selected material is unavailable, the project pauses while the team approves an alternate face stock or adhesive. Experienced buyers usually ask what else can run in the same print window instead of assuming the first choice is the only choice.
Lead time depends on the job. A straightforward seal on standard stock may move in roughly one to two weeks after proof approval, while custom shapes, specialty finishes, or machine-ready rolls can take longer. Rush work can happen in some cases, but proof timing, material availability, and press schedule always set the ceiling.
Packaging operations benefit from counting backward from launch. Build time for sample review, internal sign-off, and shipping transit. If the package seal needs to be physically tested on the final carton or jar, add another buffer for that. A few days saved in the quote can disappear fast if the team finds a fit problem after the product is already staged.
That planning matters even more when the packaging needs to survive distribution testing. Many companies look to the test methods and guidance published by organizations such as ISTA to understand how packaging behaves under vibration, drop, compression, and handling stress. A seal sticker may seem small, but if it opens or scuffs during shipping, it can weaken the impression of the entire product.
One more practical point: if the artwork has small type or fine line work, ask for a proof at actual size, not only a large artwork preview. A seal that is 1.25 inches wide behaves differently from one that is 3 inches wide, especially across a fold. Fine serif text, hairline icons, and narrow spacing often need simplification before production. That is not a design failure; it is what happens when a brand mark moves onto a small functional surface.
Step-by-step guide to ordering seal stickers with logo
The most reliable way to order a seal is to start with function, not decoration. Ask what the sticker has to accomplish. Does it need to seal a carton flap? Show whether the package was opened? Add shelf appeal? Hold a wrap closed during shipping? If the answer is "all of the above," that is fine, but the spec still needs to identify the top priority first.
Once the use case is clear, choose the substrate and adhesive by testing on the real package surface. Paper mockups help, but they are not enough. A seal that behaves well on plain board may act differently on glossy paperboard, cold glass, or textured kraft. Coating, temperature, humidity, and handling pressure can all change adhesive performance. Refrigerated storage and hot delivery trucks raise the stakes again.
Next, prepare the artwork with final use in mind. Keep the logo readable at the actual size, not only on a large screen preview. Leave safe margins so nothing critical gets trimmed. Make sure the color contrast works on the chosen stock. A dark logo on matte kraft can look strong, while the same logo on a dark carton may need a lighter field or a white underprint to stay legible.
These are the artwork points that deserve a second look before proof approval:
- Logo scale: can the mark still read at the real seal size?
- Type size: is the smallest text large enough for human hands and quick reading?
- Cut line: does the die-cut preserve the shape without crowding the art?
- Contrast: do the colors stand out on the chosen face stock?
- Placement: will the seal sit cleanly across the seam or flap?
After that, review the proof like a packaging buyer rather than only like a designer. Confirm dimensions, quantity, material, finish, and whether the proof reflects the actual adhesive and cut style. If the seal has to fit a specific box, ask for a sample on the real carton. If it has to wrap around a jar or pouch, test the application method on the actual container. A flat proof never fully replaces physical testing.
Then think about quantity with some future-proofing. It usually makes sense to order enough to cover setup waste, line trials, and a small reserve for reprints or unexpected demand. Too little inventory forces a rush reorder, while too much inventory ties up budget and storage space. A small overage is often the sweet spot, especially for brands that release new flavors, seasonal kits, or limited-edition collections.
Finally, document the final specification. Store the approved size, shape, stock, adhesive, finish, color references, and placement notes in one place so future orders can be reproduced without guesswork. If the seal is part of a larger packaging system, keep the file alongside the carton spec, insert spec, and any related Custom Labels & Tags so the whole set stays aligned from one run to the next.
That documentation saves time fast. It also protects consistency, which matters when the packaging is used across multiple product lines or fulfillment centers. A seal is small, but if it changes shape or shade from one reorder to the next, the mismatch is immediately visible.
Common mistakes when choosing seal stickers with logo
The most common mistake is sizing the sticker for the artwork rather than for the seam. A logo can look crisp in a file and still fail in the real world if the seal is too short to bridge the closure cleanly. If the sticker does not have enough width to cross the flap or wrap point, it can lift, wrinkle, or sit awkwardly off-center. The package still closes, but it no longer looks intentional.
Another frequent issue is choosing the wrong adhesive for the surface. Coated cartons, refrigerated packages, dusty environments, and oily or textured materials all challenge adhesion in different ways. A seal that grabs well on a dry folding carton may fail on a chilled jar or a gloss pouch. Real surface testing matters more than a visual mockup alone. A beautiful seal that peels at the edge is a packaging problem, not a design success.
Typography disappears faster than many buyers expect. Thin fonts, hairline rules, tiny trademark symbols, and busy micro-details often look elegant on screen but become hard to read once the seal is applied, bent, or handled quickly during packing. The smaller the seal, the more important bold shapes and clean contrast become. On a closure sticker, clarity usually beats ornament.
Teams also design for appearance and forget the production environment. A premium finish can look beautiful, but if it slows application, creates glare, or hides the brand mark, the package suffers. Some finishes can complicate recyclability or disposal expectations depending on the overall pack structure, so the full material mix matters. The best choice is not always the most decorative one.
Some groups skip the real-world test because the proof already looks right. That shortcut can cost more later. A seal can perform differently on production cartons, curved jars, cold packs, or rough kraft wraps than it does on a flat sample. If the package is going into retail, e-commerce, or food contact-adjacent use, the actual operating environment should shape the final spec. Even a small run deserves that check.
Line speed gets missed too. Hand-applied seals are forgiving, but fast application makes placement drift visible. The shape, size, and release properties need to support consistent application. For roll-applied seals, the roll format has to fit the equipment. Otherwise, the label can jam, feed unevenly, or force operators into awkward adjustments that slow the line.
When buyers avoid these mistakes, the result is usually better than expected. The seal becomes a dependable part of the packaging system instead of a last-minute accessory. That is the difference between a sticker that simply decorates and a seal that genuinely supports the pack.
Expert tips and next steps after choosing seal stickers with logo
The most useful habit is also the simplest: test the seal in the same environment where the final package will live. Try one on every relevant surface, not just one sample. That includes dry storage, cold storage, shipping conditions, and any area where dust, oil, moisture, or abrasion may affect performance. A seal chosen from real conditions is more dependable than one chosen from assumptions.
For smaller seals, keep the design bold, centered, and easy to recognize. A strong icon or simplified logo usually reads better than a crowded composition when the seal has to function as both closure and brand cue. If the package already has a strong front label, the seal can stay simpler and still feel premium. Restraint often works better than adding more elements.
Finish should follow the brand mood and the package material. Matte stocks work well when the brand wants a softer, quieter presentation. Gloss can be a better choice when you want sharper contrast or a more retail-forward look. Clear film is useful when the underlying package surface matters visually, while soft-touch is usually reserved for premium kits and gift presentation. There is no single best finish; there is only the finish that supports the pack you are actually building.
Standardize the spec before the first reorder. Create a short sheet that records size, shape, stock, adhesive, finish, quantity, placement, and any notes about hand or machine application. That file becomes the reference point for future production, which reduces confusion when different people place the next order. In packaging, consistency is not flashy, but it is valuable.
One practical way to move forward is to gather three things before requesting a quote: a sample carton or jar, the logo file in a clean format, and a rough sense of quantity. With those in hand, the supplier can recommend a stock, estimate pricing, and flag any risks with seam placement or adhesion. That usually saves time on both sides of the conversation.
If you are still deciding between options, compare one paper-based version and one film-based version before making the final call. Paper often gives a warmer, more natural look, while film may hold up better under handling or moisture. Sometimes the answer is obvious after the first test. Other times the better answer is a small material upgrade that protects the whole package presentation.
The larger point is simple: seal stickers with logo are not just decorative seals, and they are not just functional closures. They sit at the intersection of branding, handling, and package integrity. If you treat them that way from the start, they can become one of the most efficient packaging details in the entire system.
Are seal stickers with logo truly tamper-evident?
They can be, but only if the material and adhesive are selected for that purpose. A basic branded seal mainly signals that the package was closed intentionally, while destructible stocks, stronger bonding, or void-style constructions improve tamper evidence. The key is testing the sticker on the actual package so you can see how clearly it shows interference after opening.
What material works best for seal stickers with logo on cartons?
Paper-based stocks are common for dry indoor carton use because they print cleanly and keep a natural look. If the carton may face moisture, abrasion, or heavier handling, a film like BOPP often performs better. Coated or textured cartons can also need a different adhesive than plain kraft board, so surface testing matters as much as the face stock itself.
How much do custom seal stickers with logo usually cost?
Price depends on size, quantity, shape, material, finish, and print complexity. Smaller runs usually carry a higher unit cost because setup is spread across fewer pieces, while larger runs reduce the per-piece price. The best way to compare options is to request quotes using the same dimensions, material, adhesive, and finish on each version.
What is the usual turnaround for seal stickers with logo?
Turnaround varies based on proof approval, quantity, print method, and whether the design is fully custom. Simple runs can move quickly once artwork is approved, while specialty shapes or finishes add time. If the seal has to fit a specific box seam or jar closure, build in extra time for sampling and revisions.
Can seal stickers with logo be applied by hand or machine?
Yes, both are common. Hand application works well for smaller teams and short runs, while machine application needs a consistent roll format, spacing, and core specification. If you plan to run seals through equipment, confirm the roll details before ordering so the labels feed correctly and do not slow the line.
Before you place an order, lock down four things: the exact seam or closure size, the surface the seal will touch, the adhesive that fits that surface, and whether application will be by hand or machine. Those four answers do more to determine success than a proof image ever will. Once they are confirmed, seal stickers with logo stop being a small extra and start doing real work for the package.

