Cosmetics Kit Plastic Bags Batch Label Checklist Basics
The skincare launch is ready. Cartons are staged. Operators are waiting. Then someone finds the batch sticker lifting from the glossy pouch, or the lot code smearing after the filled kit rubs against the master carton. A cosmetics Kit Plastic Bags batch label checklist exists for exactly that moment, preferably before it happens. It links artwork, film, filling method, traceability data, and pack-out speed before the purchase order becomes a production problem.
These bags hold sample sets, travel bundles, promotional assortments, refill packs, shade kits, trial sizes, and multi-item beauty sets. The usual materials include LDPE, LLDPE, HDPE, PP, PEVA, EVA, and laminated films. They do not behave alike. LDPE has a soft, flexible hand. PP gives better clarity but can be less forgiving for adhesion. HDPE feels crisper. Laminated structures add stiffness, barrier, and a more premium surface, although they can also complicate coding.
The batch label may need to carry more than a small lot number. Practical fields include batch code, manufacture date, expiration or best-before date, SKU, kit variant, shade range, fragrance, ingredient reference, barcode, QR code, warning copy, country of origin, retailer code, and internal packing identifier. Most kits do not need every field. The point is to decide intentionally instead of discovering missing data during receiving inspection.
Buyers often use “label” as if it means one process. It does not. Batch information may be preprinted into the artwork, left as a blank writable panel, applied as a pressure-sensitive label after filling, added by thermal transfer, marked by inkjet, or handled through variable data printing. Each method changes cost, lead time, durability, and error risk.
Practical rule: if a code must scan, support recall traceability, or pass a retailer’s receiving check, treat the label area as a controlled packaging feature, not leftover empty space.
A disciplined checklist reduces rework, mispacked kits, compliance confusion, slow warehouse receiving, and the familiar disappointment of a bag that looks polished on a flat proof but fails once jars, tubes, sachets, brushes, or applicators are loaded inside.
How Batch Labeling Works on Custom Plastic Bags
Custom plastic bag production follows a chain: resin or film selection, extrusion or film sourcing, printing, converting, cutting, sealing, punching, zipper application when needed, inspection, packing, and carton labeling. Batch-label decisions can enter at several points. Define them early and the supplier can build around them. Define them late and the team may be redesigning artwork around finished film.
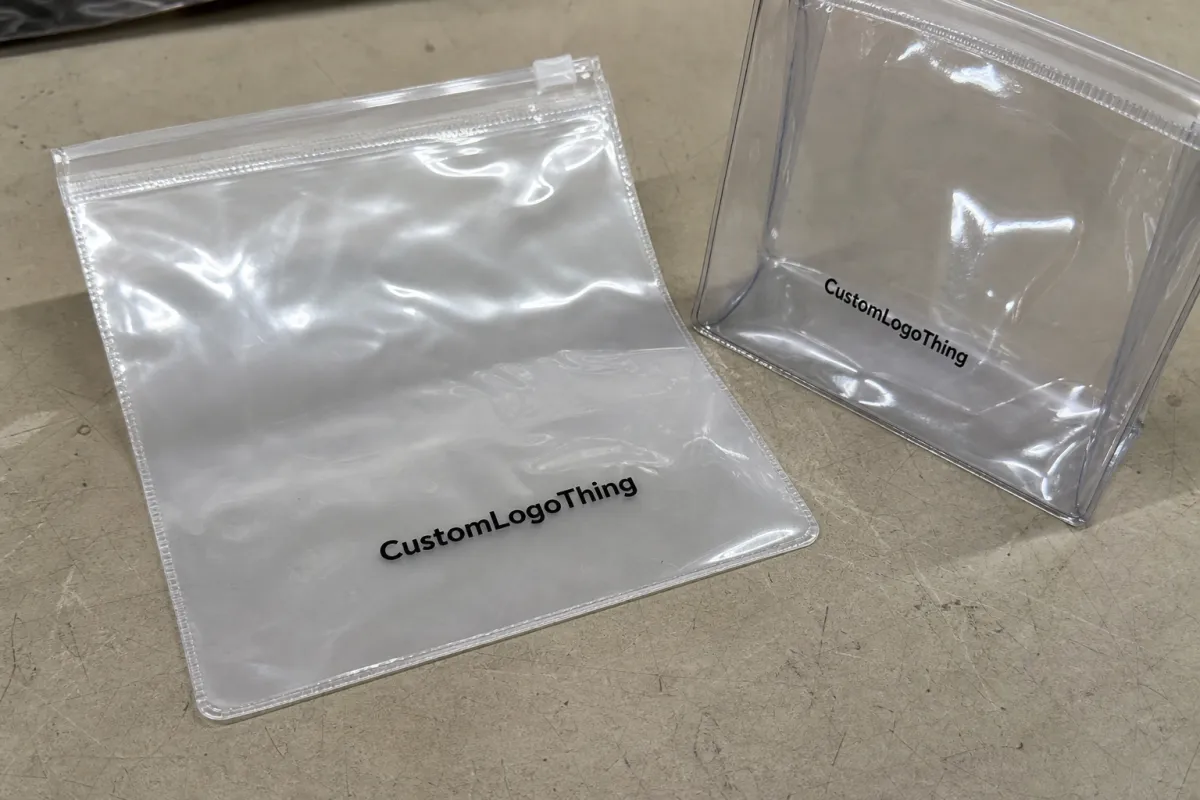
Cosmetic kit bags face a strange double test. They must look appealing to a shopper and still behave like traceable production packaging. A Frosted Zipper Bag may look refined on a vanity, but if the lot code crosses a zipper track or lands on a gusset fold, the receiving scan can fail. Beauty packaging gets judged by touch, clarity, color, and line speed all at once.
Common formats include flat poly bags, bottom-gusset bags, zipper bags, slider bags, die-cut handle bags, frosted drawstring pouches, header bags, wicketed bags for automated loading, and laminated stand-up pouches for premium sets. Each format creates dead zones. Keep batch information away from heat seals, side welds, gusset folds, hang holes, tear notches, zipper tracks, drawstring channels, and high-rub corners.
Surface energy is the quiet variable. Slick films, frosted finishes, matte coatings, and heavily inked print areas may not accept stickers, ribbons, or inkjet marks cleanly without testing. Low-surface-energy plastics can make labels curl at the edges, especially after cold storage, repeated handling, or contact with oils and powders in the filling area. A checklist should require adhesion and rub testing on the exact film finish, not a generic assurance that the label is “compatible.”
The checklist also aligns the artwork file, master carton label, purchase order, production sample, and final packed kit. That sounds administrative until the program has six shade variants, two retailers, one rush ship window, and three nearly identical inner bags. For programs using separate tags or stickers, Custom Labels & Tags should be reviewed as part of the same specification package.
Material, Closure, and Print Specs That Affect Label Accuracy
Label performance starts with the bag material, not the label. LDPE and LLDPE are forgiving for soft cosmetic kits because they flex around tubes and sachets. HDPE gives a firmer, crinklier structure. PP is useful for clear sample assortments and retail display, but adhesion should be tested. Laminated films such as PET/PE or matte OPP/PE create better print depth and a more substantial feel, yet they also change how stickers, thermal ribbons, and inkjet codes behave.
Thickness deserves the same scrutiny. Light sample bags may work with thinner film. Kits holding glass droppers, compacts, jars, brushes, or multiple tubes usually need a stronger gauge to prevent corner punctures and stretched seams. Many flexible beauty kit bags fall around 2 to 4 mil, depending on product weight, sharp edges, bag size, and closure style. Heavier is not automatically safer. Excess stiffness can create wrinkles across the label panel and make scanning less reliable.
Closures consume space. A zipper improves reuse, but it takes over the top band and can distort nearby graphics. Adhesive flaps may interfere with printed panels or post-applied labels. Heat seals need clean seal zones, usually free from heavy ink, folds, or label edges. Drawstrings and die-cut handles restrict readable space because gathered or punched areas rarely stay flat.
Print method changes the checklist as well. Flexographic printing is efficient for larger runs and simpler graphics, often one to six colors on poly film. Digital printing supports shorter runs and frequent artwork changes. Gravure or laminated printing may suit high-volume premium programs where deep color, fine detail, or matte finish carries brand value. Hot stamping and spot varnish can look sharp, but they may reduce writable or scannable space if they crowd the label panel.
Lock the artwork details before production: dieline, safe zones, bleed, color callouts, opacity requirements, label panel dimensions, barcode quiet zones, code contrast, copy hierarchy, and bag orientation after filling. Small cosmetic type is unforgiving. A six-point line that looks acceptable on a PDF can disappear on frosted film once the bag bends around a jar.
For performance references, teams often consult standards organizations such as ASTM International for material and test method guidance. Distribution testing may involve protocols from ISTA. The relevant standard depends on product weight, route, retailer requirements, and whether the bag functions as primary, secondary, or kit packaging.
Pricing, MOQ, and Unit Cost Drivers for Labeled Kit Bags
Finished bag size is only one price driver. Film type, thickness, print coverage, number of colors, bag format, closure, label method, packing requirements, and variable batch data all move the unit cost. A plain 3 mil LDPE zipper bag with an applied label is not in the same cost family as a matte laminated pouch with full-panel printing and changing QR codes.
Custom-printed bags need enough volume to justify setup, plates, press scheduling, material handling, and converting time. Plain stock bags with applied labels can work better for pilot runs, small launches, and kits with many versions. As a planning range, a simple stock bag plus label might land around $0.18 to $0.45 per packed bag at moderate quantities. Custom printed zipper bags can move from roughly $0.35 to $1.20 or more, depending on size, gauge, print coverage, and closure. Specialty laminated pouches may run higher.
Those figures are planning numbers, not a quote. Freight, rush handling, testing, proofing, label application, and carton labeling can change the landed cost quickly. The lowest unit price can become the expensive option if barcode scanning fails or operators need extra time to separate similar kit variants.
| Option | Best Fit | Typical Cost Behavior | Label Control Risk |
|---|---|---|---|
| Stock bag plus applied label | Pilot runs, many SKUs, changing lot codes | Lower setup, higher labor per unit | Adhesion and placement must be tested |
| Custom printed bag with blank batch panel | Repeat programs with changing batch data | Moderate setup, efficient repeat use | Panel must stay flat and scannable after filling |
| Full custom bag with variable coding | Higher-volume programs with clean data files | Higher setup, lower manual handling | Requires tight data control and compatible equipment |
Good quote inputs shorten the cycle. Provide finished bag size, usable interior size, film gauge, material preference, closure, print colors, order quantity, number of SKUs or versions, label data requirements, barcode specs, carton pack count, and ship-to location. Ask whether plate charges, proofing, test samples, freight, rush fees, label application, and carton marks are included or billed separately. That single question can prevent an unpleasant surprise after purchasing has approved the PO.
Production Steps and Timeline From Artwork to Packed Bags
A clean production path starts with function. Confirm what the bag must hold, measure the kit components, select material and closure, prepare the dieline, review artwork, approve the proof, test the label or coding method, manufacture the bags, inspect them, carton pack them, and ship them. Simple sequence. Plenty still goes wrong when decisions stay open.
Timelines depend on approval speed, film availability, number of versions, printing complexity, and whether physical sampling is required. A stock bag with an applied label can move quickly once label art is approved. Custom printed bags usually need more time for proofing, plates if flexo is used, press scheduling, ink curing or handling time, converting, and inspection. A realistic planning window might be 12 to 15 business days after proof approval for a straightforward repeat order. Specialty materials, multiple SKUs, or physical sample rounds can push longer.
Batch label details should be verified near the beginning: code format, date format, barcode type, label panel size, orientation, contrast, scanning distance, and whether the same bag supports multiple kit varieties. If a retailer requires a specific barcode symbology or carton mark, check that before finished bags are packed into cartons.
Proofing has two layers. A digital proof checks placement, copy, version names, and layout. A physical or production sample checks feel, clarity, seal strength, zipper function, label adhesion, fill fit, code rub resistance, and how the package looks with real cosmetics inside. The second layer catches the problems a PDF cannot show.
Rush timelines are possible only under the right conditions: simple specs, clean data, fast approvals, available film, and limited versions. Complex custom printing, specialty film, metallic finishes, multiple SKU sets, or lab-style testing add time. The checklist should include internal dates for artwork due, proof approval, sample approval, production start, inspection window, ship date, and receiving date.
Coordinate inbound timing with filling, kit assembly, label printing, and retailer ship windows. Bags arriving late stop the line. Bags arriving too early create storage issues, especially with bulky gusseted cartons or pre-labeled packaging that must be protected from dust, sunlight, and humidity.
Step-by-Step Checklist Before You Approve the Bag Order
Start with the physical kit, not the artwork. Measure the longest item, the thickest stacked arrangement, the sharpest corner, and the total packed weight. Add enough clearance for operators to load the bag without forcing the zipper or seal. A bag that technically fits but slows every packer by five seconds can become expensive across 20,000 units.
- Confirm the bag style. Choose flat, gusseted, zipper, header, wicketed, drawstring, handle, or pouch format based on presentation and the actual packing method.
- Verify batch label data fields. Include lot code, date code, SKU, kit name, shade or fragrance variant, barcode, QR code, regulatory notes, internal work order, and retailer receiving details.
- Check label placement. Avoid seal areas, zipper tracks, gusset folds, hang holes, curved corners, heavy ink coverage, and spots that wrinkle around bulky products.
- Confirm scanability. Test the barcode on a filled bag under warehouse lighting and check contrast after the film bends or frosts over the contents.
- Approve artwork carefully. Review dieline layer, print layer, label panel, bleed, safe area, color callouts, version names, and no-print or no-label zones.
- Assign responsibility. One person should approve the master checklist, one should verify the sample, and one should release the final PO.
A cosmetics kit plastic bags batch label checklist works best when purchasing, marketing, quality, and fulfillment approve the same information. Marketing may care most about clarity and brand color. Quality needs traceability. Fulfillment needs a bag that opens, loads, scans, and cartons cleanly. If one group is missing from the review, the problem usually appears later on the packing line.
If separate labels are part of the program, coordinate the bag order with Custom Labels & Tags so face stock, adhesive, coating, and print method are reviewed alongside the bag material. Treating the label and bag as one system is safer than buying them in isolation.
Common Mistakes That Cause Smears, Mislabels, and Delays
The most common mistake is treating the label as an afterthought. A team approves beautiful graphics, then tries to place a batch code wherever blank space remains. After filling, that blank area may sit on a curve, fold into a gusset, or rub against a compact lid.
Sticker failure is another frequent headache. Labels can lift from low-surface-energy plastics, frosted textures, oily handling areas, curved fill profiles, and ink-heavy print zones. If operators use hand lotion, oils, or silicone-heavy products nearby, contamination can make adhesion less predictable. Test under real handling conditions whenever possible.
Approving artwork only on a flat screen causes trouble. A label panel that looks centered on a dieline may wrap around a tube, land in a wrinkle, or hide behind a jar once packed. Filled-sample testing is not elaborate; it is basic risk control.
Version control deserves more attention than it usually gets. Shade kits, fragrance kits, seasonal bundles, sample packs, and retailer-specific assortments can look nearly identical. The inner bag batch label, master carton label, work order, and PO need matching names and codes. Inconsistent file names are a quiet source of mispacks.
Data errors can be just as costly: missing leading zeros, duplicate lot codes, inconsistent date formats, incorrect barcode symbology, unreadable QR codes, or SKU names that differ between artwork and ERP export. The checklist should force one approved source of truth for variable data.
Over-specifying wastes money. A buyer may request laminated film, heavy gauge, metallic ink, and a premium zipper when a simpler LDPE or PP bag with a clean label panel would pack faster, scan better, and cost less. The right structure is the one that performs for the kit, the line, and the retail channel.
Next Steps to Finalize Specs Before Requesting a Quote
Before asking for pricing, gather filled kit dimensions, current bag samples if available, artwork files, label data examples, barcode requirements, target order quantity, launch schedule, and retailer or compliance packaging notes. Photos help, especially if they show the heaviest kit, the bulkiest kit, and the smallest kit that may share the same bag.
Build a one-page spec sheet. Include finished bag size, usable opening, film material, gauge, closure, print method, label position, variable data method, pack count, carton mark requirements, and acceptable tolerances. If the exact material is not decided, describe what the bag must do: resist punctures from glass droppers, show product color clearly, accept an applied lot label, or run on a wicketed packing setup.
Ask for confirmation of label compatibility, not only bag pricing. Can the supplier test sticker adhesion? Can they check code rub resistance? Can they confirm barcode readability on a filled sample? Can they review seal integrity after labeling? These questions move the quote from a price exercise to a manufacturability review.
Separate must-haves from nice-to-haves. Must-haves may include a scannable lot code, puncture resistance, clean seal area, and retailer carton mark alignment. Nice-to-haves may include soft-touch finish, metallic ink, a premium zipper, or a custom hang hole. Both lists matter, but they should not carry the same weight during cost review.
A complete checklist gives purchasing, marketing, quality, and fulfillment the same working language before money is spent and production time is locked. Once the specs are firm, send the spec sheet, artwork, sample photos, label data examples, and target in-hands date together so cost, lead time, and production risk can be reviewed in one pass.
FAQ
What should be included in a cosmetics kit plastic bags batch label checklist?
Include bag size, film material, gauge, closure, print method, label location, lot code format, date format, SKU, barcode or QR code requirements, carton labeling, and approval responsibility. Add a filled-sample test so the label is checked on the bag in real use, not only on a flat artwork proof.
Can batch labels be printed directly on plastic bags for cosmetics kits?
Yes. Static information can often be printed during bag production, while changing lot numbers usually need a blank batch panel, applied label, thermal transfer code, or inkjet code. The best method depends on order volume, number of SKUs, how often batch data changes, and whether the film surface accepts the ink or label system cleanly.
What plastic bag material works best for cosmetics kits with batch labels?
LDPE and LLDPE are common for flexible, soft-feel cosmetic kit bags. PP is useful when high clarity matters. Laminated films can support premium looks or added structure. The right choice depends on product weight, sharp edges, clarity needs, closure type, print finish, and label adhesion requirements.
How do I keep batch labels from smearing or peeling on cosmetic plastic bags?
Test the exact label stock, ribbon, ink, or coding method on the exact film and finish before approving production. Keep the label away from seals, folds, zipper tracks, oily handling areas, heavy ink coverage, and places where the bag bends sharply around the packed cosmetics.
What details help get an accurate quote for cosmetics kit bags with batch labeling?
Provide finished bag size, usable interior size, material, gauge, closure, print colors, quantity, number of versions, label data fields, barcode specs, sample photos, and target delivery date. Ask the supplier to separate costs for bags, printing, labels or coding, setup, proofing, testing, freight, and rush requirements.


